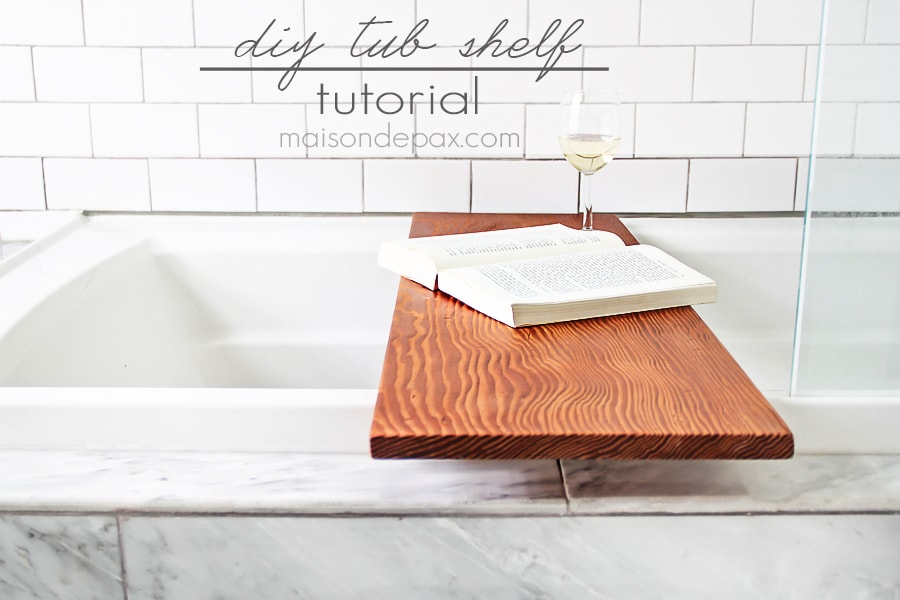
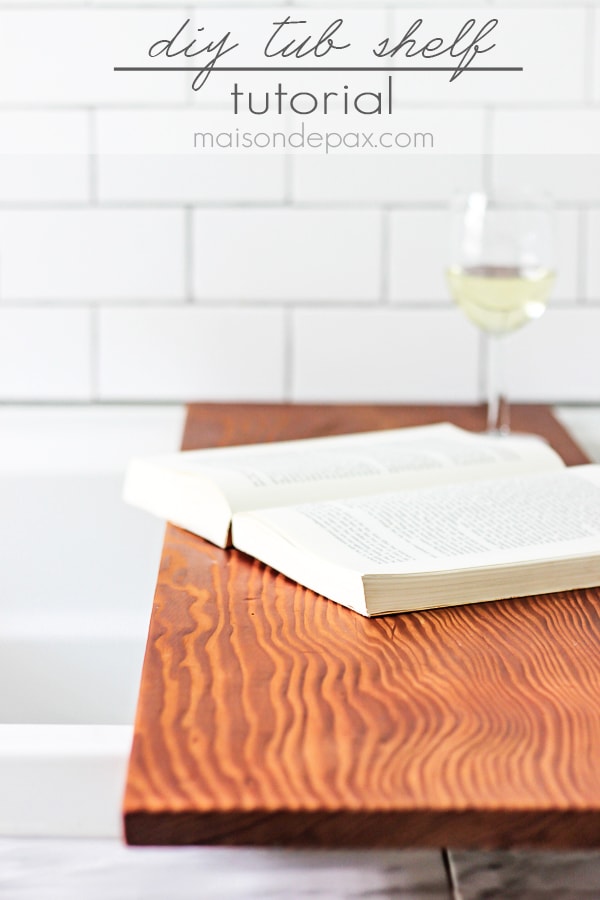
DIY Tub Shelf
I’d love to start this post by reminding you that Mother’s Day is coming up and this would make the perfect gift…
But if I’d shared it back then, I would have spoiled it for my mom.
So instead, I’ll say, treat yourself or pin this to make as Christmas gifts or for next year’s Mother’s Day. It doesn’t have quite the same ring, but this DIY tub shelf really would be perfect for any of those occasions.
As I said, I made this for my sweet mom, so I have to start by saying that it was NOT made to fit my tub. You’ll see why that matters in a moment, but just be sure to read the directions if you want to make your own. 😉
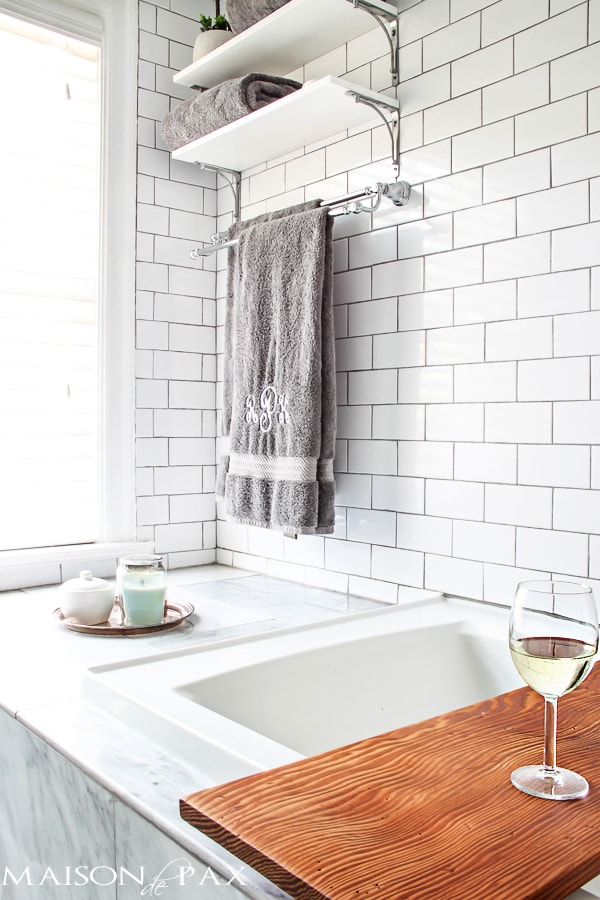
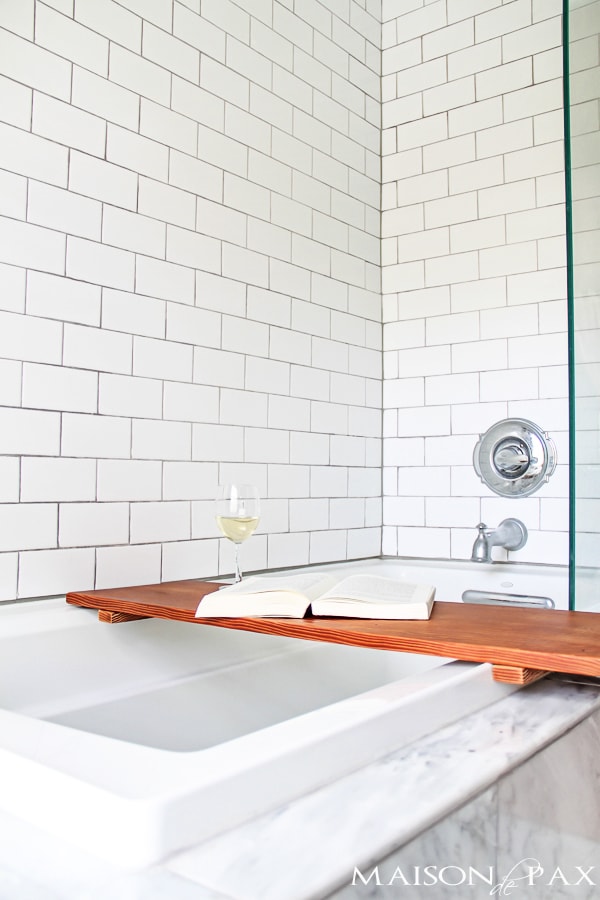
It’s convenient, luxurious, and even waterproof…
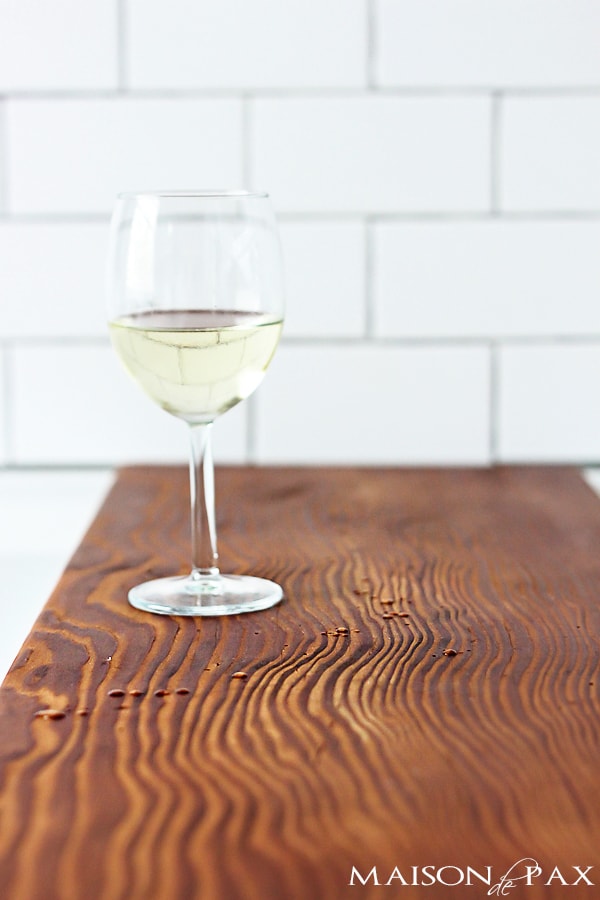
And you can make one from a simple piece of scrap wood.
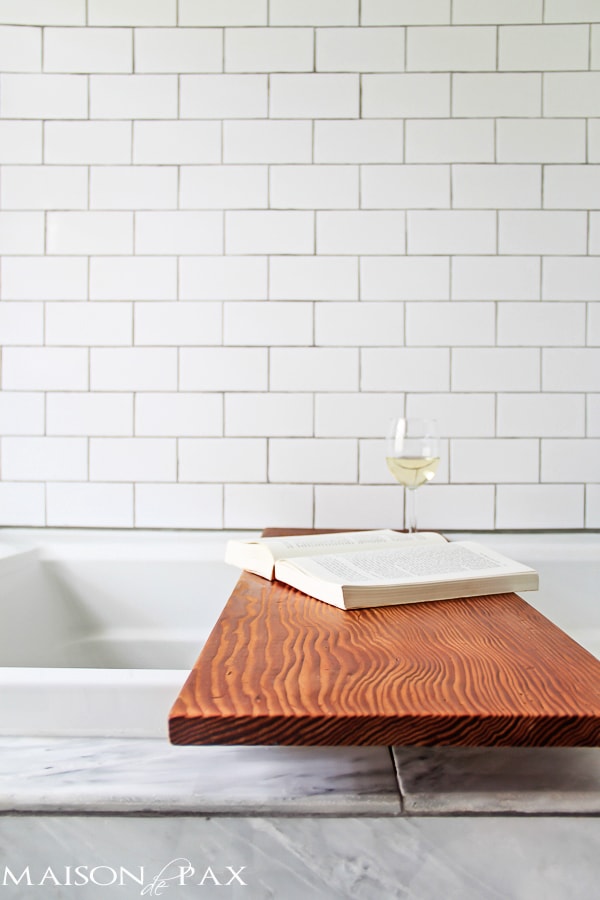
In fact, I love how the warm wood contrasts the cool subway tile and marble in our master bath so much, I might just have to make one for myself now. 😉
Here’s how to make a diy bathtub shelf:
1. Measure your tub.
You’ll need two measurements: the outside width of the tub (LENGTH 1), and the inside width (LENGTH 2).
2. Cut a wide, flat board LENGTH 1 (the longer length).
I used a 1×10 scrap of cedar leftover from our attic stairwell bookcase. Cedar is great because it is rot resistant (and bathrooms are damp places), but since you’re going to waterproof it later, any board will technically work. Be sure to obtain a handsome helper, like I did, for all your measuring. Make sure your angles are straight, and provide yourself a straight edge to guide your saw, if needed.
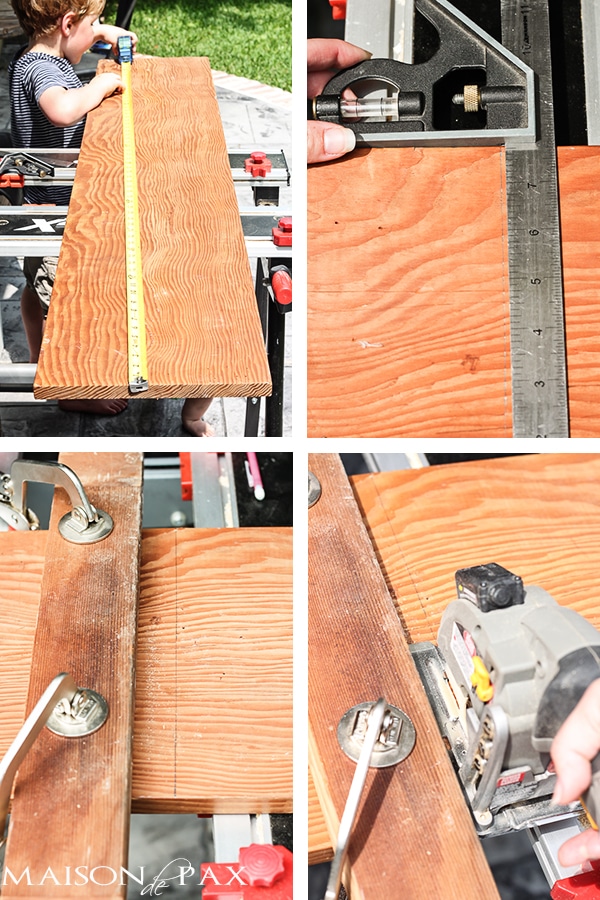
3. From your remaining scrap, cut two small pieces, 1-2″ wide.
These will be attached to the bottom of the shelf to stabilize it inside the tub.
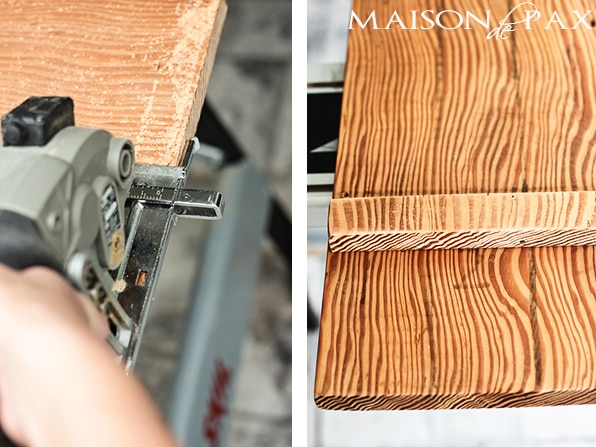
4. Use your LENGTH 2 (the inside of the tub width) to place your small pieces.
You want these to be inside the tub when you place the shelf on top, so these pieces should be about 1/2 an inch inside that measurement. Pre-drill to avoid splitting and then secure with screws. This will keep your shelf from sliding off the side and ruining your book.
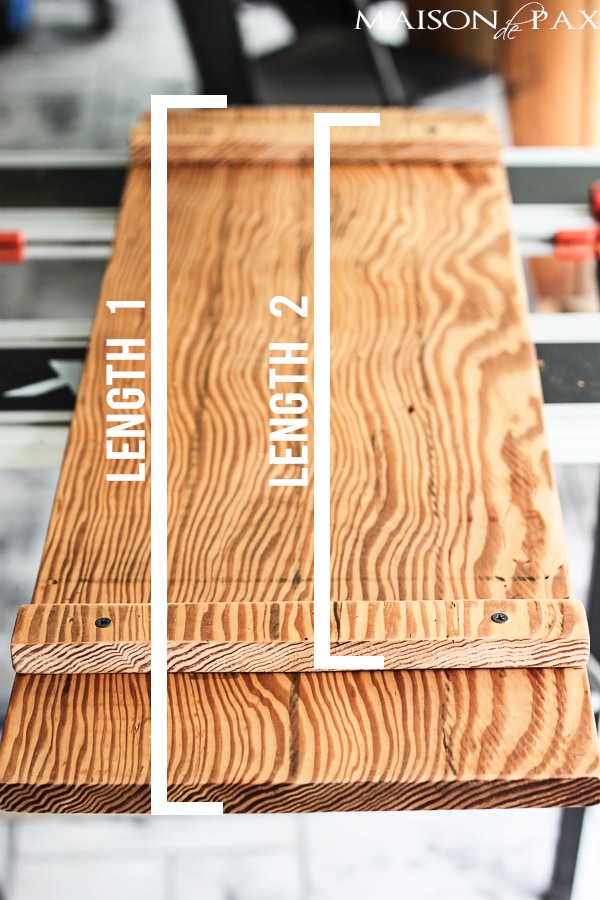
As I said, this shelf was actually made to fit my mother’s tub, and her’s is wider than mine… hence the frame piece sitting outside the tub. When done properly, both frame pieces will be inside the tub when the shelf is placed on top.
5. Finish it off by waterproofing it the easy way with this tutorial.
And you’re done! Now go find some bath salts, a beverage of choice, and a good book. You’ve earned it. 😉

MORE DIY DECOR:
Very clever and useful.I was given one before but it doesn’t fit this tub so now i can make me one,all i need is an assistant,yours sure is a cutie. Just a grandmother whose boys are getting too busy.Kids grow fast.Thanks for the diy post.
Thanks, Marlene. 🙂 They do grow fast, don’t they?! xx
Hi Rachel, I found your blog from Moonlight and Mason Jars link party. Thank you for hosting, btw 🙂 Anyway, I really love your tub shelf. I love how you are able to show the grain of the wood very clearly, and how it just pops against the white subway tiles. This is a great DIY post. Thank you for sharing 🙂
You are so kind, Veronika, thank you!! So glad you like the project and so happy to have you here. 🙂
Gorgeous. I love the choice of wood (and your bathtub!) We have a silly shower door on our bathtub, so can’t really fit a good shelf in there, but I would love one.
Thank you so much, Jenni! This one was for my mom, but I’m plotting one for my new tub soon! 🙂