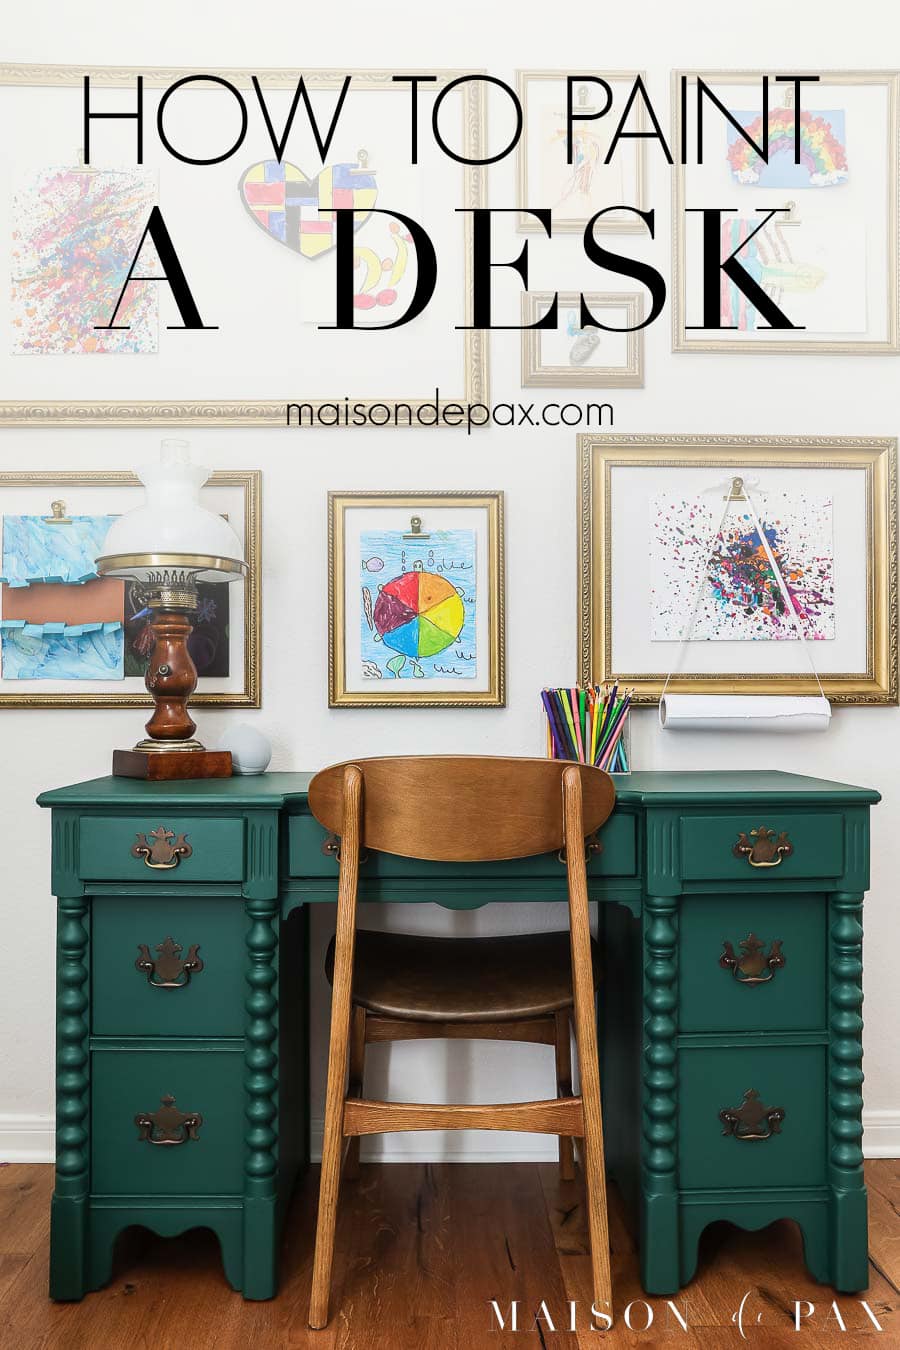
How to Paint a Desk
Wondering how to paint a desk? Get all the details for painting a desk including type of paint, techniques, and how to finish it so it will be durable enough for use!
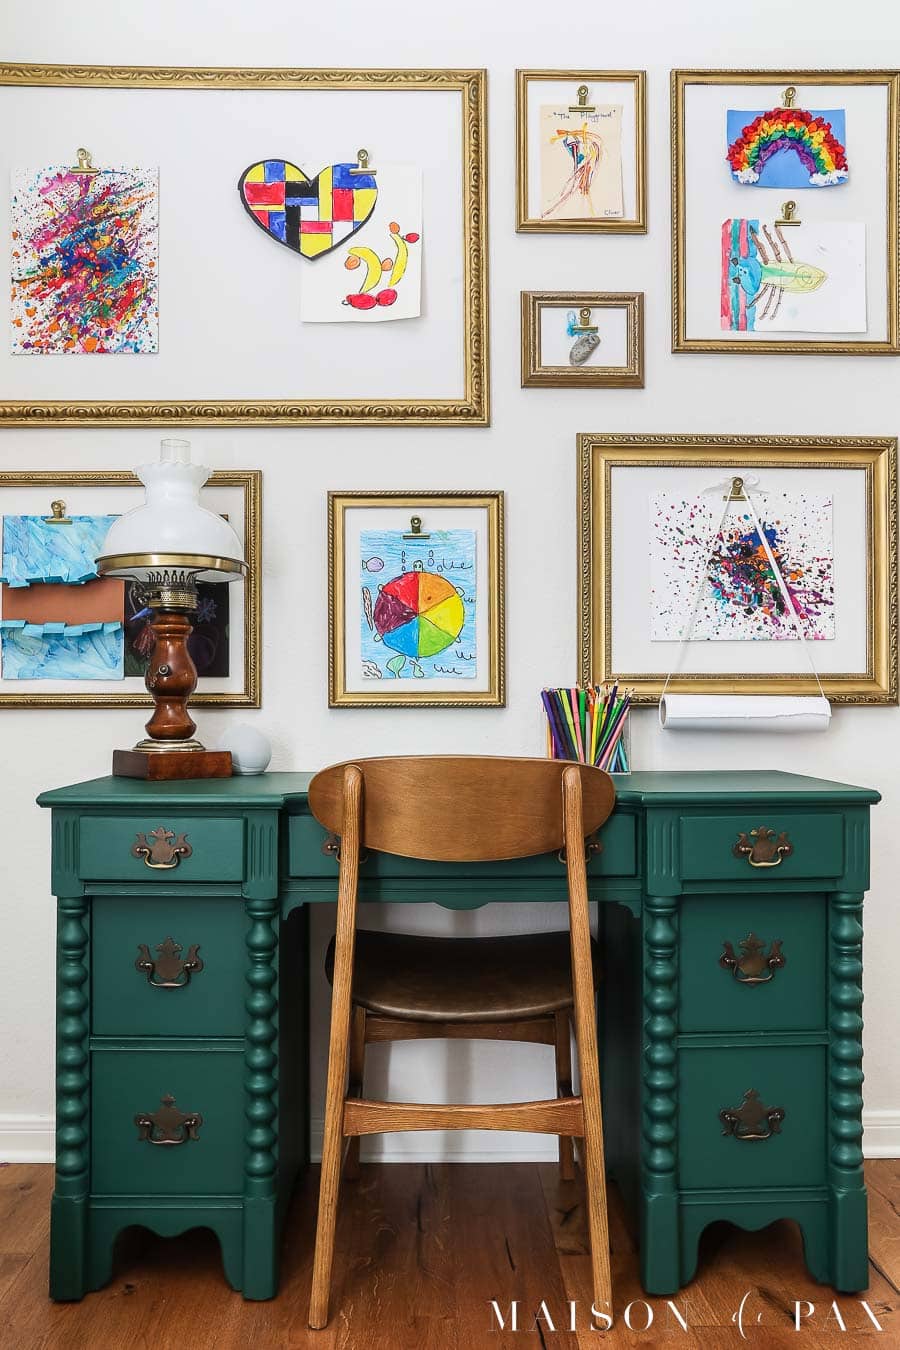
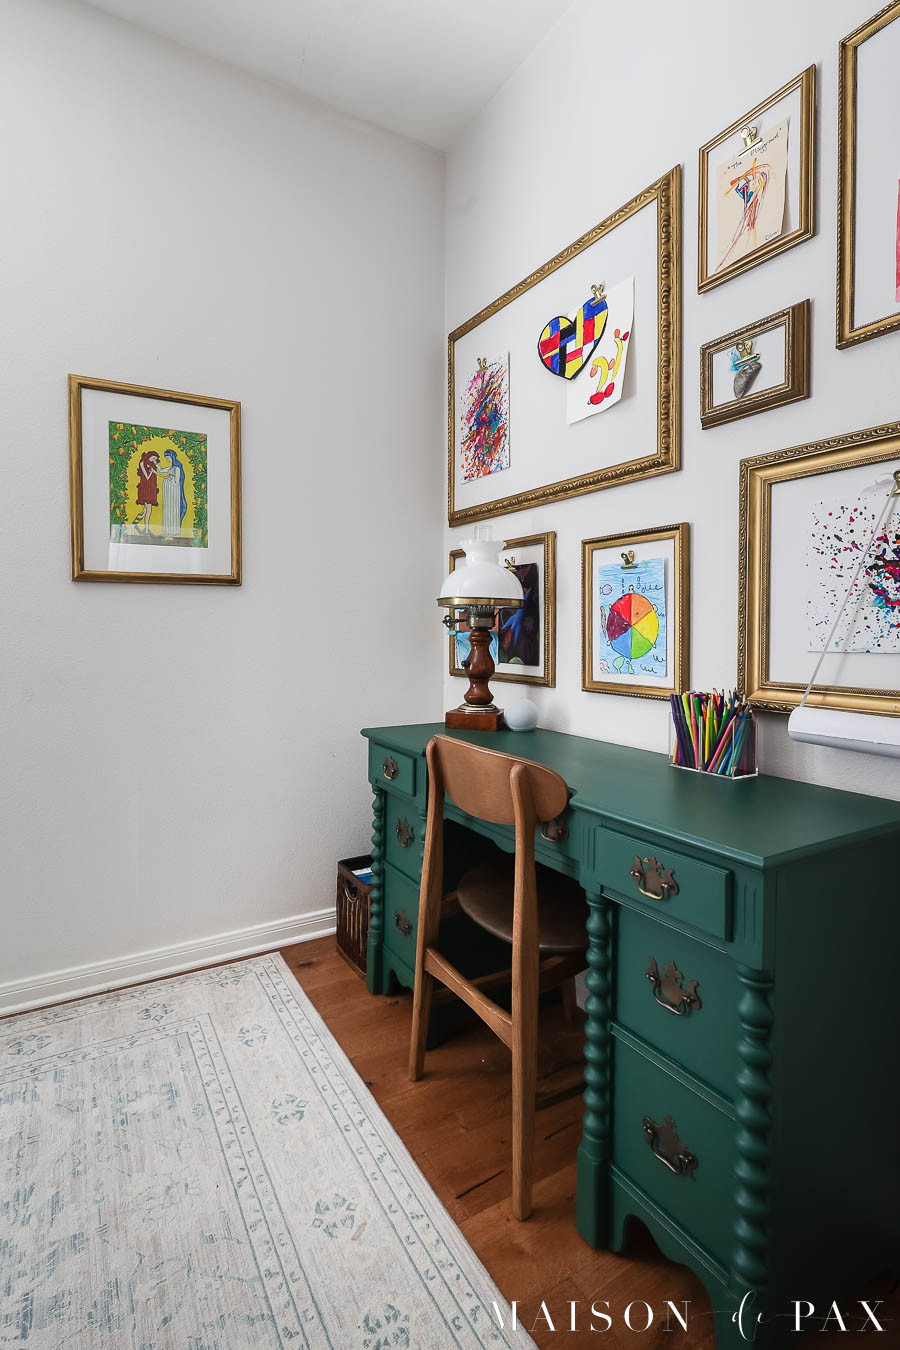
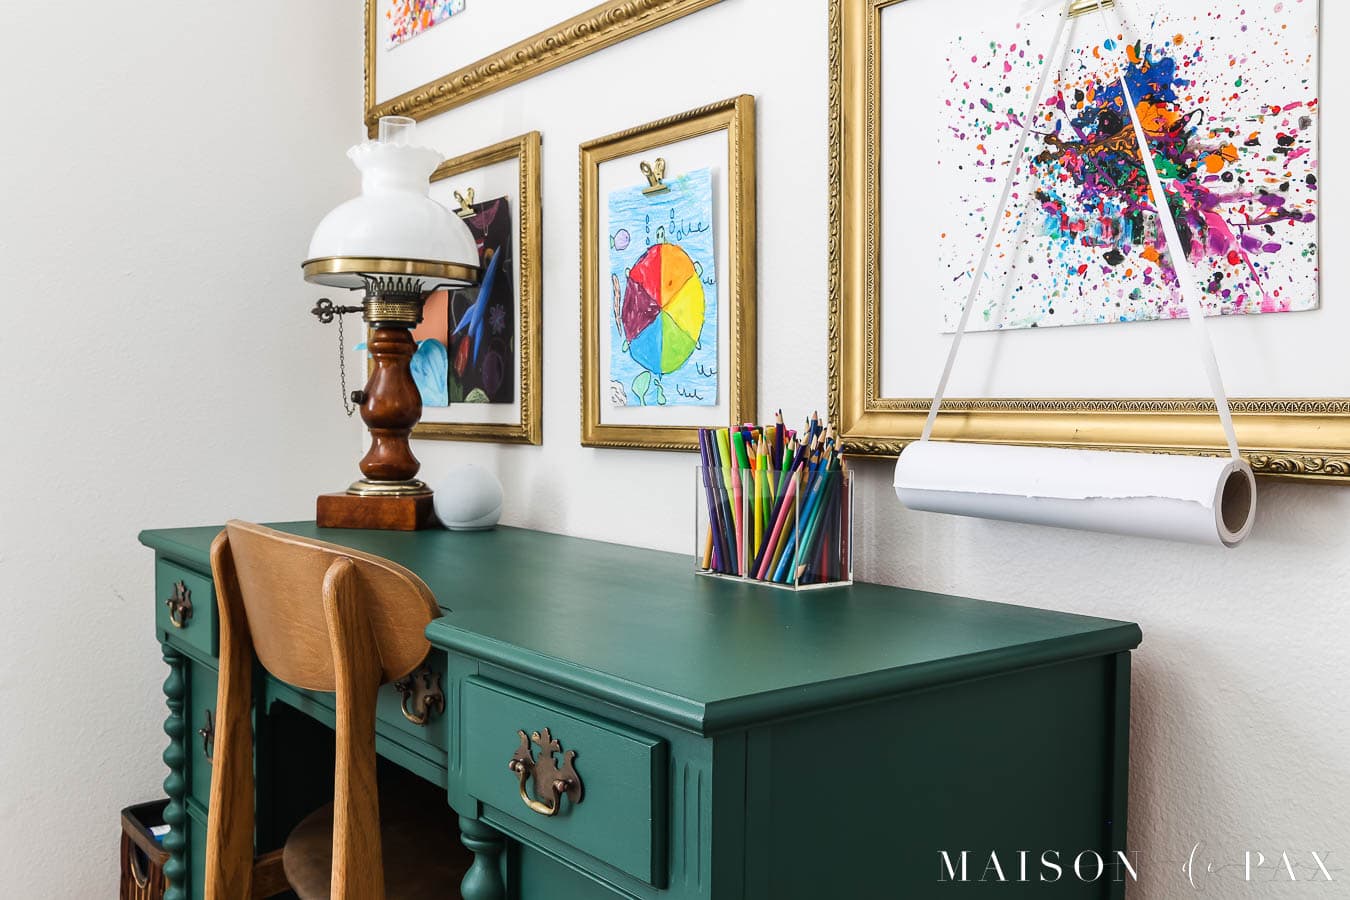
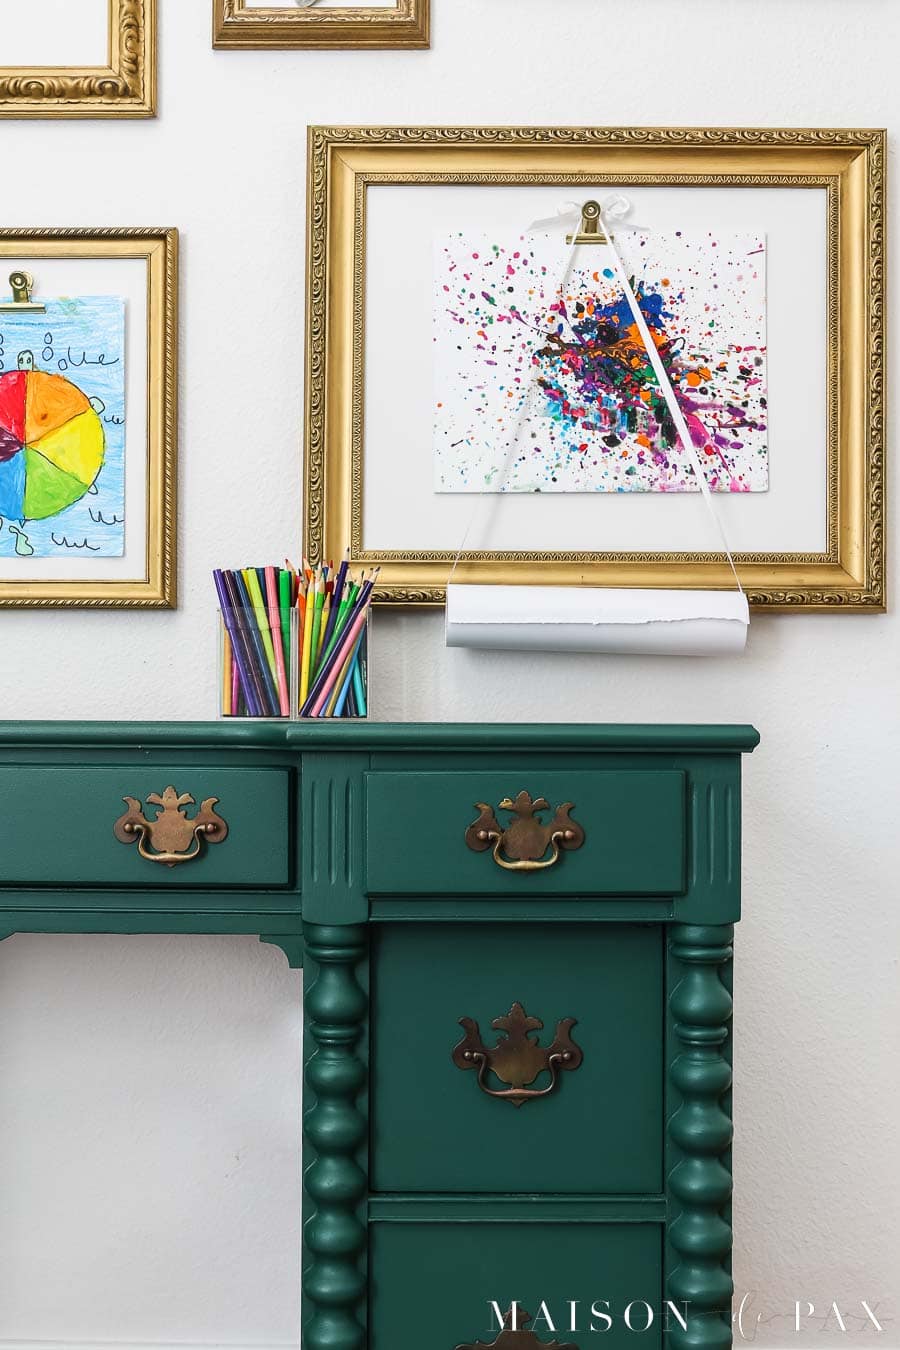
My daughters had outgrown the kids’ art table beneath their art display wall, so I began looking for an old desk for the space. I wanted something petite for their shared room but large enough to have some storage and be used as they grow.
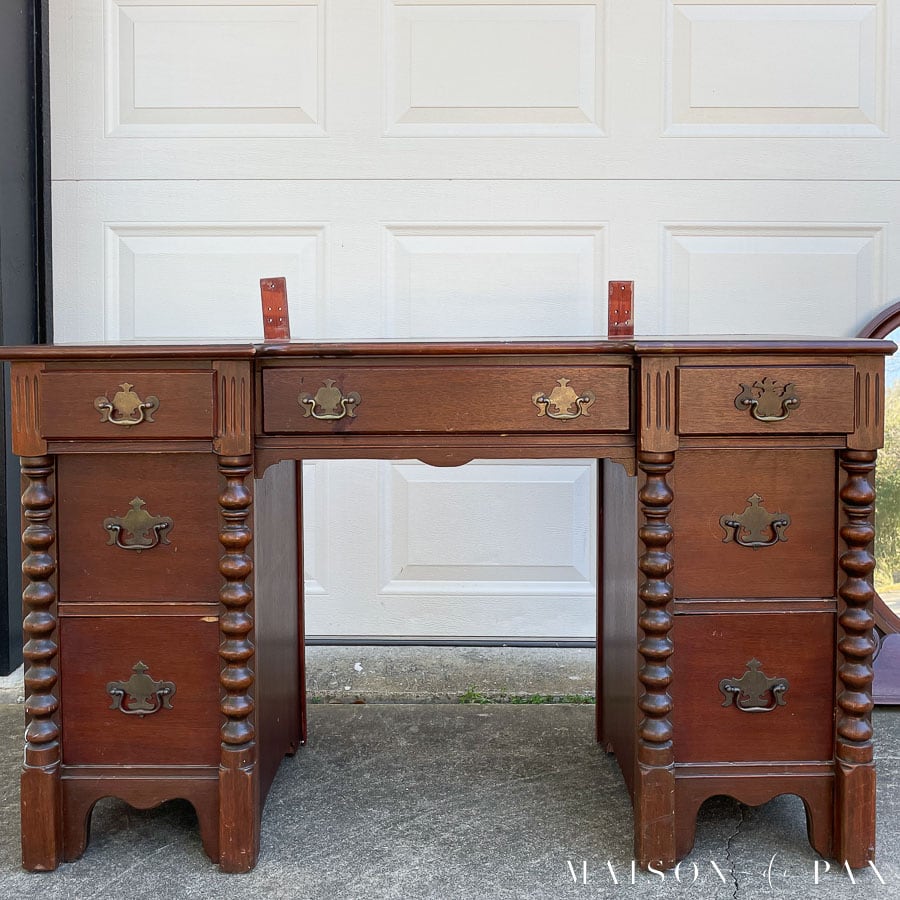
When I found a real wood antique vanity on Facebook Marketplace, I knew a desk makeover was in order.
I actually completed the desk more than six months ago, but I tried a new product to give it an extra durable top. We know how hard kids can be on desk tops, and I wanted to make sure that the pencils didn’t scratch the surface, that the markers would wipe off, and that it would maintain its beautiful color before I shared the tutorial with you all.
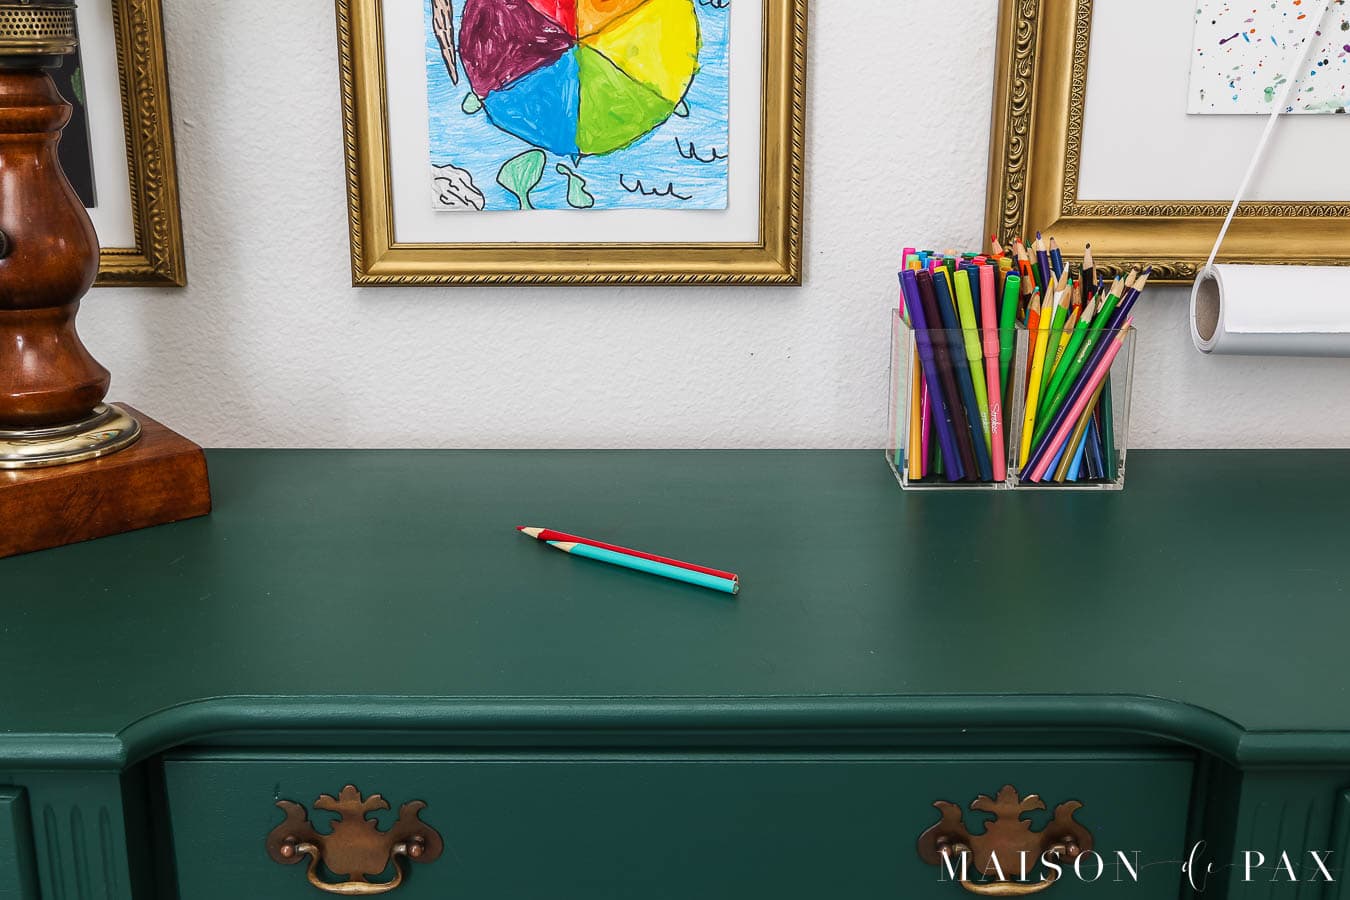
Fortunately, it still looks brand new… and it gets LOTS of use. I’m excited to share this step-by-step tutorial with you!
How to Paint a Desk
This post contains affiliate links. Click here to read my full disclosure.
Materials Needed
- wood desk
- wood filler and putty knife (if needed)
- palm sander with variety of sand paper (sanding block can work if you don’t have an electric sander)
- lint-free rags and spray (like Krud Kutter or Simple Green) for cleaning
- trim roller + tray, high-quality 2″ angled paint brush, foam brush
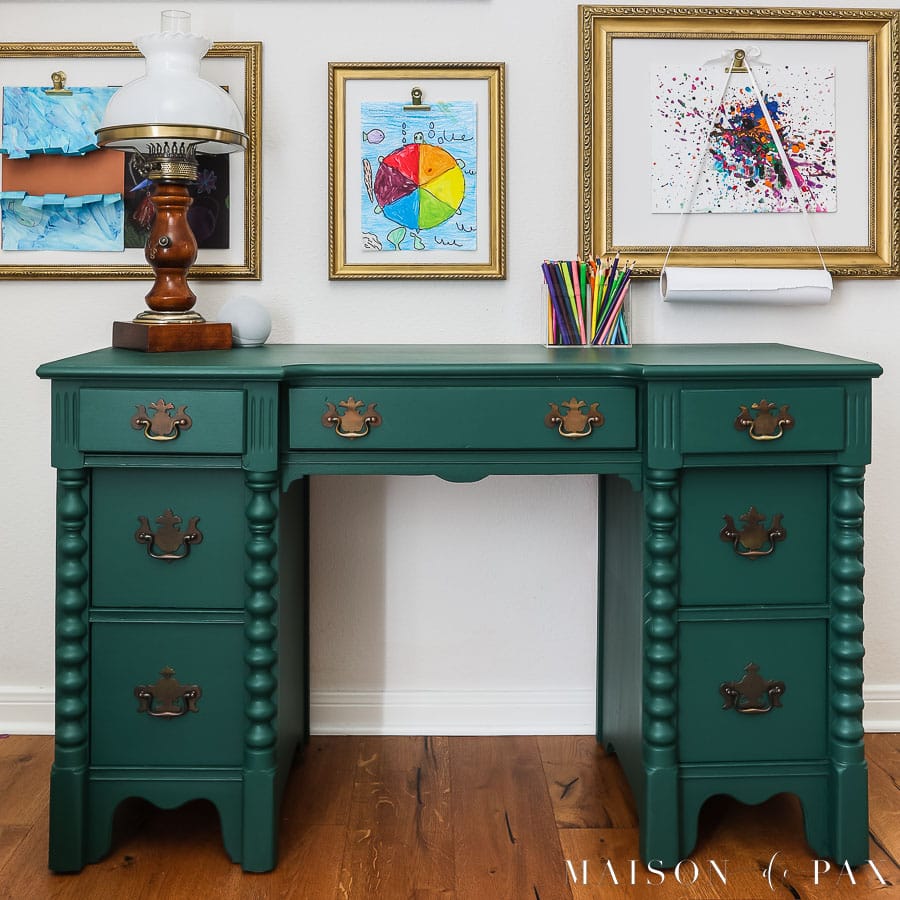
- high-quality furniture paint (I used Fusion Mineral Paint in Pressed Fern)
- Fusion Mineral Paint Stain and Finishing Oil in Natural
Video Tutorial
Watch the tutorial here or get the step by step below!
Preparation
1. Prepare the desk by removing all hardware and drawers.
2. Fill gouges and sand the desk smooth
(see FAQs below for other options if your desk is not as damaged as mine).
Mine had old glue residue from a mirror that used to sit on the desk’s top as well as majorly damaged veneer and gouges out of the top.
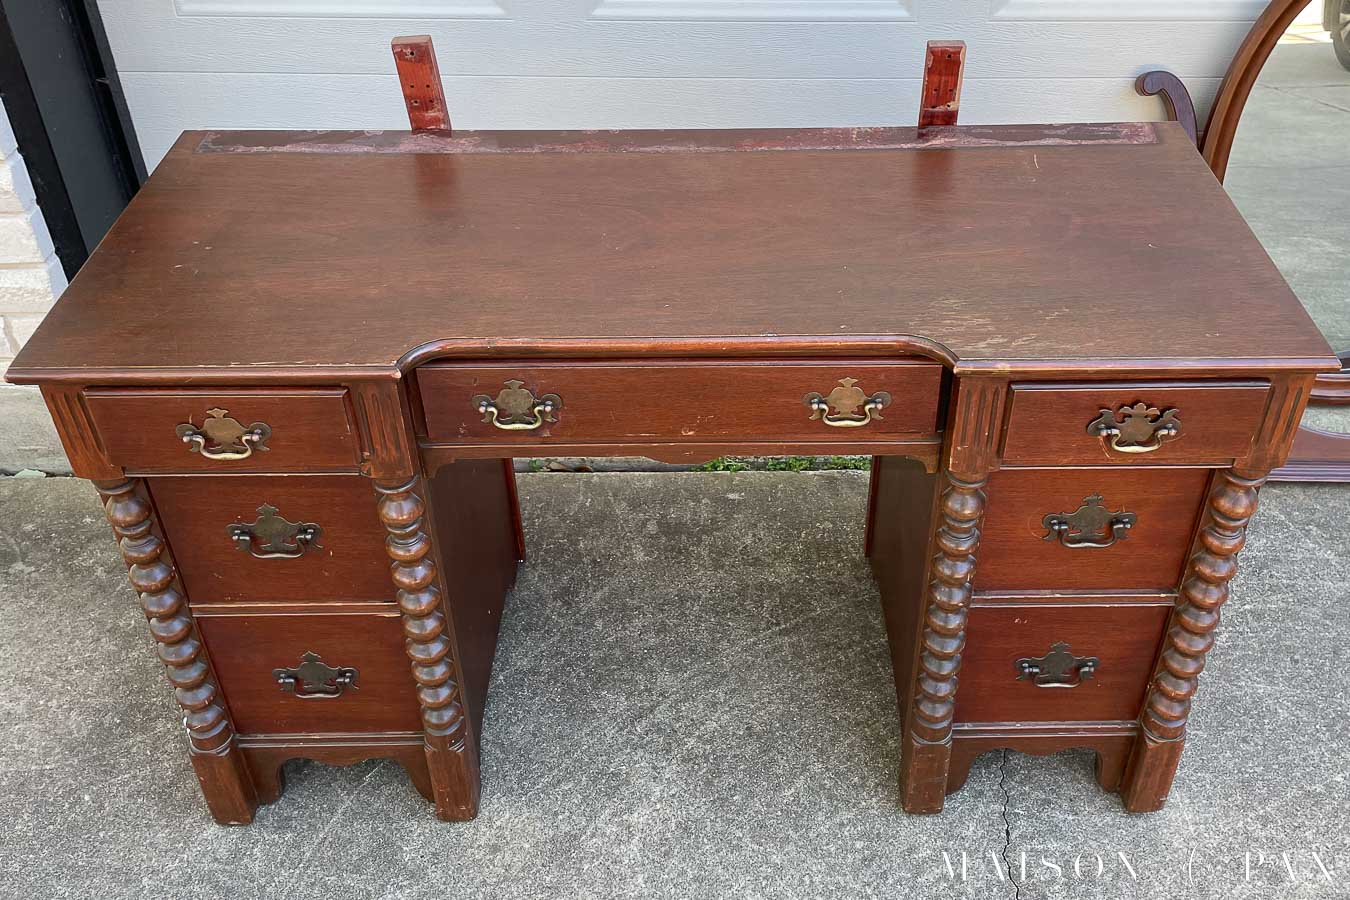
As a result, I needed to fill the gaps and sand the piece smooth. I used wood filler on the areas that were damaged, allowed it to dry, and then sanded the whole piece with 120 grit sandpaper followed by 220 grit.

In the interest of full disclosure, I originally considered going for a raw wood look on the desk, so I actually stripped the desk using this technique. Unfortunately, the veneer didn’t strip very well (which is sometimes the case), and I did not like the reddish-purple cast of the raw mahogany… So I decided to paint.
However, I have successfully used Fusion Mineral Paint on this dresser and other project without stripping the previous finish. So if you know you plan to paint this piece of furniture (which is likely since you are reading this tutorial 😉 ), then do not feel like you need to strip the previous finish. Just make sure you have smooth surfaces that are no longer shiny.
Painting
3. Make sure the desk is clean and dust free.
I usually do my stripping and preparation outside, but I try to move inside for painting to ensure a clean, smooth finish. Once you are set up inside (don’t forget to protect your floors with a drop cloth!), wipe the piece down again with a clean, lint-free rag.
4. Paint with long, smooth strokes.
A paint sprayer is great for larger projects (like this), but for a small desk, I find rollers and brushes sufficient.

I like to use a foam roller made for trim for large, smooth areas like the desktop or sides. Work to keep your strokes going in a single direction for the smoothest possible finish. Use a brush to complete any detailed work (like the spindle trim on this desk). It is ok if you don’t achieve full coverage with the first coat; multiple thin coats will be more smooth and durable than one thick, messy coat.
5. Lightly sand (and clean!) between coats.
A light sanding with 220 or 300 grit sandpaper will knock off any imperfections and help minimize brush strokes. Be sure the paint is fully dry, then lightly sand in the same direction as you painted (this important!). Remove any sanding dust with a damp, lint-free cloth.
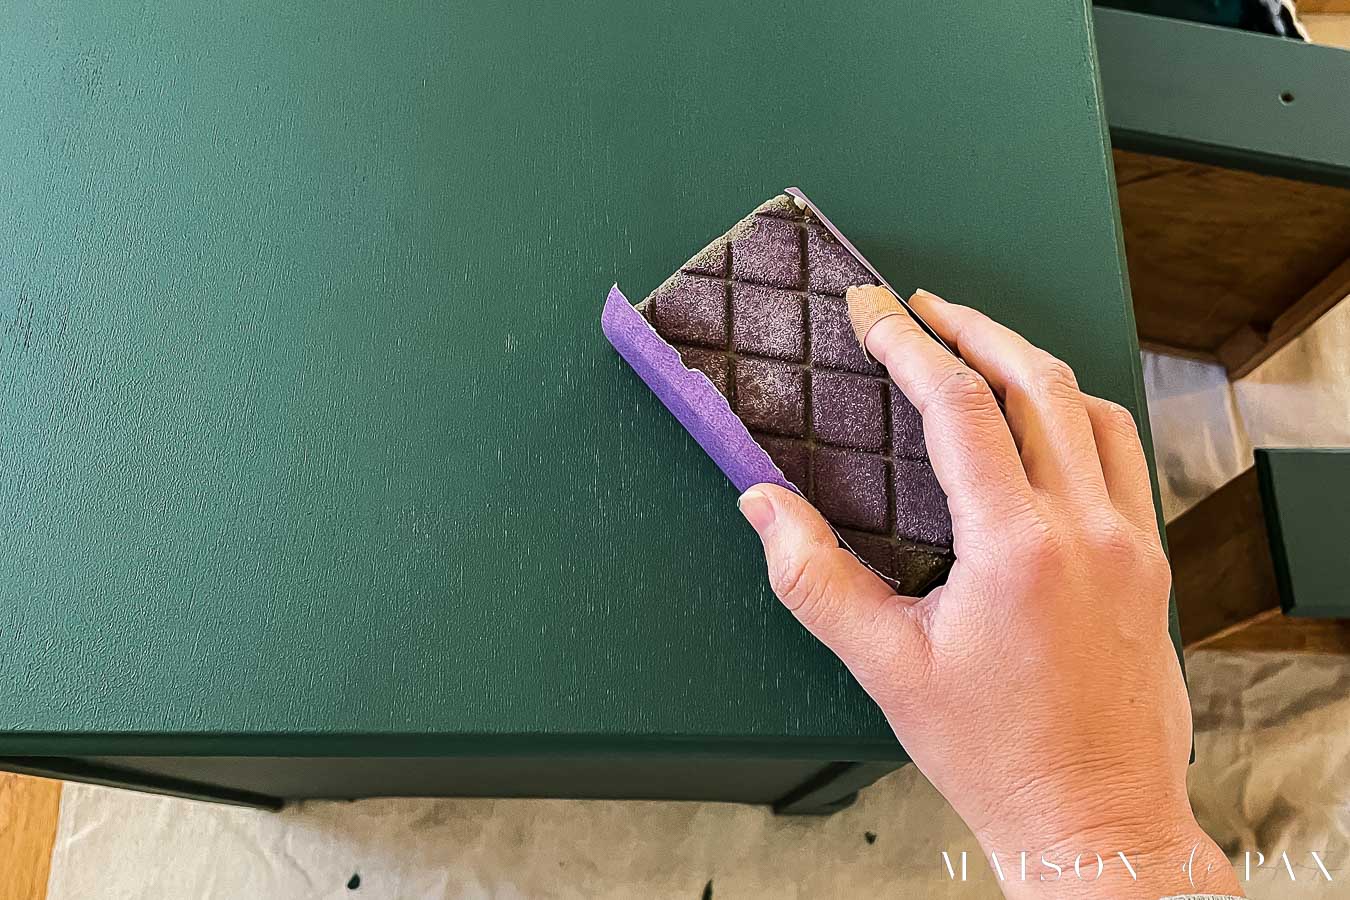
6. Paint a second coat. Then sand and clean again.
Finishing
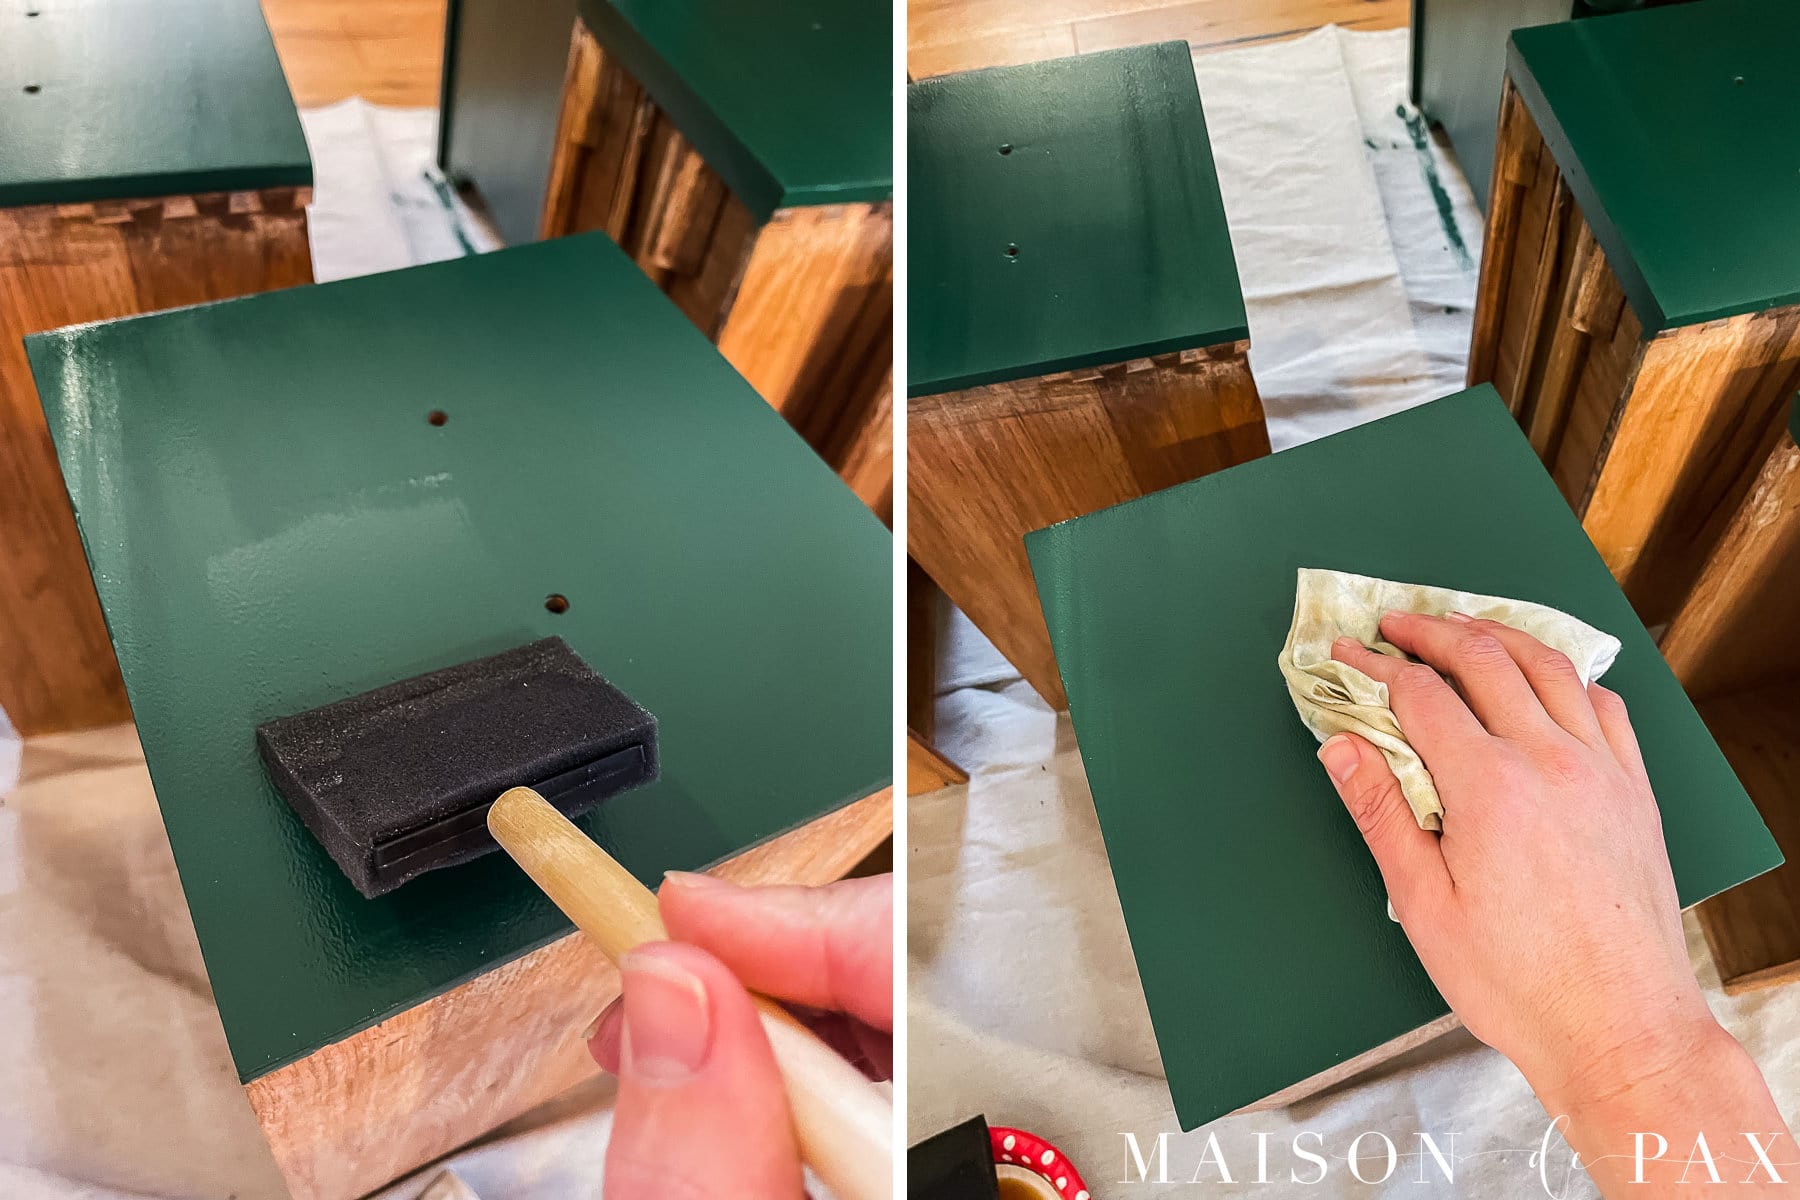
7. Apply finishing oil.
Fusion Mineral Paint does not actually require a topcoat. It produces a lovely matte finish that I have found is sufficient for dressers, side tables, etc. However, I knew that a desk would receive much more wear and tear and needed an extra layer of protection.
Finishing oil is an oil-based topcoat that soaks into raw wood. When using over paint, though, it doesn’t absorb fully, so you will need to paint on using your foam brush and wipe off the excess with a lint-free rag.
A couple of notes about finishing options:
- Adding a top coat does usually change the sheen (and sometimes the depth) of the paint. In the image below, you can see three Fusion topcoat options I considered…
- Oil-based topcoats tend to be the most durable; however, they do yellow a bit over time. The yellowing is not usually noticeable over a dark color like Pressed Fern, but it would show on a white piece. If you are painting your piece white, you might consider a water-based topcoat (like the Tough Coat seen below) rather than the Finishing Oil.
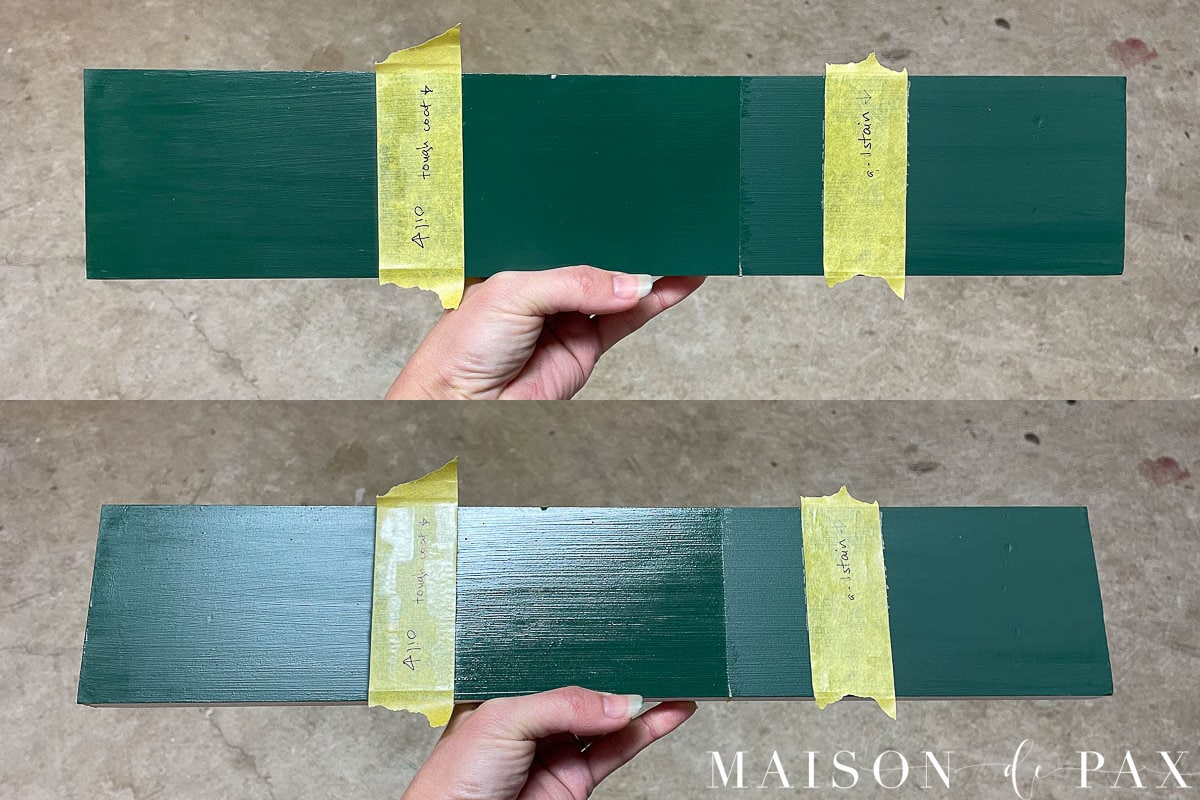
You can see on the top how the color is affected and on the bottom how the sheen is affected. What does not come out in the picture is that the gel stain left a bit of cloudiness to the color.
8. Reattach hardware.
When the finish is dry to the touch, you can reattach your handles.
9. Let fully dry and cure.
Although the finish will feel dry in mere hours, you will want to give the piece of furniture at least a week or two to fully cure and harden before heavy use. This will ensure that your beautiful finish lasts!
FAQs for Painting a Desk
What kind of paint do you use on a desk?
You can use many types of paint for a desk: acrylic paint, latex paint, chalk paint, or oil based paint. But each requires a different amount and type of preparation and top coats. I have been most pleased with the combination of Fusion paint and oil as I shared in the above tutorial. The paint was easy to apply, while the oil finish has proved extremely durable.
Do you need to prime a desk before painting?
Not necessarily. If you are painting a laminate desk, I would definitely prime with water-based or oil-based primer to ensure the paint will adhere. Or if you are planning to paint a dark wood desk a light color (like white), I would use a shellac or oil-based primer to block the dark color. Paint 1-2 coats of primer according to the same instructions above regarding paint, then do 1-2 coats of paint to achieve the desired color.
What is the best way to repaint a desk?
As you can see in the tutorial above: take care to prep the wood desk well. Paint with smooth, even strokes. Lightly sand and clean between coats for an extra smooth finish. Use a top coat for extra durability.
Do you need to sand a desk before repainting?
Can you paint a desk without sanding? Yes! If your current finish is in good condition (which mine was not for this project), you could start with liquid sandpaper or deglosser (see more about that in this post) rather than sanding. You just want to ensure that your finish is smooth and not shiny by the time you begin painting.
More painted furniture ideas and diy projects
I hope you enjoyed this desk makeover! Painting furniture is such a fun, affordable (and therapeutic 😉 ) way to bring new life to an old piece. Check out all my furniture posts for more helpful tips and ideas.


That is really pretty, i love the color so much
Thanks for the hints, I’m getting ready to tackle a pie safe. I want to do it n a two tone. Like a flat black and wood stain natural.
If you have any pointers, that would be great.
That combination sounds beautiful! In this post, I do discuss natural staining (and feature a black painted hutch with stained portions): https://www.maisondepax.com/how-to-get-a-natural-looking-wood-finish/
Thank you so much, that’s exactly what i Needed. I’ll show you how it turns out.
Glad I could help!
Hi Rachel! Such a beautiful color. Thank you for all of the tips.
Thank you and you are so welcome, Cheryl!
This is gorgeous and exactly the color my daughter wants me to use to refinish an old desk we have on hand for her room. Approximately how much of the paint and stain did you purchase for this project? Trying to estimate coverage. Thank you!
I’m so glad you like it, Michelle! We used about 3/4 of a 500Ml jar of paint for this project and very little oil… just 1/4 or so of an 8 oz can. I hope this helps!
Beautiful! Thanks for teaching newbies like me.
Glad it was helpful, Laurie!
Your colors inspired me! I did my first piece and I’m excited to try more!! Loved learning about the mineral oils and how they easily soak into the wood!
So glad you found that helpful, Veronica!