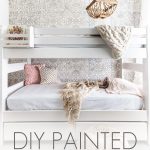
DIY Painted Bunk Beds
Check out these beautiful white DIY PAINTED bunk beds for an adorable shared girls’ room, and find out how to paint wood furniture!
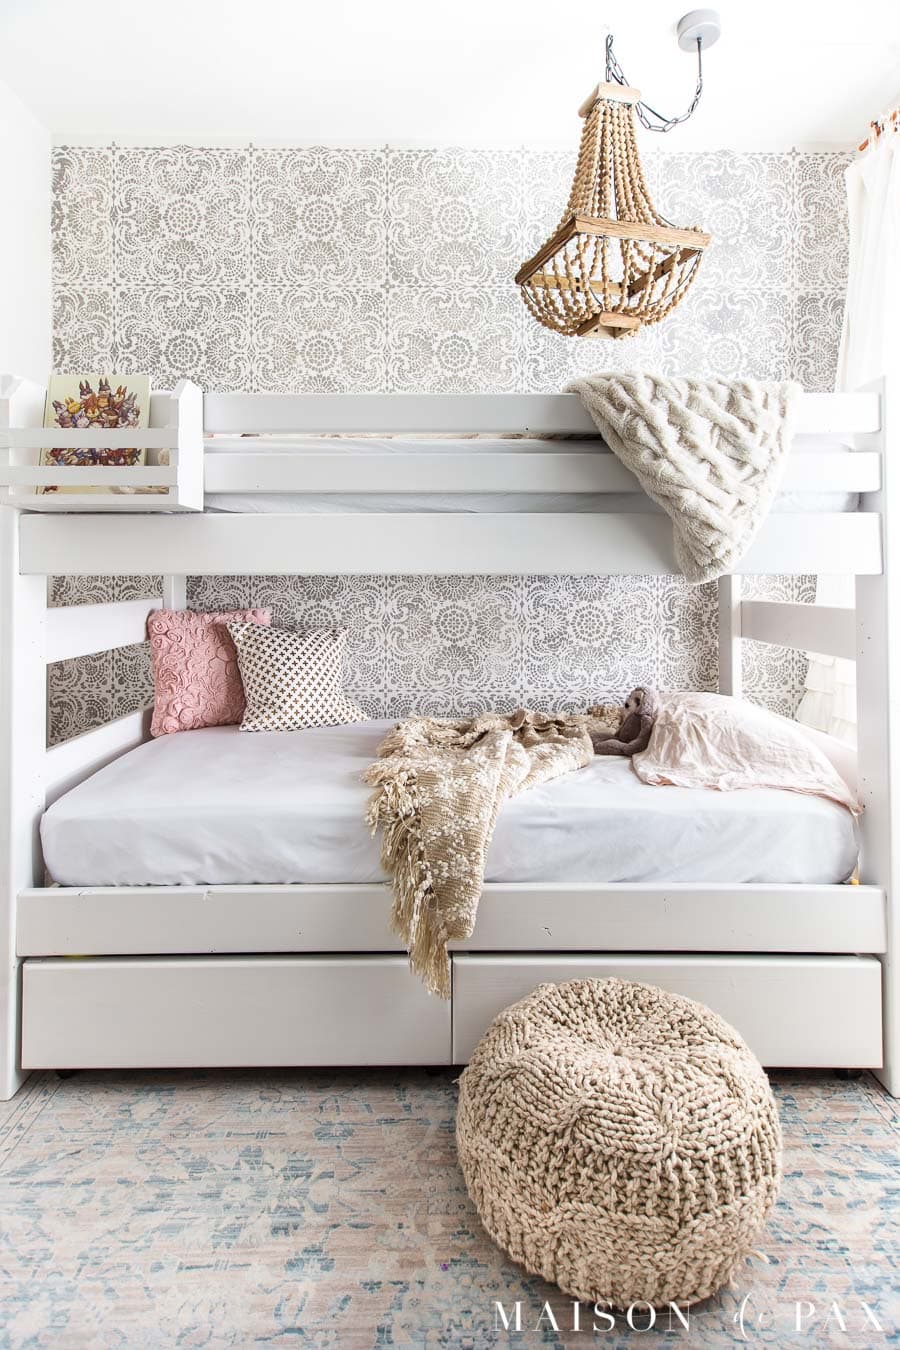
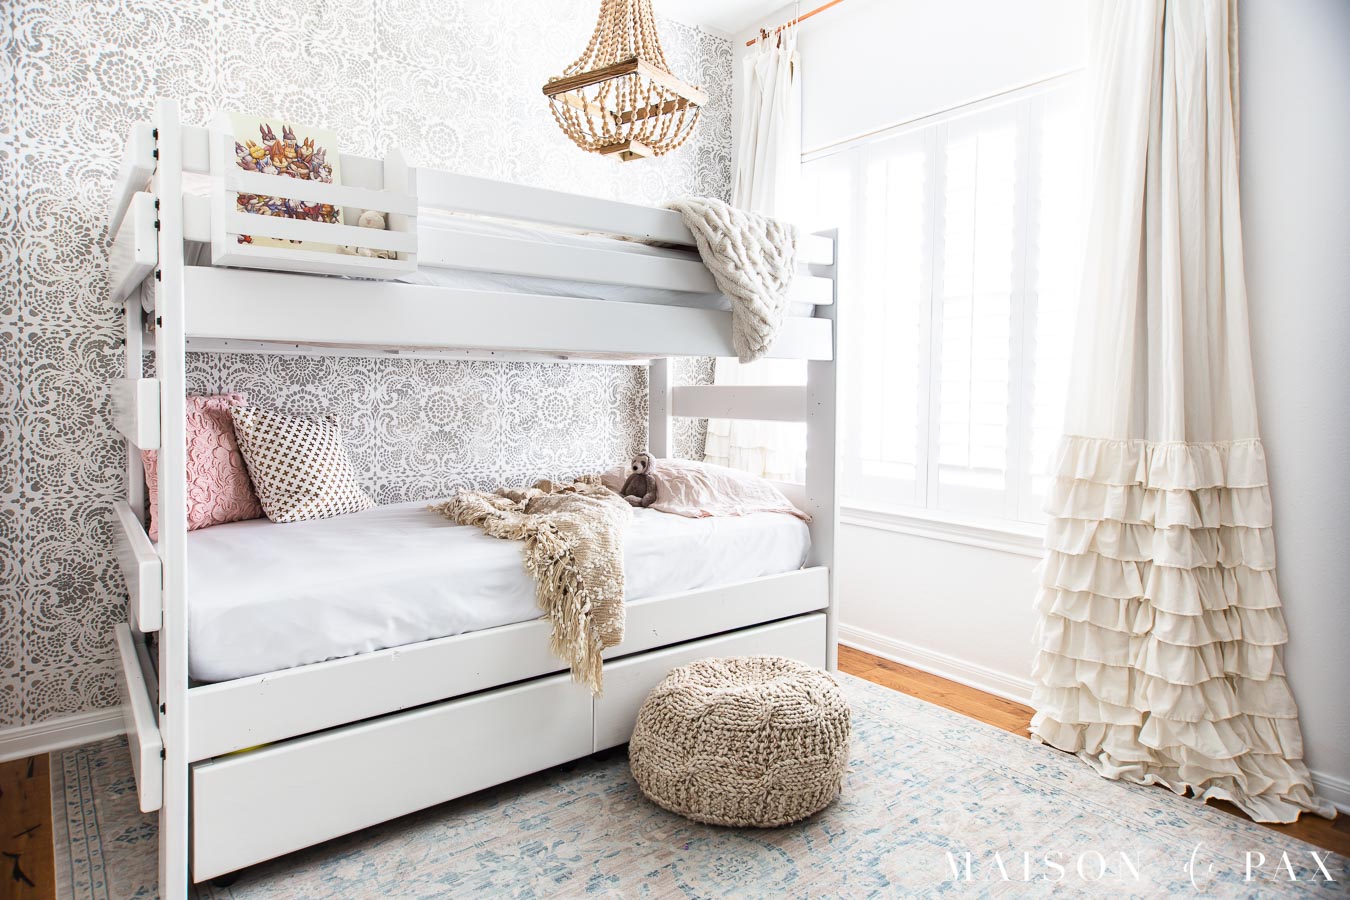
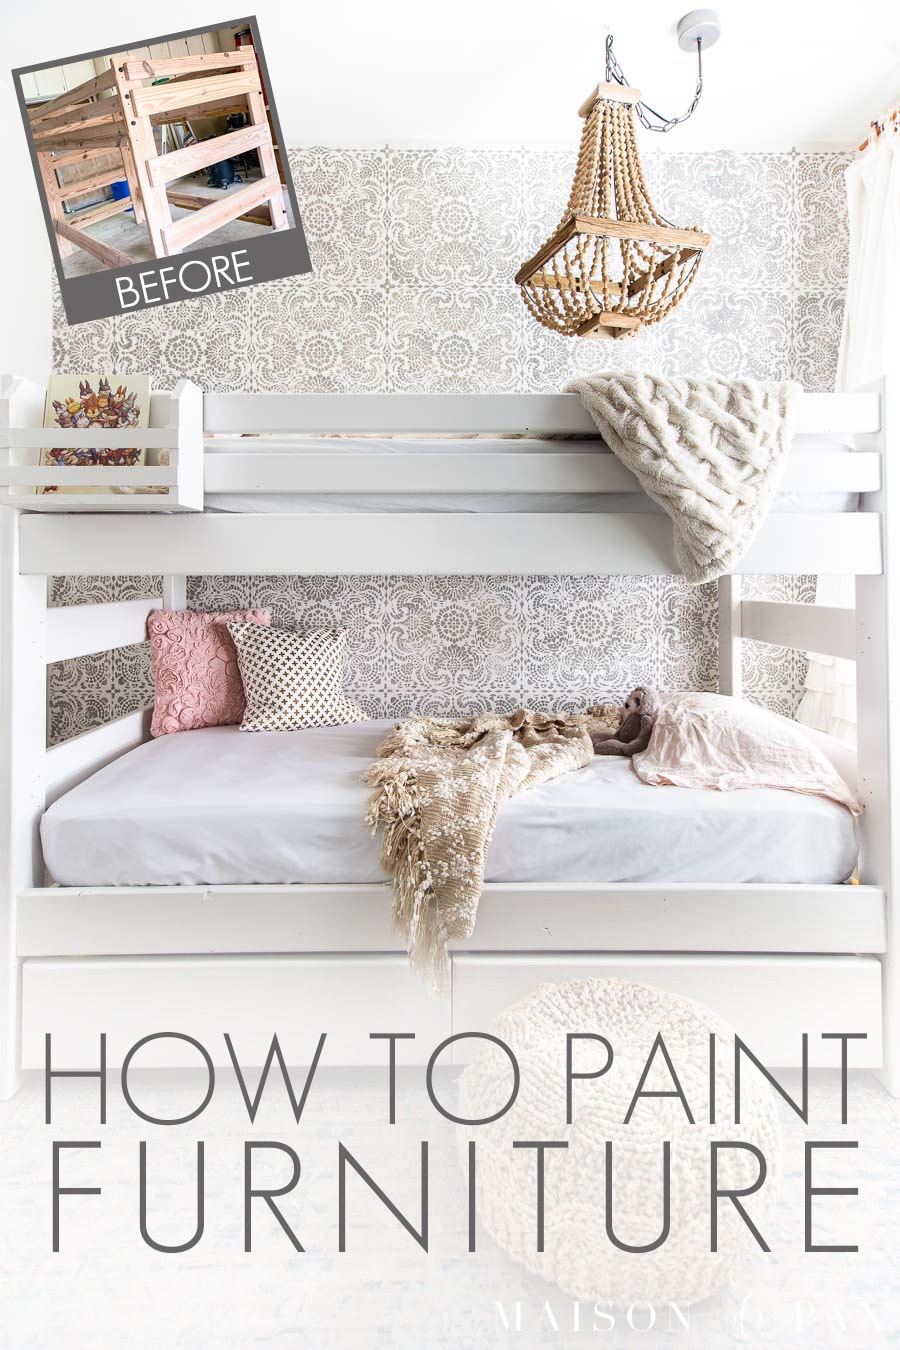
I can’t believe my baby is so big. She’s basically not a baby any more! And she proved it recently by moving in with her big sister. White bunk beds were the perfect solution for this shared girls’ room (because there’s no way we could fit two beds in here). And I thought you all might like to see how we transformed some $75 Craigslist wooden bunk beds into the perfect piece for my daughters’ small bedroom.
Plus I’m sharing this DIY alongside a few other bloggers today, so be sure to check out all the projects at the bottom of this post!
Shared Girls’ Room
I spent a lot of time searching for the perfect bunk beds. My number one priority was that they be sturdy. I was willing to spend if I had to (though, naturally, I always love a good deal 😉 ), but I knew I wanted solid wood bunk beds that weren’t too bulky. As you can see, we don’t have the space for anything with extra stairs or attachments.
This post contains affiliate links. Click here to read my full disclosure.
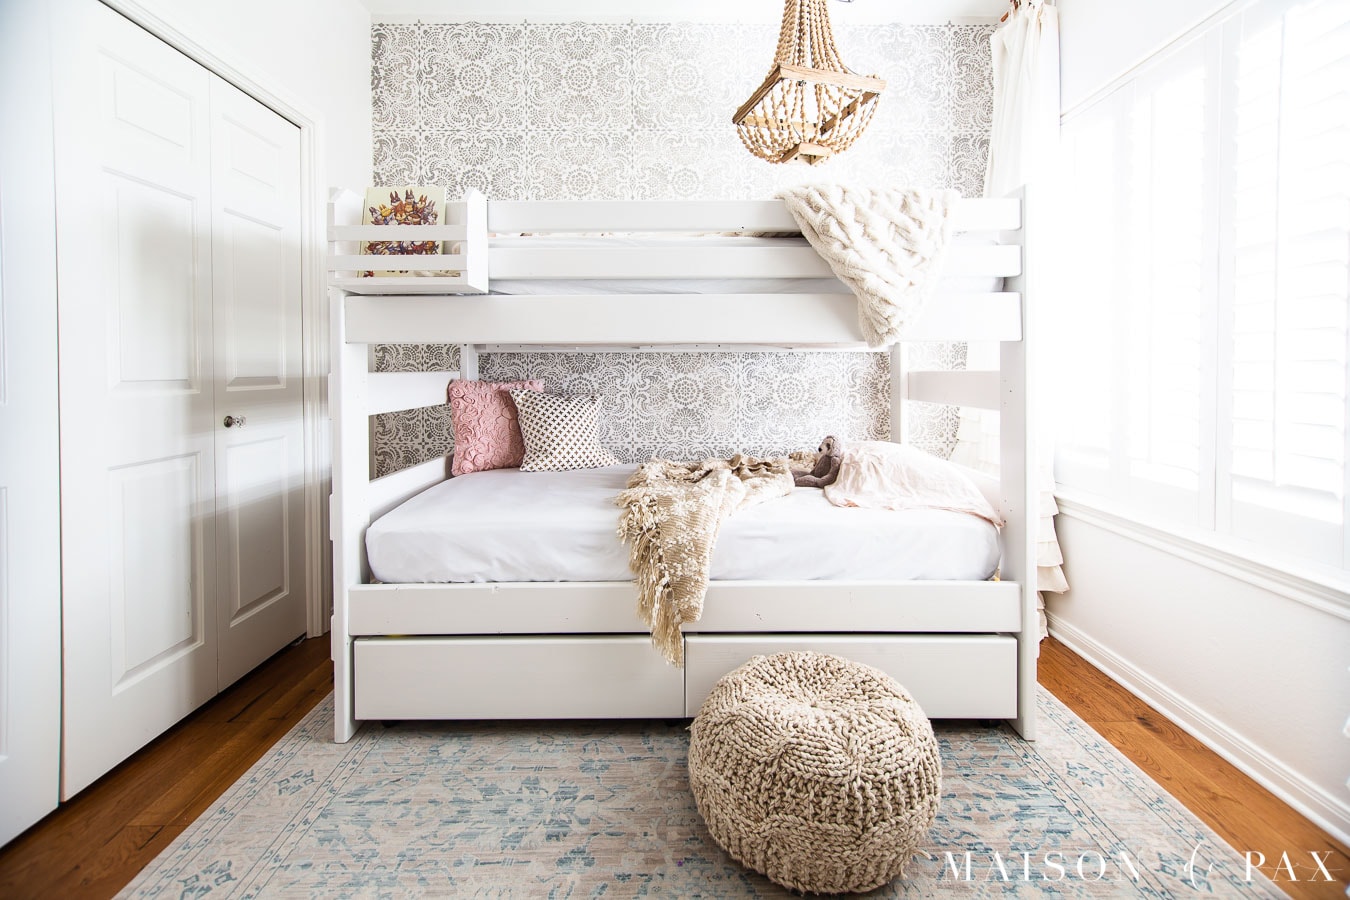
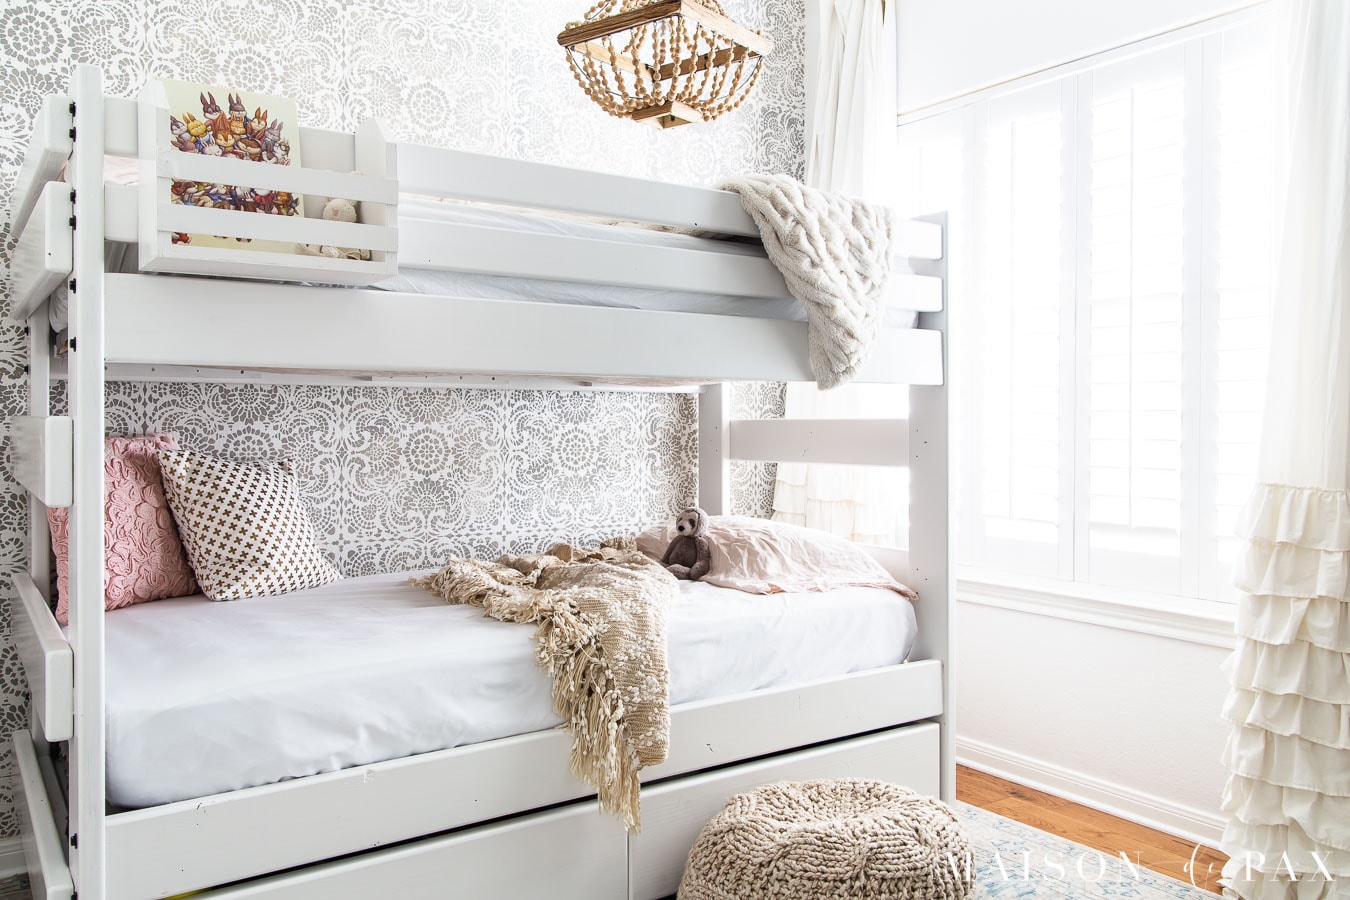
We also wanted drawers underneath for extra storage. In a small shared room, storage under the bed for things like dress up clothes and legos left plenty of room in the closet for clothes and books and puzzles… An organized place for everything!
GET THE LOOK:

Choosing white paint for furniture
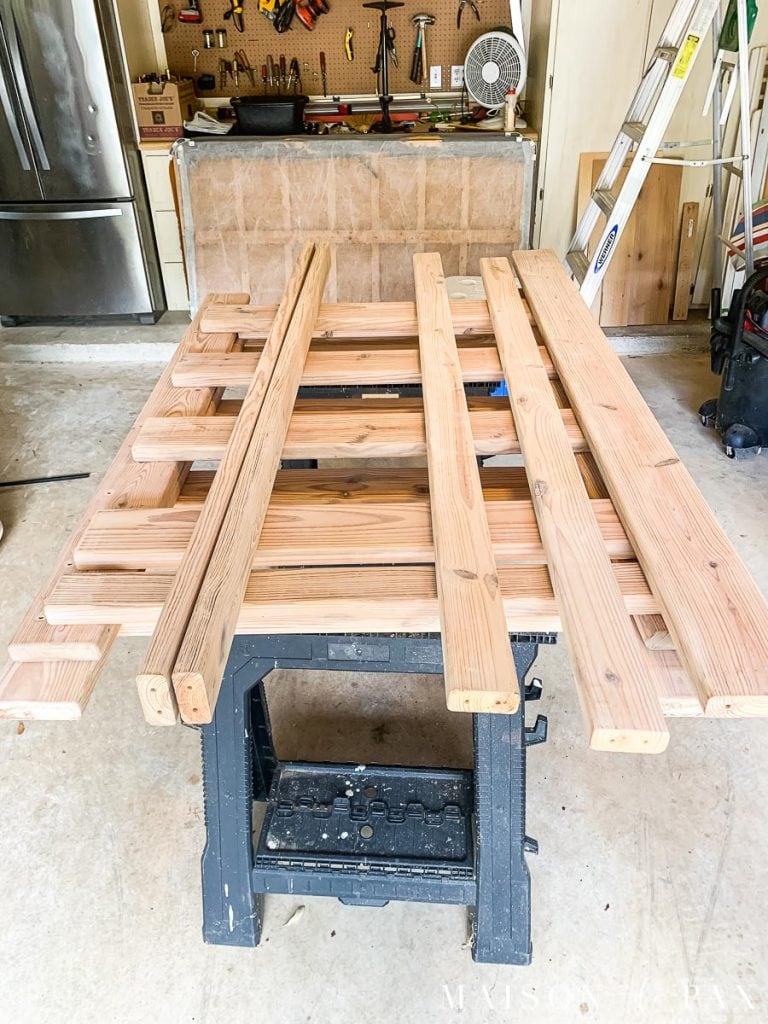
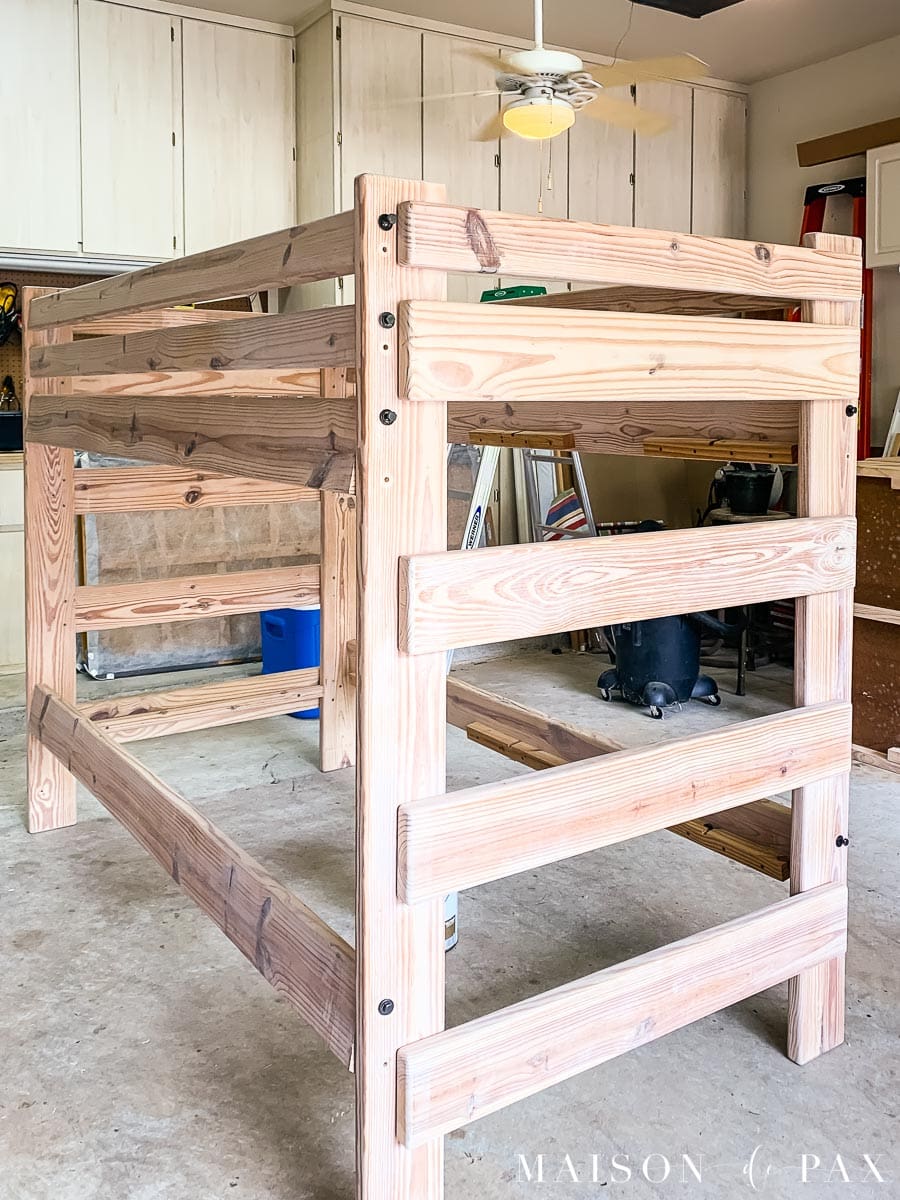
After searching for some time without success, I began researching DIY bunk bed plans and was about to break down and make my own when we finally found these DIY bunk beds made from 2×4’s and 2×6’s on Craigslist. It wasn’t very pretty (yet 😉 ), but I knew it would be sturdy, and the dimensions were perfect. And for $75, I knew it would cost me way more in lumber and energy to make my own. This is what it looked like when we brought it home.
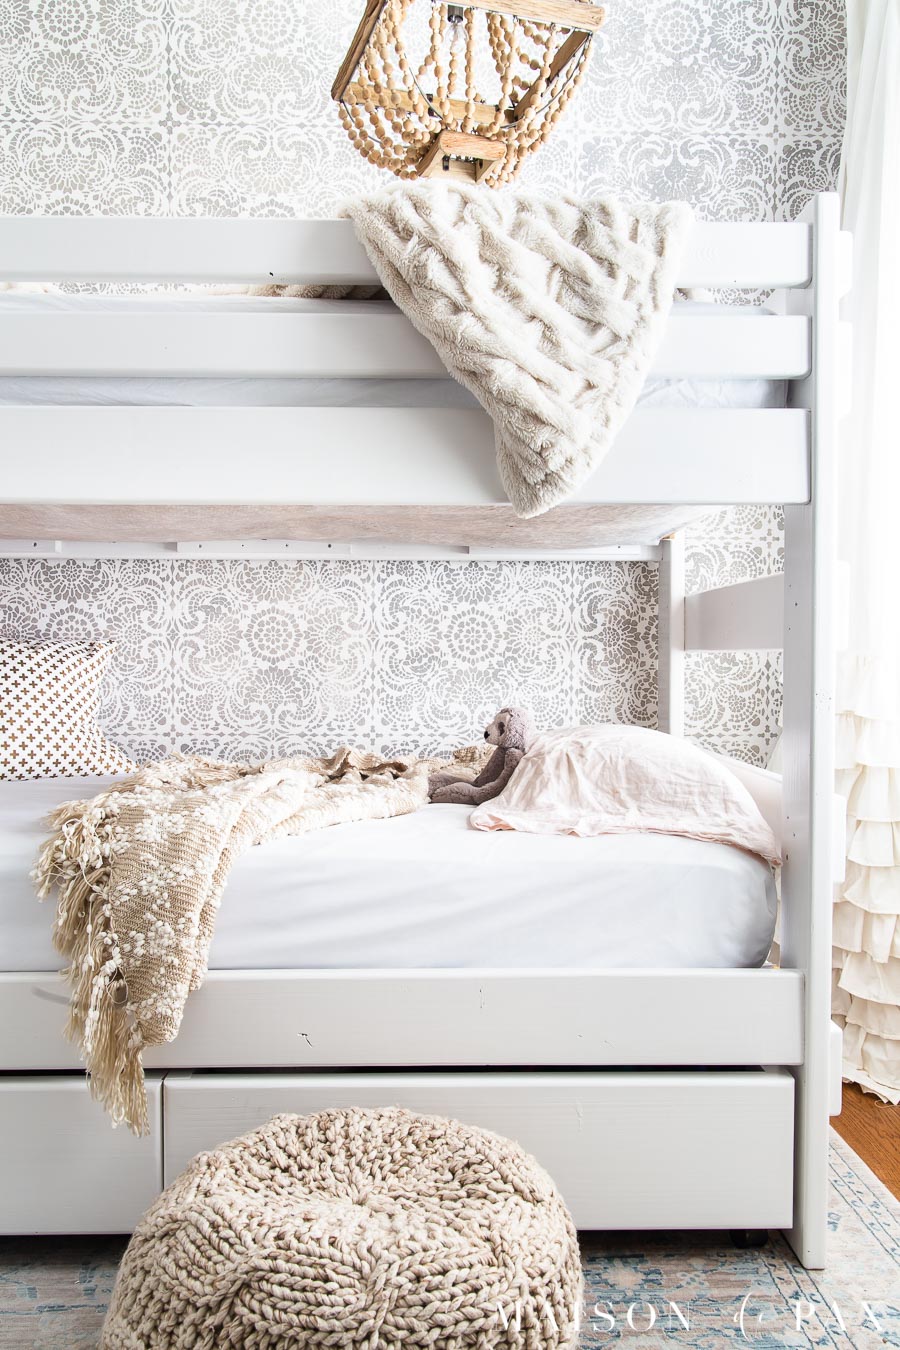
I also knew I was going to be layering lots of different neutrals in this space. My older daughter’s room already had the stenciled wall (diy tutorial here!) and the beautiful rug, but I knew I wanted to bring in some of the warmer whites (like the ruffled curtains) from my little girl’s nursery. With such a hodge podge of neutrals, finding the right white for the bunk bed was important.

Luckily, I had some Behr Cameo White paint (the same color as the walls) in semi-gloss (the walls are eggshell). I knew semi-gloss paint would provide the right protection for kids’ feet to climb up and down and generally abuse the bed, and I liked the idea of the same color but different sheen than the walls. That way, I knew it would coordinate but still stand out.
Painting the bunk bed was a little time consuming, but SO easy! Here are the steps I took… which would work for any wooden furniture or cabinetry.
How to paint raw wood furniture
How to paint raw wood
- Sand
When the wood is raw, this sanding step is fairly easy because you don’t need to remove any existing finish. Rather, you want to smooth the wood and prepare it to receive the primer evenly. If the piece is already fairly smooth, then a light sanding with a palm sander and 150 grit paper will often be enough. If it is super rough, though, you’ll need to start with 60 or 80 grit (and maybe an orbital sander for a quicker job) and move up from there. For a particularly fine finish, you’ll want to finish with at least 240 or 300. For these bunk beds, though, a once over with 150 grit was plenty.
- Prep
Now that the piece is sanded, it needs to be clean, dry, and arranged to facilitate paint. To clean sanded wood, you can use an air compressor blower, paper towels and a whisk broom, or a tack cloth. Just be sure the piece is free of sawdust before painting begins. For these bunk beds, I chose to assemble the beds in order to paint (rather than laying the boards flat to paint) because I didn’t want to have to wait for each side to dry before I could flip it over to paint the other side. Whatever you decide, prepare your space with drop cloths, etc. before you begin.

- Prime
A single coat of primer will save you at least one coat of finish paint, so I definitely recommend it! For this project, I was using a paint+primer for the final finish, but I still chose to prime the raw wood first. I like to use a 2 1/2″ angled brush, and while the primer doesn’t have to be perfect, know that the better your primer coat, the easier your paint will go on. So be careful to avoid drips and brush strokes.
- Paint
I used a semigloss water based latex paint in Cameo White. It is the same color but a different sheen as the walls (the walls are eggshell). As with the primer, be careful to avoid drips and brush strokes. A high-quality synthetic brush or trim foam roller will help, but you’ll need to take care not to get over ambitious with the paint. Two thin coats will provide a better, smoother finish that one thick coat of paint, but be sure to let both dry completely. Drying times will differ depending on your primers and paints, so be sure to read the labels!
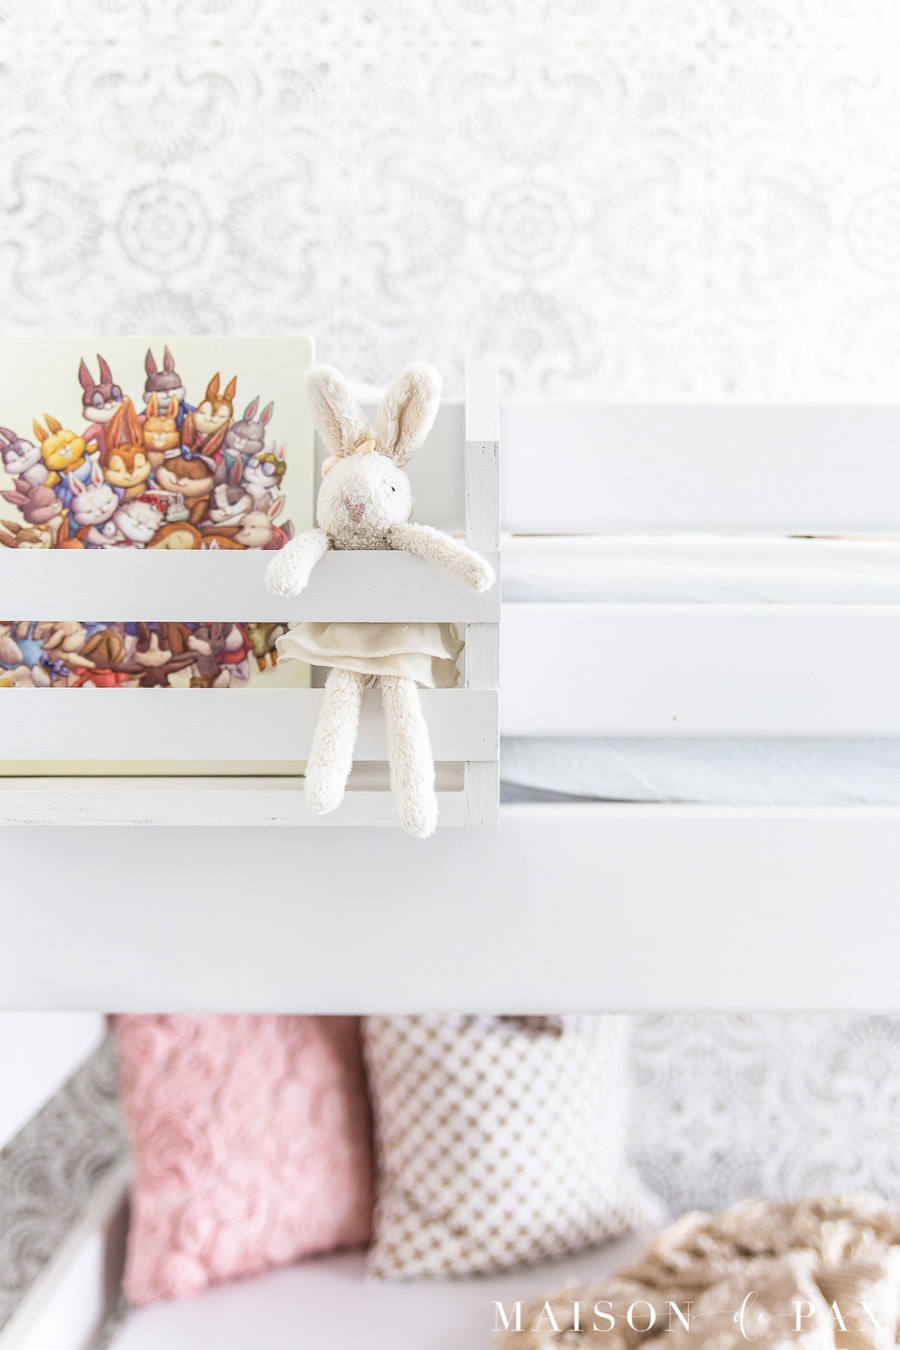
Sand, prime, paint, paint, done! It took three sessions (so things could dry in between), but it wasn’t hard, and this bed is about as sturdy as they come. We finished it off with a little bunk buddy for the top bunk painted the same way (inspired by my friend Jen and her brilliant plans)…
and layered it with simple white sheets and fun throw pillows and blankets we already had.
GET THE LOOK:
It’s not a super elegant or fine piece of furniture, but it’s a perfect piece for my daughter’s room: a well-painted, sturdy bunk bed with extra storage… I’m so grateful for it! Don’t forget to pin it to help you paint your next Craigslist or Facebook Marketplace find.
More DIY projects
To make things even more fun, I’m not the only one sharing a DIY project today! Be sure to check out the other DIY projects my friends are sharing below for even more inspiration… or follow me on Instagram to hear more about them all!
My Vintage Porch | Randi Garrett Design | Fox Hollow Cottage
Sarah Joy Blog | Love Grows Wild | Rooms for Rent


They look gorgeous! Well done!!! xoxo
Thank you, Randi!
That came out sensational! I’m all for a good coat of primer too! It makes such a difference. Love the drawers on the bed you found, so smart! Hope they make loads of good memories with these, bunk beds are such fun!!
Thank you, Shannon! The girls are excited!
Wow! They turned out so amazing! I’m in awe of your craftsmanship!
Thank you, Natalie! I love that they are sharing a room now.
These are great and turned out perfect. Do you plan on making the under the bed storage instructions? I am in need of those as well.
Thank you! I’m afraid the under the bed storage drawers were included with the bunk beds, so I don’t have building instructions. They are basically just 2×6’s with a bottom and wheels… They’ve been wonderful, though!
Would you share a picture of the drawers? I’m a visual person 🙂
This is beautiful! What a sweet room.
Thank you, Sarah!
The bunk beds came out great! I was just telling my husband that I would like to paint our girls beds white, & put in them in the guest room. (They are grown up ladies now!). Thank you for the detailed instructions & beautiful pictures!
I’m so glad you liked it, Lucy!
So adorable! Good job! Did you stencil the wall behind the beds or is that wallpaper? It really is beautiful as well.
Hi Maureen! It is a stencil! I did a whole blog post about it here: https://www.maisondepax.com/how-to-stencil-an-accent-wall/
You have amazing taste and wonderful ideas.
Thank you, Stella!
So GORGEOUS Rachel!!! This room turned out dreamy. Only wish my sister & I had these beds when I was growing up…..terrific job!
Thank you, Susan! I pray my girls always stay close.
Wow! These bunk beds look so beautiful against the backdrop of that gorgeous wallpaper! Great job building these friend!
Thank you, Martina! Would you believe the wall is stenciled paint and not wallpaper?
Love, Love, Love the room! Where di dyou buy the rug? I went to the attached link and the page is no longer available.
It is a Safavieh rug! This rug is super similar: https://rstyle.me/+QbLBYyjjXUFCMzmYdYkbwg