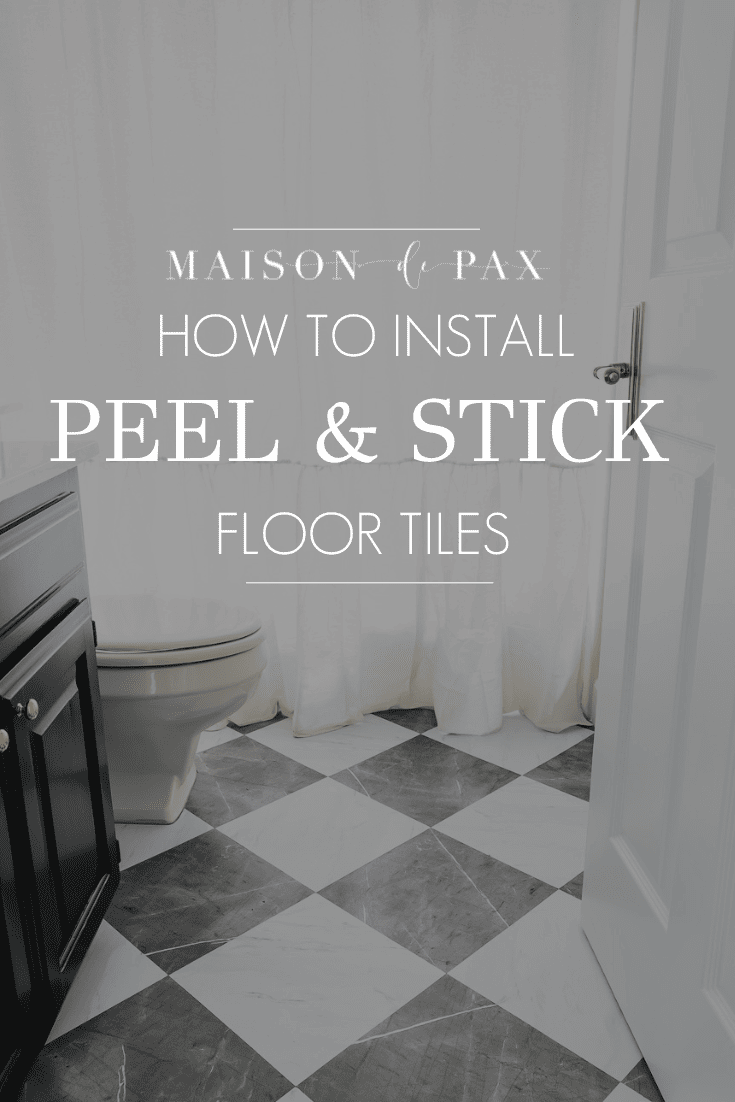
DIY Peel and Stick Floor Tile
Wondering how to install peel and stick floor tile? Get the step by step tutorial on DIY peel and stick floor tile with this gorgeous black and white floor tile!
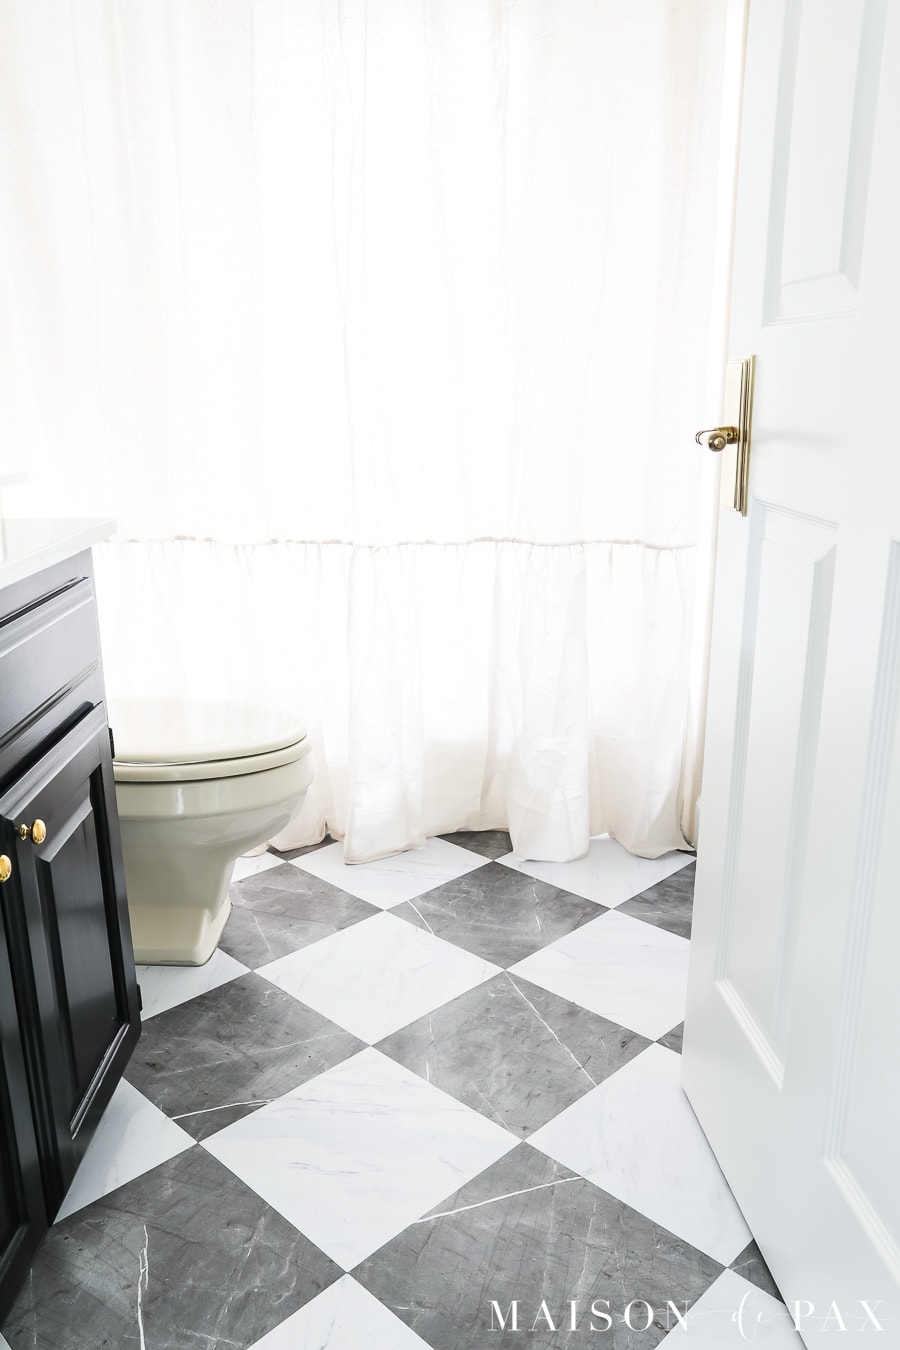
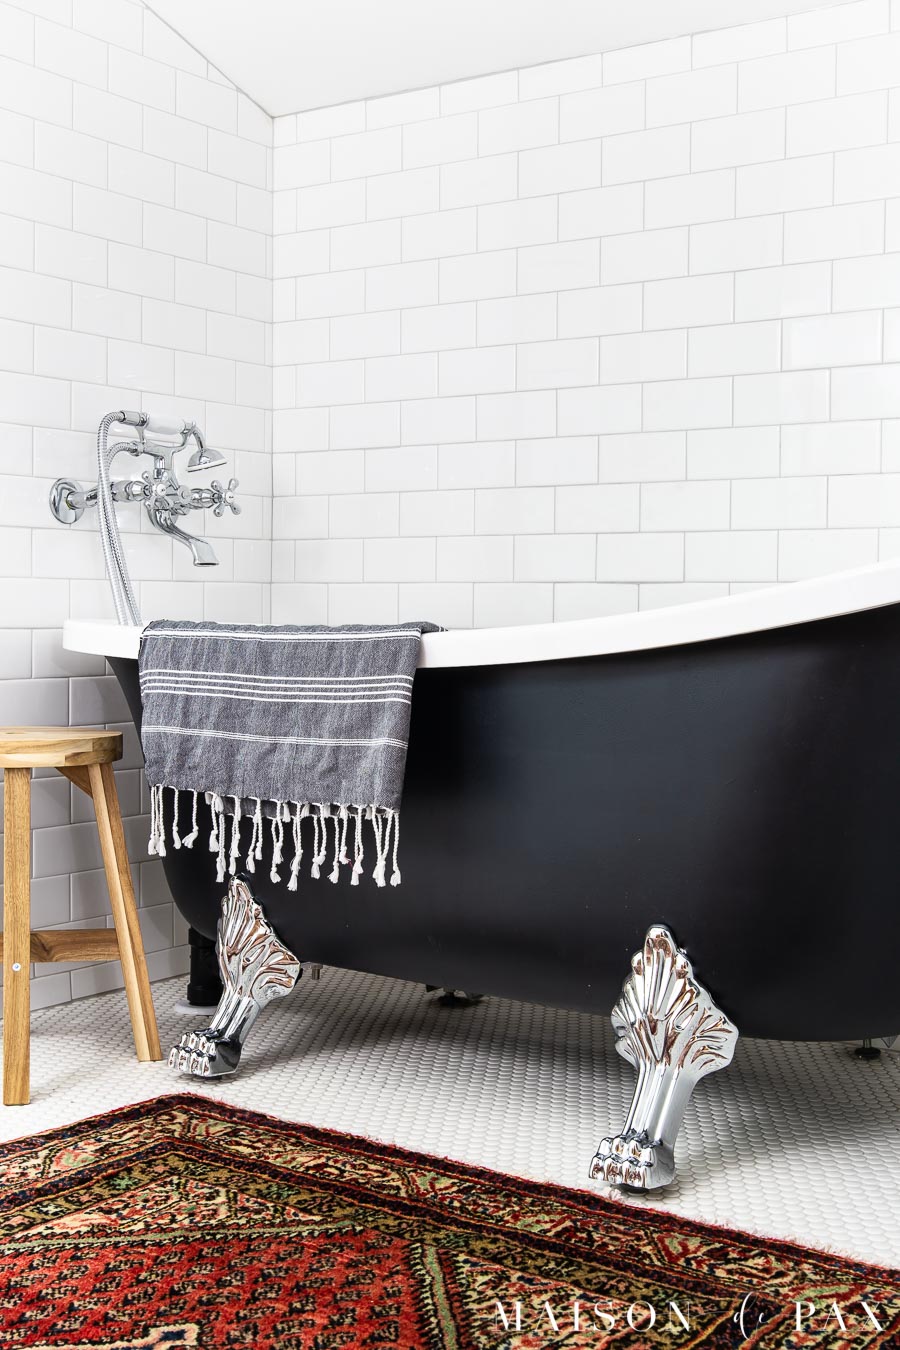
Remember the guest bath in our new home? When we closed on the house, it looked like this.
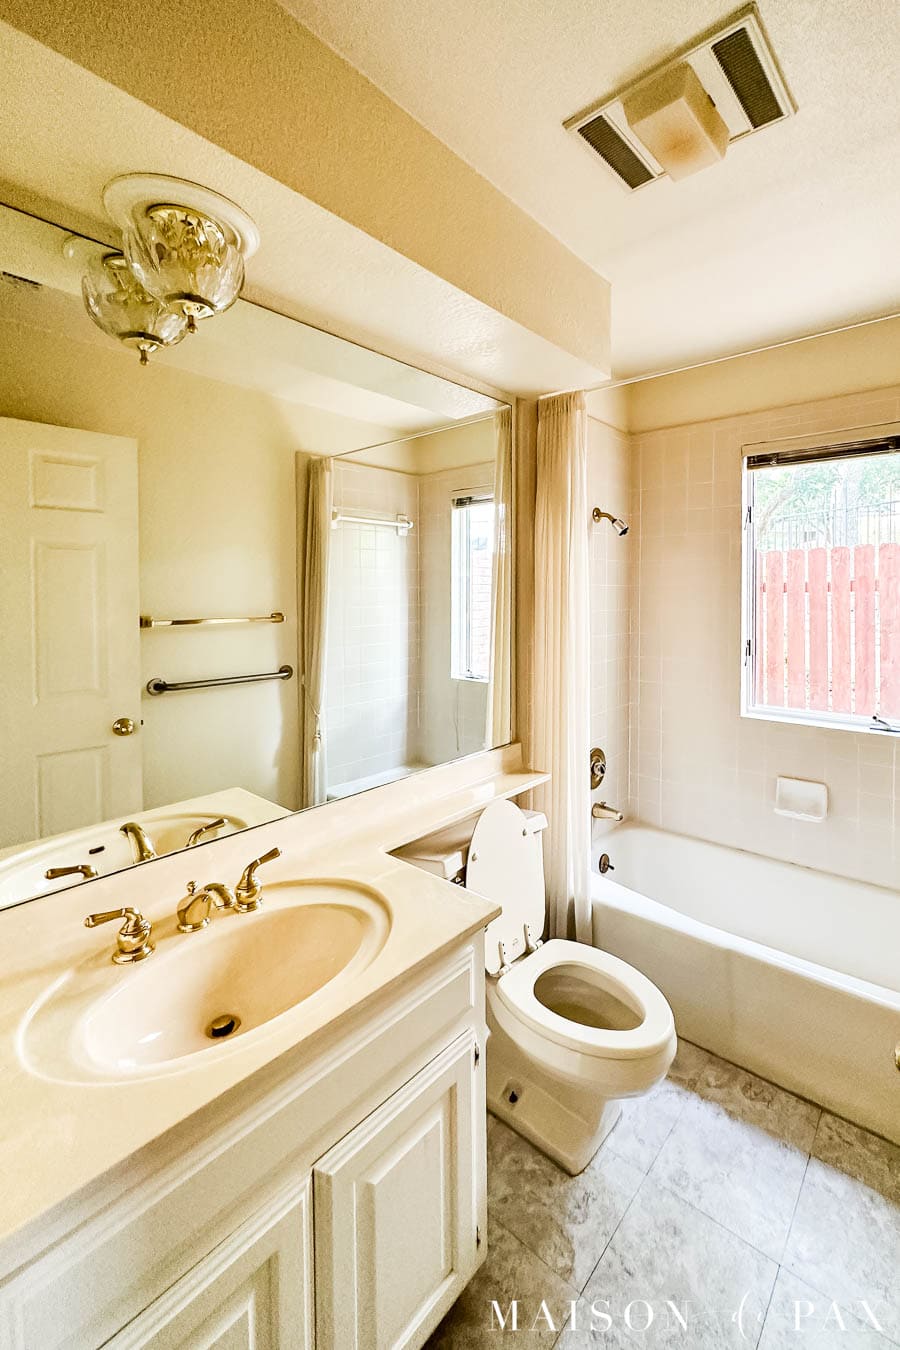
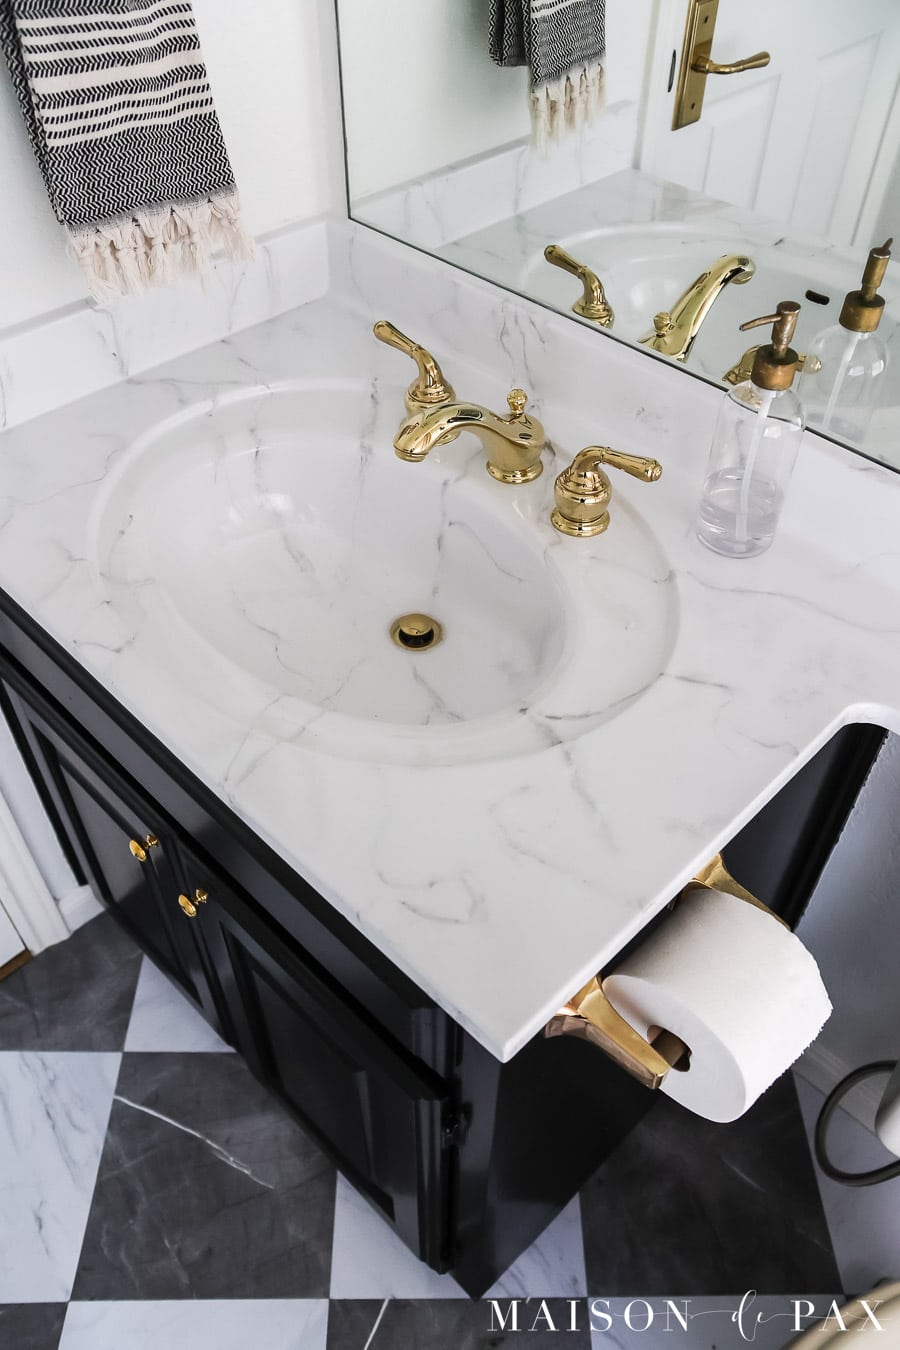
Fortunately, everything worked just fine, but the 80’s vibe with the furdown, the peachy color palette and the bright gold brass was ready for a bathroom makeover. Plus, the 40 year-old stained cultured marble countertop and the peel and stick vinyl tile floor had definitely seen better days.
However, neither our current budget nor our long-term plans has us ready to gut this bathroom and start over… As our only guest bath, though, I knew a budget-friendly facelift was in order. And this black and white floor tile was exactly what I wanted after being inspired by my trip to France… And it only cost me ~$63 for the entire room! Let me show you how to install peel and stick tile.

This post contains affiliate links. Click here to read my full disclosure.
When to use peel and stick tiles
This is obviously a personal choice, but I’ll admit that peel and stick tiles aren’t made to have the long life of real porcelain, ceramic, or stone tile. So when is it ok to use them? I think they provide a wonderful budget-friendly option to extend your need for a renovation.
They are best used over a flat, level flooring. If your existing flooring has lots of variations in height or especially large grout lines, then this may not be the right product for you.
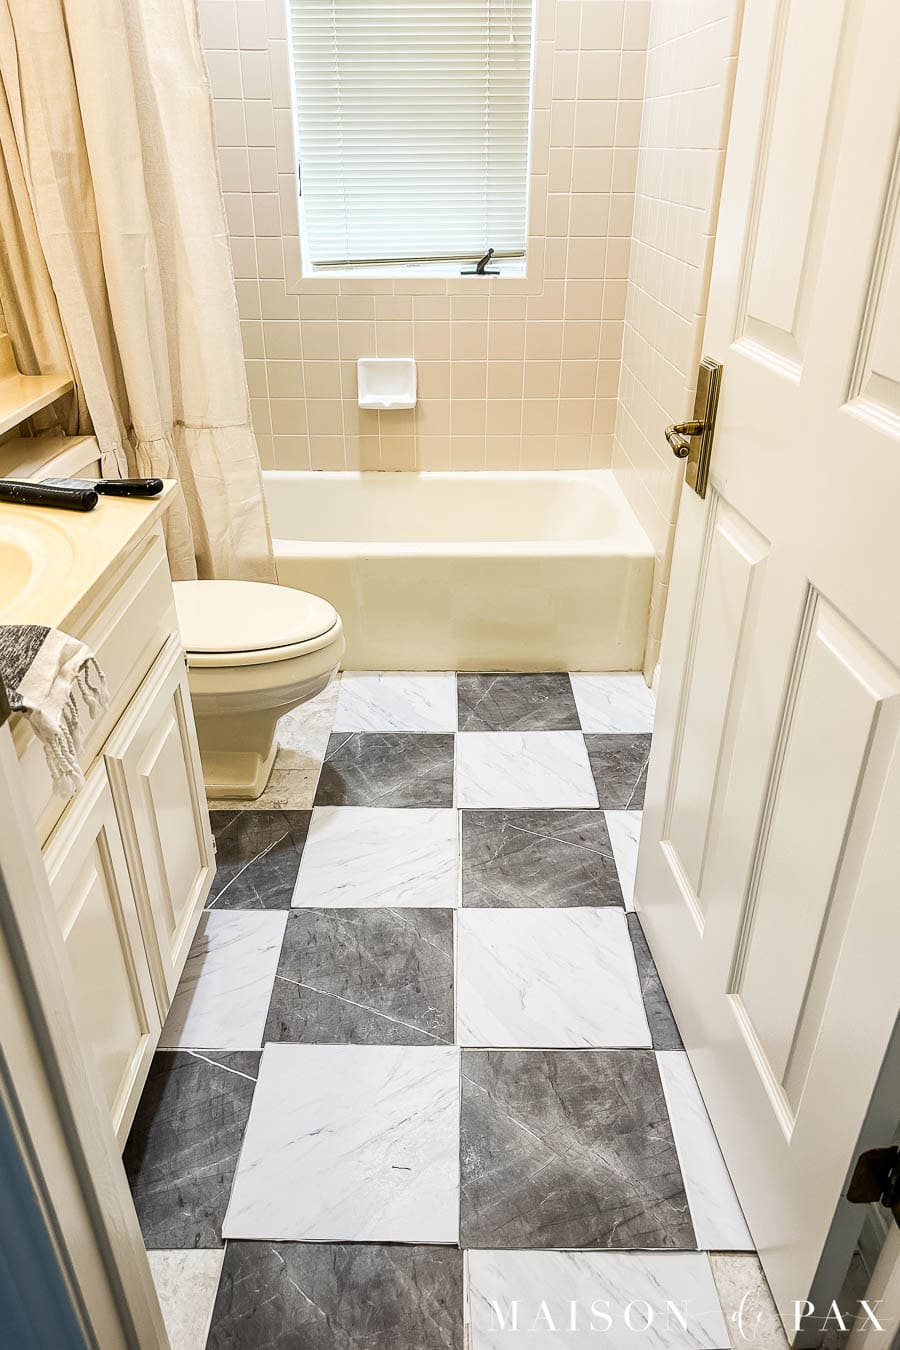
Note: our bathroom floor had some perfectly smooth and level peel and stick flooring vinyl already applied over the previous tile (I peeled up a corner to check!) which had large grout lines. So my experience with this new peel and stick tile was laying over a perfectly smooth floor, but our previous layer showed that adhesive floors can go over larger grout lines successfully, too.
Supplies needed to install peel and stick floor tile
- vinyl floor tiles by floorpops (each box has 10 square feet)
- long straight edge
- large piece of cardboard or foam (to cut on)
- utility knife
- scrap paper
- contour gauge (optional, but helpful)
- pencil and scissors
How to Install Peel and Stick Floors
Actually installing the floors is such an easy DIY project. The pattern choices you make, though, can make the layout and angles challenging. The basic process is as follows:
- Clean and dry your floors
- Layout your tile for a dry fit
- Peel backing off tile and secure to floor
- Roll over tile to strengthen bond
Here are my step-by-step instructions, though, with all the tips and tricks I learned along the way.
Step 1 – Decide your layout pattern
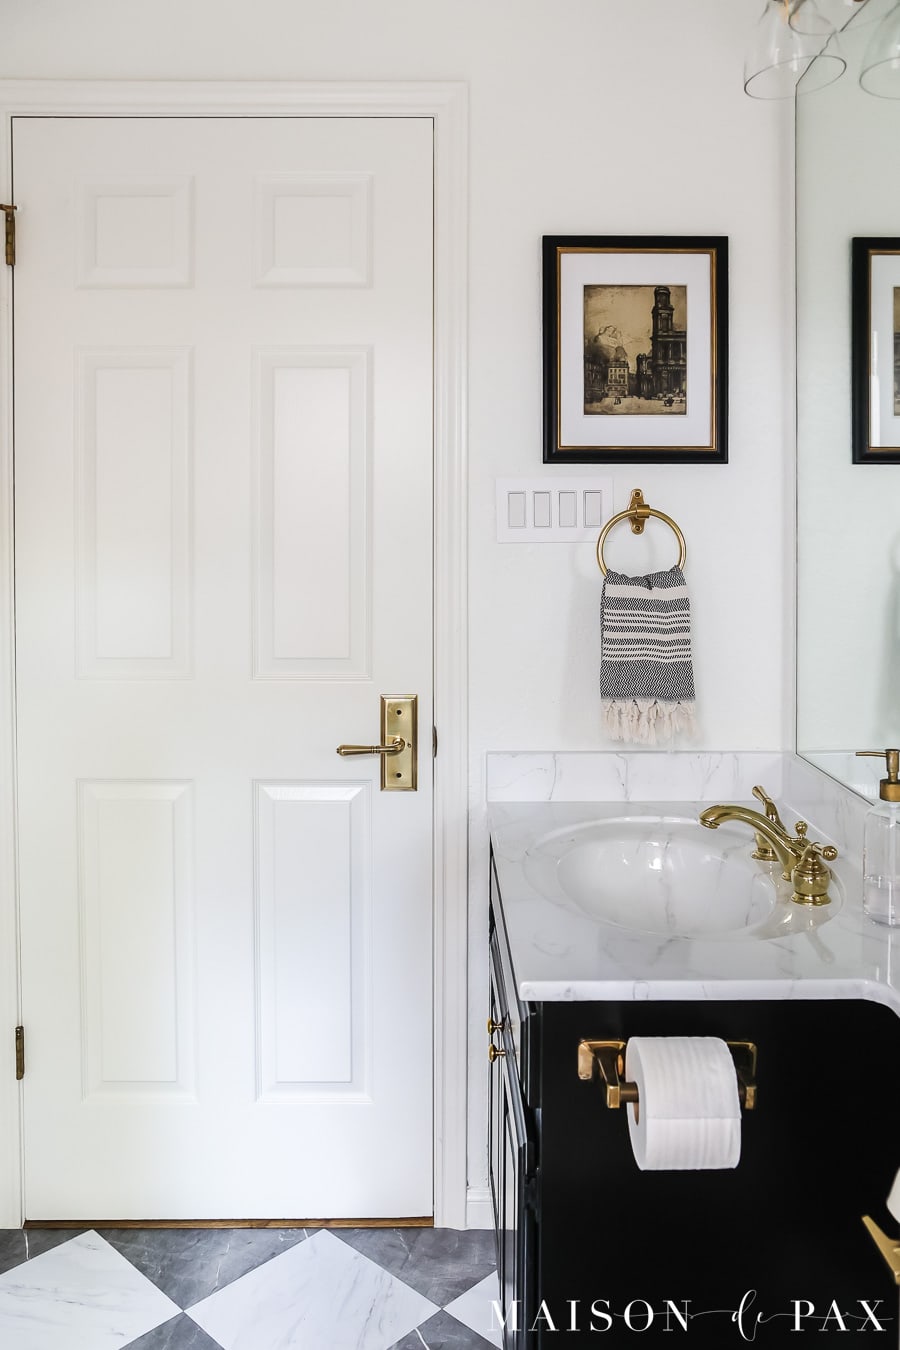
Consider whether you want your tiles running in a checkerboard pattern or a harlequin pattern. The checkerboard option is definitely simpler. Naturally, I chose the harlequin.
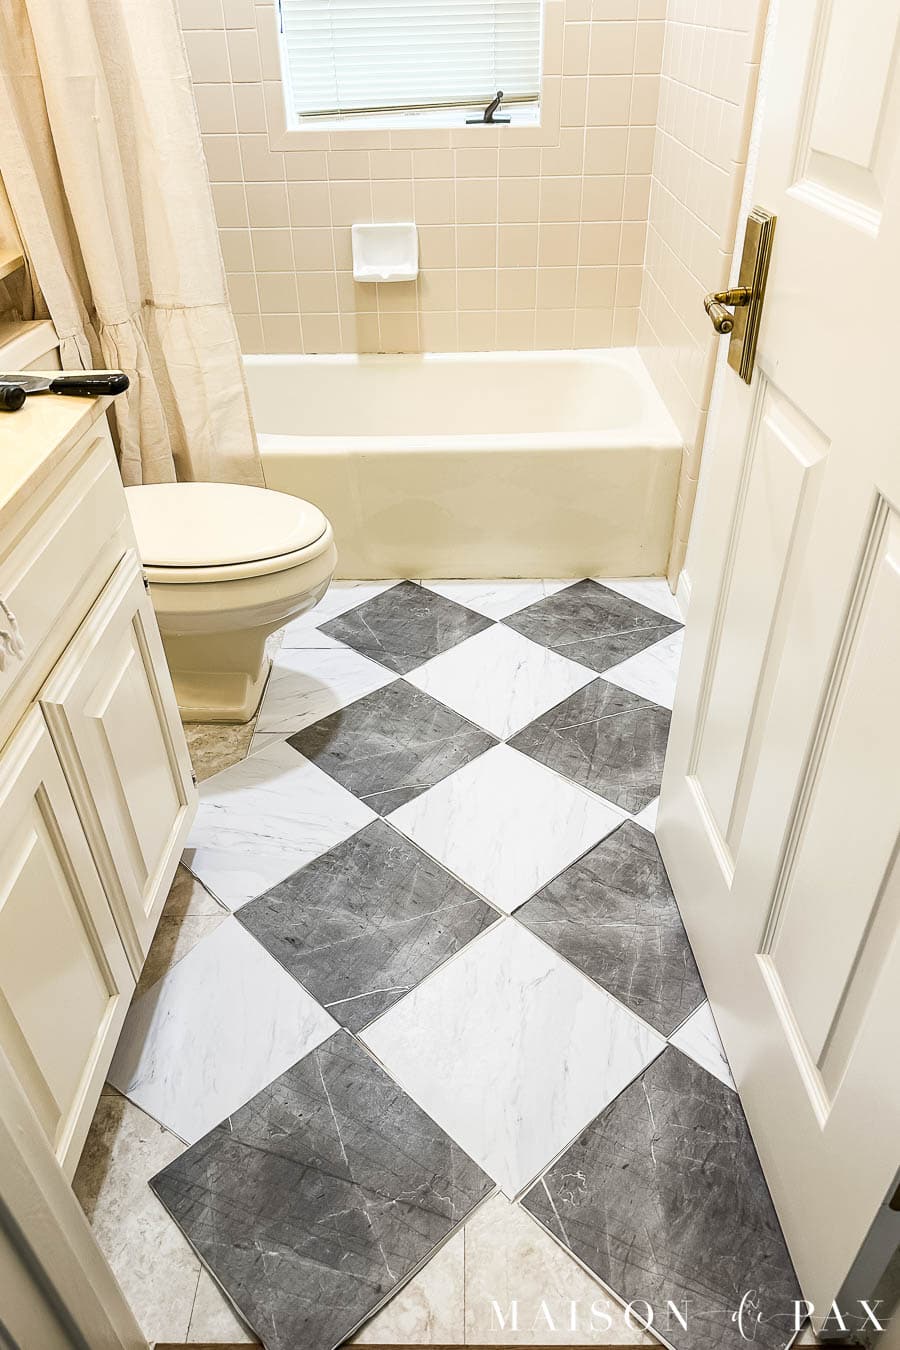
Starting in the center of the room, layout the tiles with the paper backing still on to make sure you like the pattern and that it doesn’t leave you with any teeny slivers along the perimeter of the room. If needed, shift it by a few inches. Make note of the main focal line of tiles before you pick them up. For example, when I finally decided how I wanted them, I used a tape measurer and made note of exactly how far that first line of dark tiles was from the wall on the right.
Step 2 – Prepare your floors
Clean the existing floors well: vacuum first, then wipe with a cleaning agent that cuts grease. Be sure to check that the floors are completely dry and free of dirt and dust.
Step 3 – Draw guide lines
I used a long level and a pencil to draw the center line of my first dark row of tiles. You could also use a chalk line running from one edge of the room to the other if your space is bigger.
Step 4 – Lay your first row(s)
Using the guidelines you drew, lay your first row(s) of tile. If you are laying in a checkerboard pattern, I recommend just laying one straight row. But if you are doing a harlequin like I did, I recommend laying two or three rows so that you can press the tiles right up against one another as you lay them, ensuring you don’t have any cracks between edges.
Tip: Rotate them around until you like the pattern before removing the backing and pressing them into place.
Step 5 – Lay the rest of the full tiles
Once you have a complete row in place, laying the rest of the full tiles goes quickly! Just stick vinyl floor tiles up against the edge of the last one.
Tip: Be sure to clear out any debris as you go so the adhesive has a clean surface to stick to.
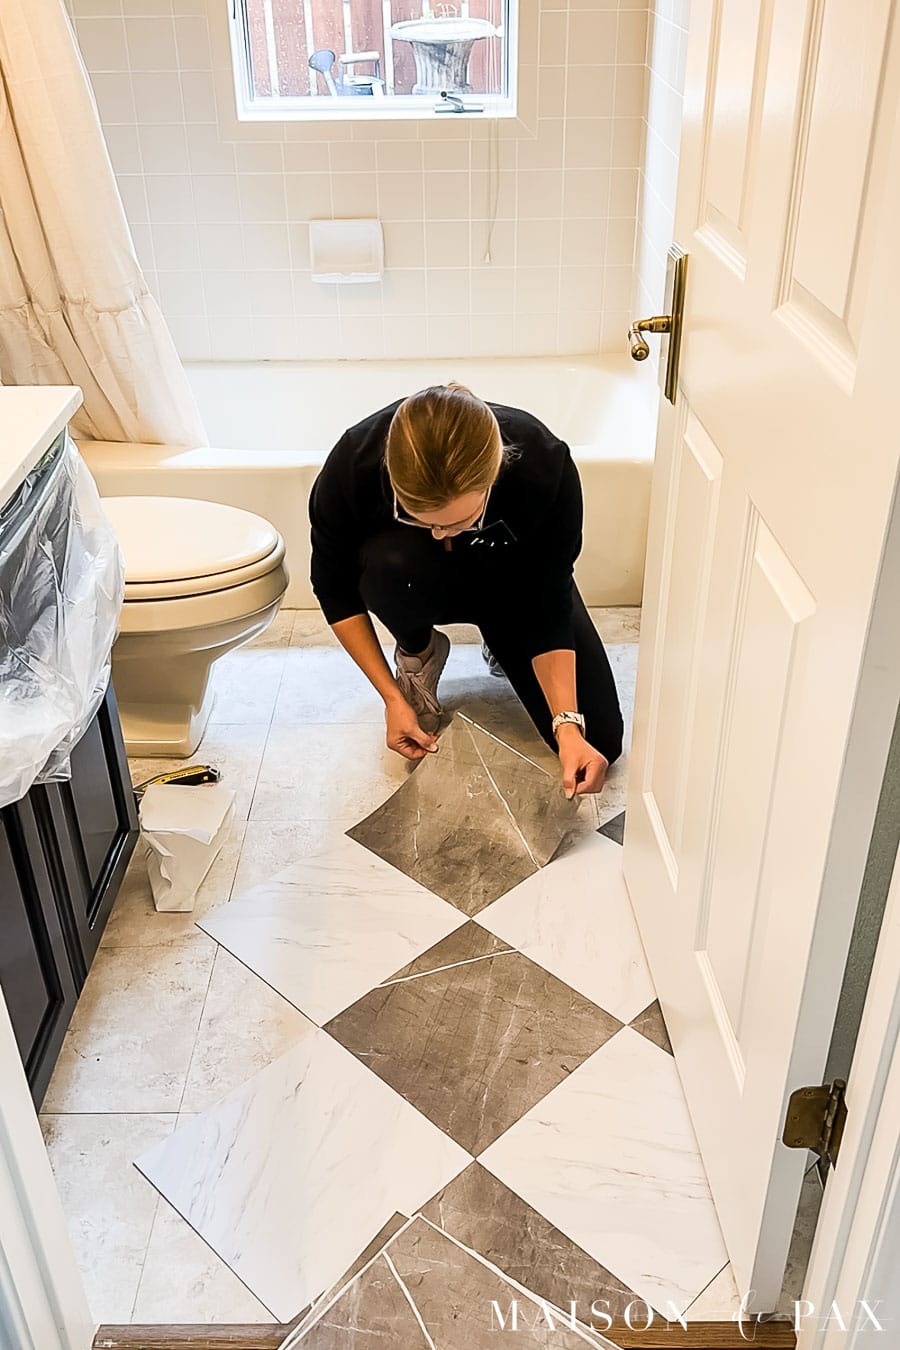
Step 6 – Cut and lay the simple partial tiles
For the basic cuts, measure the width of each side of the tile, then use a metal straight edge and scour along it with the utility knife or box cutter. You do not have to cut all the way through. Just fold the tile along that straight line and the tile will snap. Peel the backing and lay as before.
Tip: Sharp new blades on your utility knife make this process easy!
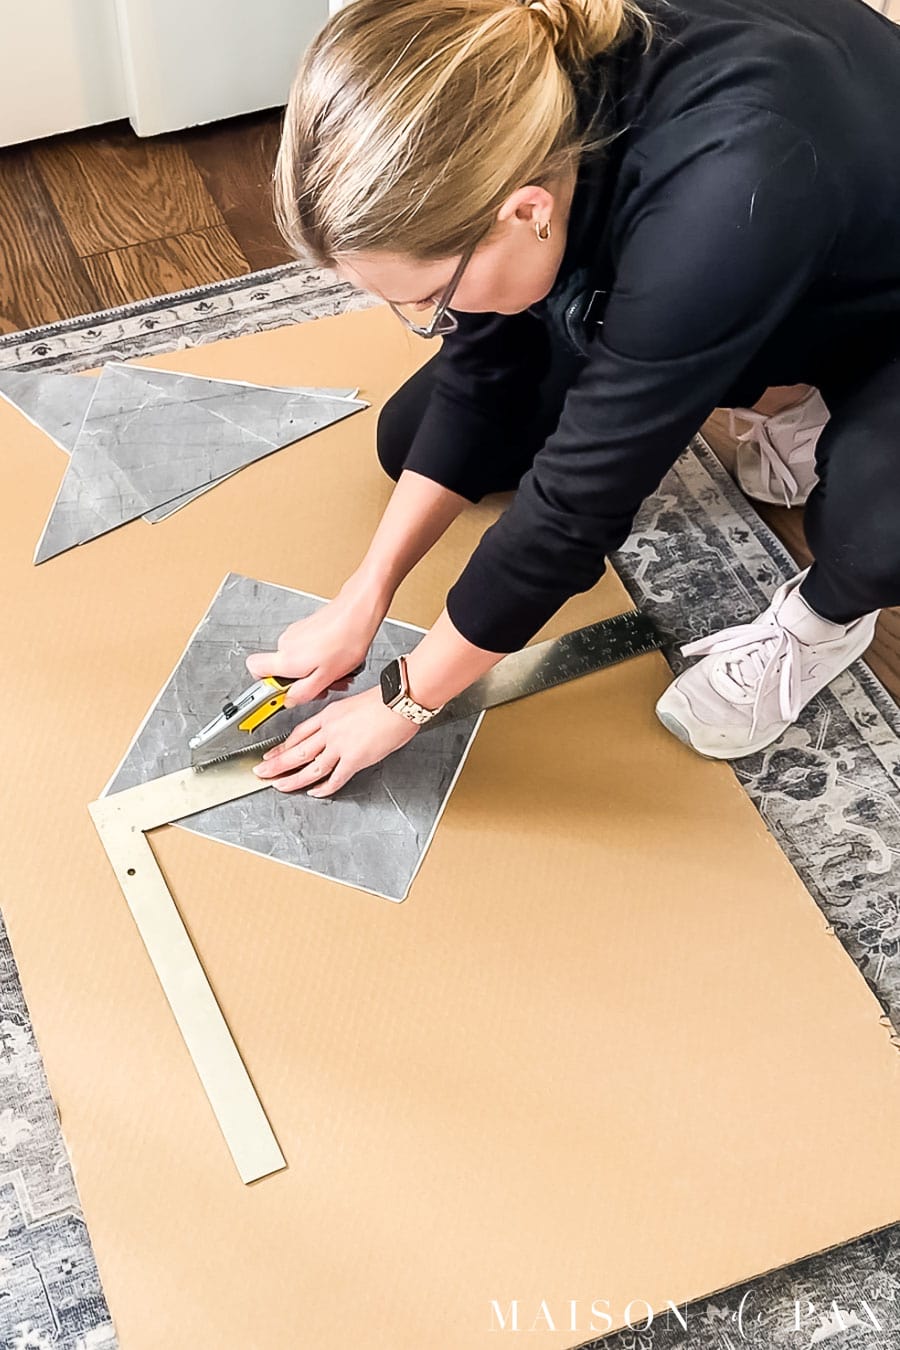
Step 7 – Make templates for tricky partial tiles
For the really tricky ones, I used some butcher paper to create little templates. I first cut a piece of paper the same size as a tile, then I pressed that into place and used a pencil to draw the edges of the space. I also used my contour gauge to replicate curves.
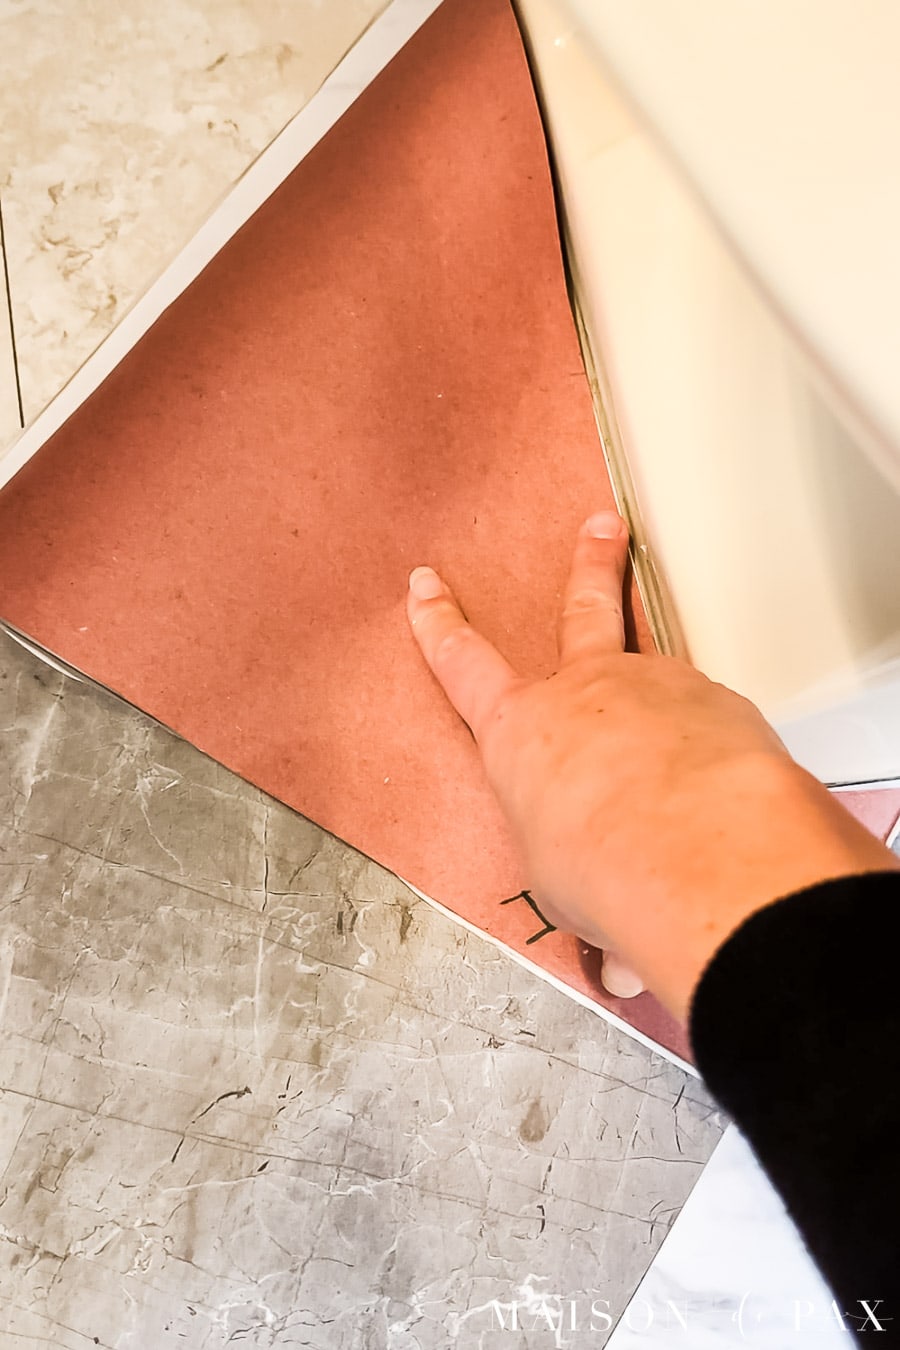
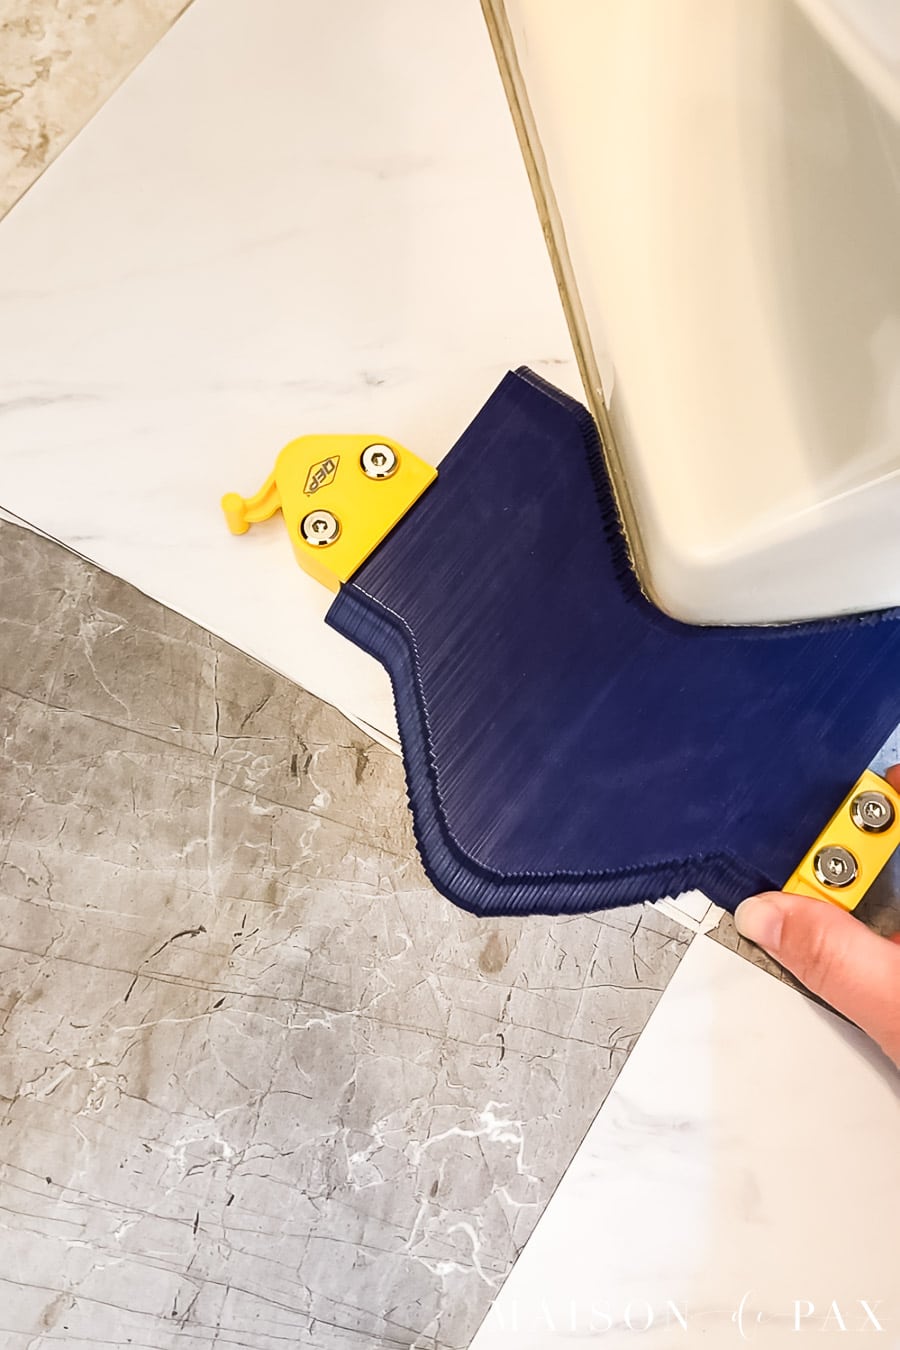
Cut out your paper template, trace it onto the tile, then use the utility knife to cut it as much as you can.
Tip: If needed, use some sharp scissors for tricky shapes.
Step 8 – Roll over tiles
The installation instructions that for optional adhesion you should. use a 75-100 lb tile roller. I am sure that would be great, but I just asked my kids to run back and forth over them, rolling their feet across the tiles. None have moved since. 😉
Step 9 – Caulk the edges
Especially on a bathroom floor, I recommend that you caulk the edges of the tile. This may not be as important if you are using these in a laundry room or mudroom or other space.
Peel & Stick Floor Tiles FAQs
How do you prep a floor for peel and stick tile?
See Step 2 above.
Can I lay peel and stick tile over uneven floors?
See “When to Use Peel and Stick Tiles” above.
Do I need to remove the baseboards?
You do not. I chose to remove the old, damaged baseboard along one wall and laid the new one atop the tiles for a wonderfully clean look, but this is not necessary if your baseboards are in good shape.
How do I work around toilets and cabinets?
See Step 7 above.
What do I do about transitions to other flooring?
Fortunately, these tiles are quite thin. I found that they were below the level of our existing transition. If not, though, you could consider adding a transition piece to match your other flooring.
How long do peel and stick tiles last on a floor?
We have had ours about 5 months at the time of writing this, and they still look exactly as they did on the day I installed them. Vinyl is generally a very durable material, but only time will tell.
How do you care for peel and stick vinyl flooring?
Simple! You can vacuum or sweep and then mop the entire floor with vinyl floor cleaner (I use this one). The vinyl itself is moisture resistant, but it is not recommended to clean with an excessive amount of water. Probably to avoid getting water underneath the tiles.
Now it makes me smile every time I walk into the room with our black and white tile floors…
My friend just bought a house, and the first thing she wants to do is rip out the bathroom because she hates the tile, and I was like, “No! Use peel and stick tile!” Totally sending this DIY to her. She needs the visual. Thanks!
Thank you, Kyla! I hope she finds it helpful.