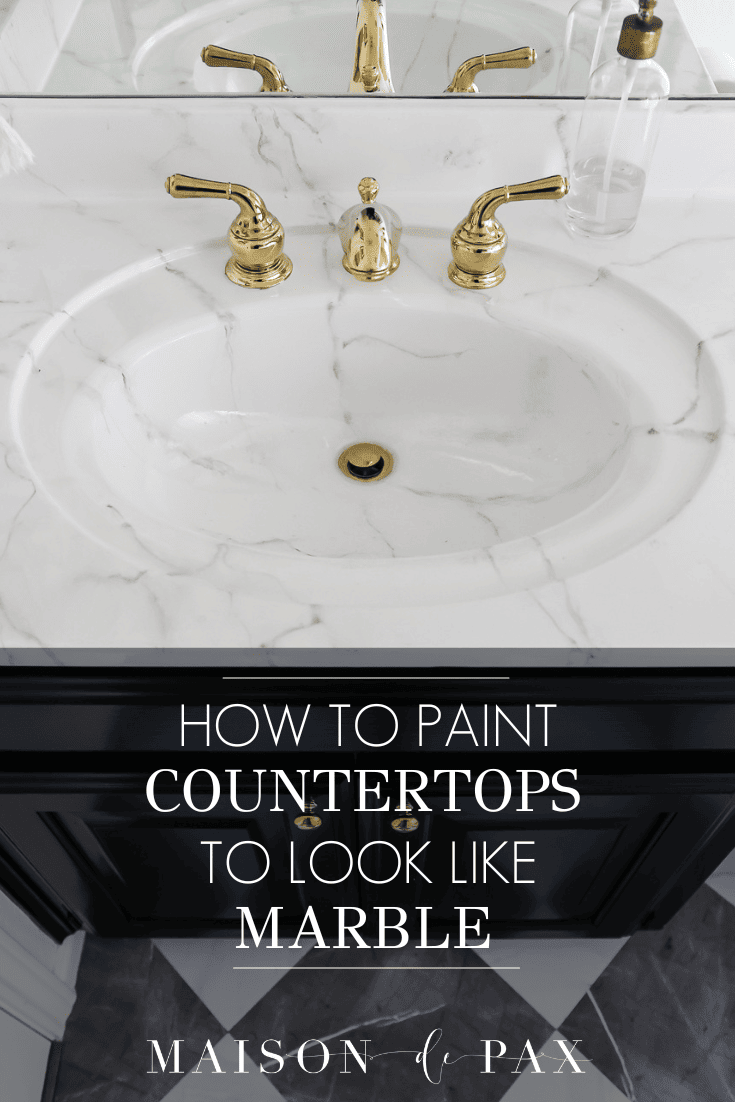
How to Paint Countertops to Look Like Marble
See how a Giani marble countertop paint kit (from Amazon!) transformed this old yellow countertop, and find out how to paint bathroom countertops to look like Carrara marble!
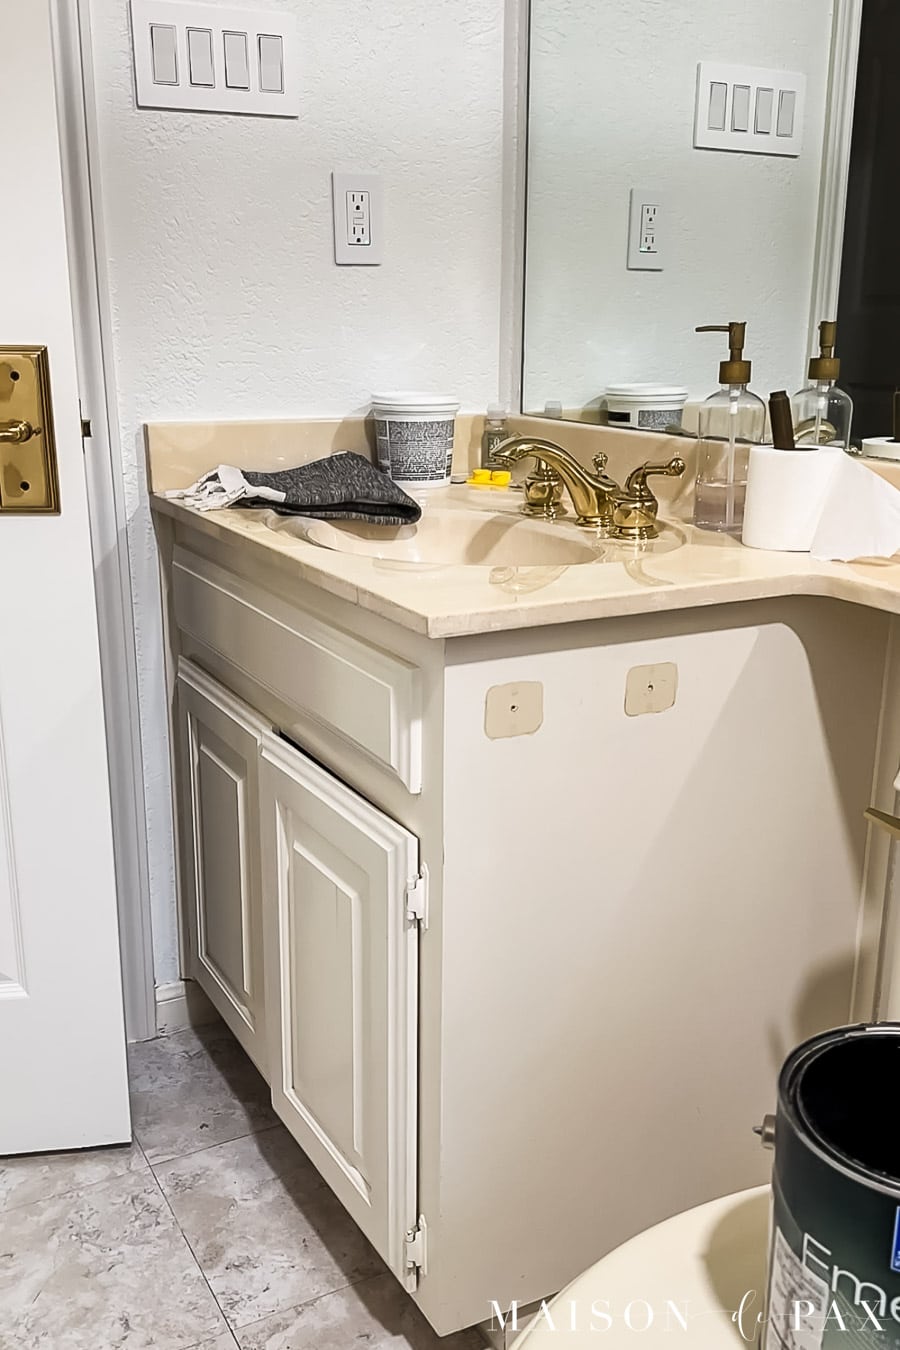
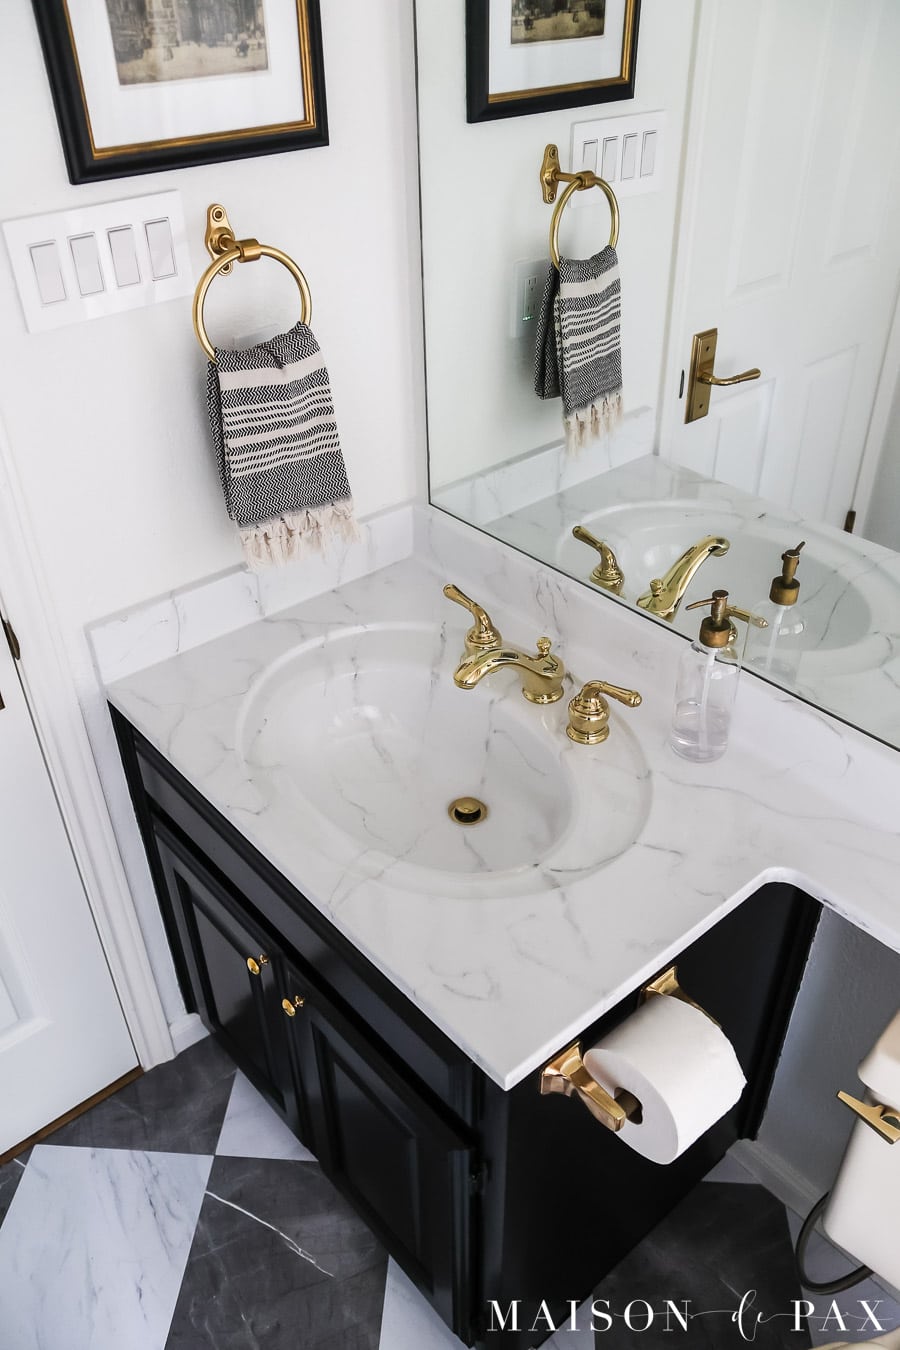
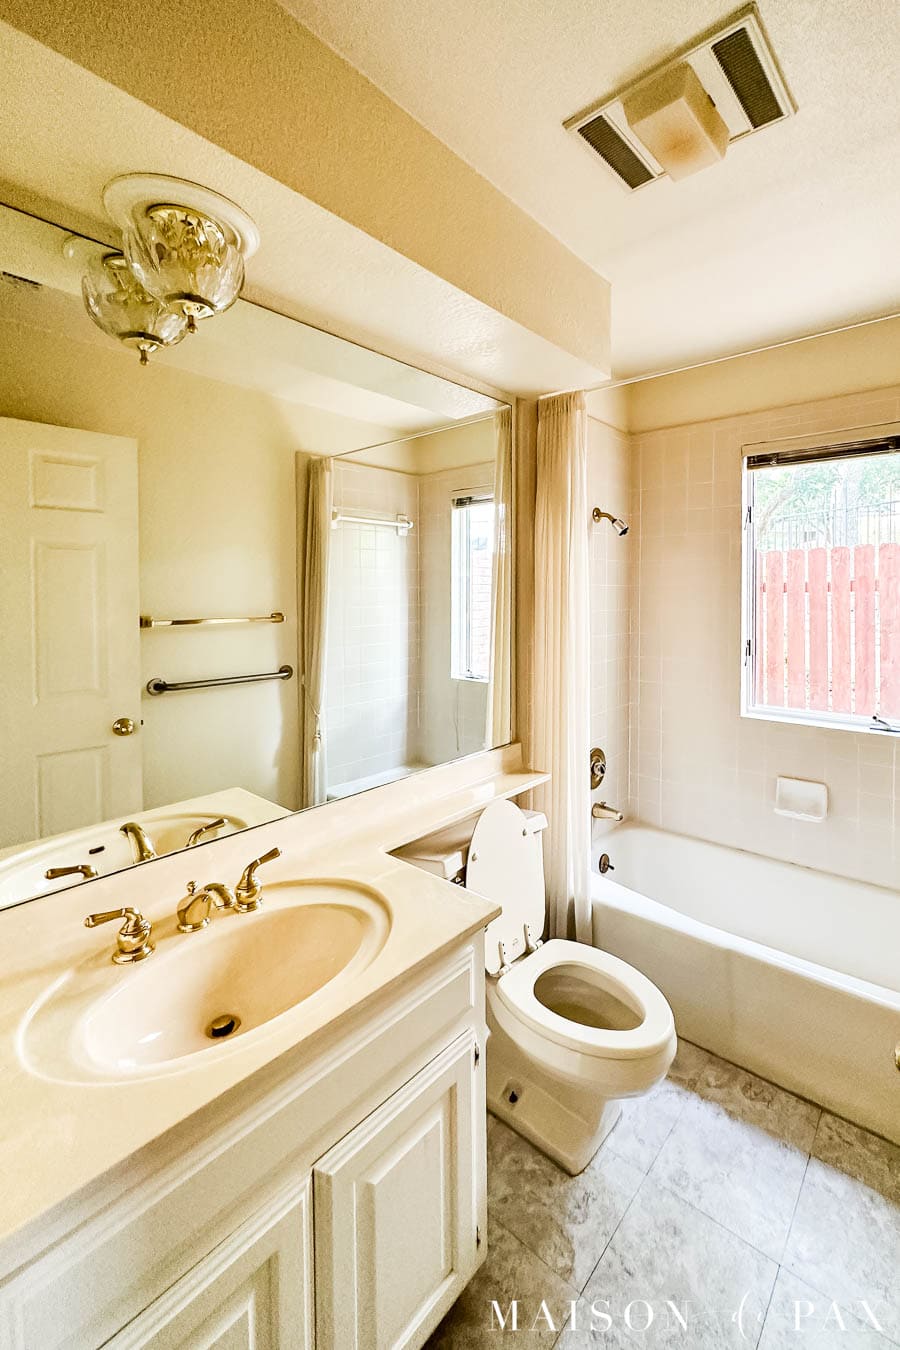
I recently painted my 40 year old cultured marble bathroom countertops to look like marble. For around $100, I couldn’t be more pleased with the new look! And I’m excited to show you how to paint countertops to look like Carrara marble.
This post contains affiliate links. Click here to read my full disclosure.
FAQs on Painting Countertops
Before I share the step by step tutorial, I want to answer a few questions about how to paint countertops to look like marble.
Is painting countertops a good idea?
I am a firm believer in doing things you love to your space! If it makes your space more your style, then I think it’s great. Before doing a project like this, though, I generally ask myself two questions:
- Is it cost effective?
I don’t want to spend tons of money changing something that was perfectly functional, and I certainly don’t want to lower the value of my home just for a quick aesthetic fix. But many a diy project just takes mostly time and elbow grease, and I love to see the transformation brought by those! - Will it hold up?
There’s no point in covering up something that functions with something that doesn’t function. So I always try to do my research to make sure the change won’t fall apart sooner than my previous item.
So for this project, I was able to spend around $100 to completely transform the look of this bathroom with this kit. Since we aren’t ready to completely remodel the space, this seemed like a great option for the time being. And the stained 40 year old cultured marble countertops definitely weren’t an attractive option.
How do you prep a countertop for paint?
Proper prep work is always important! This depends on the material of your counters, though. Formica and laminate countertops just need a good cleaning with a scour pad to remove all dirt and dust. Cultured marble, Corian, wood, and metal counters need a light sanding with 300 grit sandpaper and then a good cleaning. And granite and concrete need to be cleaned with xylene or lacquer thinner to remove any oils or wax residue. Fortunately, the countertop kit I used includes all these specific instructions for each material.
How do you make a countertop look like marble?
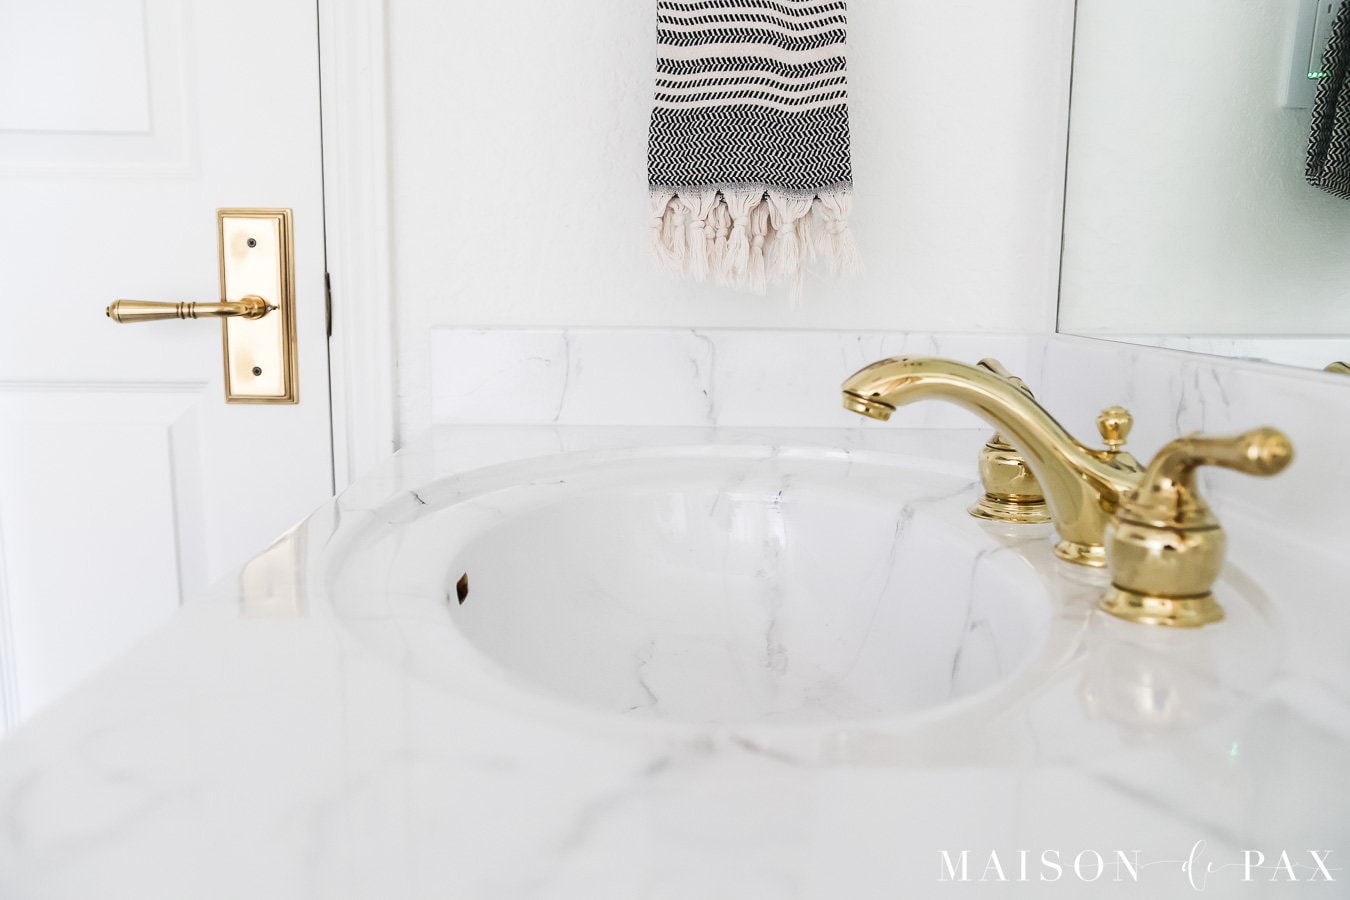
This part is so fun. If you spend time looking at real marble, you realize that no two pieces are alike… so there’s freedom! In this case, I used a white primer and then painted over it with gray vein paint, softening the lines with a spray bottle of water and a sea sponge. There are more details below, and the kit I used had step by step instructions for this.
Are painted countertops durable?
There are two keys to durability for any painted surface:
- the adhesion of the paint to the countertop
Proper prep and a high-quality primer are essential to ensuring that the paint adheres to your countertops. With the right materials, painted countertops can last for a long time! - the strength of the top coat
The epoxy sealer in the kit I used is supposedly equal to 50 coats of poly, making it extremely durable if applied correctly!
What’s included in the Giani Marble Countertop Paint Kit
The kit included protective gear like plastic sheeting and gloves, water-based primer and paints, a two-part epoxy sealer, and all the brushes and paint rollers needed for the project. Most importantly, it included specific step-by-step instructions for creating the faux marble look.
The bathroom countertop kit covers up to 12sf and costs $110 (at the time I purchased it). The kit for kitchen countertops covers up to 36sf and costs $200. Since I have a few other potential projects in mind, I decided to purchase the kitchen kit.
Make note, though, that once you mix the epoxy, you have to use it immediately. The bathroom kit has just one set of the epoxy, so you can only complete one project (or two small projects at the same time). The kitchen kit has three sets of epoxy, though, so you could theoretically complete three small projects at different times.
How to Paint Countertops to Look Like Marble
See the instructions in the Giani countertop paint kit for a more detailed tutorial
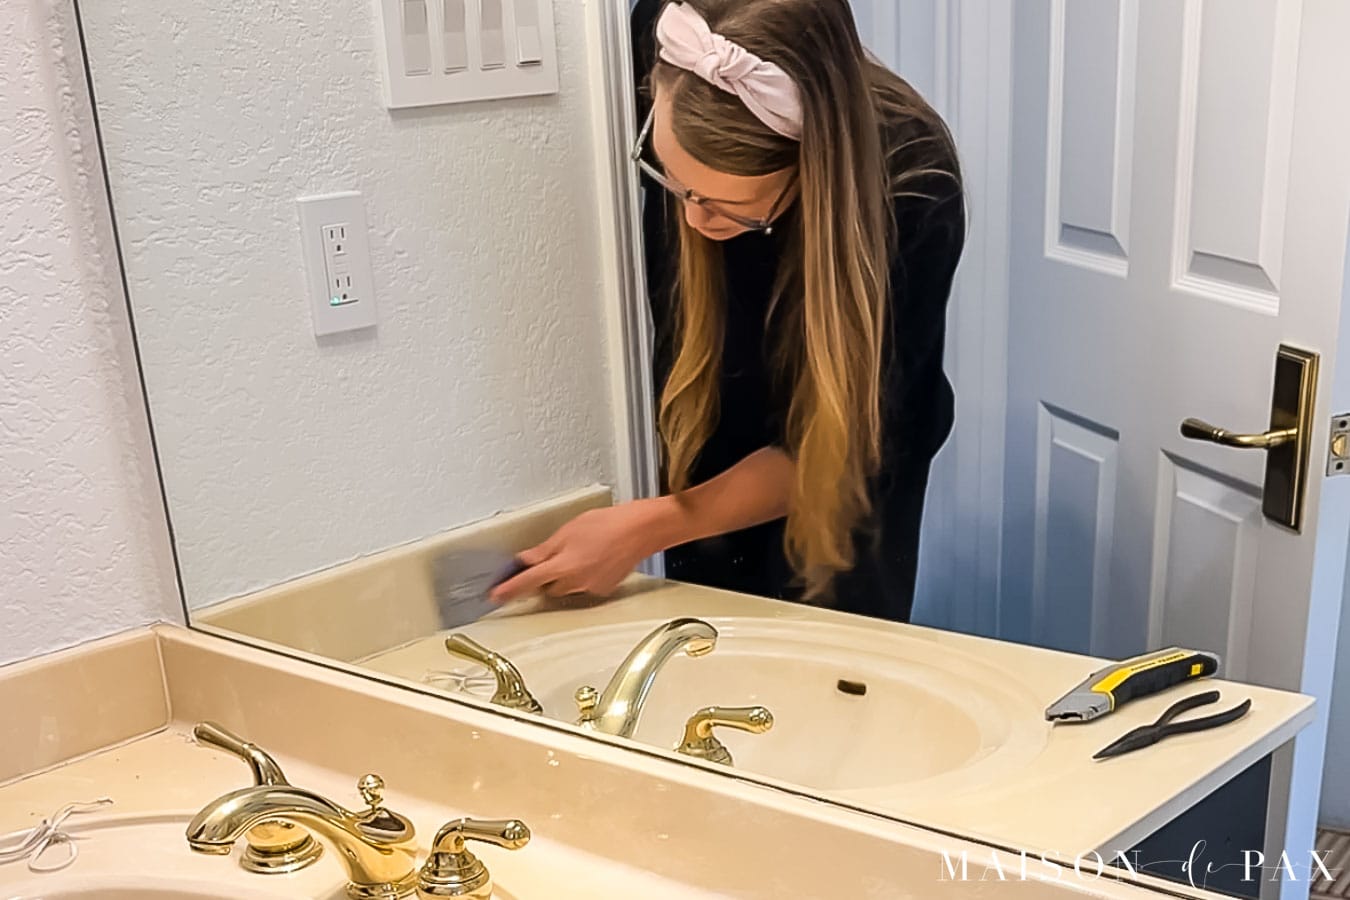
- Prepare the Countertop
The kit includes instructions for prepping your particular material. For our cultured marble countertop and sink, I had to remove old caulk and sand the existing material. I then cleaned it thoroughly.

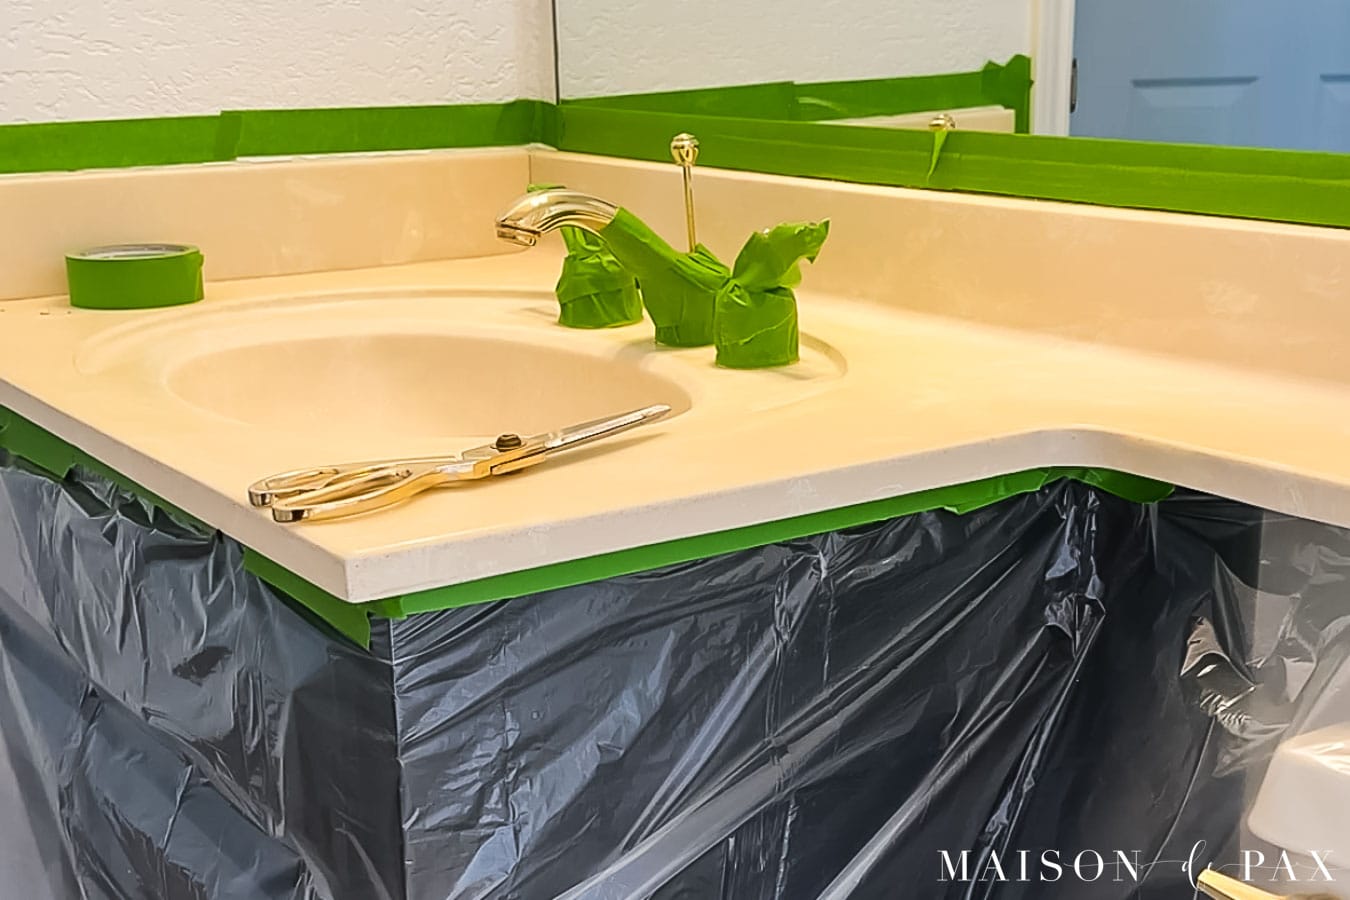
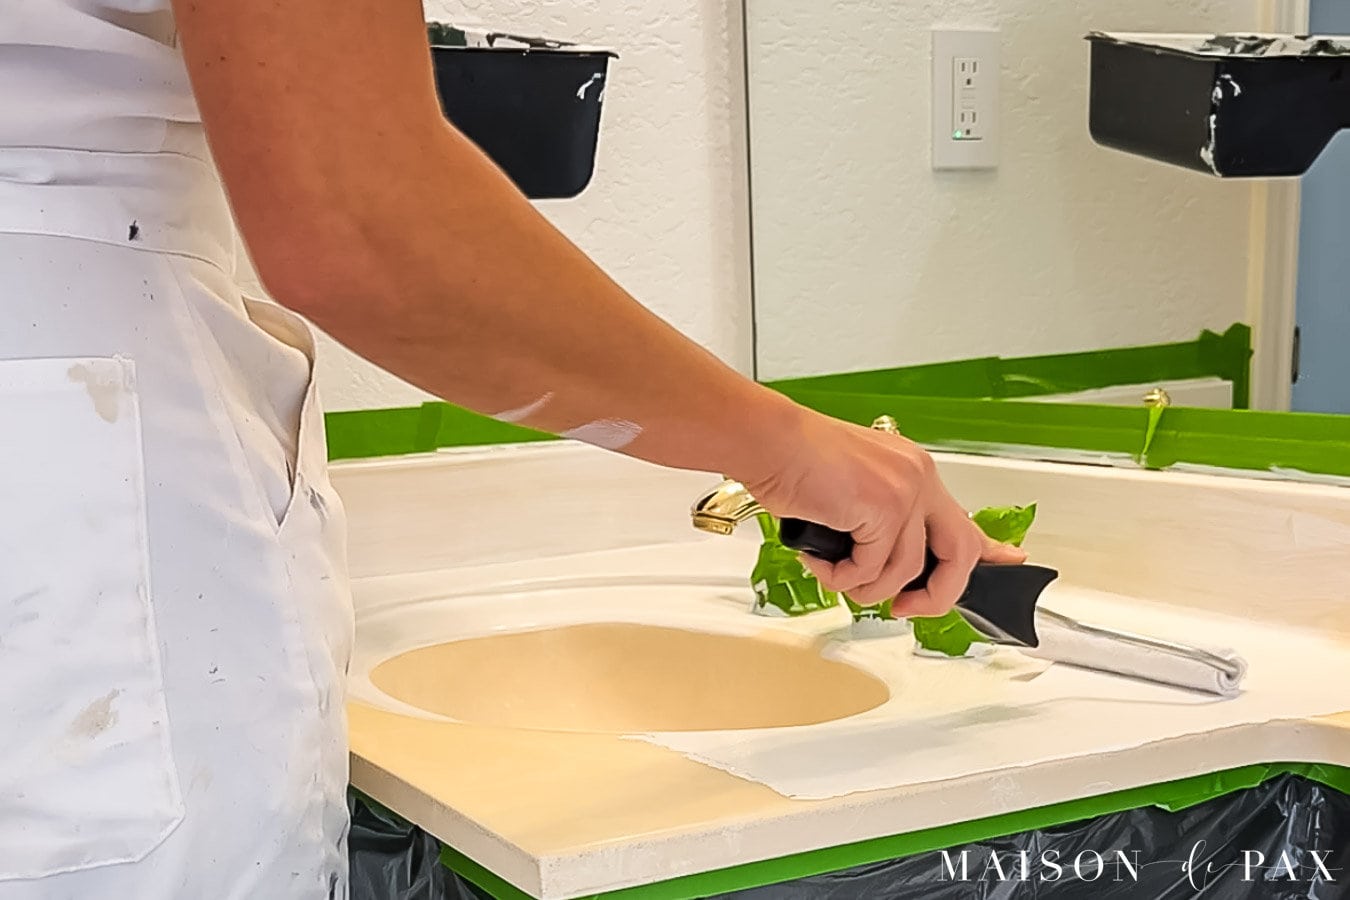
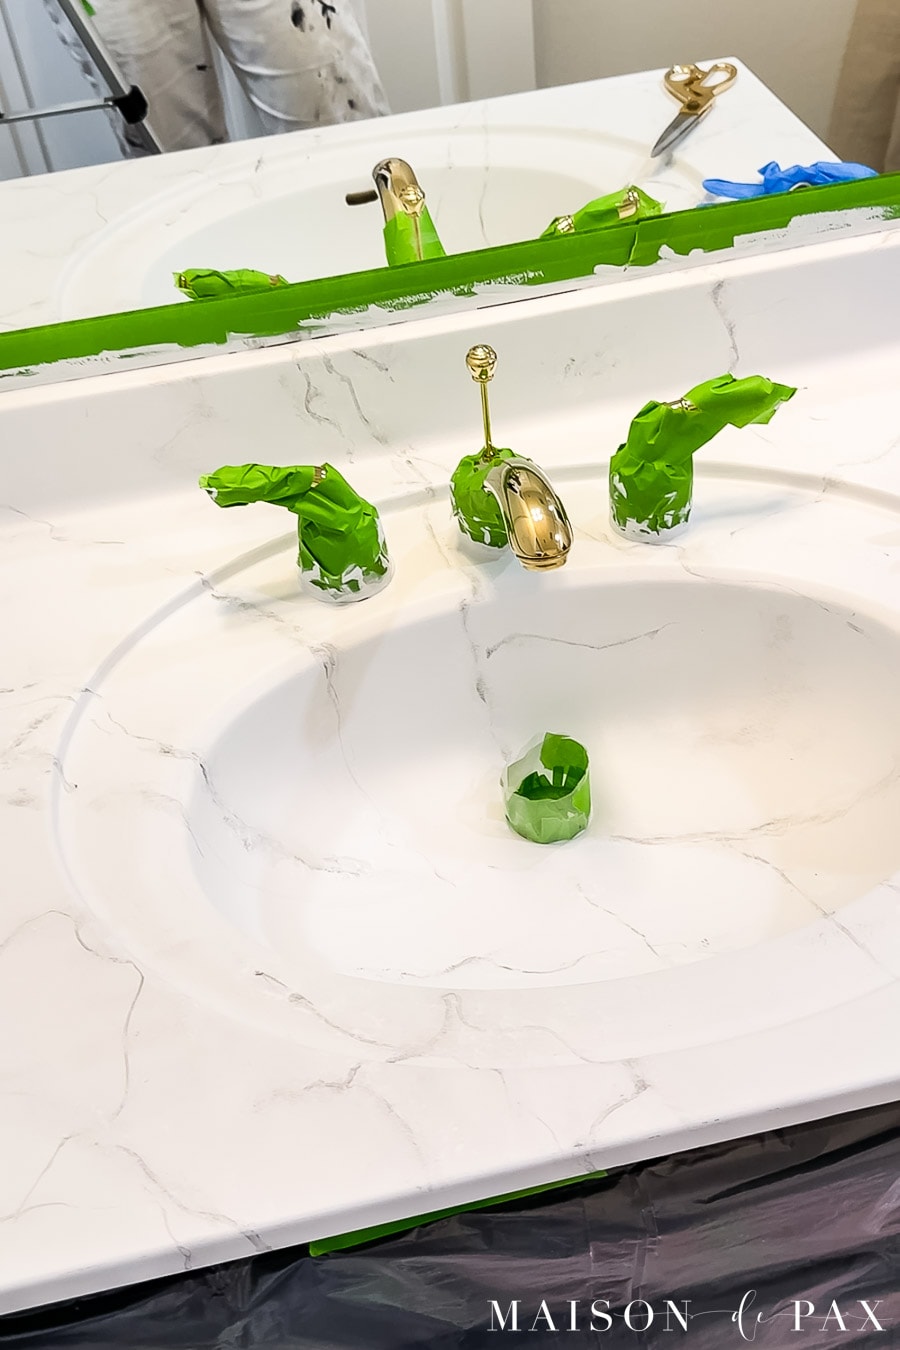
- Protect the Area
The kit includes plastic sheeting to protect your space. I added paper to my new tile floors and painter’s tape around all the plumbing fixtures (see below for more details on the sink and drain).
- Prime the Countertop
Using the proper roller and tray provided in the kit, I primed the countertop. I had to use a brush on the backsplash and in the sink, as the curve of the bowl did not work with the roller. I was afraid that it would leave brush strokes, but fortunately you can’t see any once the epoxy is applied.
I expected a second coat, but my counters required three coats for full coverage, probably because the brush did not apply the primer as thickly as the roller. Be sure to wait for the primer to dry between coats. - Paint the Marble Look
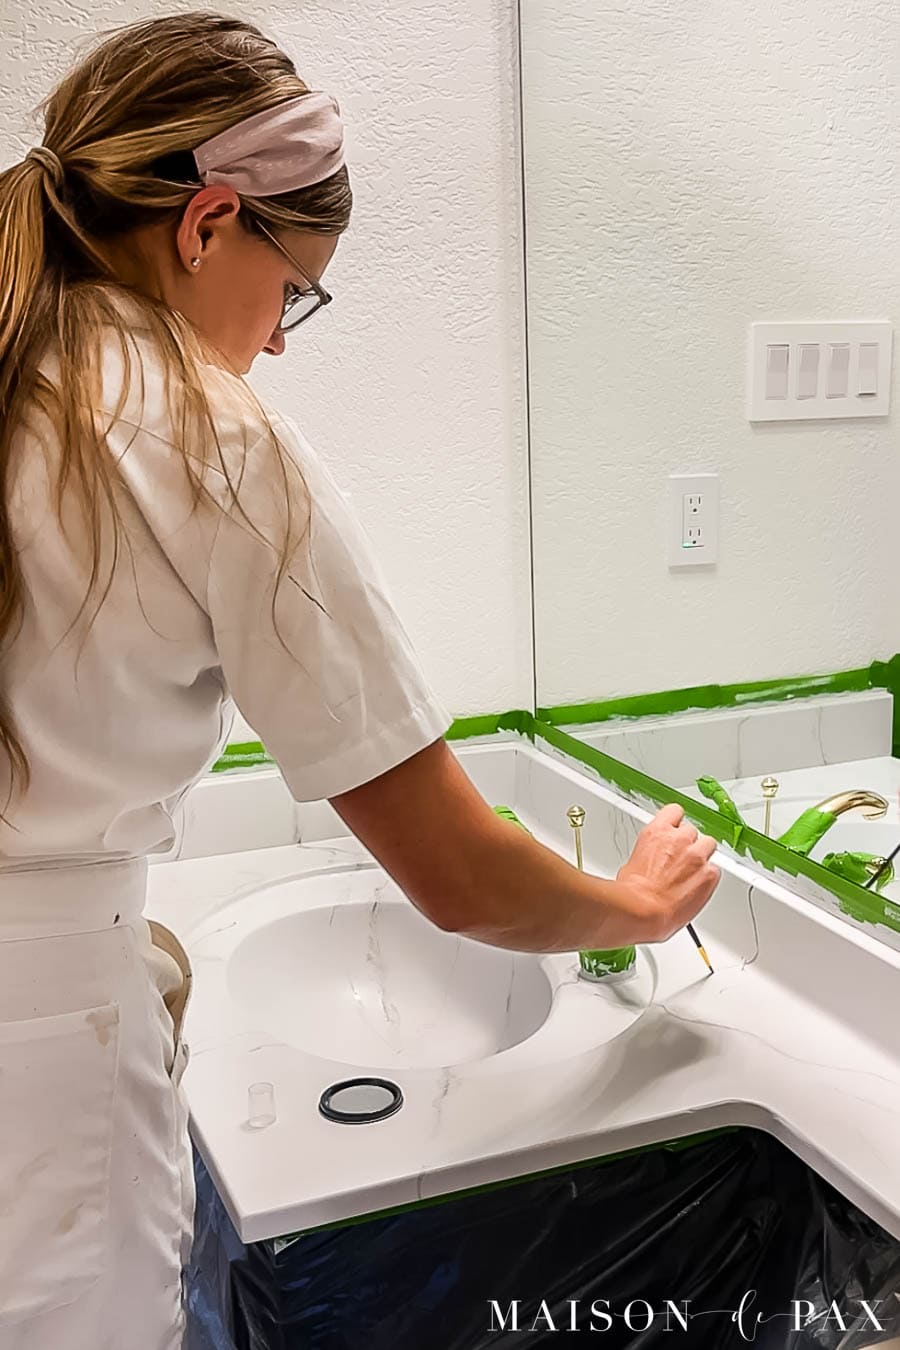
This part was fun! The kit has little cans of gray paint and white paint along with a small brush, large brush, sponge, and spray bottle.
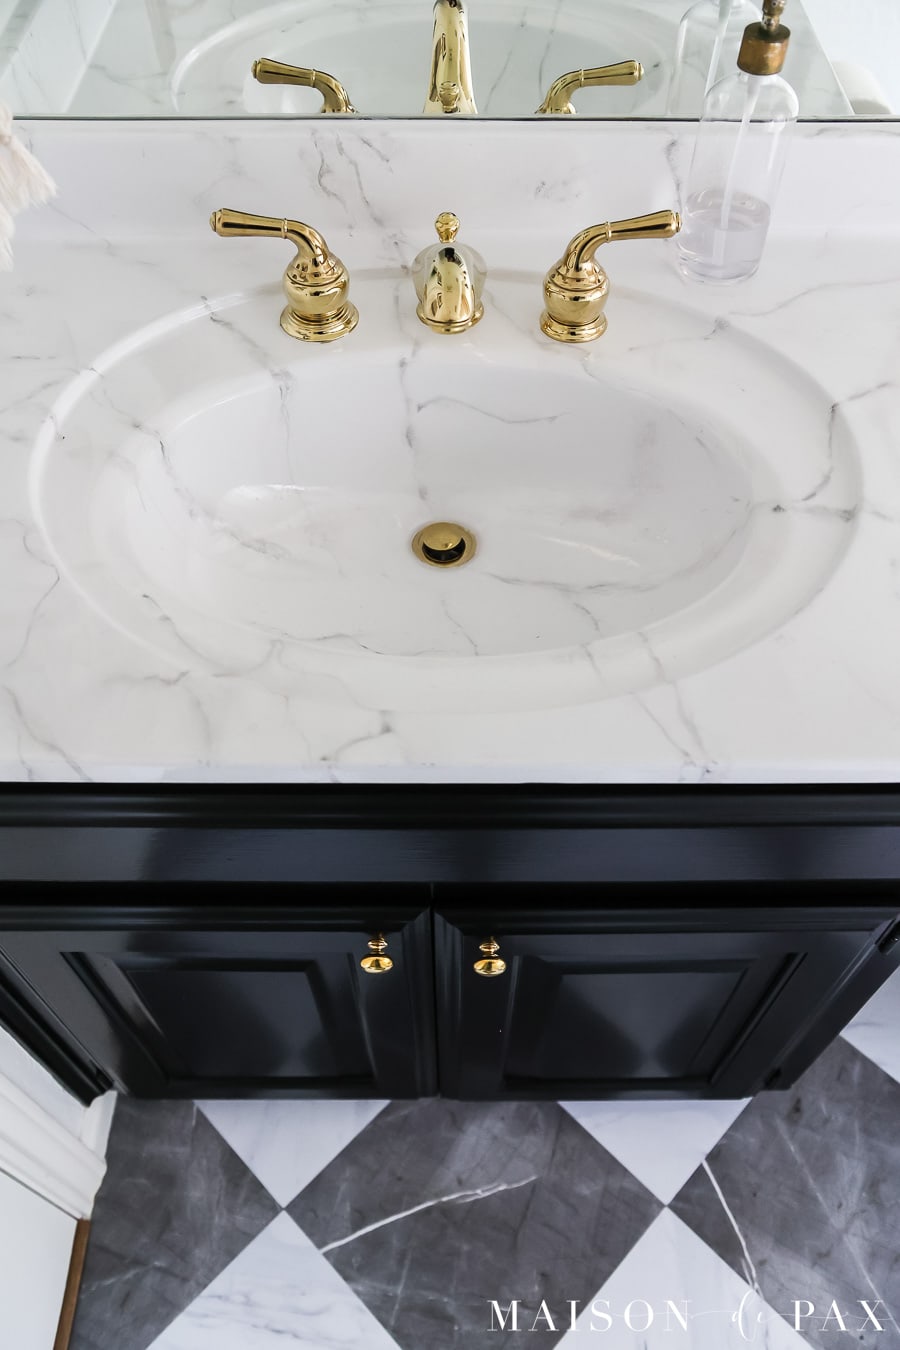
I used images of real Carrara marble as inspiration and painted gray veins with the small brush. Then I sprayed the grey veining with water so that the paint softened and spread, and I dabbed them with the large paint brush and sponge to create more texture and interest. Dab at different angles and with different amounts of force to feather the grey vein paint and create natural variety.
Finally, I followed up with some white paint layered over parts of the gray as highlights. Again, it added dimension and a more natural look.
- Apply the Epoxy
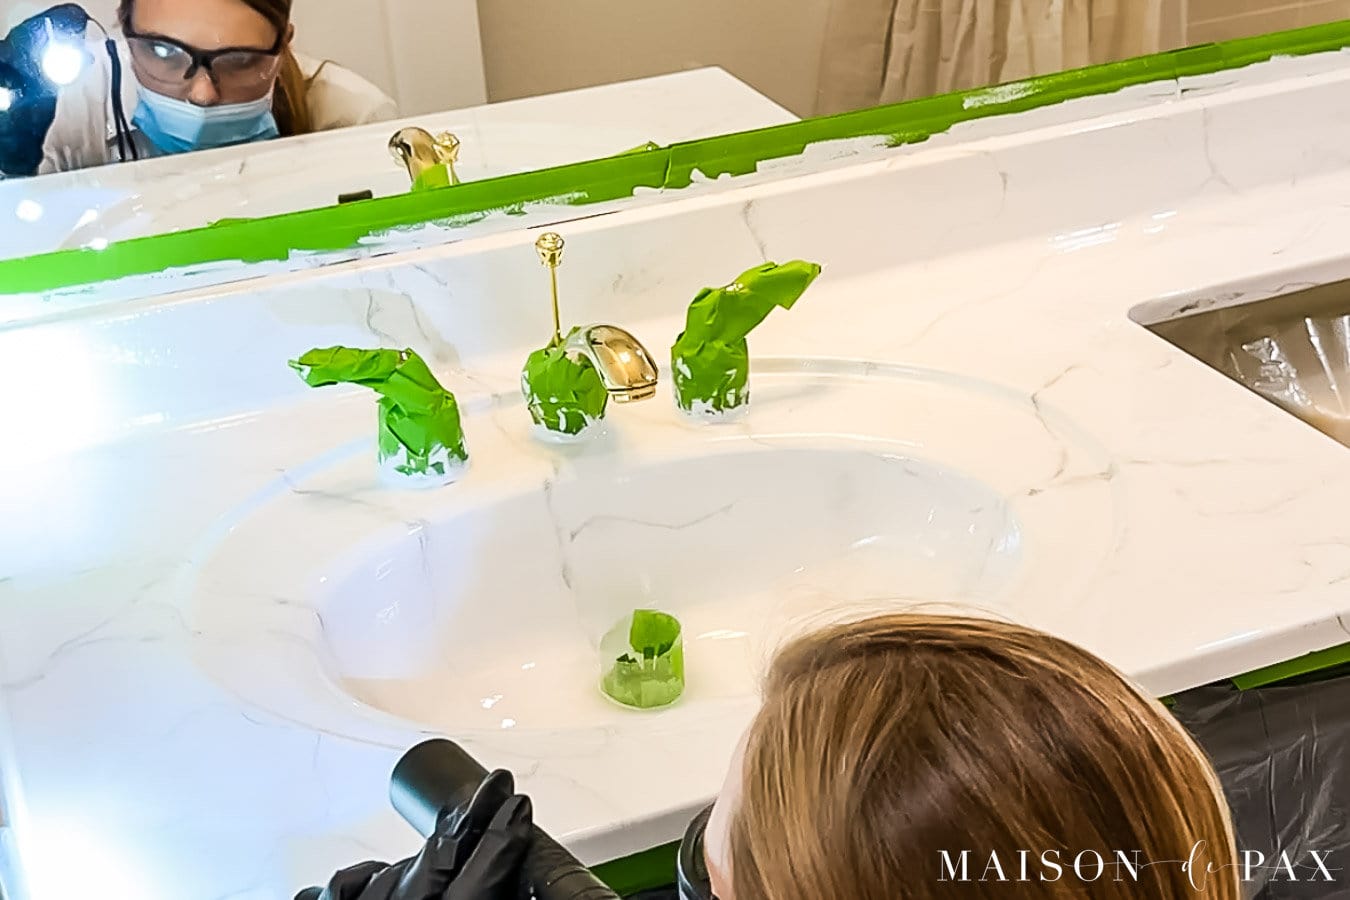
The instructions for the epoxy are very specific, so follow them carefully. I set a timer for the amount of time I was to mix the two parts, then I poured the mixture onto the countertop and spread the epoxy resin using the provided brush and foam roller. I wore gloves and a mask for this part, but I was pleasantly surprised by how faint the smell was.
I used a flashlight to look for tiny hairs or air bubbles and used a needle and tweezers to take care of those issues.
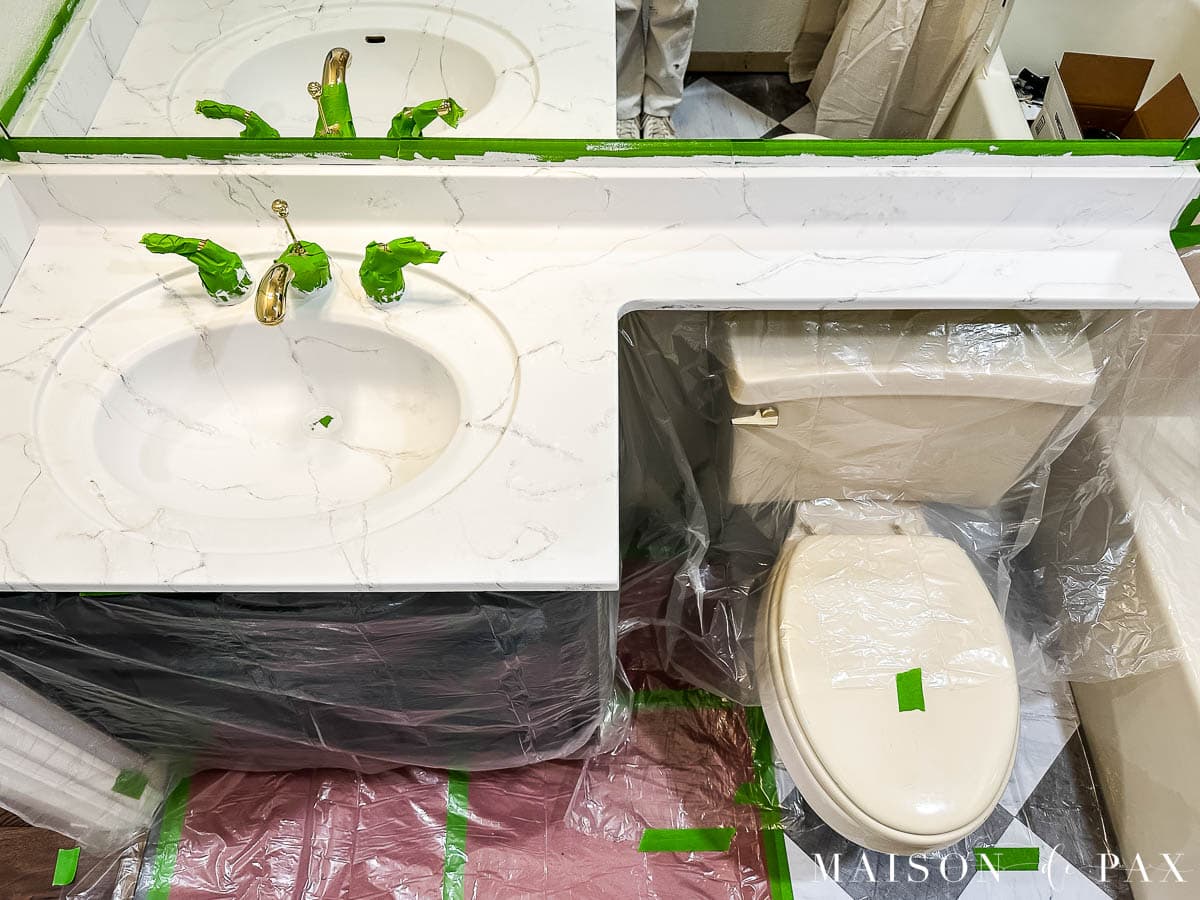
Be sure to follow the instructions carefully about when to remove the painter’s tape so that the epoxy can fully dry without trapping the tape. *See below regarding drain - Let the Countertop Cure
It is best to stay away from the space for as long as possible so that you don’t accidentally create imperfections in the surface. It takes about a day before you can use it lightly, and it has a full cure time of seven days.
- Re-caulk the Seams
Once the countertop is cured, use a high-quality silicone caulk to seal seams and edges.
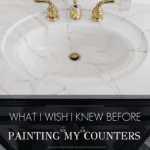
What I wish I knew before I painted my countertops…
The only thing that the kit didn’t really clarify for me was the question of the drain hole. I wondered before I began if I could paint my sink (since it is all one piece with the countertop), so I messaged Giani before I purchased the kit. They were SO helpful, by the way! The answer is yes, you can paint the sink. Or you can just prime it and make it look like a white sink. I opted to give it the full marble look.
What I didn’t realize until I began the epoxy process, though, is that the slope of the sink means that the self-leveling epoxy continues to run toward the drain much longer than it takes for it to level off on the flat surfaces. I created a little wall of protective plastic around the drain before pouring, which was helpful to avoid completely covering the drain.
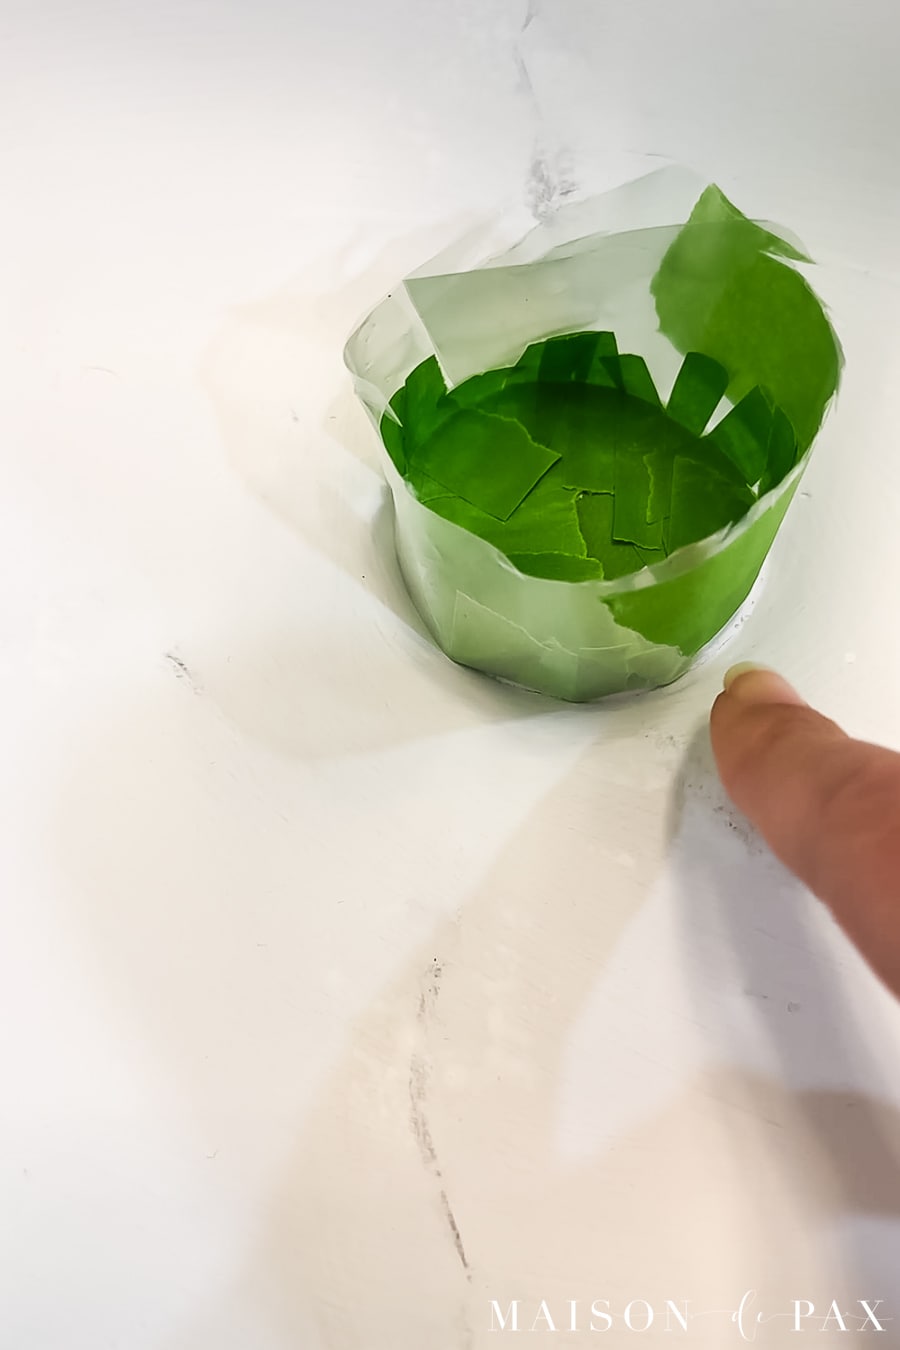
But when I removed that plastic and tape (according to the kit’s timing instructions), the epoxy continued to run slowly over the drain trim. So I simply carefully wiped it up with a paper towel every 5-10 minutes for the next hour or so.
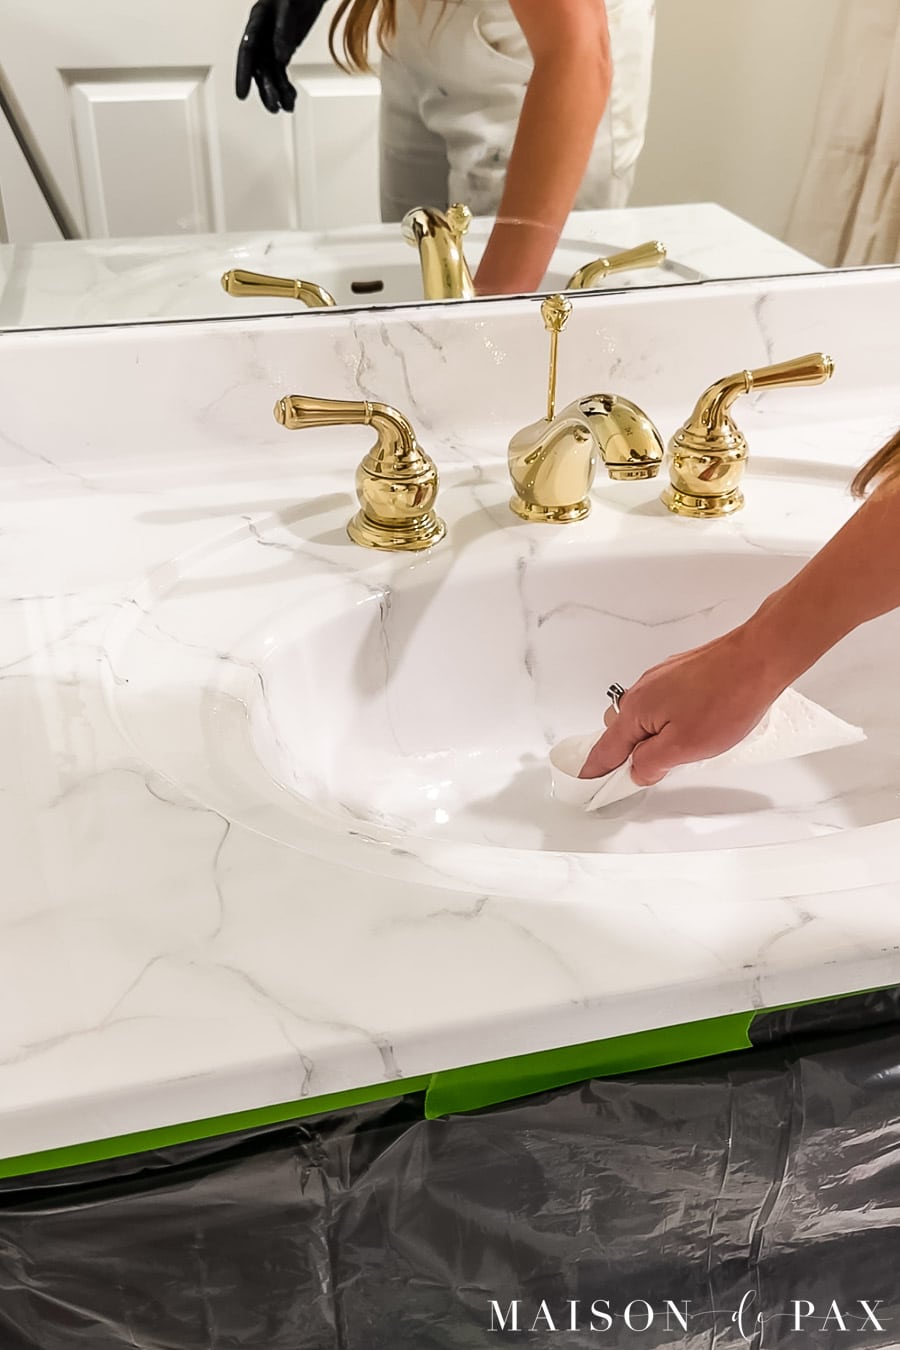
I wish I could have stayed for about 2 more hours to continue to wipe clean the running epoxy, but I had to leave town. In the end, the epoxy ran over just the outer edge of the drain trim, which would be a problem if I were ever planning to replace that trim. Fortunately, the sealer is clear and doesn’t show, and this is all I intend to do to this space until we are ready for a full remodel down the road.
Budget Bathroom Remodel Ideas
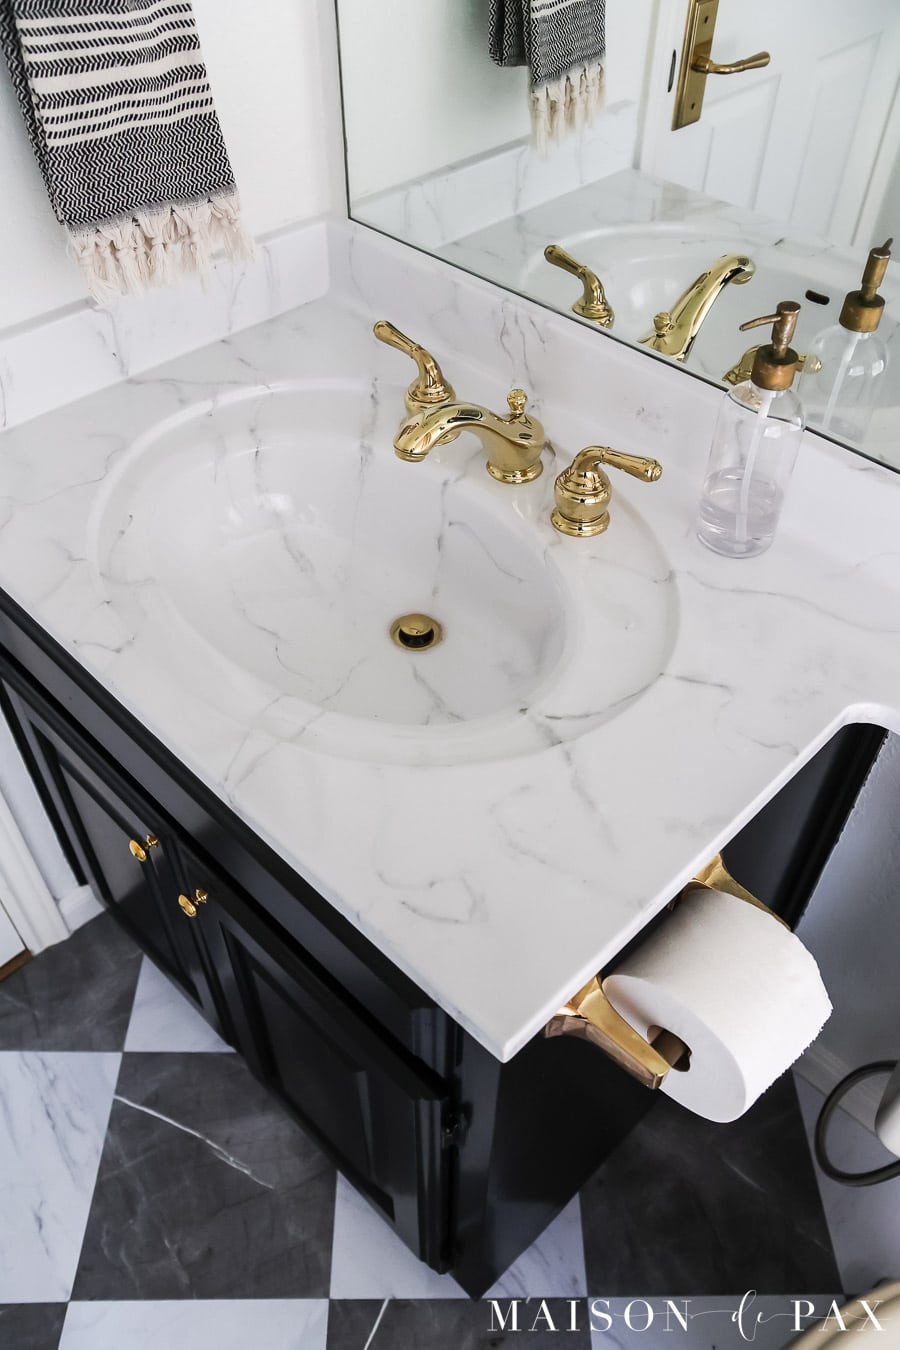
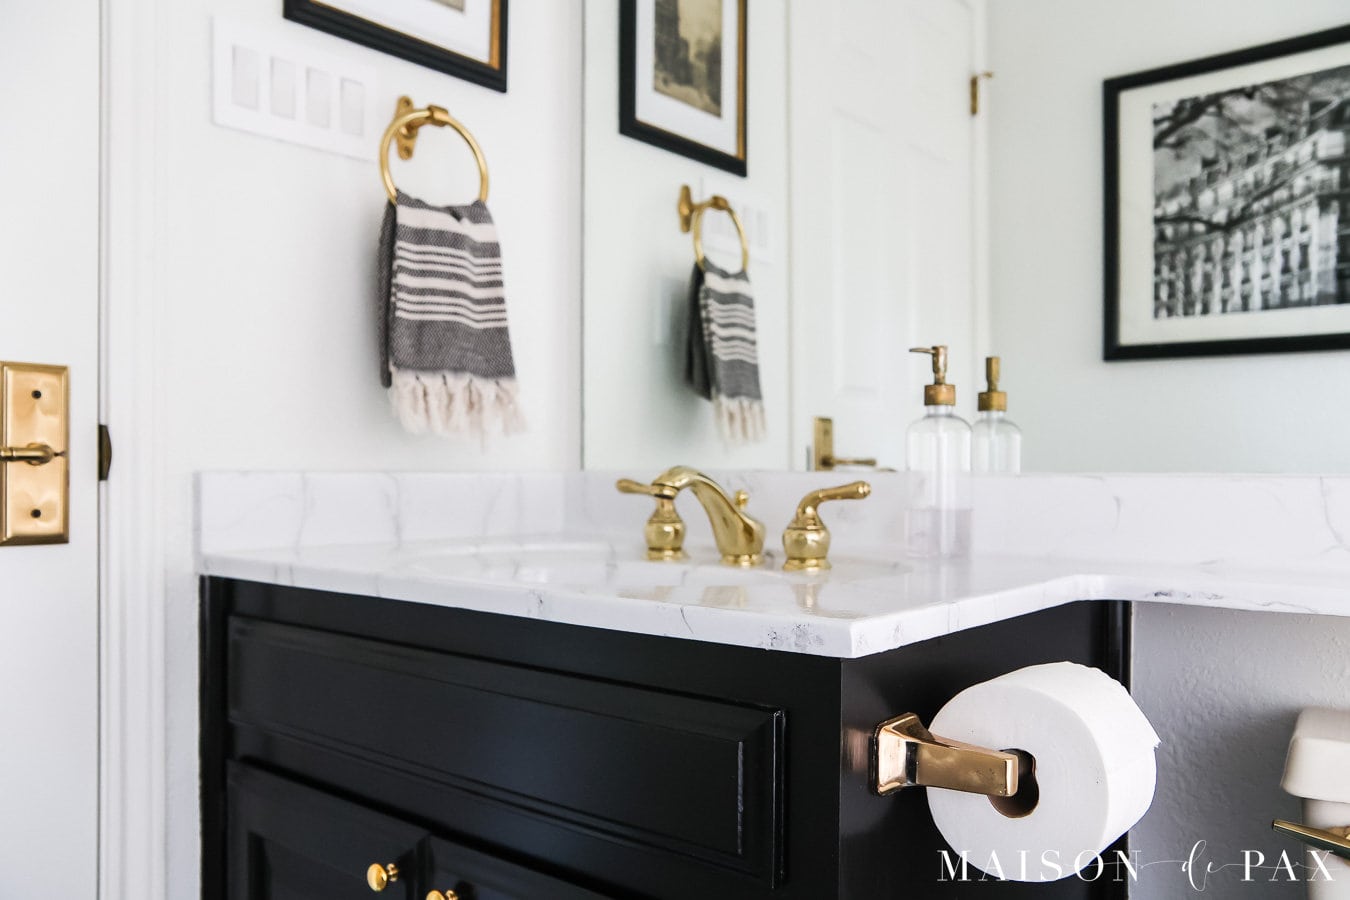
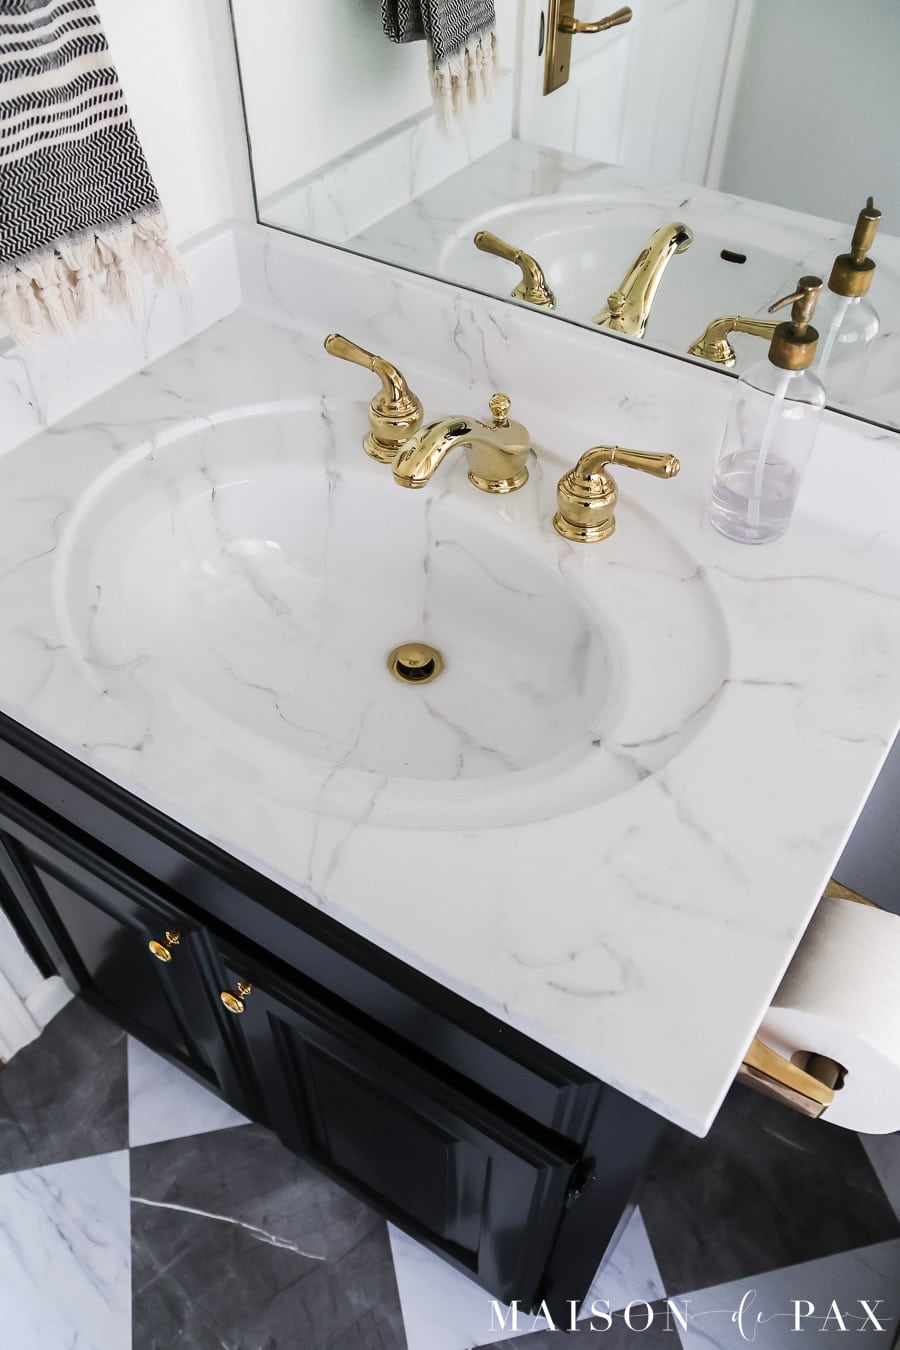
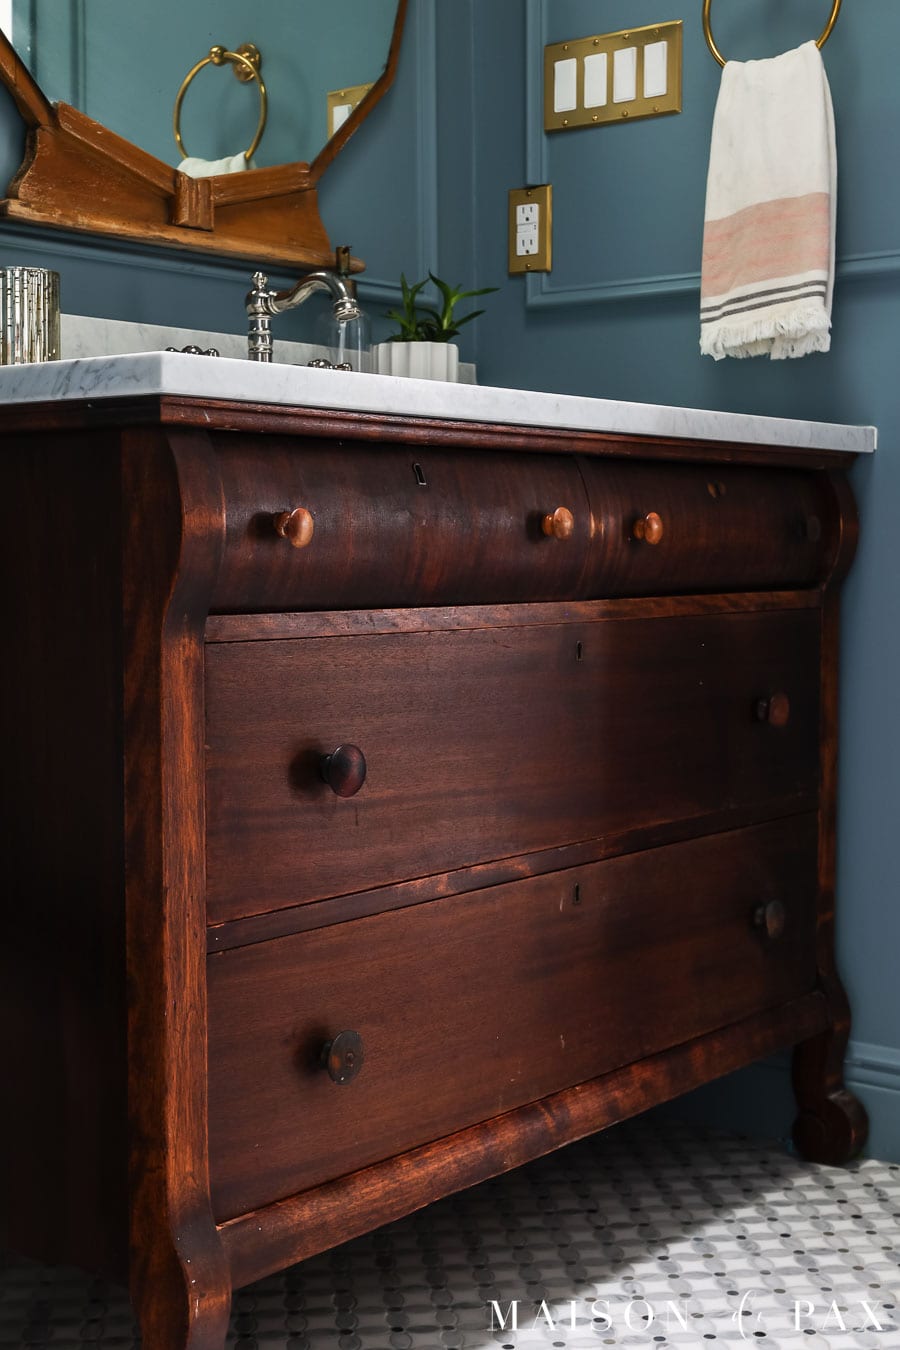
This project was so fun to do, and it felt like a great return for my investment. I think the budget-friendly transformation of this bathroom is amazing, and the painted countertops were a HUGE part of that:
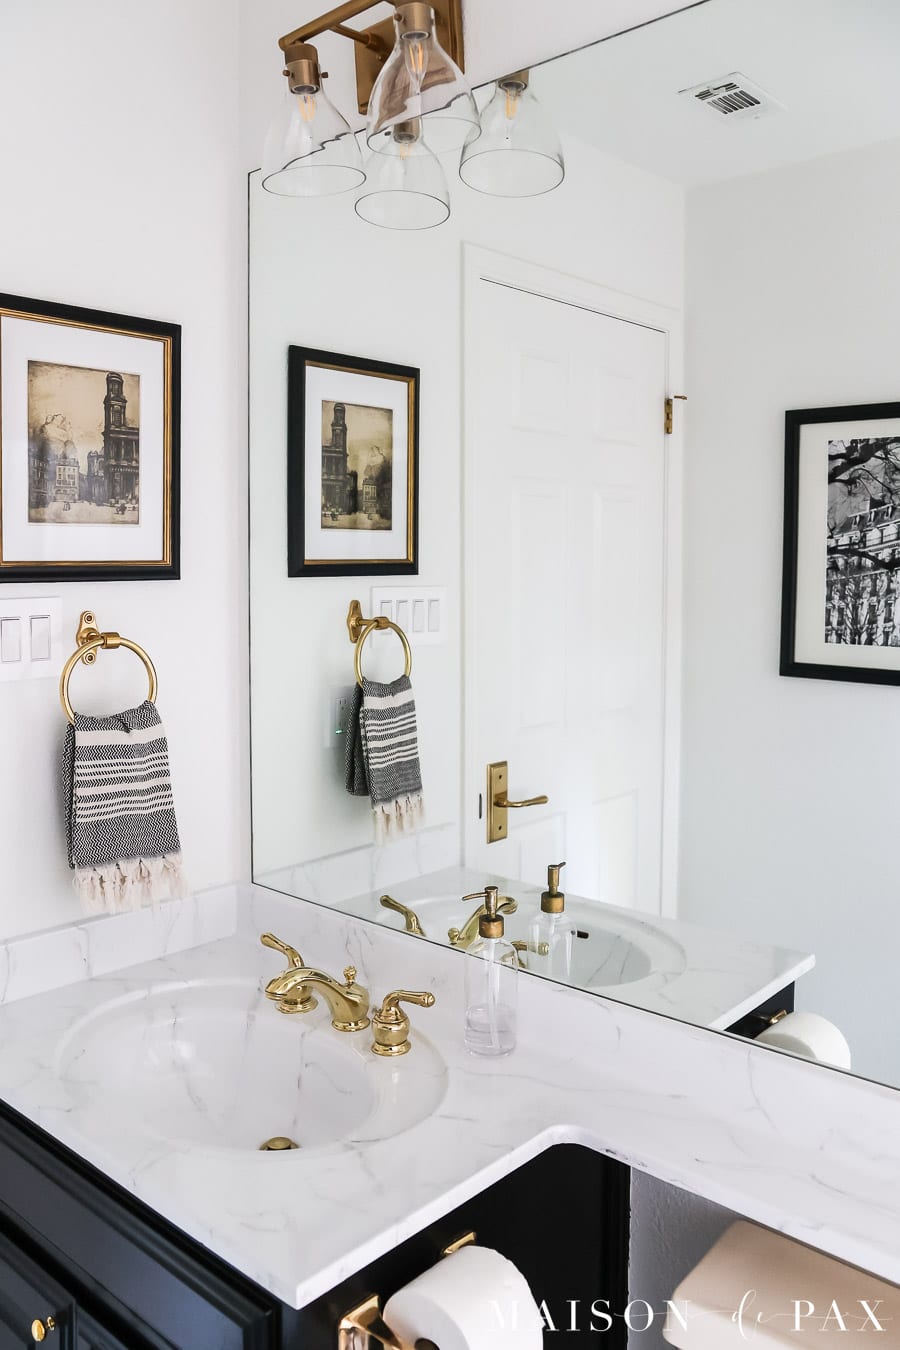
Painting the vanity with leftover paint was another key step, and I have a full tutorial here for painting cabinets. The floors only cost $65 and I have a tutorial coming soon. The frames were both from my garage stash that I’ve collected over the years. Here are a few sources for the space:
- countertop kit: small size or large size
- floors
- shower curtain (similar)
- cabinet knobs
I hope this encourages and inspires you!


I have a purple colored tub.
Can I use this process on my tub?
Terry
I wouldn’t attempt this for a tub, but there are some tub and tile kits that work! There are also professionals that spray tubs that can have a long lasting finish too!