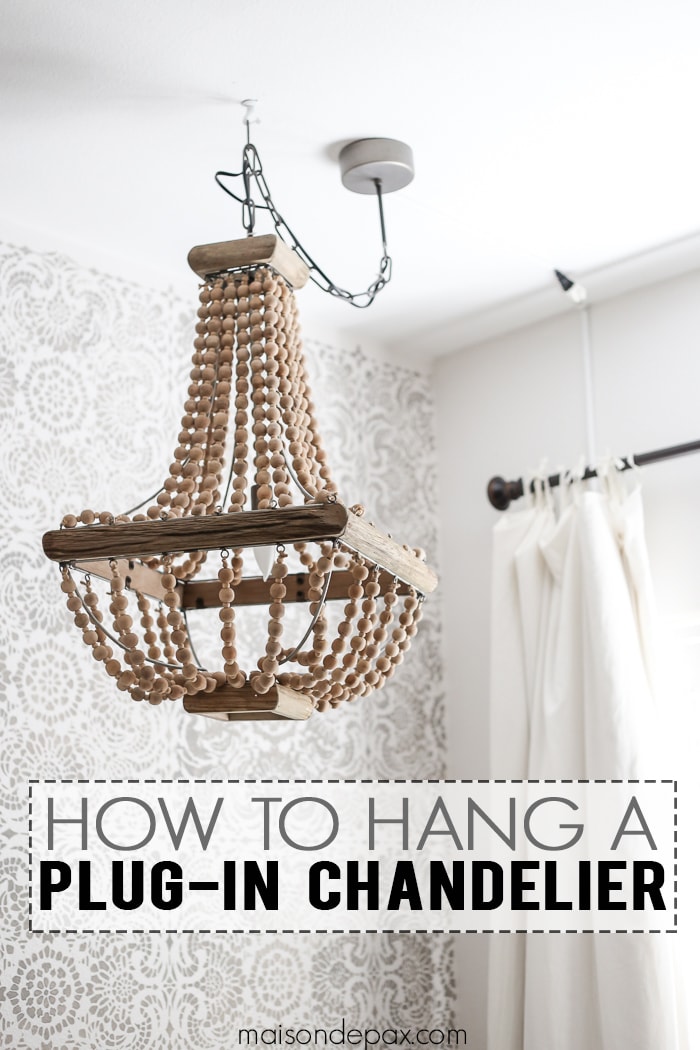
How to Hang a Plug In Chandelier
Want a chandelier but don’t have an electrical socket there? No problem! Learn how to hang a plug-in chandelier.
I think light fixtures are like the jewelry of a room; they accent, polish, and bring elegance to a space. (On a slightly related note, I think my jewelry is getting lonely… I may just have to break it out with my yoga pants and t-shirts. 😉 )
And there are so many gorgeous chandeliers and pendants out there!
But not every room is equipped for a chandelier… You may not have overhead wiring in the space, or you may want to hang it in the corner where wiring doesn’t make sense, or (as in my case) you may need to keep the ceiling fan for survival, so you find another spot to hang a chandelier… Whatever your reason, being able to hang a plug in chandelier or swag light is an excellent option.
Note: There are quite a few chandeliers you can buy that come with plugs, but if you have a traditional hardwired light fixture and would like to convert it to a plug in, see this tutorial… Then come back and follow the instructions below.
How to hang a plug in chandelier:
This post contains affiliate links for your convenience. Click here to read my full disclosure policy.
You will need the following:
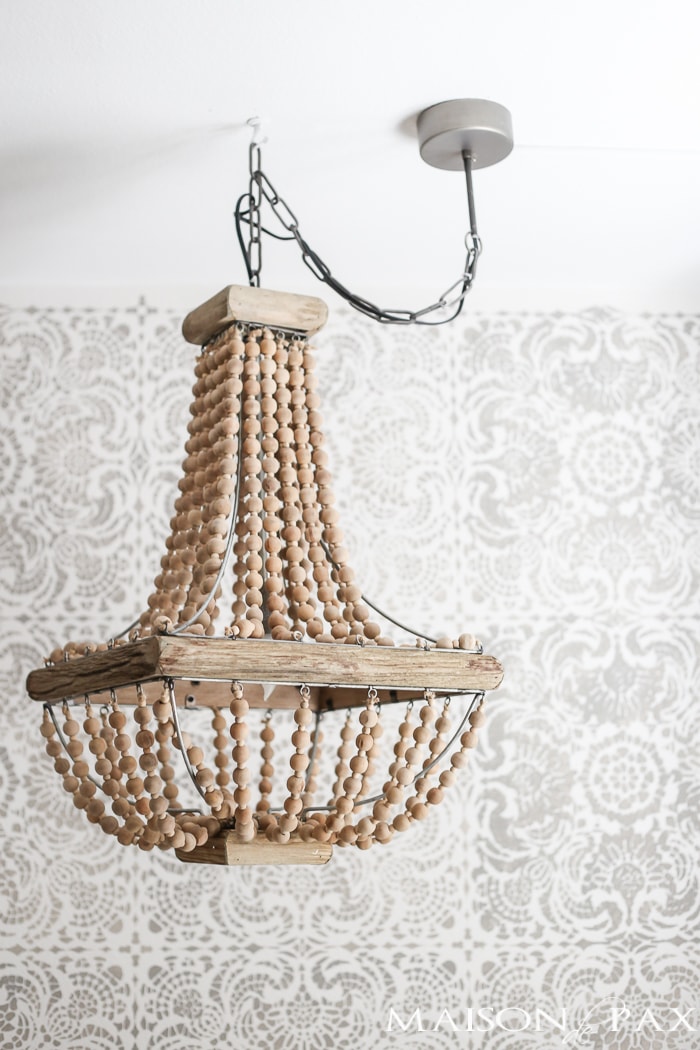
- plug in chandelier (I bought the one you see here; if they are sold out, you can also find it here)
(see this tutorial to convert a traditional fixture into a plug in) - stud finder (optional)
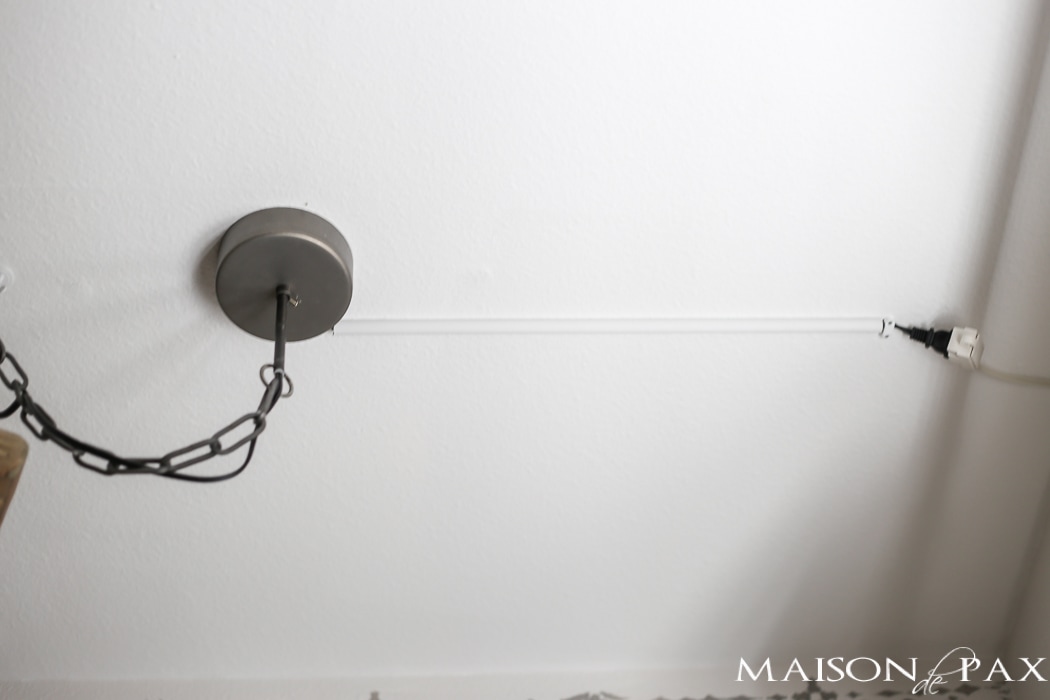
- round ceiling pan
- ceiling hook
- drill and 2″ screws
- extension cord (to your required length)
- cord with remote switch
- plastic insulated staples
- cord cover
If you’ve hung regular fixtures before, then this will be a snap. If not, this is the best kind of light hanging project because you don’t have to worry about electrical wiring!
- Using your stud finder (or old school knocking and testing), find a ceiling joist near where you want to hang your chandelier.
Note: if you cannot find a joist where you want to hang it, go to the closest one and then swag your chandelier using a swag hook + the chain link to get your exact desired location. - Using your screwdriver and 2″ screws, screw your round ceiling pan through the sheetrock directly into the joist.
- Attach your chandelier to the round ceiling pan bracket using the provided screws.
- Slide the chandelier ceiling plate up to hide the round ceiling pan, leaving just enough space for the cord to get out.
- Plug chandelier cord into an extension cord that reaches your desired outlet.
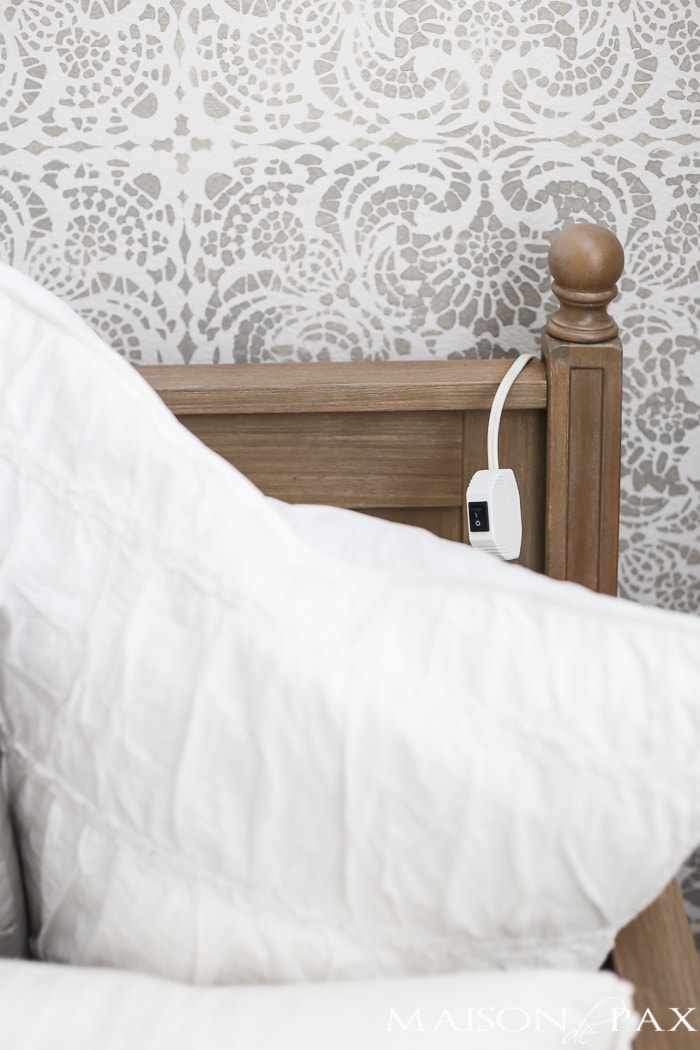
- If outlet is not already connected to a wall switch, use this cord with remote switch (simply plug the cord with remote switch into the wall and plug your chandelier extension cord into the remote switch receiver).
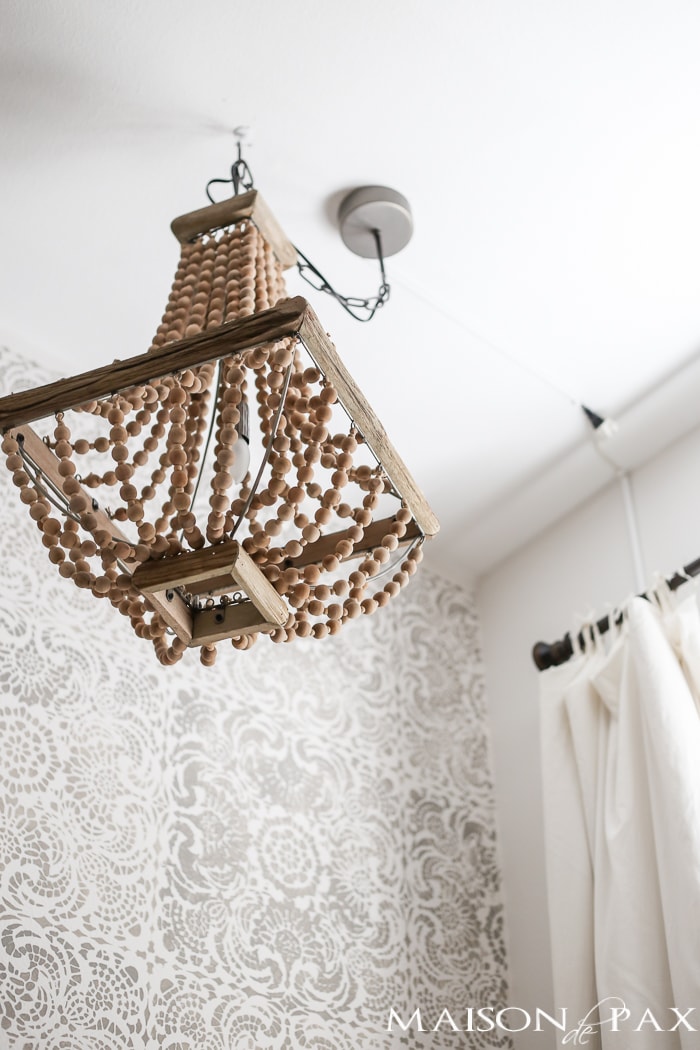
- Secure your chandelier cord and extension cord to the ceiling or wall, as needed, using the plastic insulated staples.
- Cover your cords, as needed, using the cord cover.
Our chandelier wire length was rather unfortunate as it only reached midway on the ceiling, but once it was covered with the cord cover, the black wire and plug are just hardly noticeable.
I have more details coming soon (update: see the full space here), but suffice it to say that we are using this as a sort of reading light for my daughter’s bed (as there is no space for a bedside table and lamp in there). The lamp cord with remote switch is an awesome feature because it allows us to plug it in behind her bed and drape the little switch right behind her pillows where she can reach it. We could even tack it to the wall right next to her bed using another plastic insulated staple if we wanted.
And that’s it! I’m excited to show you the full space (soon, I promise!), but you’ll have to take my word for it that the chandelier really does make the space… And I love that we didn’t have to do any electrical wiring for it! Plus, when the time comes to rearrange or move, it comes right back down and a little spackle and paint will remove any evidence.
What do you think? Where would you like to hang a chandelier or pendant lights?


Love it! Is this the first time we’re seeing her bed in this room? I would love to see the whole room now that it’s a toddler room.
Thank you, Kim! The room reveal is coming in just a couple of weeks. 🙂
I did not realize this was a plug-in fixture… how clever!