80s Home Update: Before and After
Wondering how to update an 80s house? Get decorating and renovation ideas for your 1980s home update from this 80s home remodel before and after!

I think it’s safe to say that there wasn’t much about the 80’s that was subtle… Including interior design. The home my parents recently purchased definitely still had an 80s vibe when we first walked through it. Now, I think it’s perfectly modern, casual, elegant, and timeless.
I’ve been sharing the #clientmomanddad renovation room by room and project by project on this design blog, but today I thought it would be fun to share some basic before and after of the whole space as well as some tips and ideas for you to consider if you are trying to update an 80s home.
80s Home Renovation Before and Afters
I find before and afters so satisfying. I honestly haven’t even photographed the whole home, but these are the spaces I have, and I feel like they capture the home’s transformation beautifully.
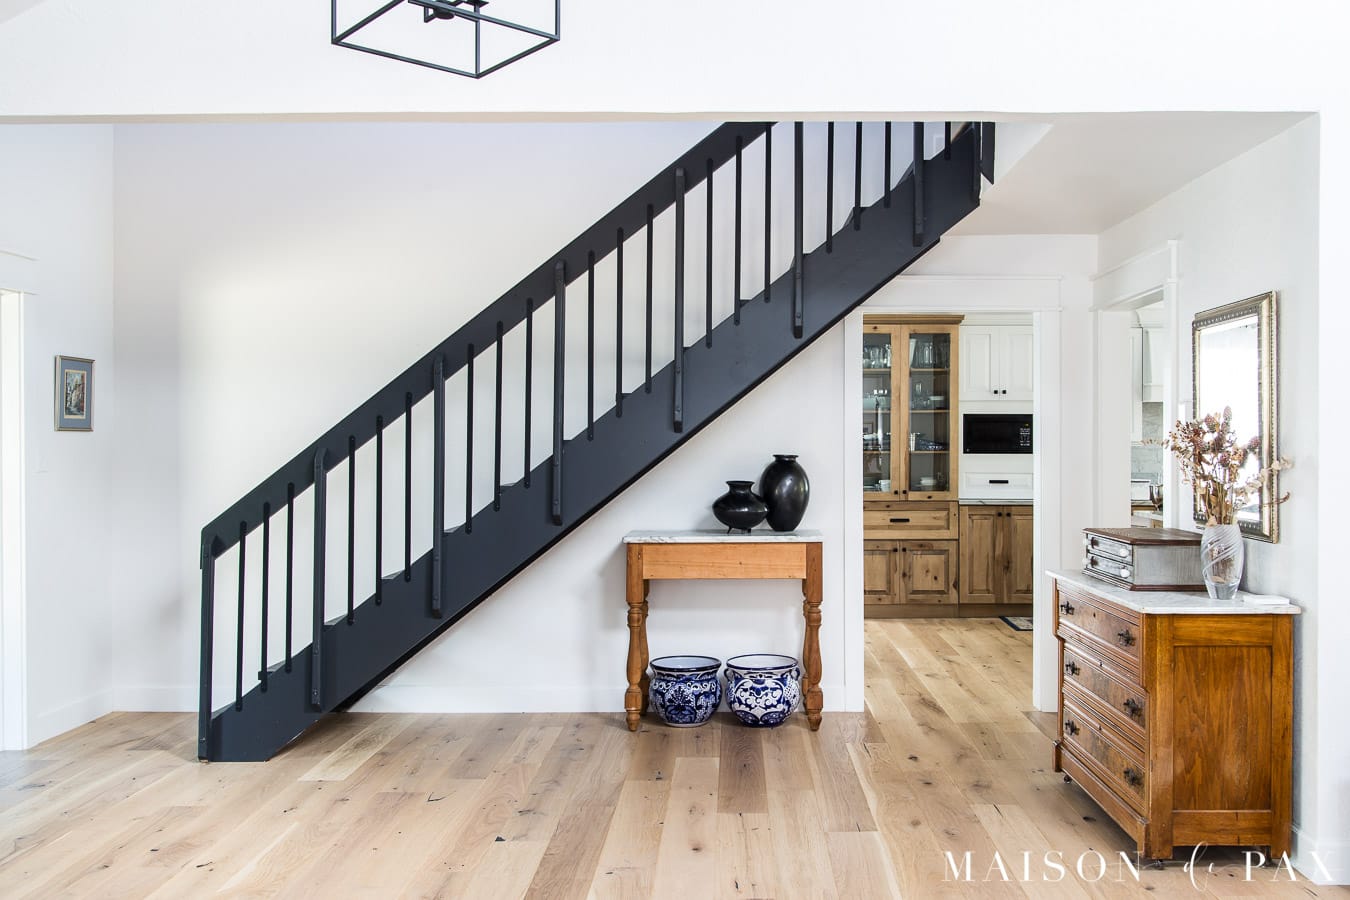
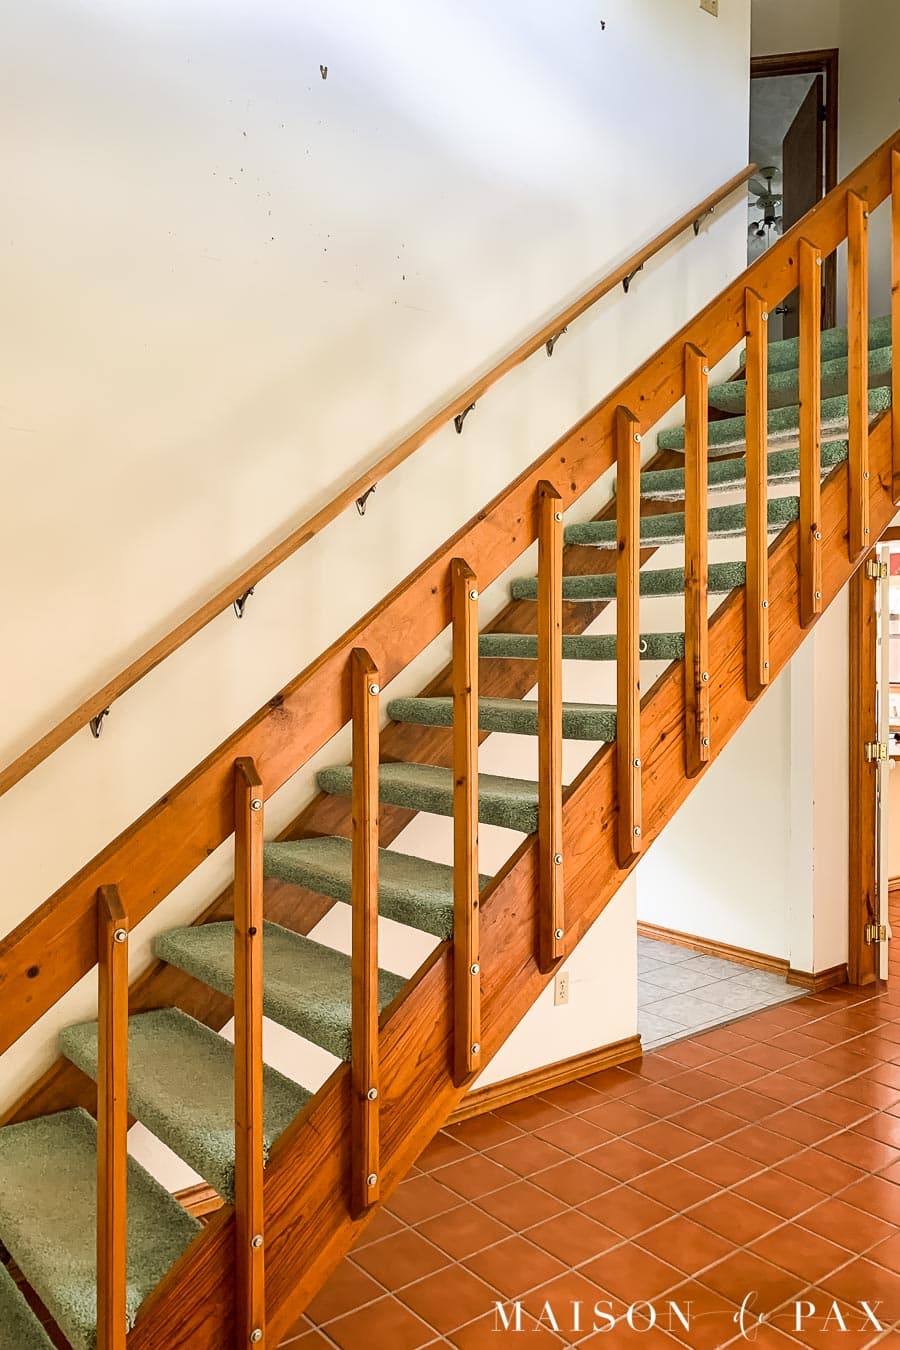
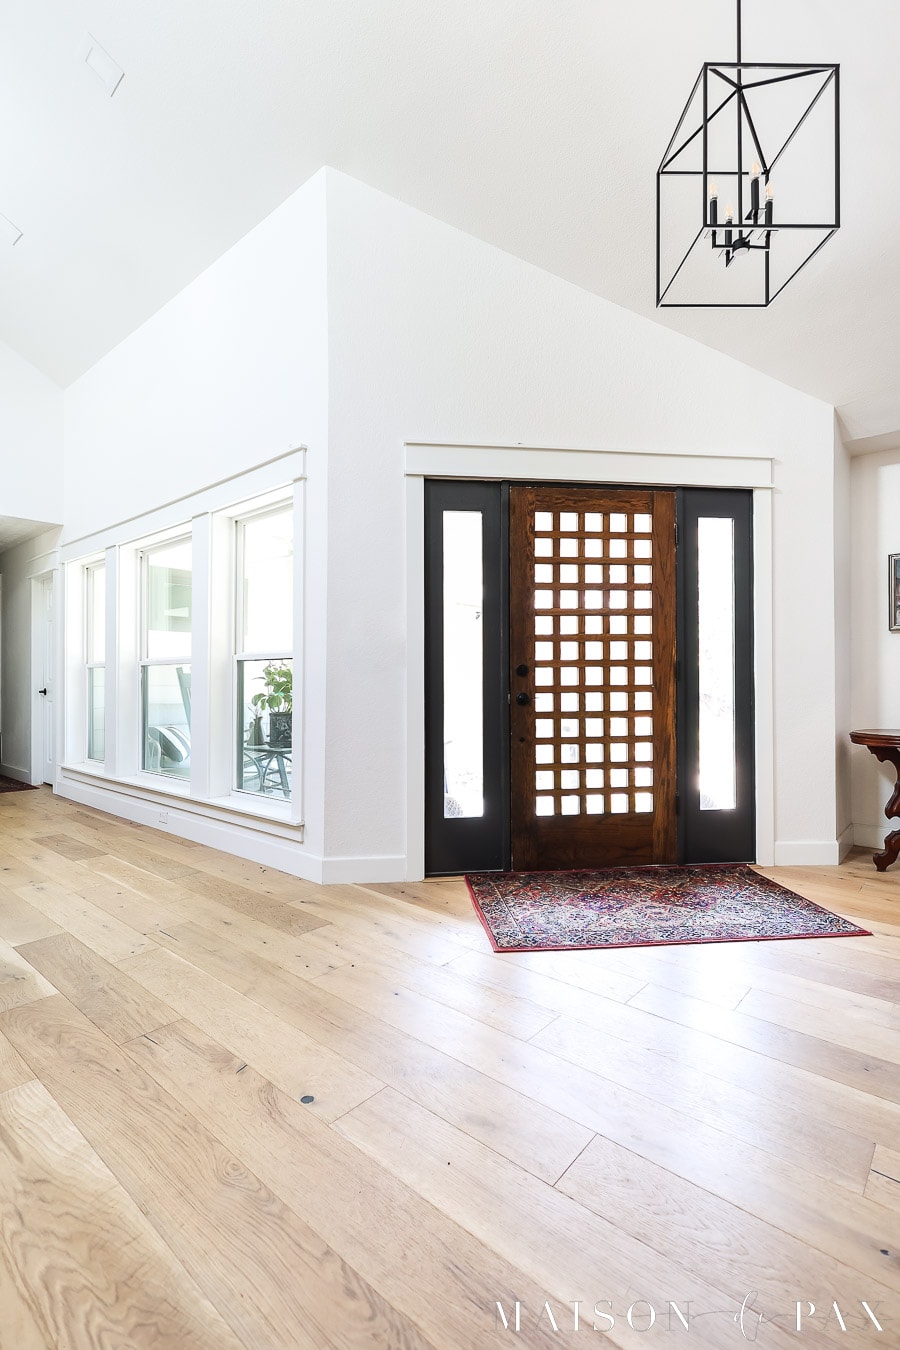
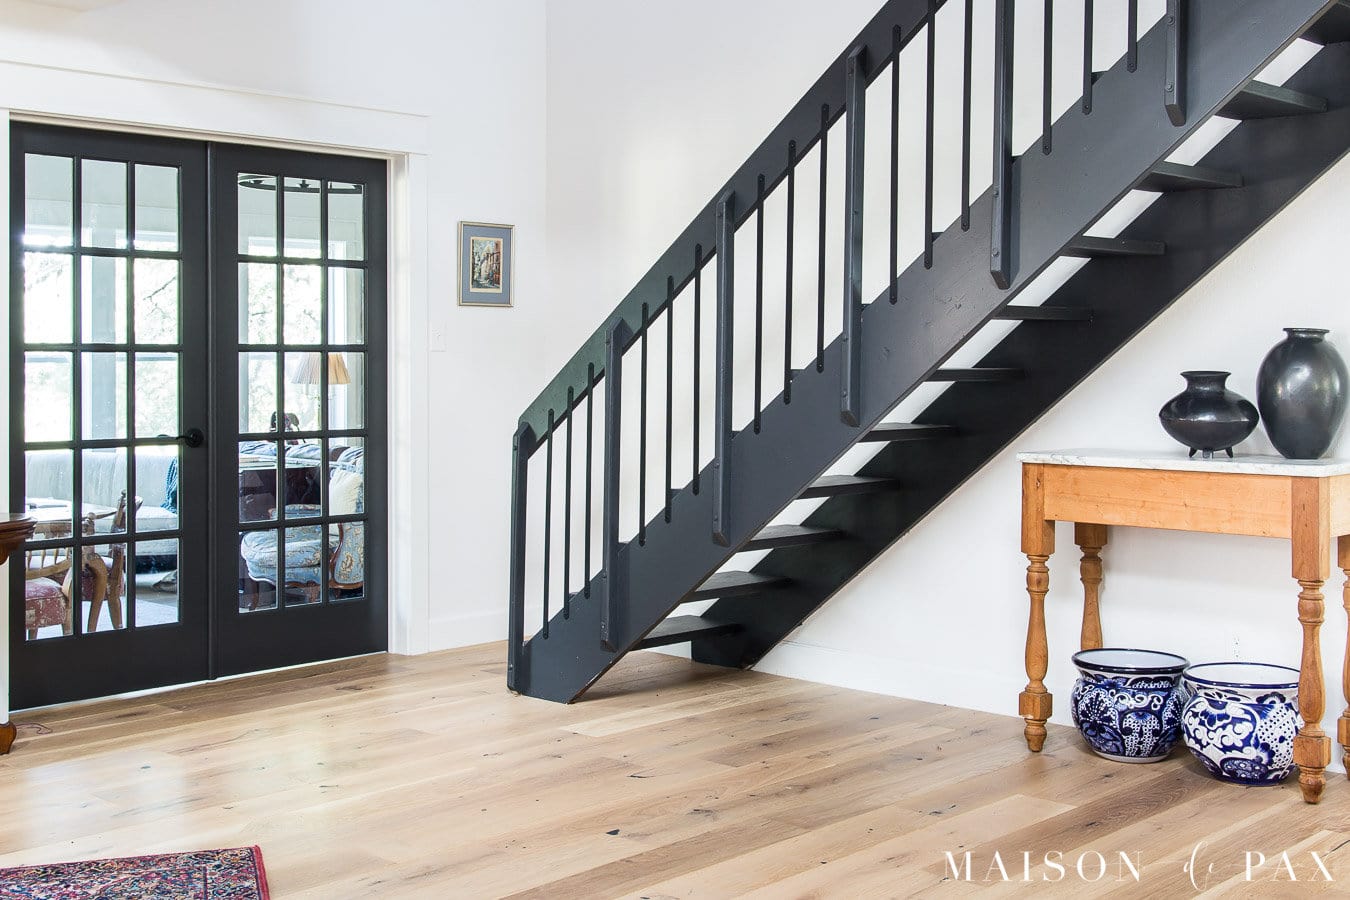
Entryway and Staircase
We removed some awkward half walls, brightened up the space with fresh paint and new floors, and chose a simple focal pendant light to draw the eye upward.

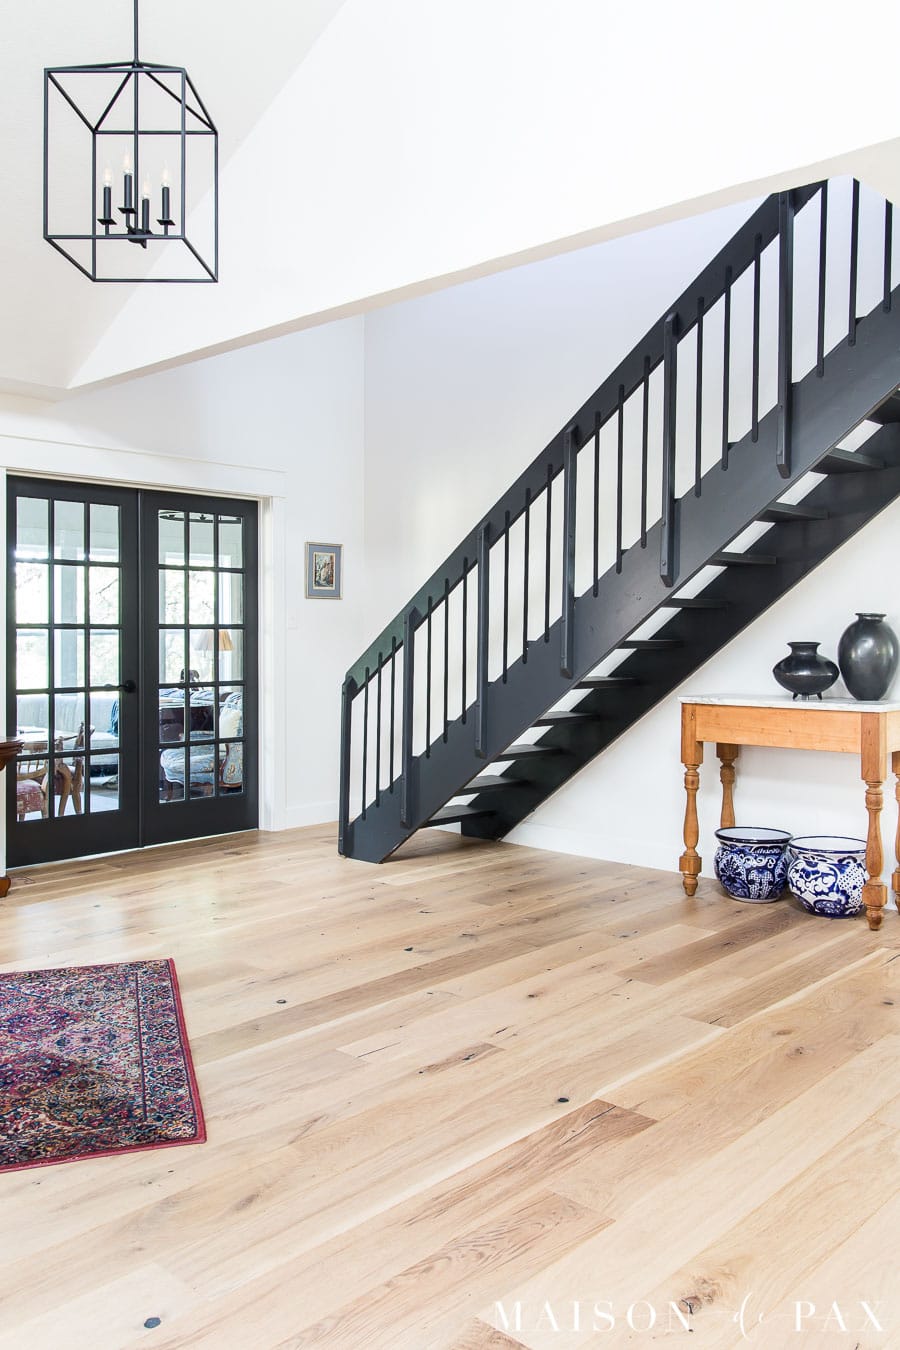
The show stopper in this space, though, is the staircase that we painted SW Iron Ore.
Get the full details on the staircase makeover here.

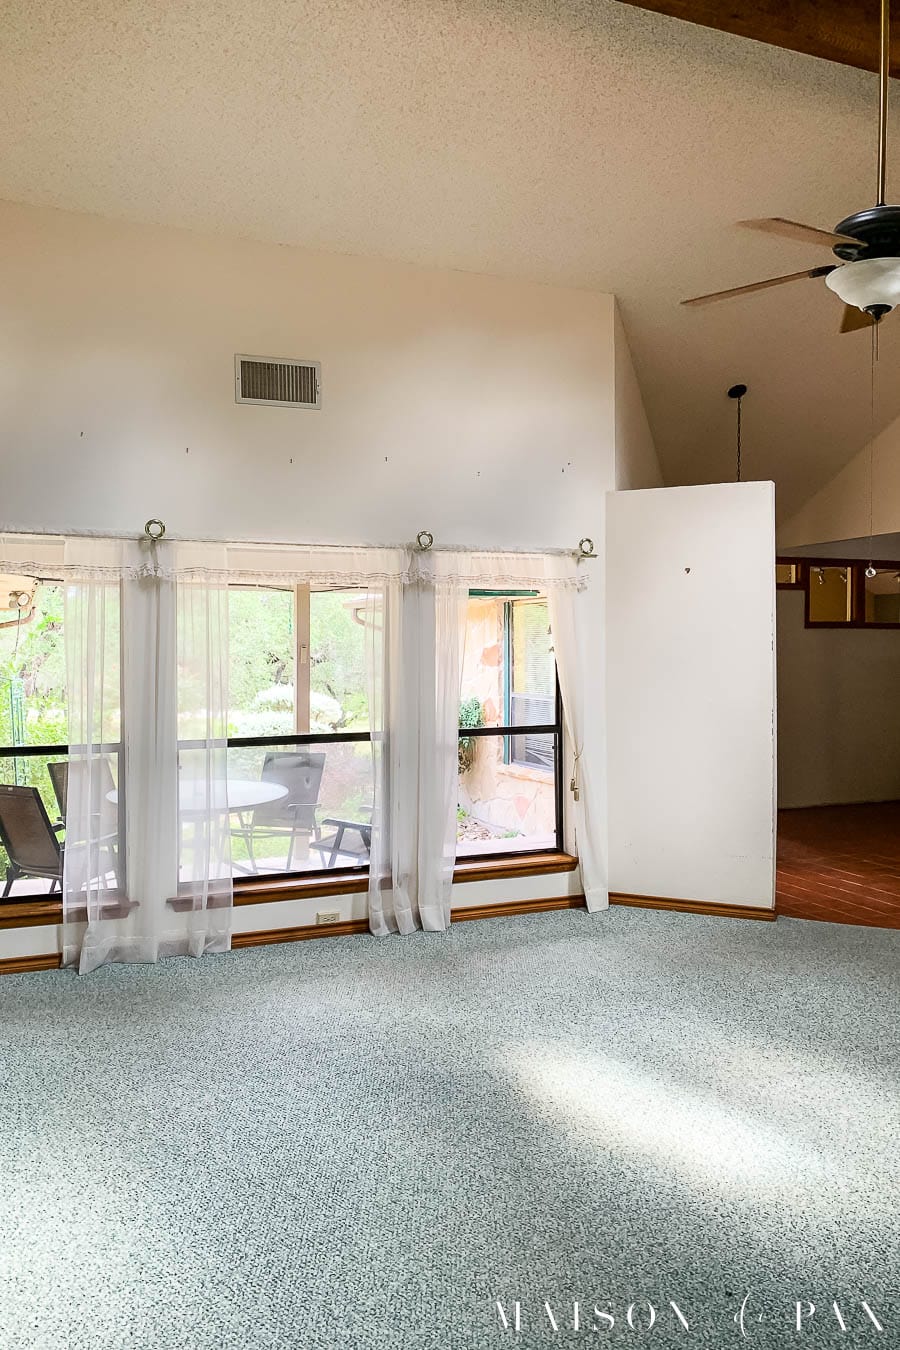
Living Room
The beams and ceiling height were wonderful to start with, but the whole space was tired. The sheetrock work above the fireplace needed work, the carpet had to go, the half walls from the entryway cut into the space, and the orange trim made it feel dingy.
The popcorn ceilings had to go first, then with fresh paint, engineered wood floors, lots of lighting, and new trim work, the space regained its grandeur.
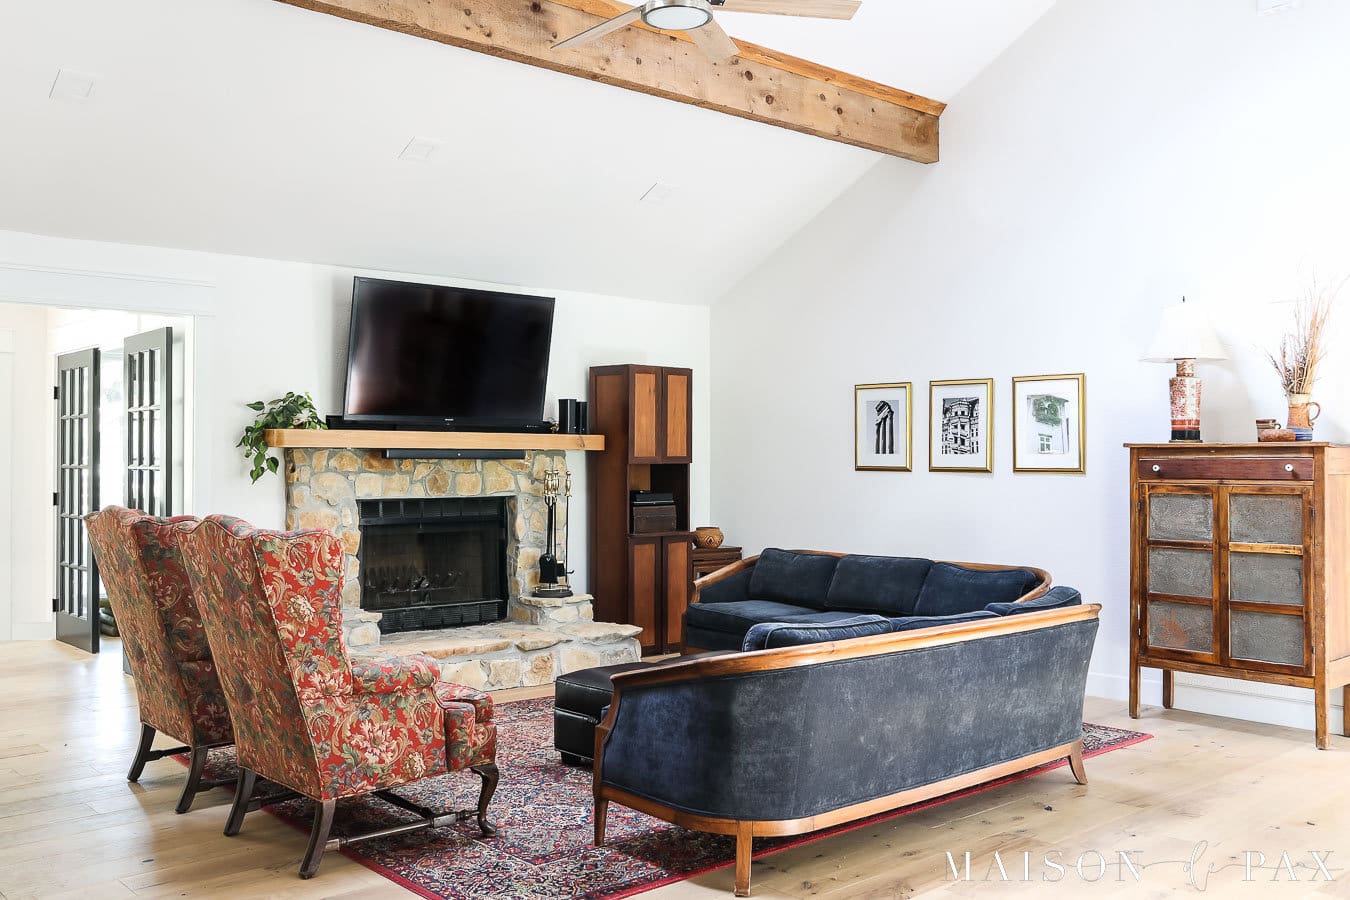
I particularly love the trim we added around the windows. Previously it was just sheetrock with a small window ledge, but I love this simple trim work to tie the windows together.
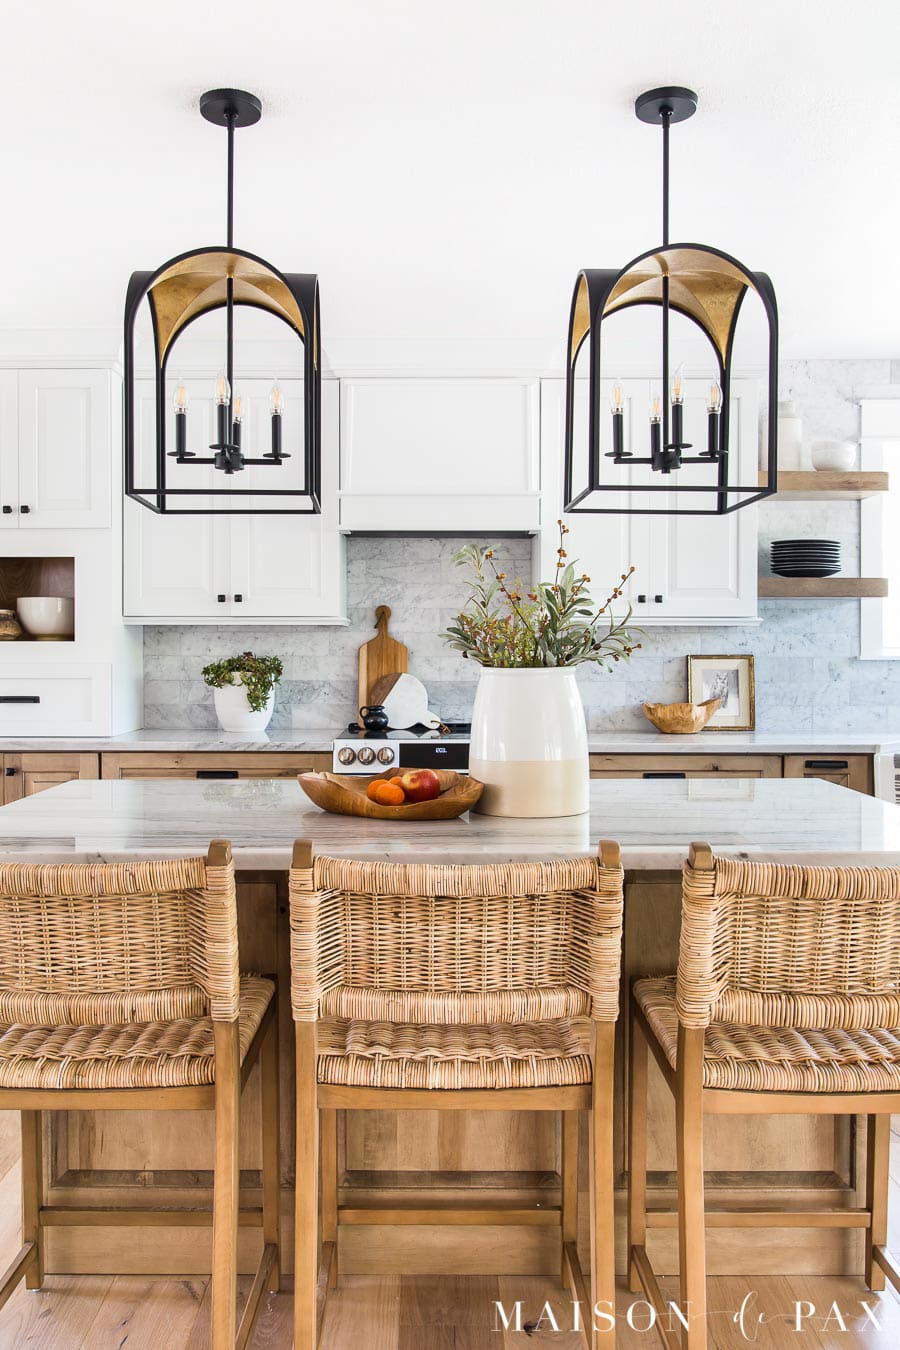
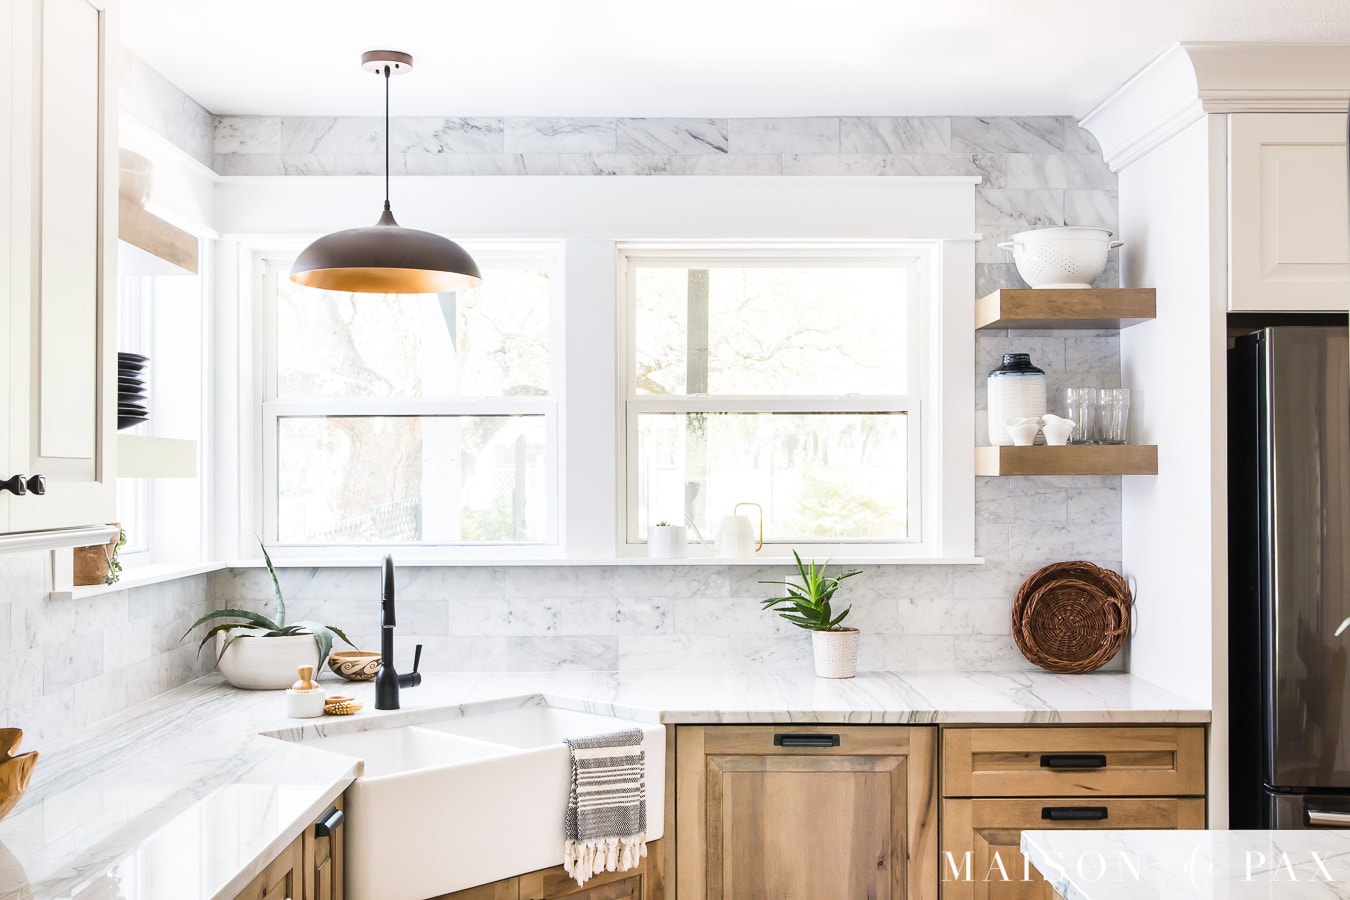
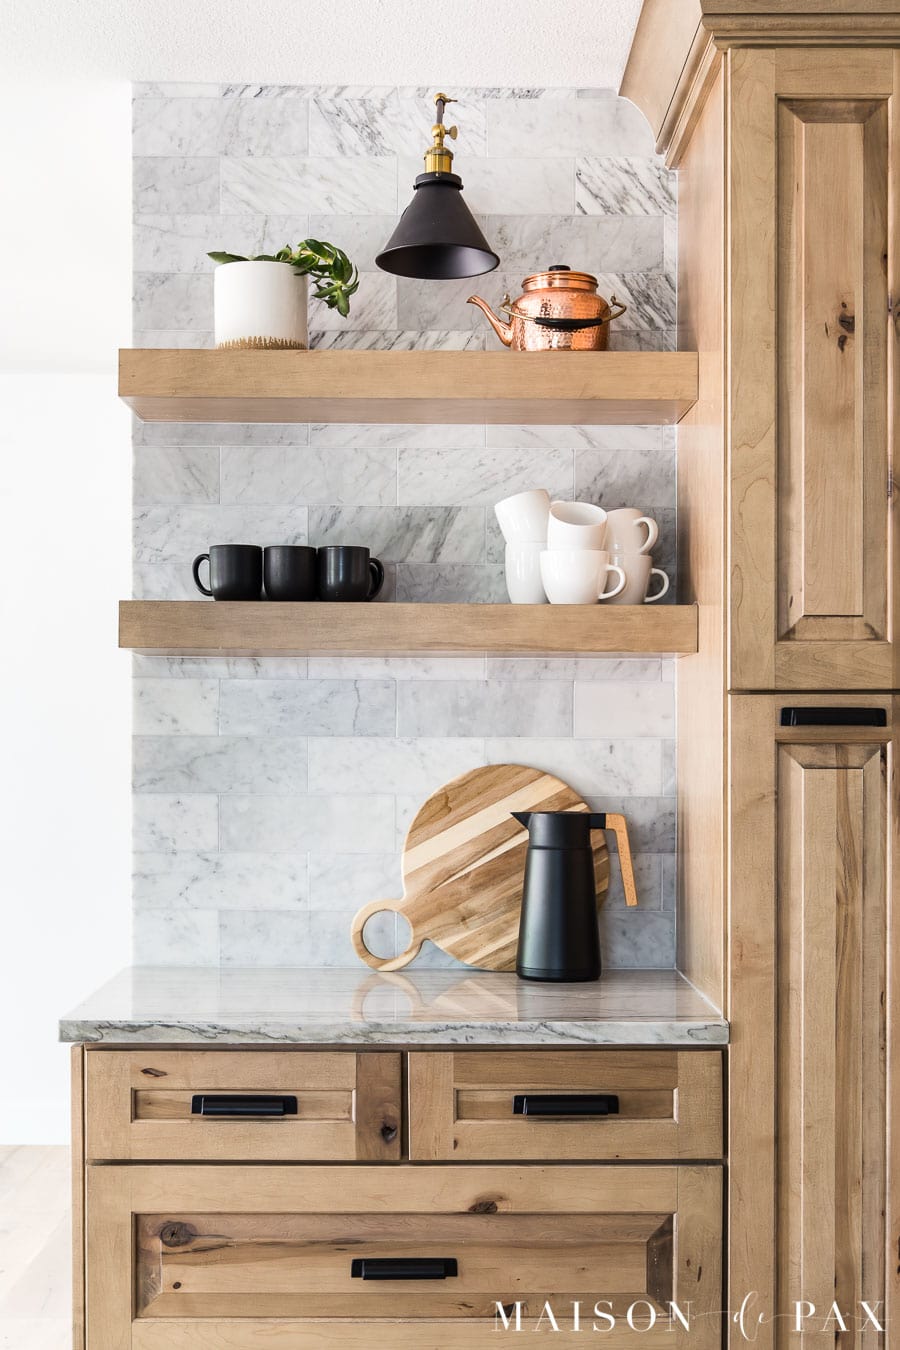
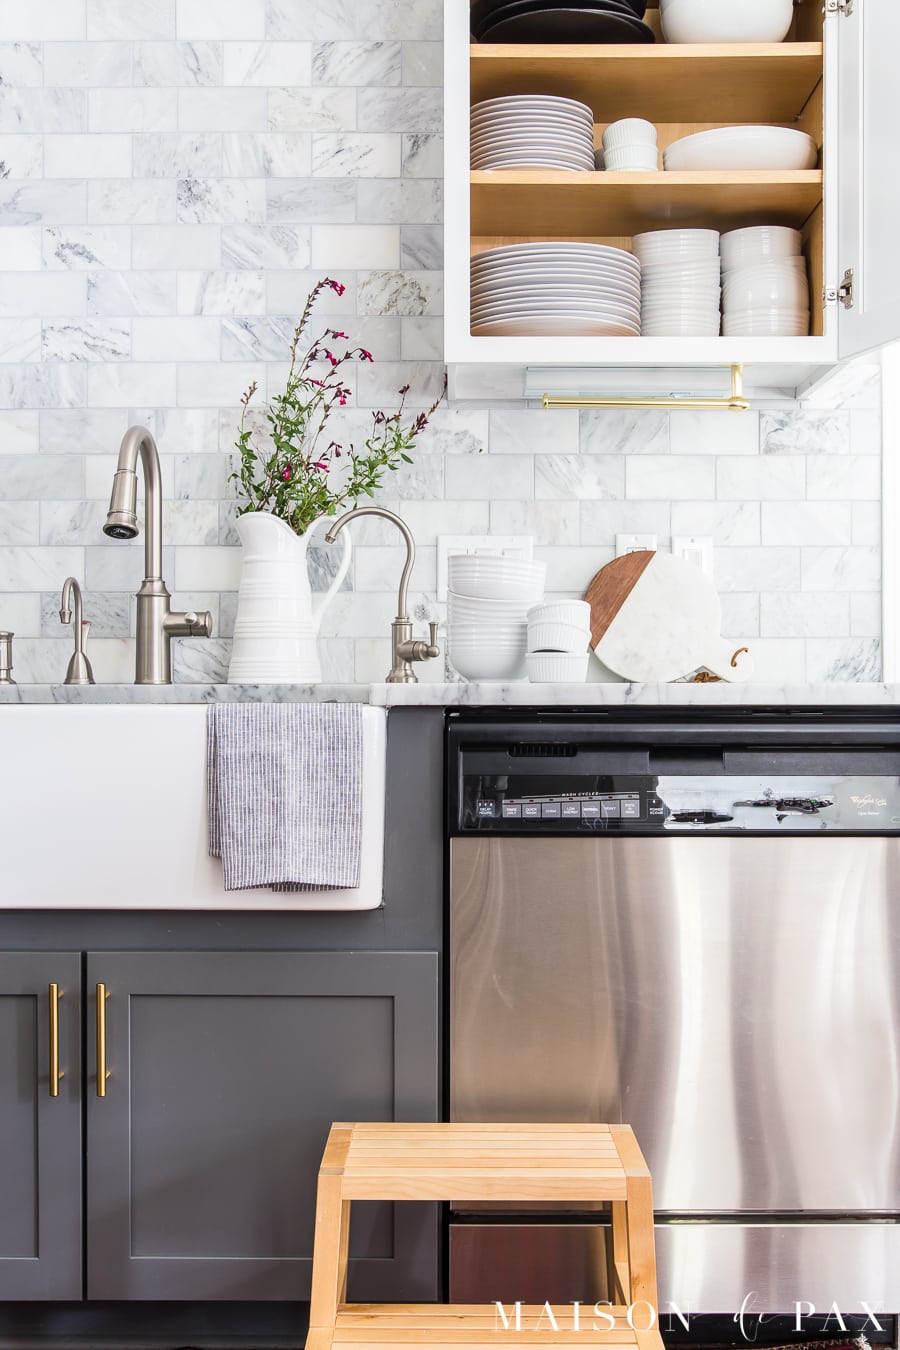
Kitchen
Oh man, how I love this space! We opened the wall to the dining room, relocated the refrigerator, and tweaked the placement of everything with the new cabinetry.
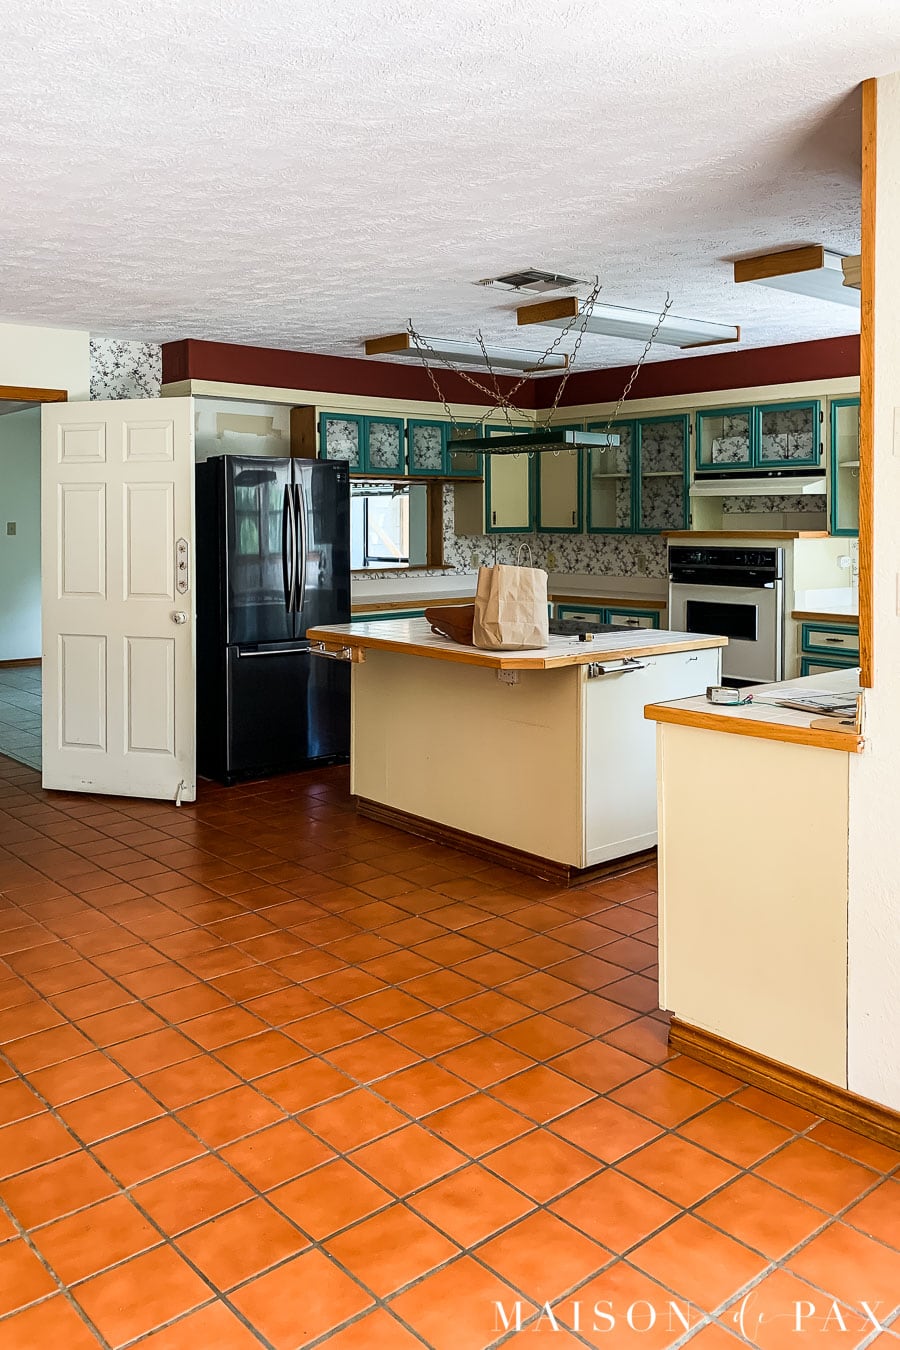
We also removed a cased opening and rearranged the doors and windows across the back so that the sun room type space could function as a breakfast room with a large dining table.
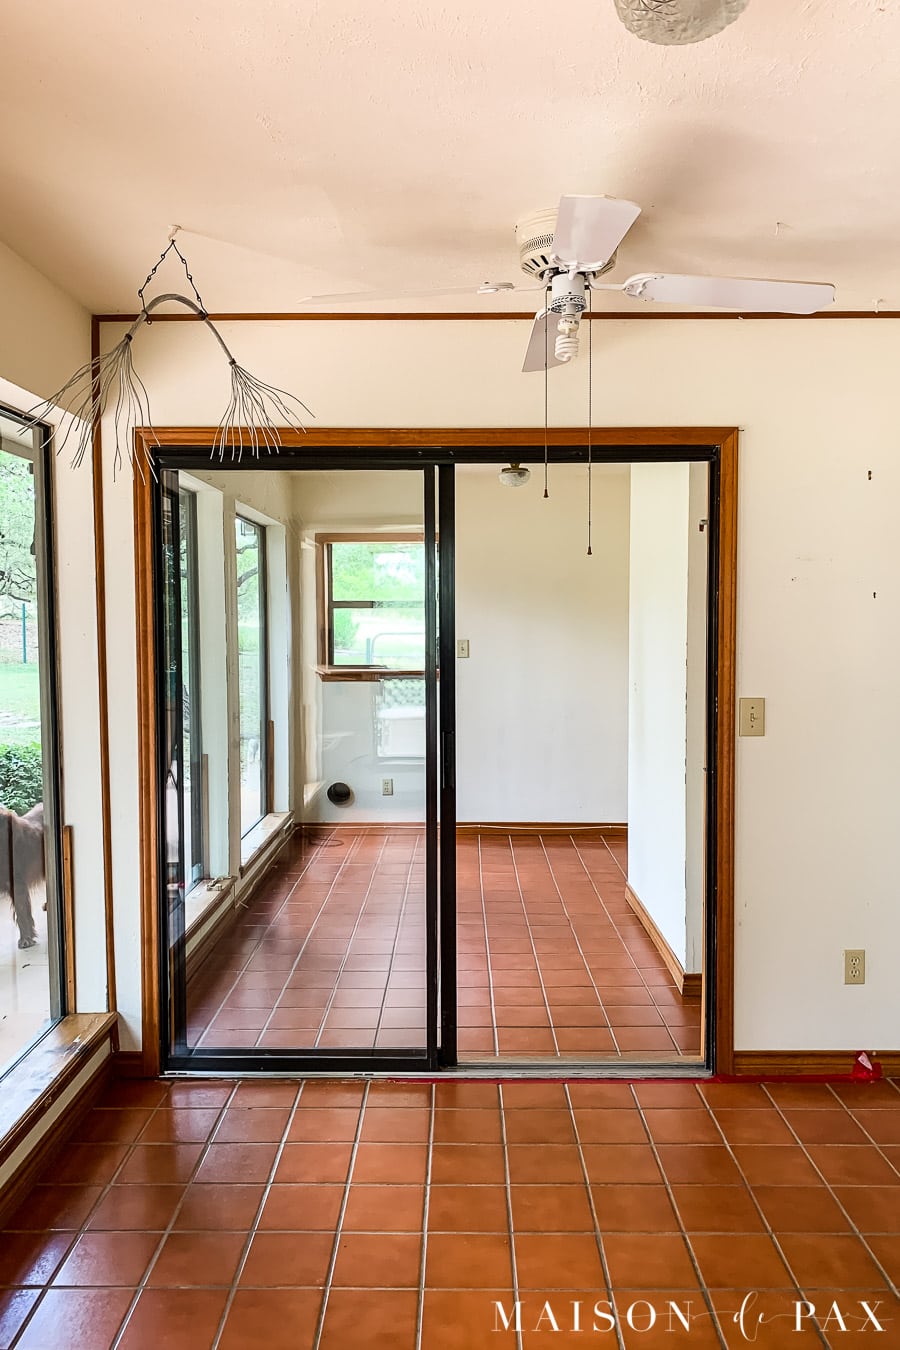
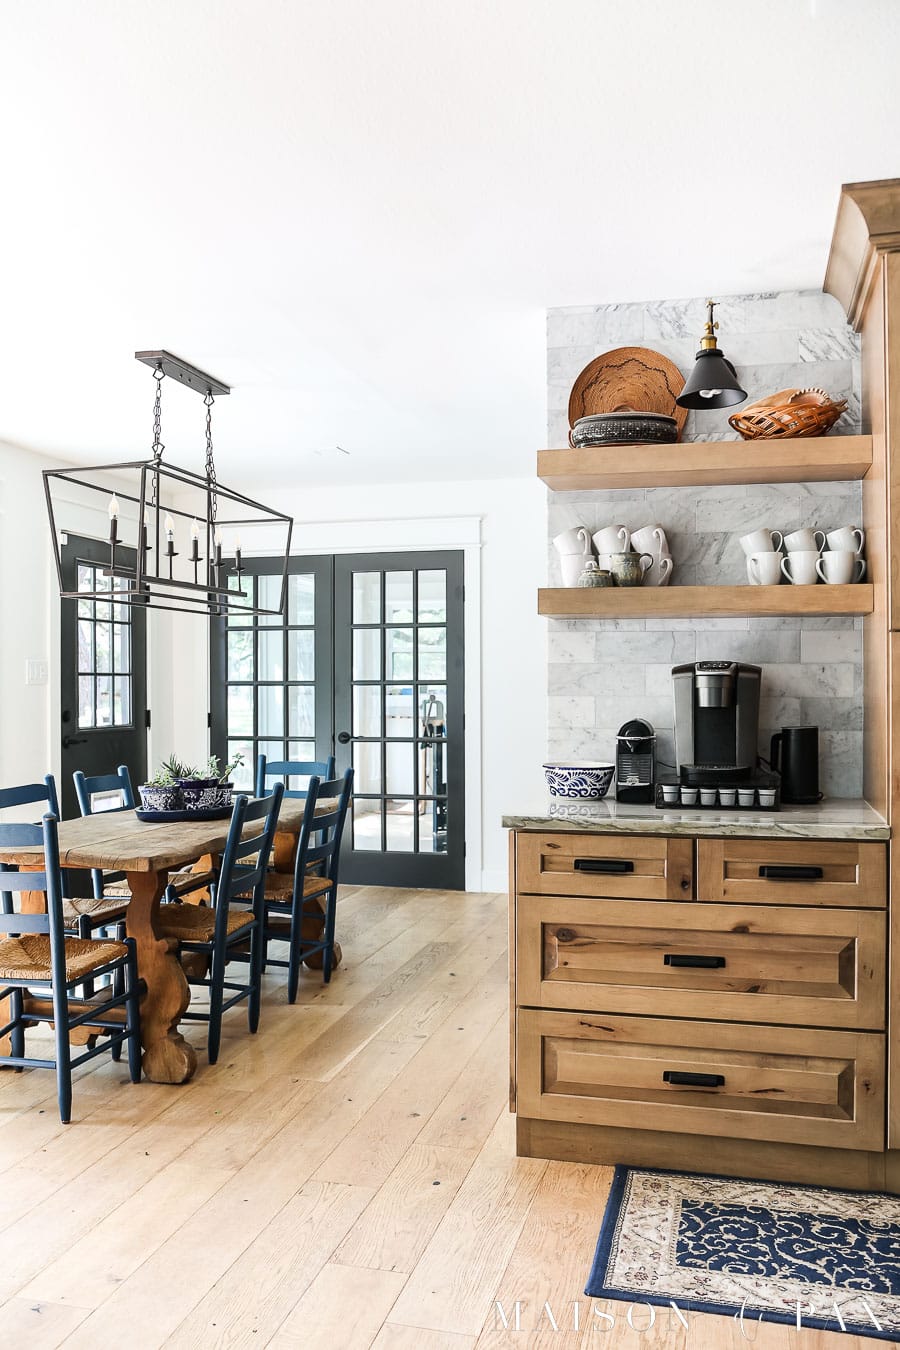
Get all the details on the kitchen renovation here.
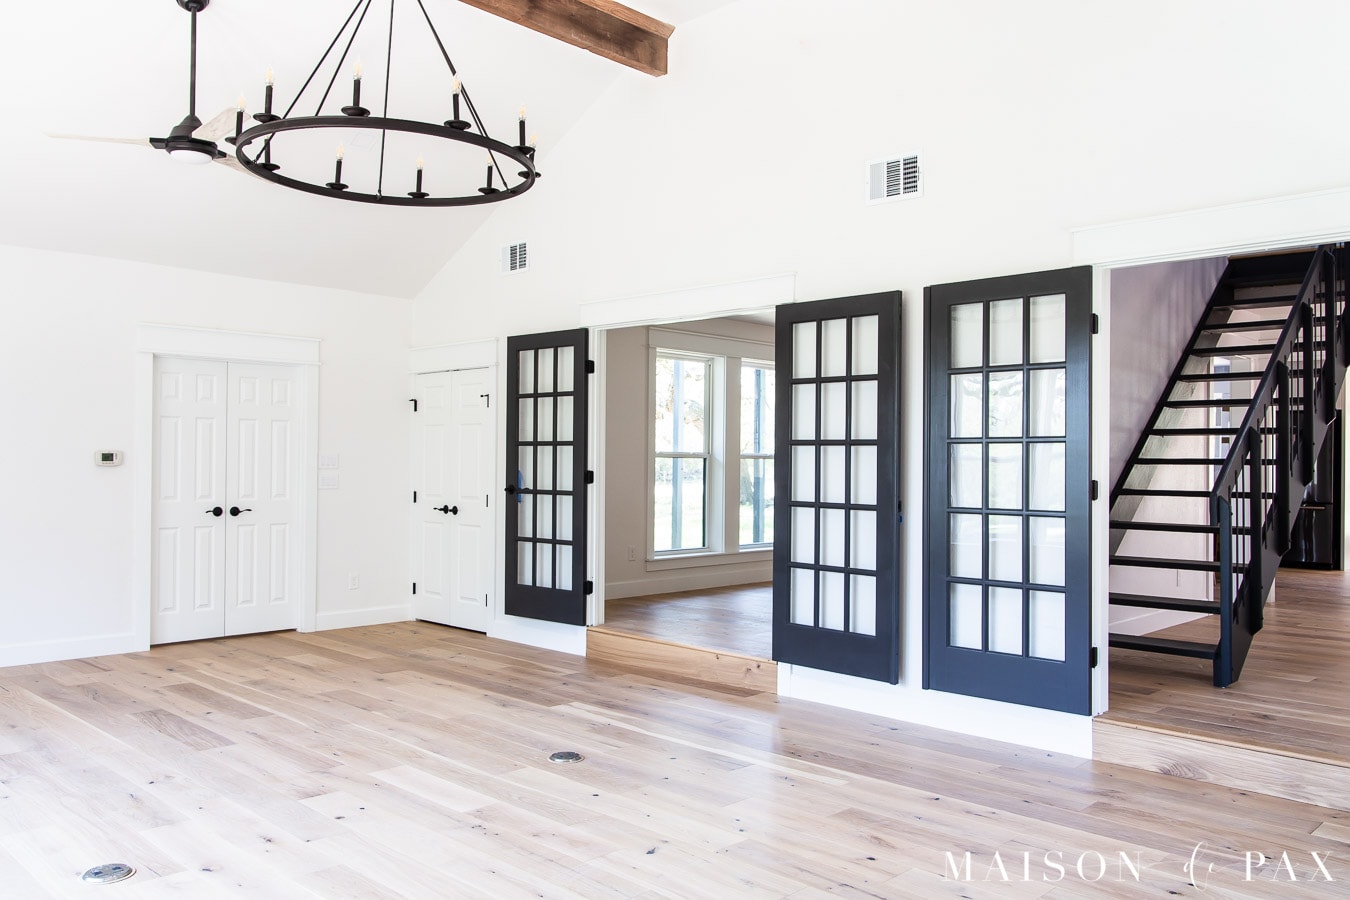
Family Room
This space was huge and had wonderful vaulted ceilings, but it needed a major facelift. We leveled the split floor, replace the carpet with wood, gave everything fresh paint, replaced light fixtures and fans…
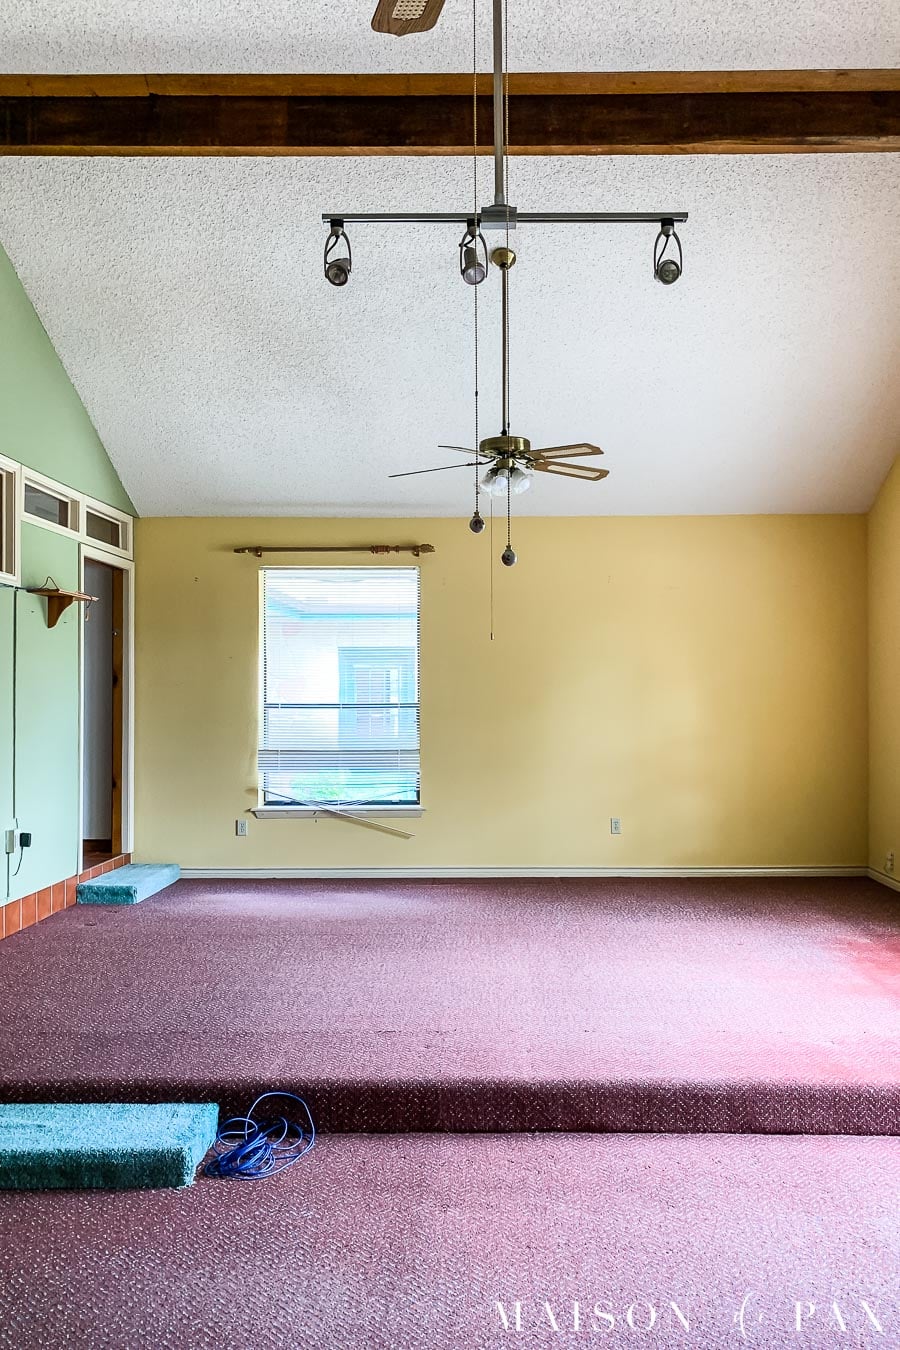
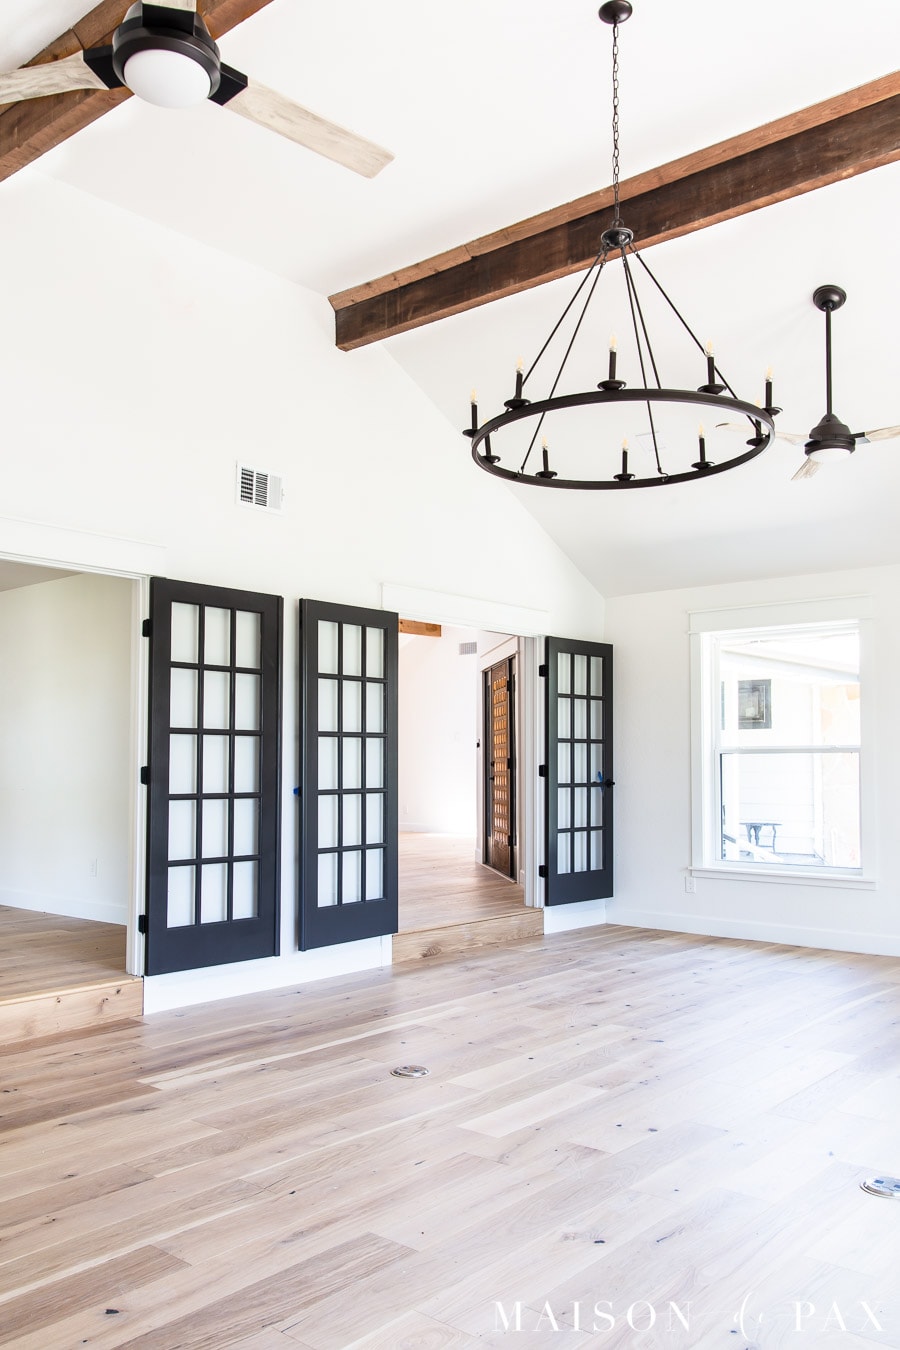
And most importantly, we installed two sets of french doors. These can be opened fully to allow this huge living space to feel like a part of the rest of the living areas (the entryway through the right doors, and the dining room through the left set). Or they can be closed to separate the space for use as an office, tv room, or playroom.
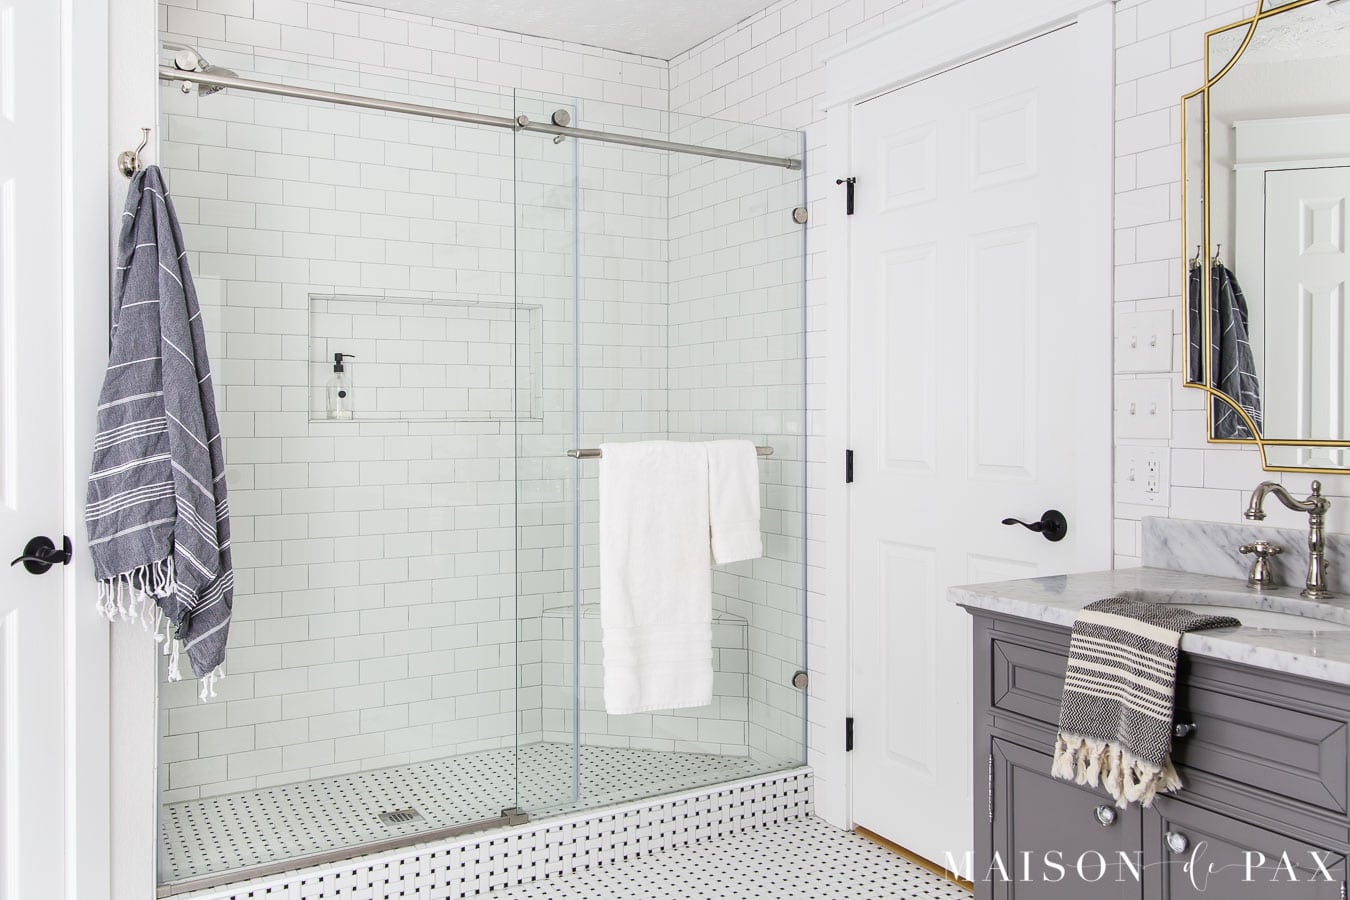
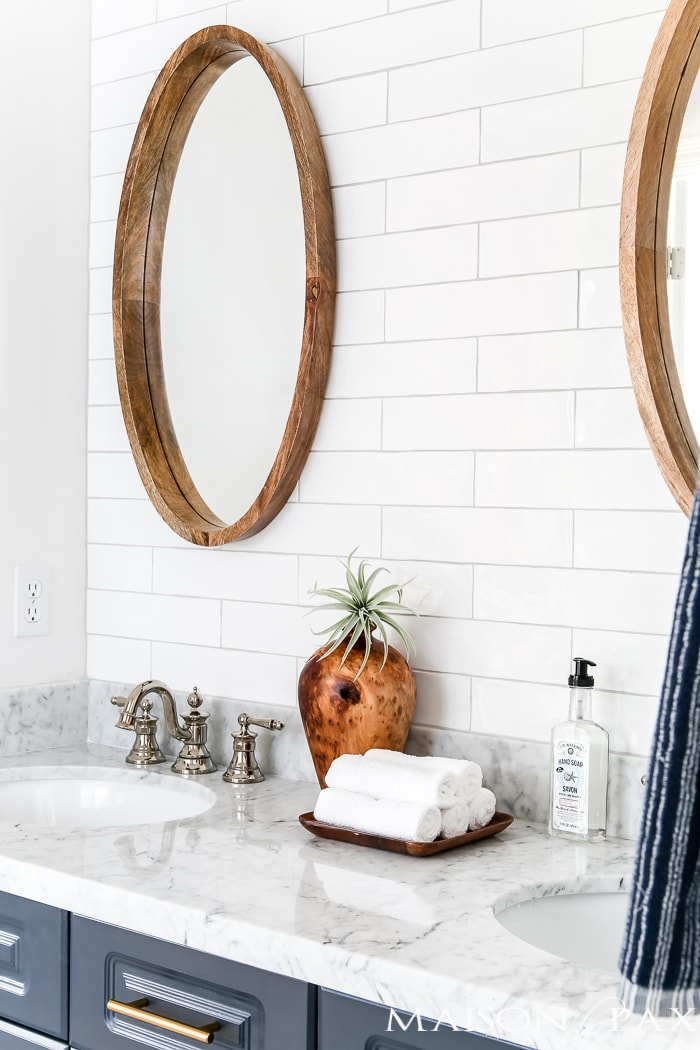
Guest Bath
Just off the living room, this little guest bath was so fun to remodel. We used classic materials like marble and ceramic subway tile, but we gave it a fun twist with geometric mosaic floor tiles and a gorgeous blue shower tile.
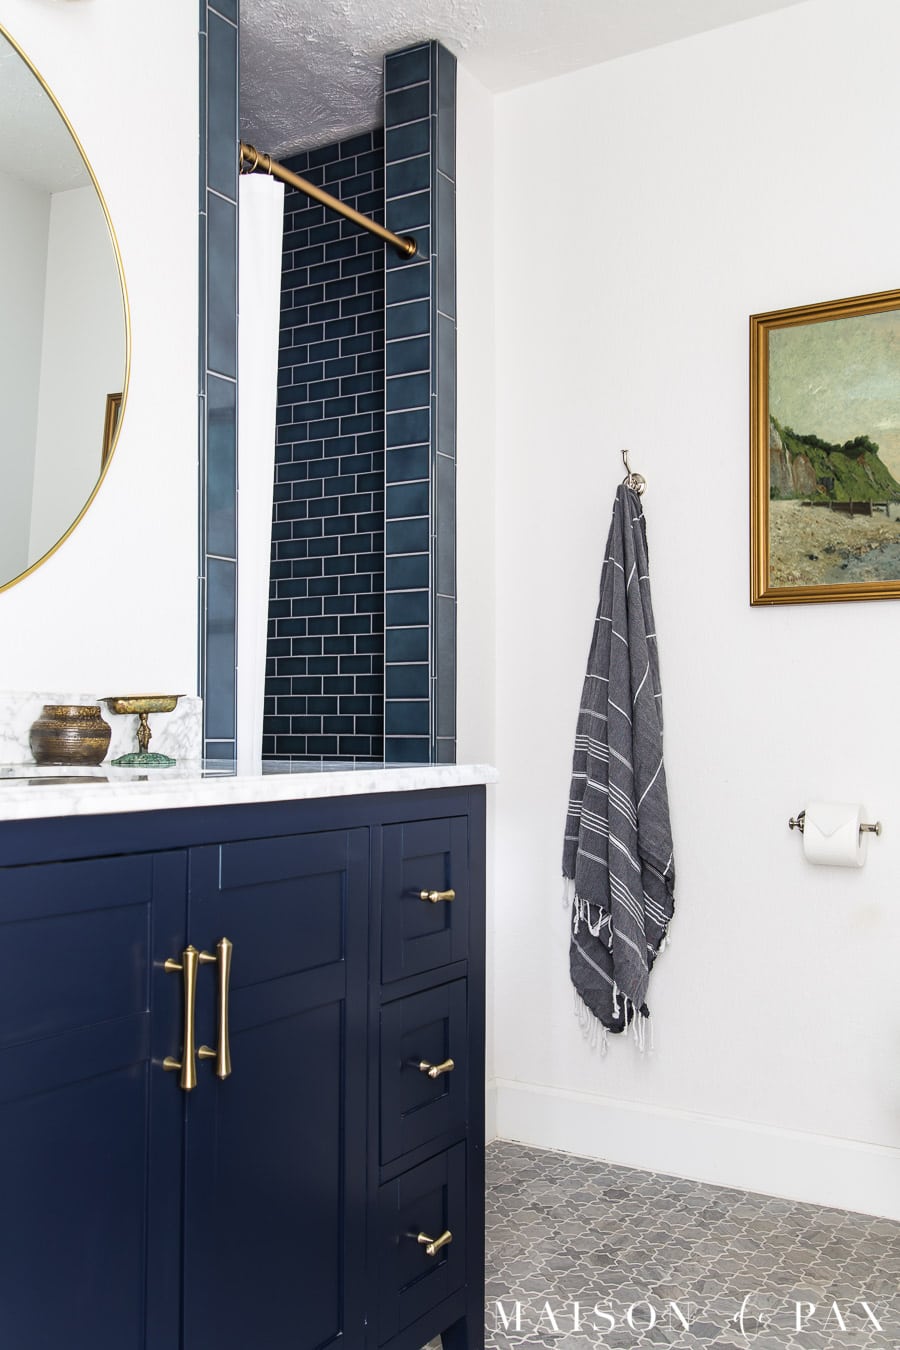
Get all the guest bath renovation details here.
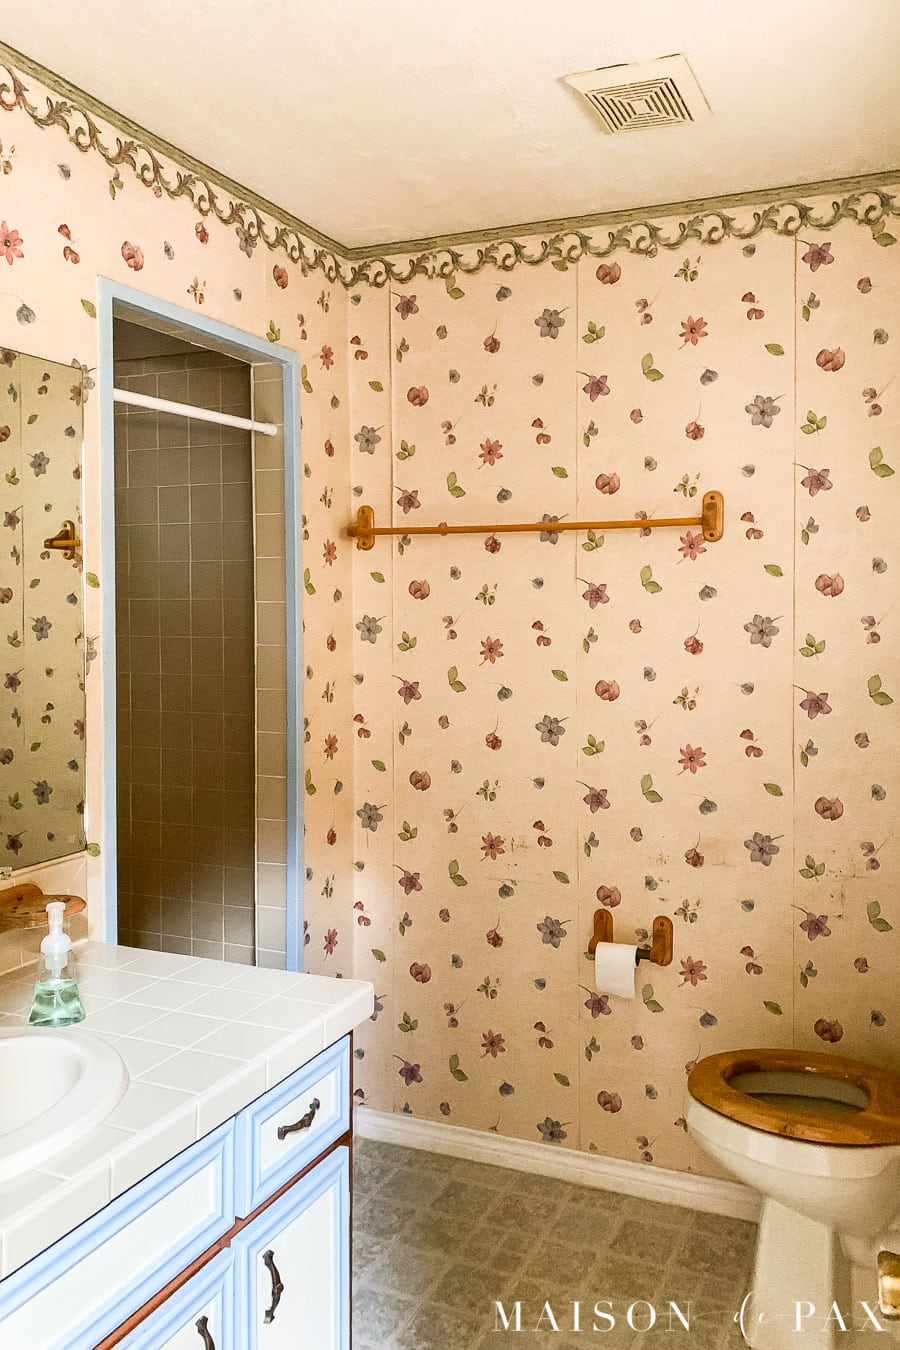
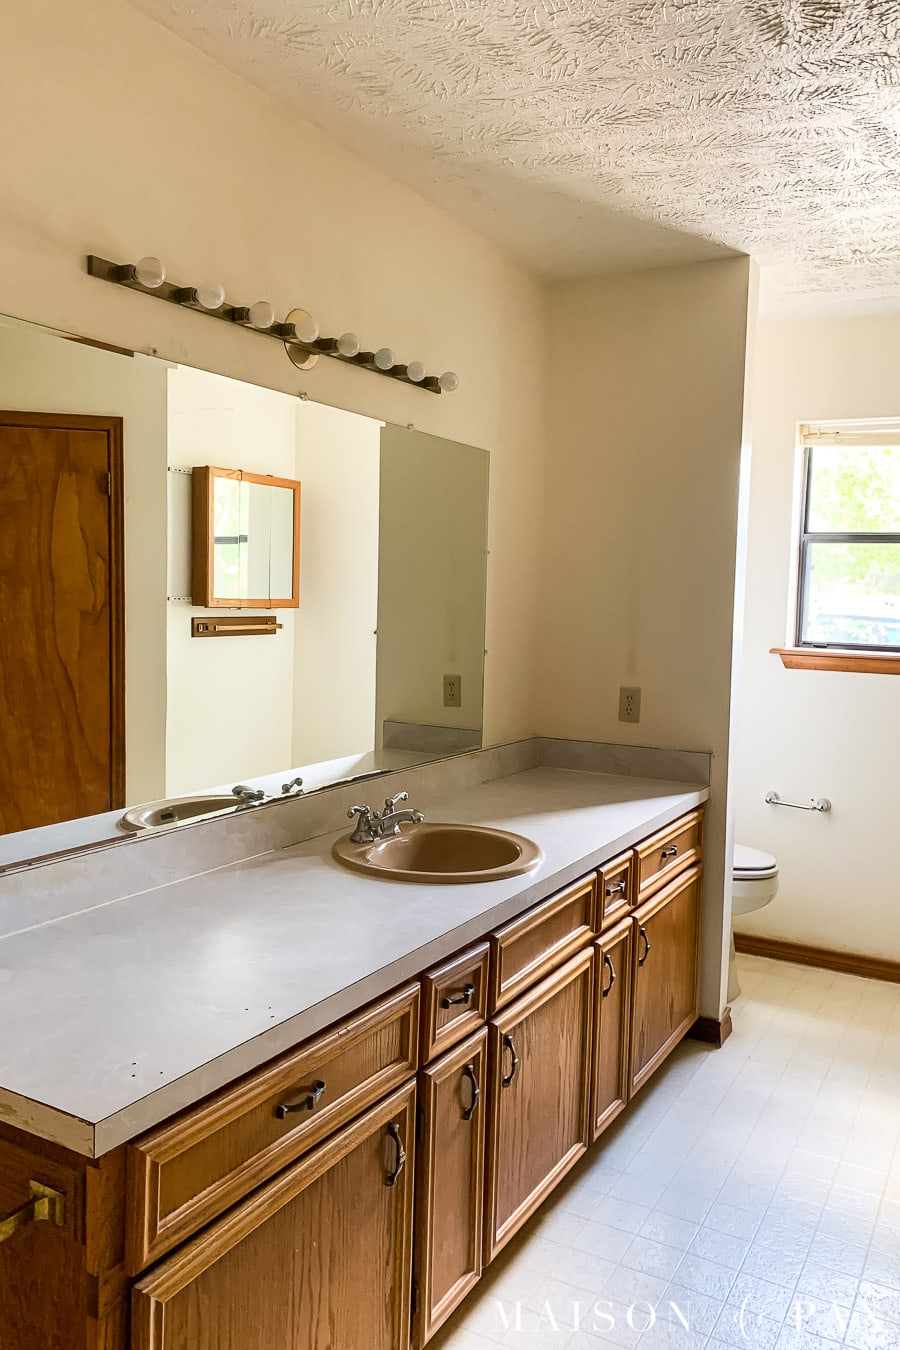
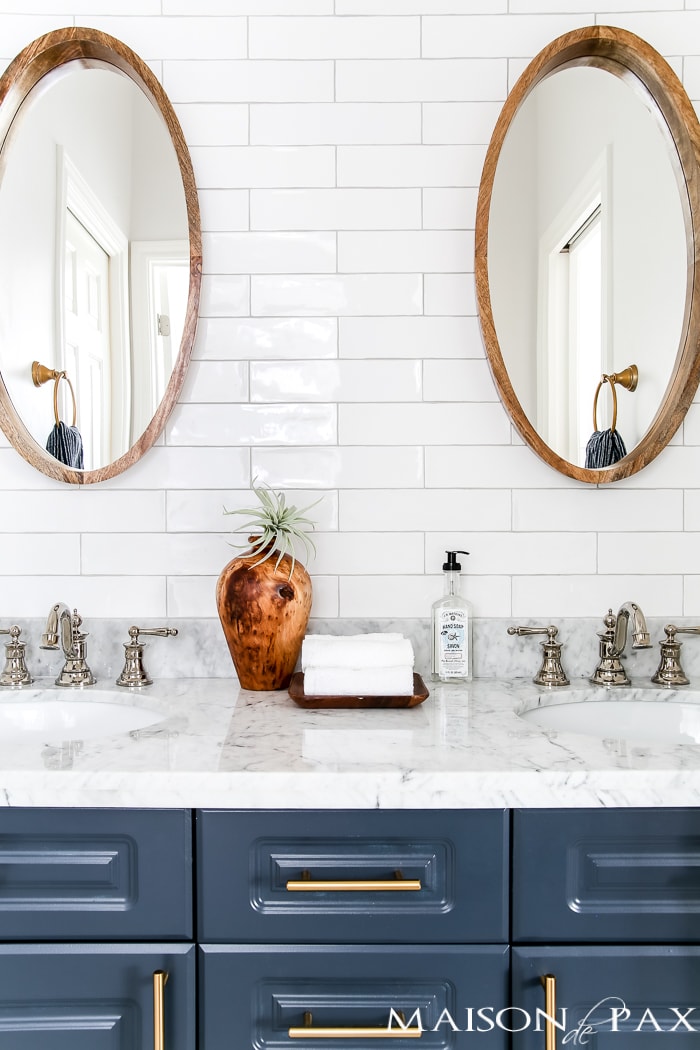
Primary Bathroom
The master bath began with linoleum and formica countertops for miles… Now it’s crisp and clean with classic black and white basketweave, a beautiful furniture-style vanity with marble countertop, and a freestanding tub.

We were even able to add a stand alone shower in some previously under-used space.
Get all the primary bathroom renovation details here.
Tips and Ideas for Updating an 80s Home
Looking over the choices we made (and the wonderful, updated feel the home has now), I thought it might be helpful to share a few observations in case you are trying to update an 80s home.
Color Palette
I think color is a very personal thing… So take this with a grain of salt (because if you love color, then go for it in your own home!). But I think one thing that helped update this home was choosing a bright soft white to freshen up the space and tone down the orange oak accents.
We used SW Snowbound on walls and ceilings and SW Extra White on trim. See my full review of Snowbound here, or get my list of favorite white paints (plus tips for choosing!) here.

Open Flow
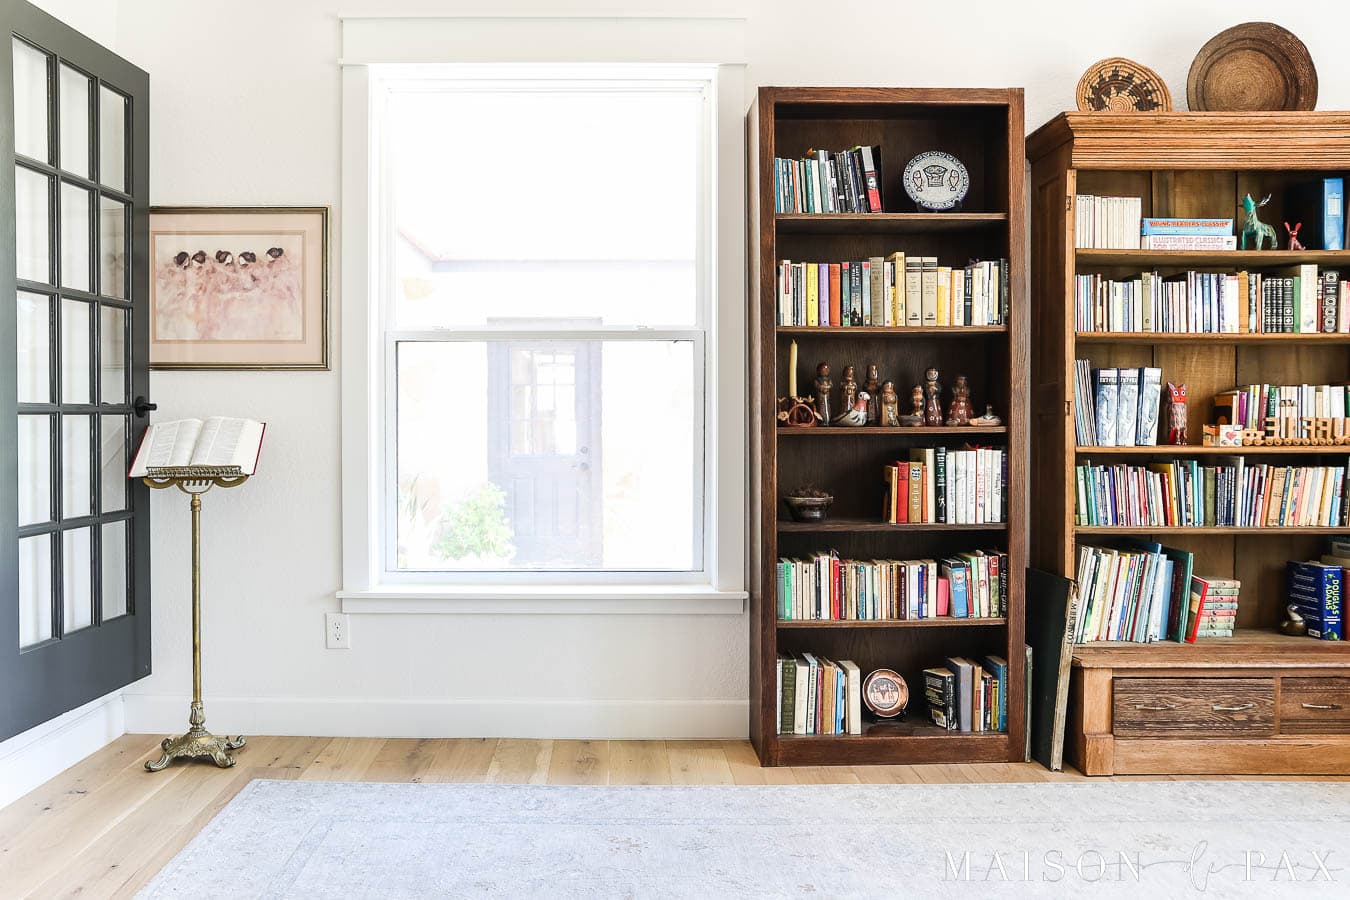
The 80s seemed to enjoy orange oak bookcases, offset windows, or glass block walls as room dividers…
Removing those elements for a clear, open flow helped update the feel of the home. Even better, adding some more classic room divider options (like these french doors) maximizes the versatility of the spaces and lends a more traditional feel.
Wood Floors
This may not be the case in every 80s home, but this one had at least 8 or 9 different types of flooring: linoleum, tile, carpet, laminate, etc. Choosing a consistent flooring throughout helps to unify the space and make it feel more upscale.
Get the details on the engineered wood floors we used here.
Painted Trim
Orange oak trim and cabinetry are probably the most identifiable 80s home trends. Since we were replacing the flooring anyway and the windows didn’t have any trim, we just started over with white trim for a more modern style. However, if you would rather paint the wood trim you have, here’s a full tutorial to help you do so.
Non-orange Wood Tones
Just because you are covering up the orange wood tones doesn’t mean you shouldn’t have any wood. Wood tones lend an elegance and timelessness to a home that is hard to achieve with metal or painted materials. Wood floors and wood cabinetry brought that grounded elegance to the home.

Classic Materials
Similar to the effect of real wood, classic materials lend an elegance and gravity to a home that feels timeless. I think the use of marble tiles, polished nickel plumbing, traditional basketweave designs, and more helped to create that ageless feel.


Wow, looks so good!!! I especially love the wood and marble in the kitchen😍!!
Thank you, Victoria!
Watched your video on care and maintenance of marble countertops. I installed marble in my new kitchen, based on your posts and videos, as well as your reply to my questions, and I am ABSOLUTELY IN LOVE with my marble countertops, and am 100% certain I made the right choice. Regarding your video on care and maintenance, it mentions a link to the sealer you use, but I could not find that link. Would you please share with me the brand and type of sealer you use? My countertops were sealed before install a couple of months ago, but I want start applying soon to protect them. Thank you in advance, Rachel! By the way, great job on the transformation on your parents’ home! It’s stunning!
I’m so happy to hear that, Diana! And thank you so much. This is the sealer we’ve used on our marble. I hope this helps!!
Gorgeous! So many stunning details.
You’re so kind. Thank you!
this is lovely, is there any possibility of you the dimensions of the tv area? i keeptrying to convince my husband we could do this layout, but he thinks it would be too crowded… tyia
I’m so sorry for the slow reply; I just found this comment buried. It’s hard to give the size of the space since there are walkways all around it, but the rug is
~9×12. I hope this helps!
I have a similar open staircase in my 1960s house! We updated it but kept it open – any ideas on how to aesthetically baby proof?
Stairs are always difficult! I’d try a gate at the top to prevent them from sneaking down the stairs. I worry more about them falling down than them sneaking up because I can catch them before they get too high.
I love all the updates. I, too, live in an 80’s orange world. When husband retires we hope to upgrade.
It will be worth it, Debbie!
amazing kitchen! where did you get the pendant island lanterns? Beautiful.
Can you share where you purchased your island vase also?
Great Style
Thank you so much! These are the lanterns in the kitchen, and you can see more of the whole space here. I think the vase was a Homegoods purchase a few years ago. I hope this helps!
How did you remove your popcorn ceilings?
My parents had the contractor remove them. It was an expense, but especially with those vaulted ceilings, it seemed worth it to pay the professionals. 🙂
Did You Replace The Refrigerator Or Just Relocate The Existing One?
We were able to re-use the refrigerator! Good Catch!
Where did you get the front entrance door from…I love it!
Thank you! My grandfather actually made it by hand. 🙂
Hi, love the updates!
Curious about the wood beams in the ceiling. Did you refinish them? Or replace them? We have nearly the same ones in a house we just purchased and trying to determine how light they can go once sanded down.
Thank you! We actually did nothing to the beams. Isn’t it amazing what changing the colors of the ceiling and floors did to how they look?