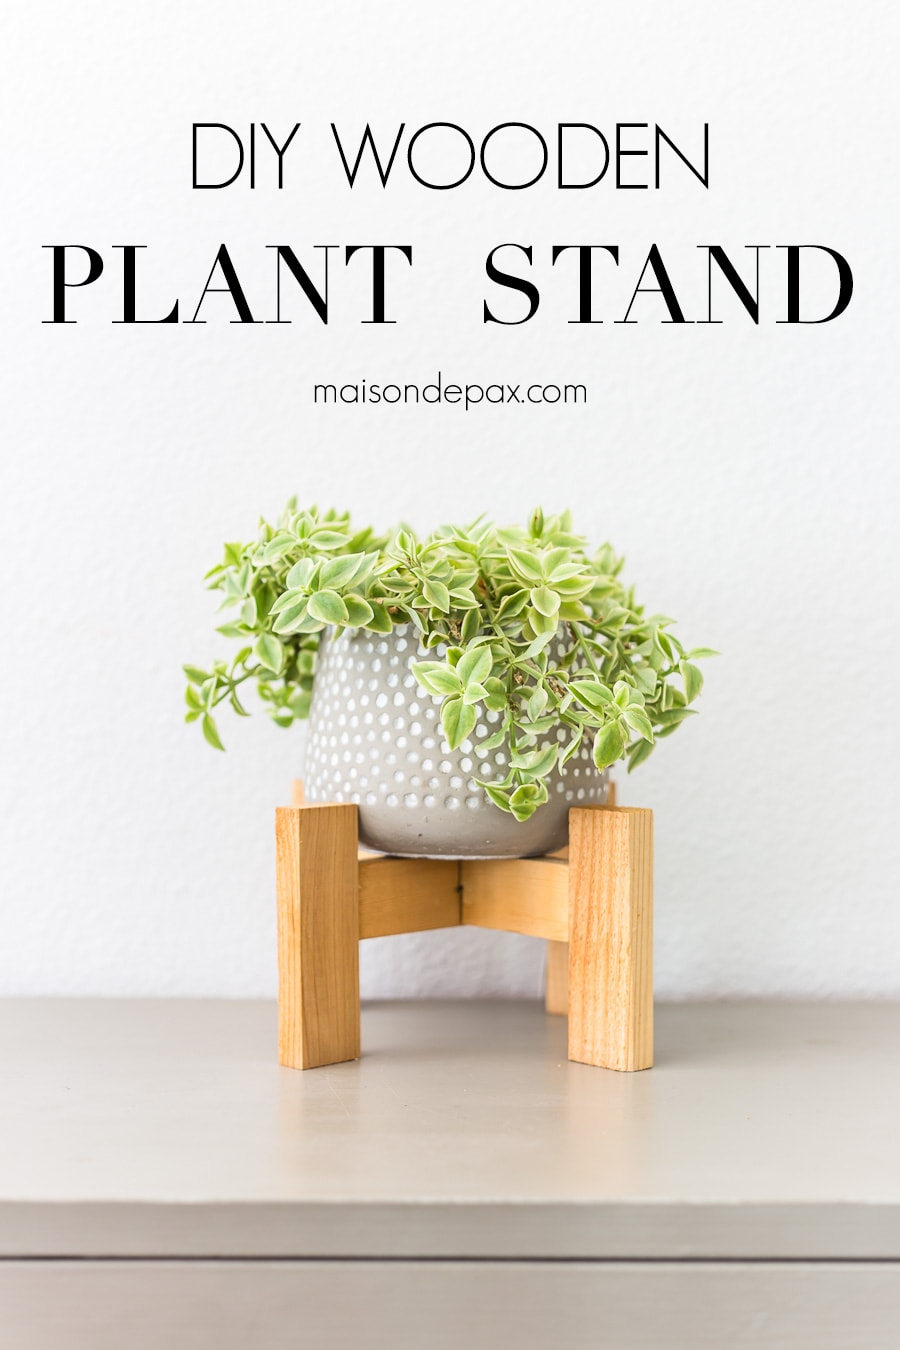
DIY Cedar Wood Plant Stand
Looking for affordable wooden plant stands? Learn how to make these West-Elm inspired, mid-century modern DIY wood plant stands… for just $4 each!
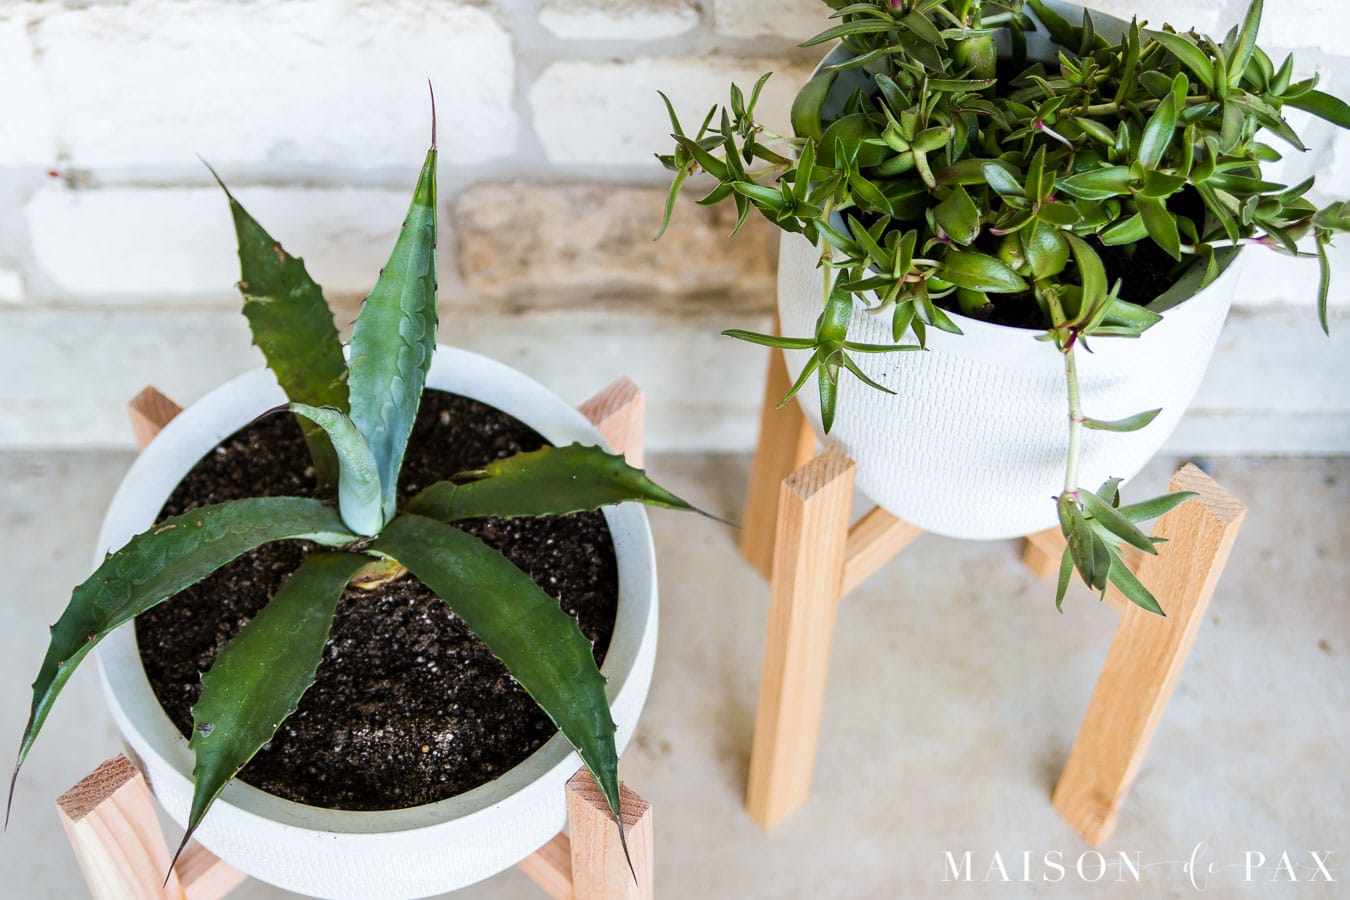
As if four kiddos weren’t enough to keep alive, I confessed this summer that I’m really digging potted plants these days (see what I did there?! 😉 ). But naturally, I am having just as much fun with the pretty pots as I am with the actual plants. And since I love layering things visually, I decided to build some little DIY modern plant stands to add some vertical height to some of the pots in our outdoor space.
This post contains affiliate links. Click here to read my full disclosure.
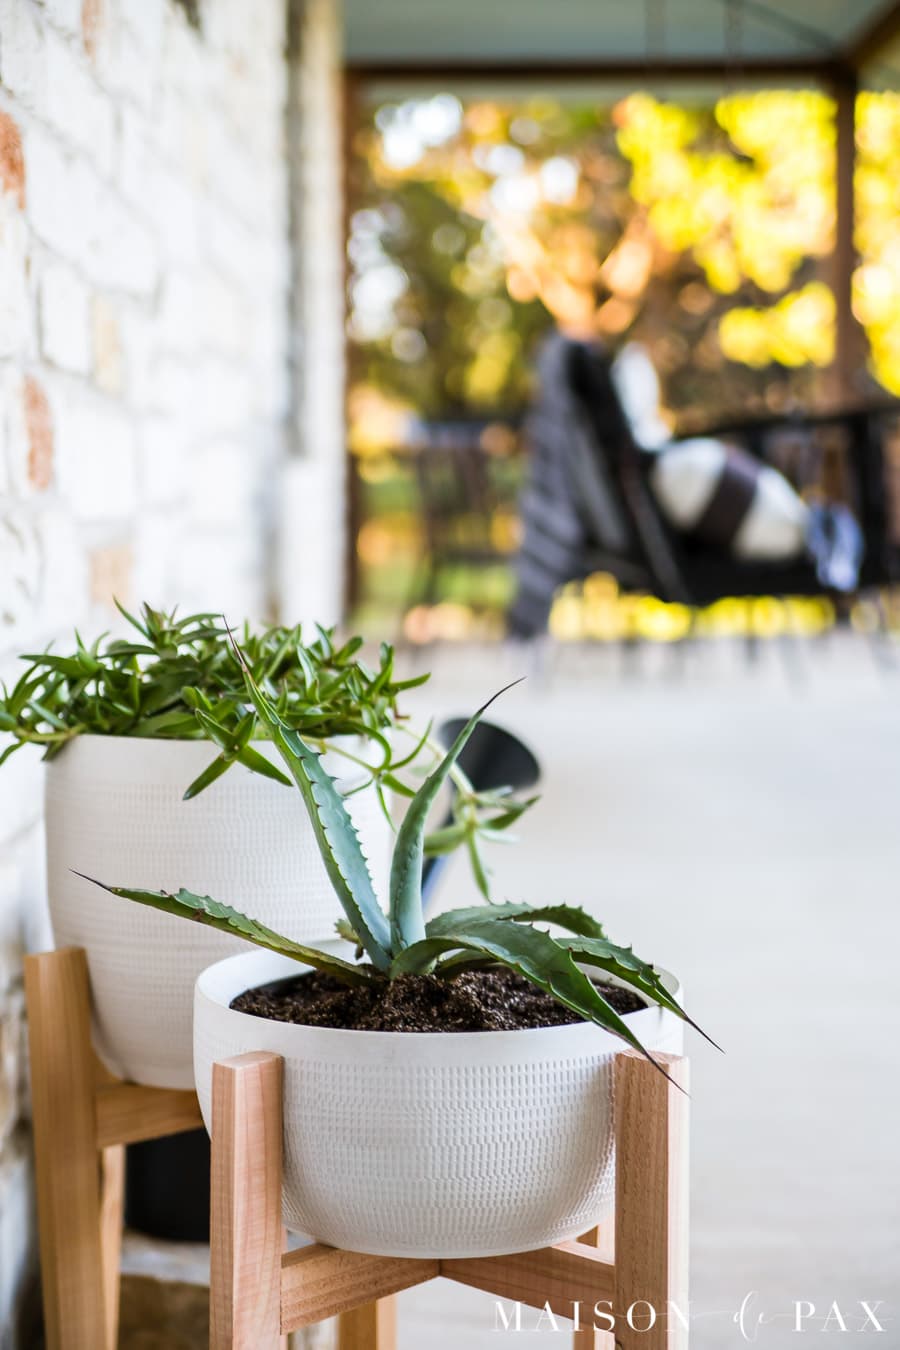
I’ve always loved these West Elm tall plant stands and other mid century plant stands like them. But as I was originally looking for them when decorating the front porch at the ranch, I was wanting a more affordable option… Since I’m not afraid of DIY projects and 8-foot cedar 1x2s were a mere $4 at my local store, I figured I couldn’t go wrong. Even better, cedar is naturally rot resistant, so it’s the perfect wood to use for outdoor plant stands. Pine is an affordable option, as well, but not as good for outdoor use.
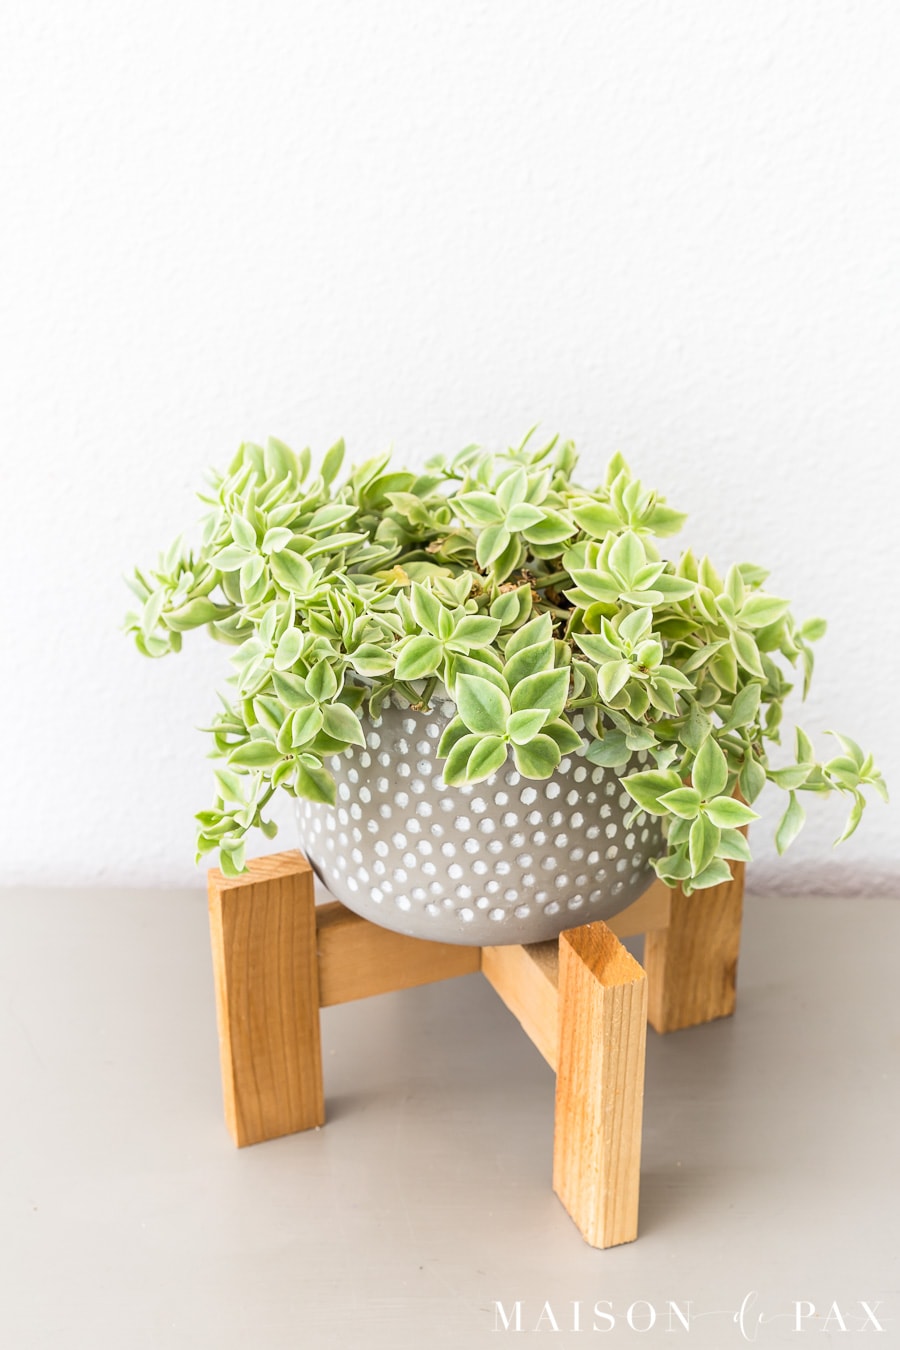
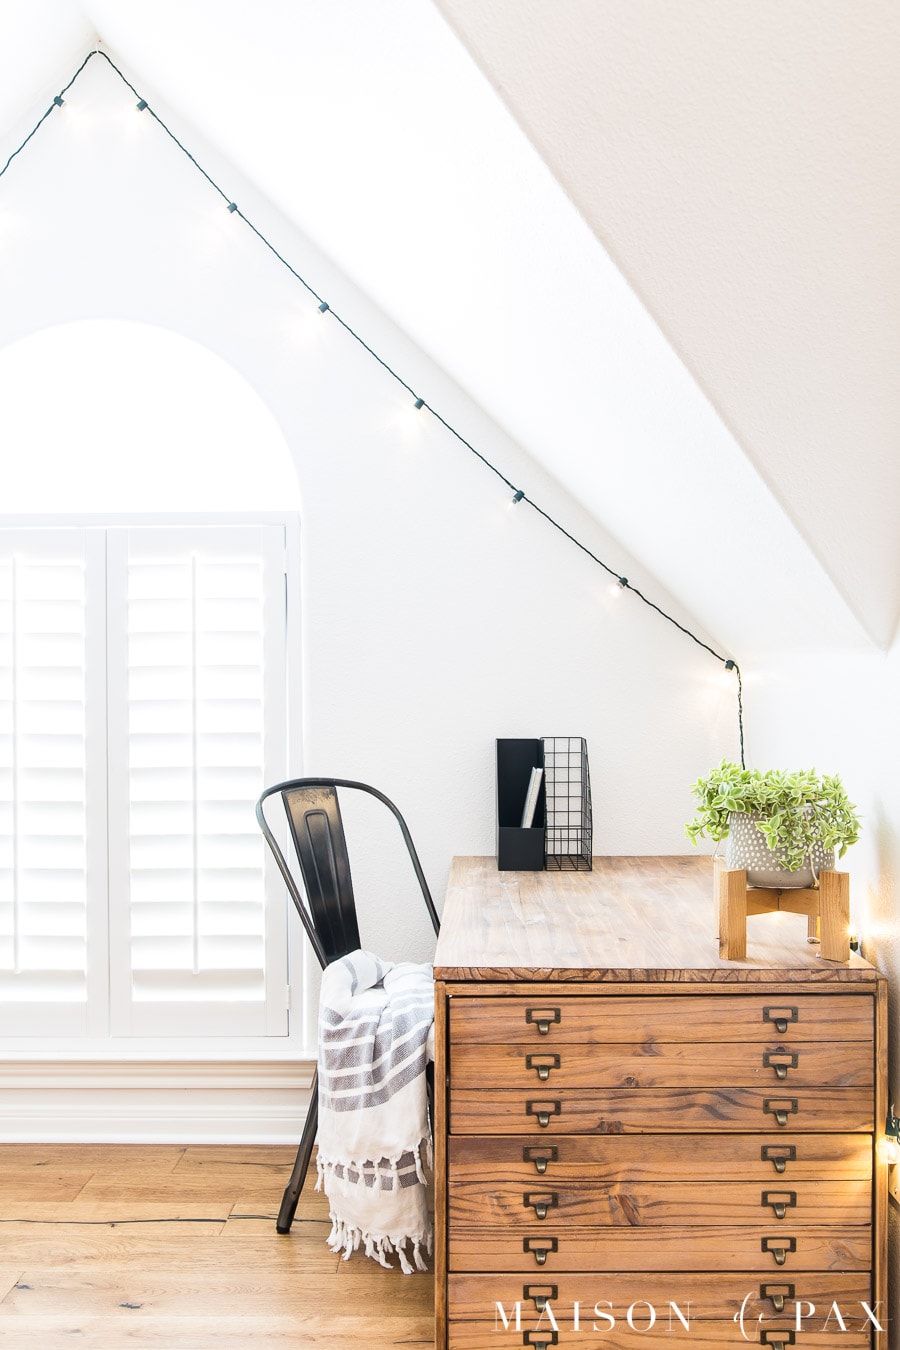
I was even able to use the scraps from one of the larger stands to make this little DIY wood planter stand for indoor plants… isn’t it adorable?

Supplies needed for an indoor/outdoor wood plant stand:
- cedar 1×2 (by online pick up for free at most locations!)
- hand saw or chop saw and measuring tape (power tools optional)
- basic tools: hammer and wood chisel (or large flathead screwdriver)
- either dowel pins, wood glue, and clamps OR Kreg jig
- plant pots of your choice
How to build a simple, mid centry plant stand:
The key to building this cedar plant stand is to create strong joints between your cedar pieces – strong enough to support your pot, soil, plant, and water!
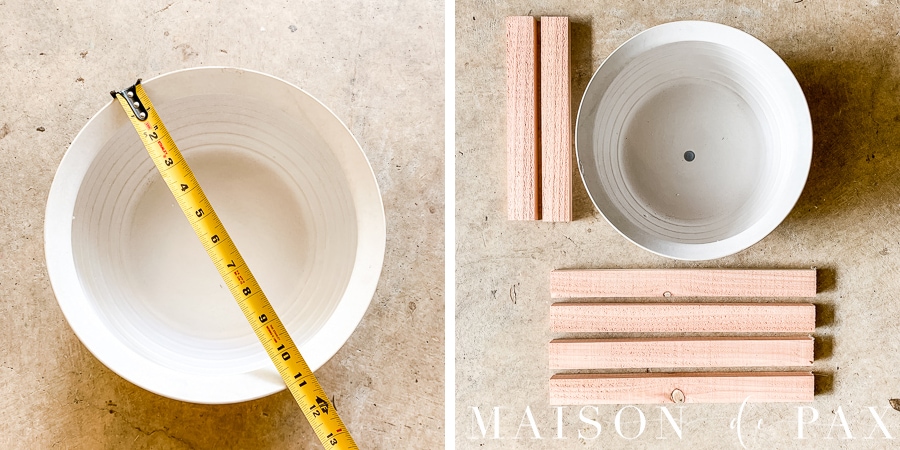
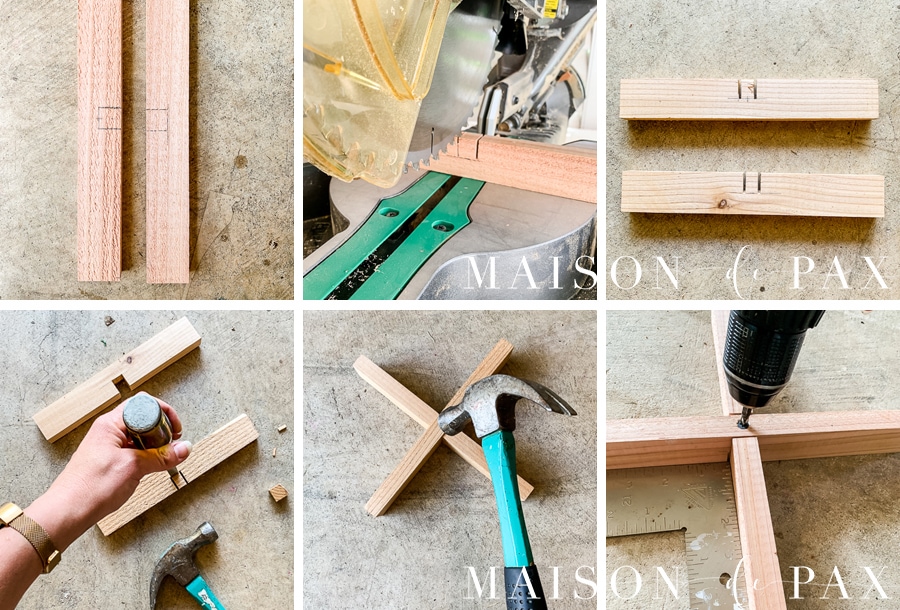
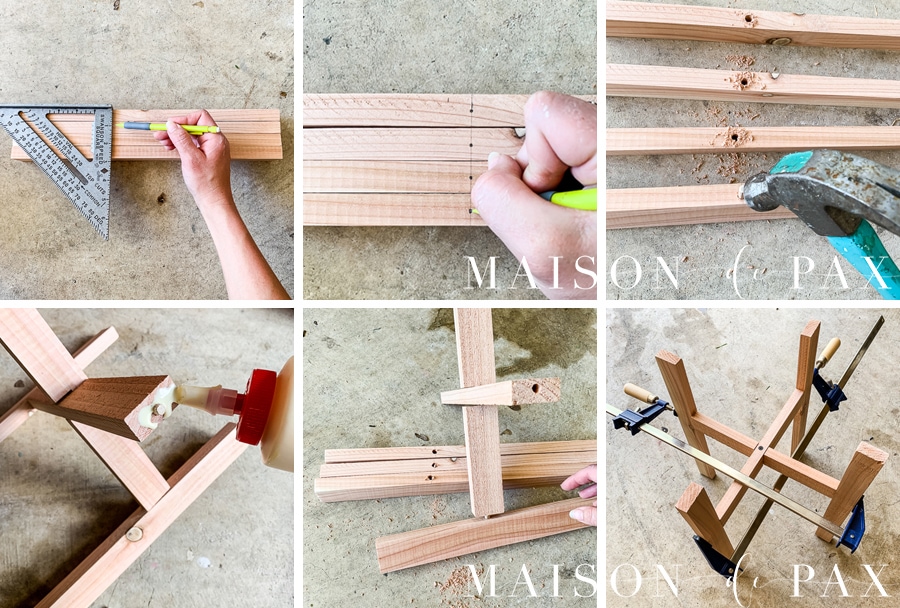
- Measure and cut
Measure the width of your pot and cut two pieces of 1×2 lumber to that length; these will become your X base on which the pot will sit. Then decide how tall you want your legs (height off the ground + how high they come up around the pot) and cut four pieces of 1×2 to that length.

- Assemble the pot base
To create the base for the pot, you want to remove a notch from each of your two base pieces so they can fit together to create an X at a 90 degree angle. To do so, find the center of each piece and measure the width of your 1×2. Mark with a pencil. Use your saw to cut through the wood only halfway and then use a wood chisel (or a large flathead screwdriver could work in a pinch) to chisel out the notch. Then use your hammer to tap the two pieces together to form an X. (Note: if you didn’t get the cut quite right and the pieces are too loose to actually hold together, you can always put a screw right through the two pieces where they fit together; it will be hidden by the pot later).

- Attach the legs (option A)
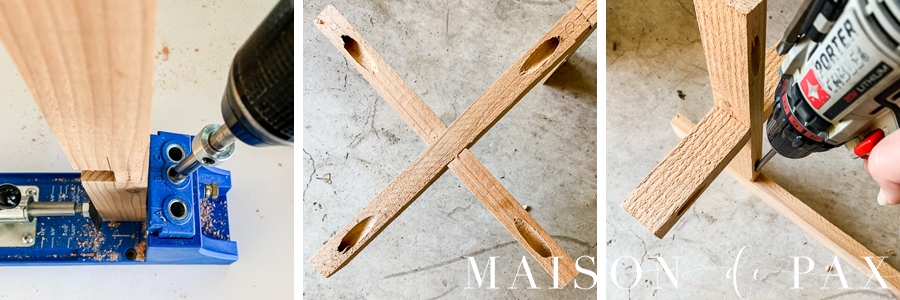
You can do this in two ways: using a Kreg Jig with pocket hold screws OR using dowel pins and glue (read the next step for those instructions). If you have a Kreg Jig, drill pocket holes into the underside of the X base. Decide how far off the ground you want your pot and then turn the base and the leg pieces upside down and attach using Kreg screws.

- Attach the legs (option B)
If you do not have a Kreg Jig, you can attach your legs using dowel pins. To do this, mark the spot where you want the base to meet the legs (make sure it is the same height on all four legs!) and drill a hole to match the size of your dowel pins into the narrow side of the 1×2 , then tap the dowel pins half way into each hole. Drill a matching hole into the four ends of the X of the base, add a little wood glue, and tap the dowel pins in the legs into the ends of the X base. Use clamps to hold while the glue dries.

I chose not to stain or finish mine with polyurethane (again, the benefits of cedar!). The new wood is light brown, but it will weather to a slightly silvery finish. If you prefer a different color, though, you can paint or stain and seal your pieces of wood.
These wooden stands may seem to have a lot of little steps, but my 7 year old was able to do it (and is SO proud of the beautiful succulents, the perfect addition to this desk!), so I know you can, too! Its simple design makes this an easy diy project.
The first little plant shelf took me about an hour as I figured out the best process, but the others just took 20 minutes or so to make.
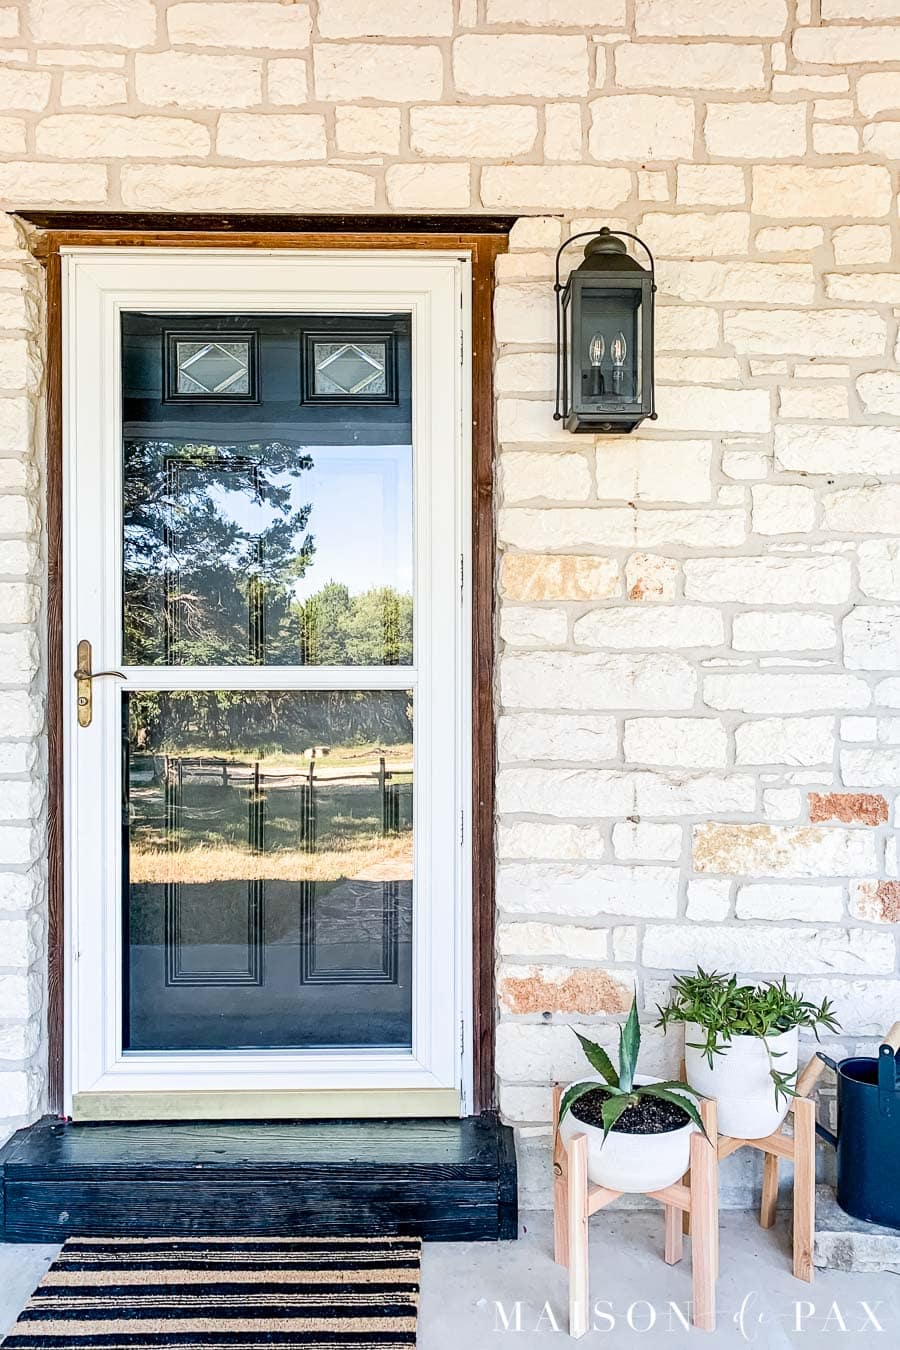
I love that this DIY plant stand can be customized to fit any pot, and the cedar makes them perfect outside or in…
Will you use yours indoors or out? Don’t forget to pin it!


No way. I didn’t even notice these (consciously?!?) in your other posts, but I’ve had one of these stands on my to-do list for a couple weeks now. I guess I don’t have to figure it all out myself after all, huh?!? 😊
Thanks! They’re lovely!
Thank you, Becky! So glad I can make it easier with a tutorial. 🙂
I pinned this it looks like it’s fairly easy, so i will see. They are so very nice, i really like them, thanks so much.
Of course, Marlene! I’d love to see how they come out.
Love this! And where’d you find that cute pot from!
A sweet local plant store!
Do they ship? I’m in Texas 🙂
Lol. Not at the moment… but I’m so glad you like them. 🙂
Totally beautiful. What size screw did you use for the Kreg jig?
Thank you! And I’m so sorry, but I cannot remember what size screw I used.
I needed a secure stand to hold a birdbath with small water fountain bowl and this will do the job. Thanks!