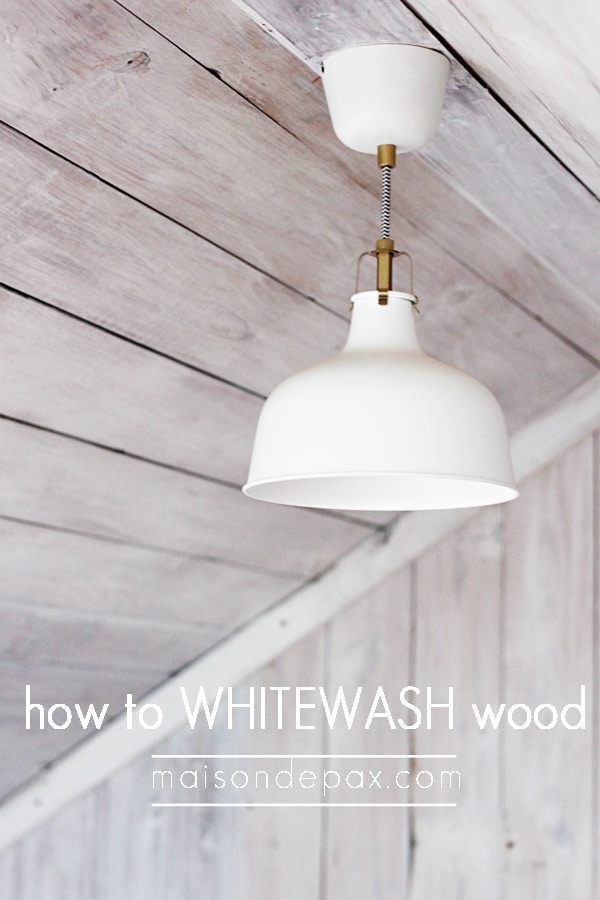
How to Whitewash Wood
Wondering how to white wash wood? Read on for a simple tutorial for whitewashed wood planks for walls or ceilings.
If you follow me on instagram, you’ve seen a lot of updates on our attic space renovation. And oh boy, do I have a lot to share! But I wanted to start simple. Today, I have tutorial for you on whitewashing wood.
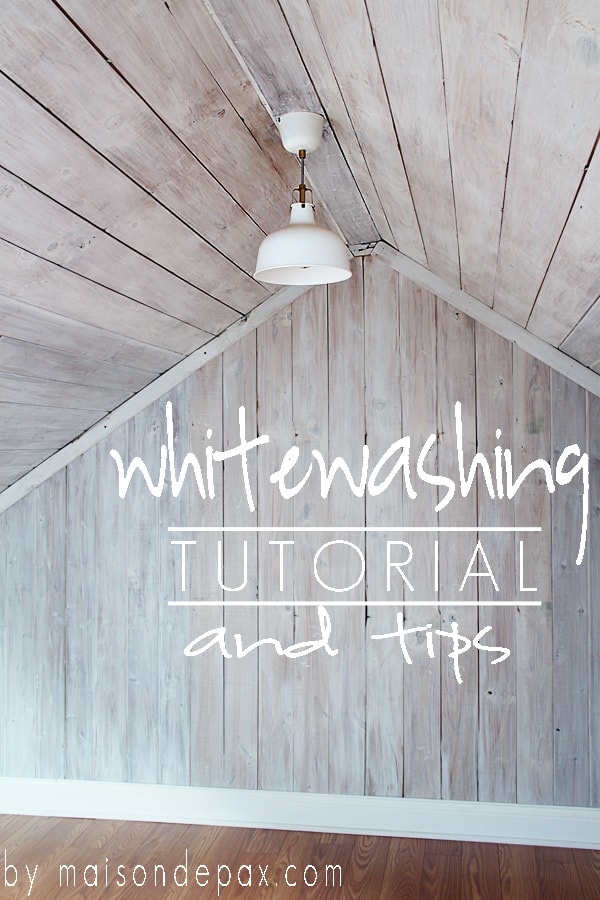
We wanted something light and bright for our attic space. We only put one skylight in the space (mostly because it’s going to be a beast to keep it cool during Texas summers!), and with the low ceiling, we knew we wanted white.
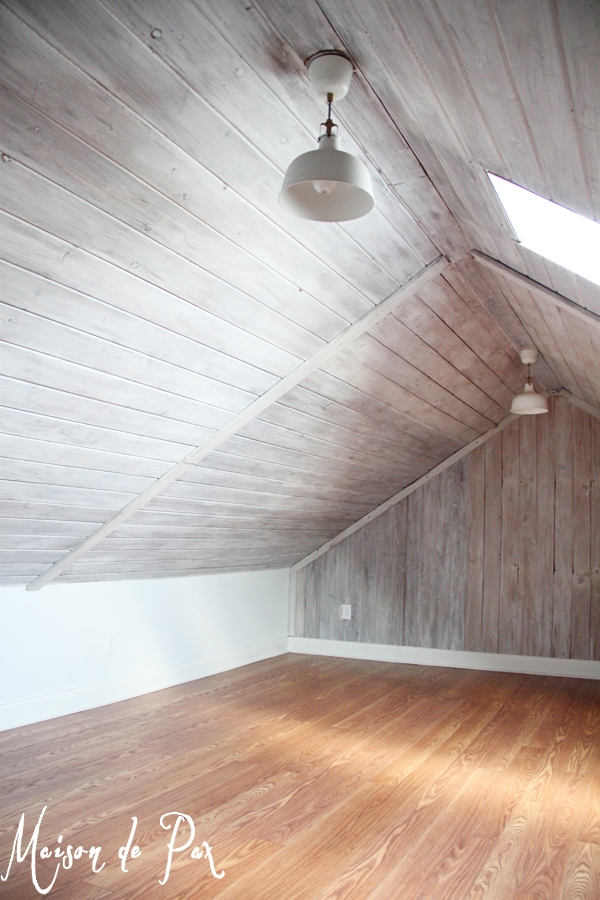
But our attic already had some of this fabulous, aged cedar planking… How could we resist capitalizing on that with wood walls?
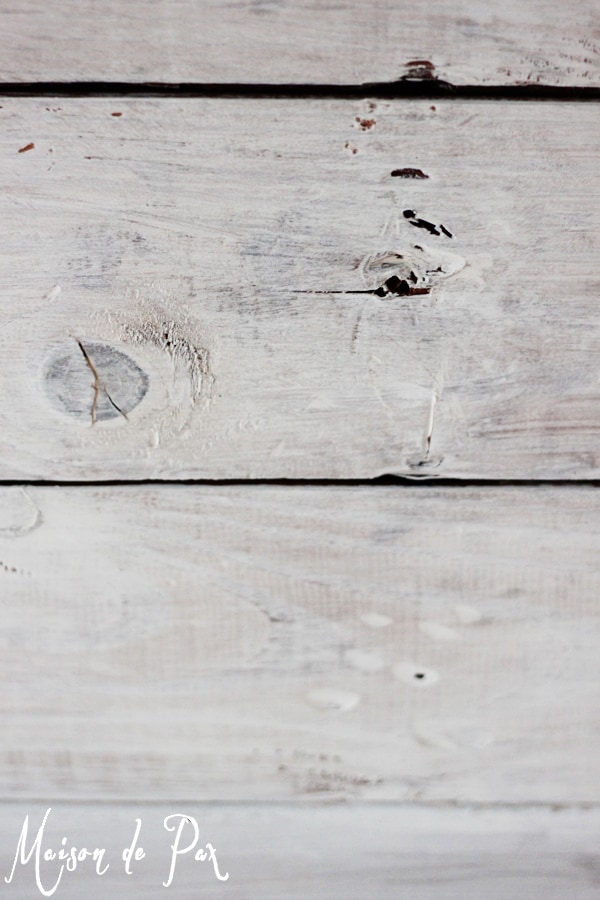
And how could we cover up all that beautiful woodgrain and texture with solid white paint? We couldn’t…
And so the whitewashed ceiling and walls plan was born. We wanted to get an authentic lime wash look, like an old fence, but on these lovely cedar planks.
Making Wood Planks look old
We ran into a problem at the very beginning, though (welcome to DIY, right?!?!): our gorgeous aged planks were a totally different color than the fresh, new natural wood planks we had to buy to complete the space.
While we could mix them up some, we knew we needed to try to match the new and old boards first, so we started by staining all the new boards to a color similar to dark wood of the aged ones. The match was far from perfect, but knowing that we were planning to whitewash anyway meant that they didn’t need to match exactly.
If you are considering whitewashing newer planking, I would recommend staining the wood surface a bit darker first. This brings out the knots and textures in the wood grain more clearly. Then, when you whitewash, you can keep more of the wood grain showing through.
Ok, on to the tutorial:
How to whitewash wood ceilings and walls
- (optional) Stain your wood a medium brown to bring out the grain and knots (we used Wheat by Rustoleum with just a touch of Kona to make it a bit darker).
- Mix up 1 part water to 2 parts paint: flat white latex paint is best (we used budget ceiling paint from our local hardware store).
- Brush (don’t roll) the white paint with water on in the direction of the wood grain.
- Wipe off with a paper towel or rag in the direction of the wood grain.
- Repeat steps 3 and 4 if desired.
Now that doesn’t sound too hard, does it?
And it wasn’t… but it wasn’t really easy either. Like a lot of painting projects, it’s more an art form than a science. You have to keep going until you love it…

Tips for Whitewashing wood
To help you reach the “love it” stage, here are some tips I found that helped. Each plank has its own identity, and each plank will take a certain finesse, but the overall result is wonderful… isn’t it?
Tip 1: The paint brush strokes in the direction of the wood grain are important, especially if you’re working with faux aged (i.e. stained new wood) rather than authentically aged planks. Some of your texture comes from those brush strokes, and you want them to work with your grain, rather than against it.
Tip 2: Have a spray bottle with water in it on hand. If you ever feel your paint is getting too thick, just squirt a little extra water in. The 1:2 water to paint ratio is a guideline.
Tip 3: Be careful at the ends of boards. The paint tends to glob up there a bit and show the wiping marks if you don’t rub it in well.
Tip 4: Don’t wipe too vigorously or you’ll have to put on a million coats.
Tip 5: Even though you’re working with watered down paint, sometimes a “dry brush” technique is the best approach. In other words, squeeze your brush out on a paper towel, get just a little watered down paint, and then brush it onto the surface of the board. “Dry brushing” watered-down paint seems counter-intuitive, but trust me; sometimes it’s the easiest way to create the desired texture.
Tip 6: If you ever do end up with ugly brush strokes or too much paint, use a wet rag and rub vigorously… As long as the paint hasn’t fully dried, you can wipe most of it off.
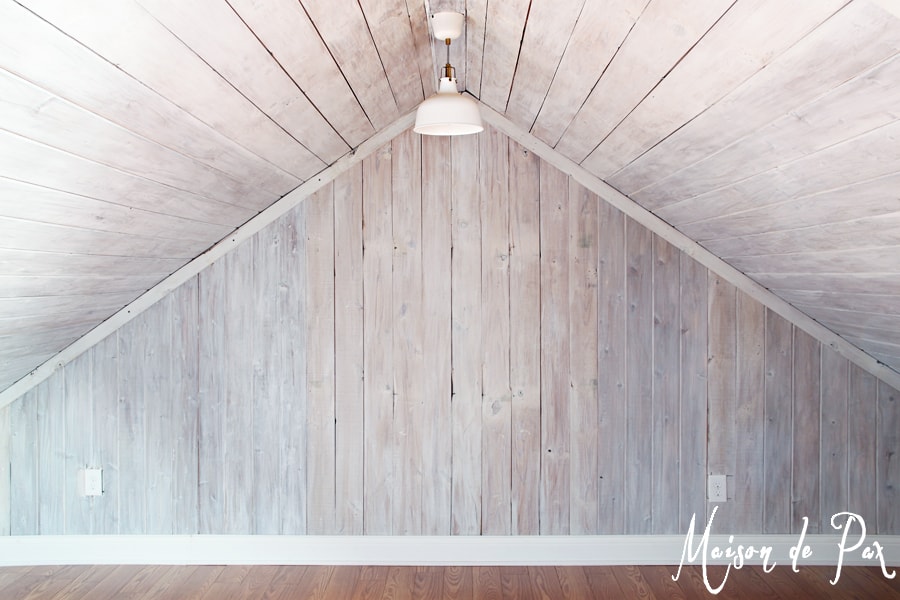
Tip 7: If you are layering any pieces a different direction (like our faux beams below), try to whitewash them before you install them so you don’t mess up your brush strokes.
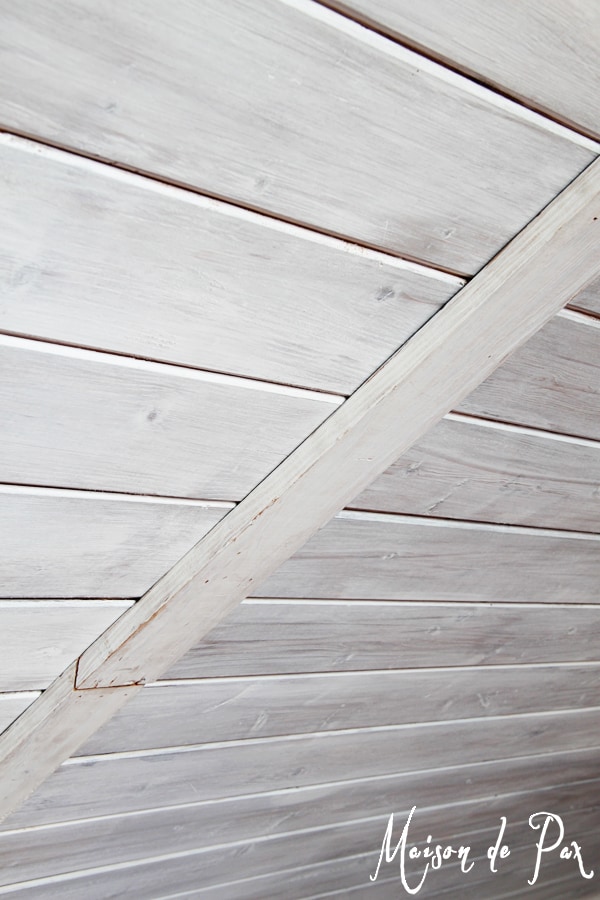
Though we stained and painted the entire accent wall and ceiling in the space (because we wanted the stain and paint to settle in the nooks and crannies authentically), I did whitewash the faux beams (which were used to cover the seams in the planks) on saw horses before installing them.

We loved the effect so much that we even whitewashed the closet door. I promise a tutorial on that soon…
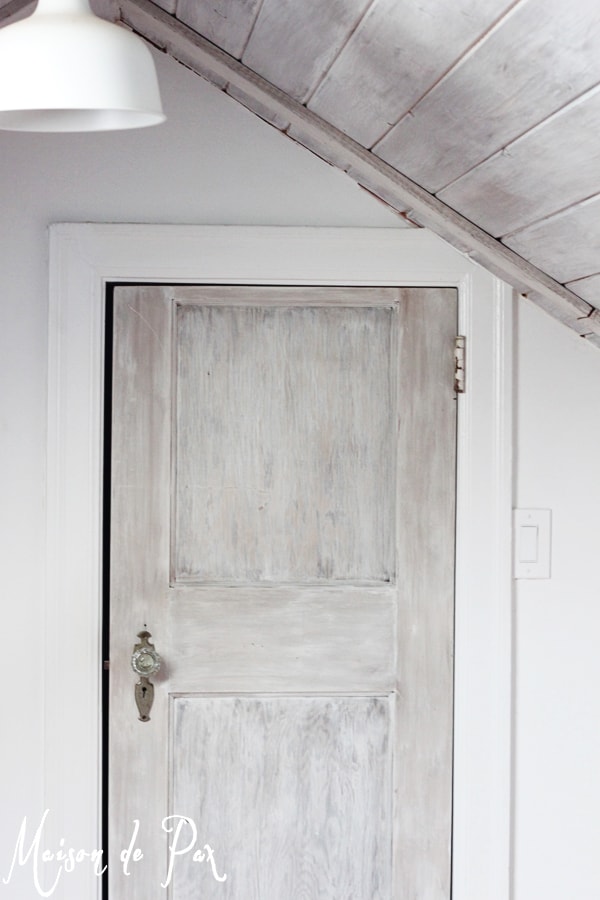
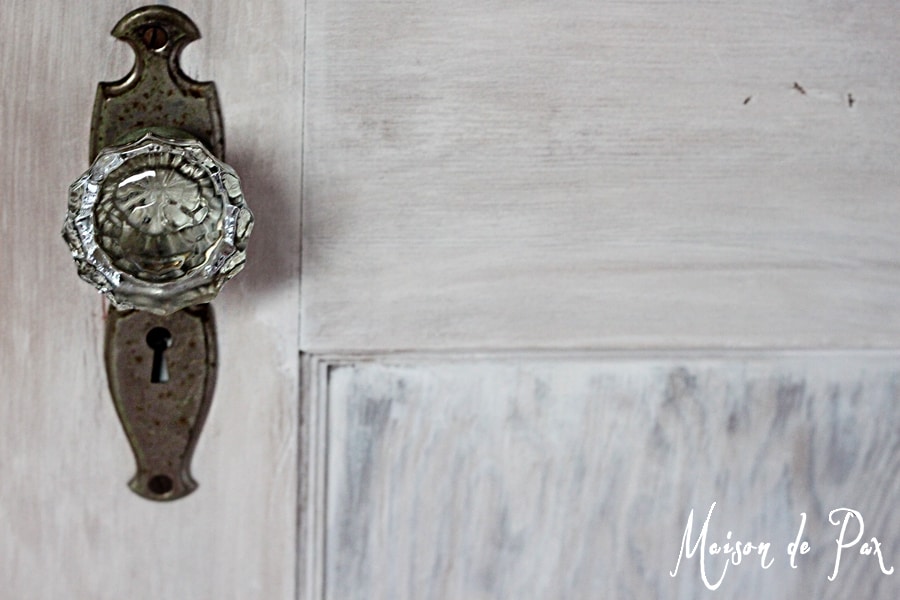
As a side note, I LOVE living in a home where we can find treasures like this old cedar door (which we sized down for the closet and whitewashed) in the attic. Just look at the gorgeous patina and crystal on that door knob!
And I LOVE the whitewashed planks… Do you? This same technique could be used on so many things, including other types of wood, accent walls, or a tabletop… What are you itching to white wash? 😉
Update! More whitewashed attic tutorials now available: whitewashed door, reclaimed wood stairwell bookcase, simple side table. Explore and enjoy!

Looks great!
Thank you so much, Brenda!! So glad you like it. 🙂
So I can’t figure out how to make my own comment without hitting reply on someone else’s! haha
But I was wondering…I think this is absolutely beautiful, and have decided to do an entire room in my new home that is being built. I had the painters stain all the shiplap for me and I am doing your process of white washing. My question is that all of my shiplap runs horizontal. Do I need to start at the top and go down, or does that matter? Also, do I have to work in the normal faux painting 3×3 box sections? I would figure doing it plank by plank would be a better technique…
How exciting! I bet it will be beautiful. If it were me (and remember, I’m a make-it-up-as-I-go kind of gal 😉 ), I would do plank by plank. And I would start at the top so that if I do drip anything (and don’t see it to clean it up) I can sand that spot just before I whitewash that plank. Does that make sense?
From my experience plank by plank for best results
Definitely do blank by blank for your job if the horizontal beams
Rachel, your attic renovation turned out gorgeous! I am about to whitewash the cedar planking in my living room but still a little unsure. The planking is already stained a deep brown but my question is would I not need to sand it all down first before painting? I asked one of the employees at Sherwin Williams and he said definitely sand it first. Seeing your beautiful results makes me want to do whatever it is necessary to get the same results 🙂
Thank you so much, Sarah! Here’s the tricky part: the stain is not so much the issue as the sealer (or lack thereof). Most stains penetrate the wood but do not seal it, so the paint can still penetrate the woodgrain and therefore adhere. If the wood has any kind of sealer on it, though, the paint will not penetrate into the woodgrain; this will not only give a different look (because soaking into the wood gives it the variation from the wood grains) but it very well may chip off, too, which would be a major bummer! And he’s right; chances are that if it is a stained wood it is probably sealed somehow, too. If it were me, I would probably try a deglosser and strong cleaner first (becuase you’ll want to remove oils, too) and then test an inconspicuous area. Give it time to soak in and dry and then try a scratch test. If it still scratches off, you probably need to give it a good sanding to ensure strong adhesion. Hope this helps!!
What about cheating and paiting them a medium and then whitewash AND aging it with darker glaze? It won’t have the wood grain though, but at least it could have an aged effect? No?
Hi, I am hoping you can give me just a little advice.
My whole house is paneled. It is circa 1960’s
Smooth and shiny with a small amount of grain showing. I have finally convinced hubby to let me get painted (It is his grandparents’ house and he wanted to leave as-is)
I don’t plan on painting it myself – I have a painter. However, I was hoping for something a little different that just painting a flat latex paint. Do you think a paneling such as mine can be whitewashed? do you have any other suggestions for painting a paneled wall that is just a little out of the ordinary?
Thank you so much, Dani
Hi Dani,
I’m so sorry, I just found this comment buried in my archives… I hope I’m not too late! Without seeing the paneling, it’s tough to say, but I do see two other options. You could go with a shinier paint (semigloss or even high gloss) for more impact. It would also accentuate the lines of the panels more than flat (which tends to dull texture); it might be a fun option. Otherwise, there are certainly possibilities of creating a faux texture using dry brush techniques, though it would be a lot of work. Just remember that smooth and shiny is going to need some good, strong primer to make the paint adhere (and probably a light sanding or deglosser first would be a good idea, as well). I hope this helps and again, sorry for the slow reply!
I accidentally bought a satin finish. How important is it to have flat?
It’s tough to say…. Satin paint may or may not absorb into the wood in the same way, and it definitely can look more opaque than flat (as it is made to be more durable), but if you can’t return it, you can always try a small corner as an experiment! You may be able to water it down a bit more and still manage. Good luck!
Wow! Nice job, it looks gorgeous!!! Now I need to whitewash too… hmmm…
Thank you so much, Heather! Watch out, it really is rather addictive. 😉
I’ve always wondered how this was done! Thanks for the easy to understand steps!
You are so welcome, Selene! I’m so glad you found it helpful. 🙂
This is gorgeous! It’s going to be an amazing space! I love it! We have an unfinished room above the garage and I wanted to do something similar!
Thank you so much, Shirley! I hope you’re able to do something you love in that space above the garage!! 🙂
This whole room is gorgeous! Thanks for easy step by step instructions. And I LOVE that door! Can’t wait to hear more about it!
Thank you so much, Nicole! I’m so glad you like it. 🙂 I promise to share the door soon!
I see….. brush and wipe are the secret components…. Your rooms looks fabulous. Can’t wait to see what else you end up doing in there…..
🙂 Have a happy week!!
“hugs” Crystelle
Crystelle Boutique
Thanks so much, Crystelle! I can’t wait to share the rest… I hope you have a fabulous week, too!
If I want to whitewash my outdoor deck, do I need to use different product since it needs to be water/weather proof?
Thanks!
I’m afraid the latex paint used was for interiors only. You’ll want to look into exterior stains if you are hoping to whitewash a deck. I hope this helps!
It’s been a few years since I originally white washed our tongue and groove pine ceiling. The colour has now faded and been absorbed into the wood. Can I re whitewash the ceiling a second time now to freshen it up?
Of course!
This looks so nice…………I did a whitewash on an armoire once and we loved it…..I added some gathered floral fabric for “windows” in the doors……..turned out great, but I have never done a room….thank you for sharing this. 🙂
Thank you so much! Your armoire sounds lovely… there’s nothing like a soft, simple whitewash. 🙂
This is so beautiful!! I’m so glad you shared the entire process! I am wanting a similar look for one wall in my sons room and everything I’ve tried thus far just wasn’t working!
Thank you, Holly! I’m so glad you found the tutorial helpful… I hope you’re able to achieve what you want in your son’s room!!
Such a beautiful space!
Thank you so much, Shannon! I’m so glad you like it. 🙂
What a gorgeous room! I love the white washed look with old wood peaking through. It’s a lovely twist on a an all white room!
Thank you so much, Abby! I appreciate your sweet comment… I’m loving it, too. 🙂
My goodness – GORGEOUS!! Pinning this!
Thank you so much, Karen! I’m SO glad you like it!! 🙂
Looks lovely! The whitewashing turned out so well.
Thank you so much, Anu! We have really enjoyed it. 🙂
Visiting from the Link Party Palooza. The white wash finish is beautiful, and you gave so many practical tips for how to successfully navigate this project – thank you! I would love to white wash a dresser for our guest bedroom.
Thank you so much, Abi! I’m so glad you came by and that you like the tutorial. I hope you have fun doing the dresser!!
So pretty. I love the new old look… I am featuring you tomorrow. Thank you so much for linking up with The Party Bunch!
Besos!
Desiree
Thank you so much, Desiree!!
I’ve been looking for information like this for ages – that I could actually understand – this absolutely made my day. Thank you so much!
I’m so glad it was helpful, Helle! I hope you are able to use it and enjoy it!!
Love this, Rachel! It’s beautiful! And awesome tutorial and tips… I need to find something in my house to do this with now!! Have a great weekend!
Thank you so much, Ronda! I’m warning you, it’s addictive! 😉 Take care.
WOW, looks great! I might have to give this a try!
I’m so glad you like it, Sandra! Thank you for your sweet comment. 🙂 I hope you find a fun way to use the tutorial!
This turned out so so lovely! Thanks so much for linking up to our Link It or Lump It party!
Amy @ http://www.delineateyourdwelling.com
OMG! This is gorgeous! I just want to whitewash my whole house ;p
Awesome job.
Thank you so much, Rayana!! I admit that I had that urge, too, when I was finished with the attic! 😉
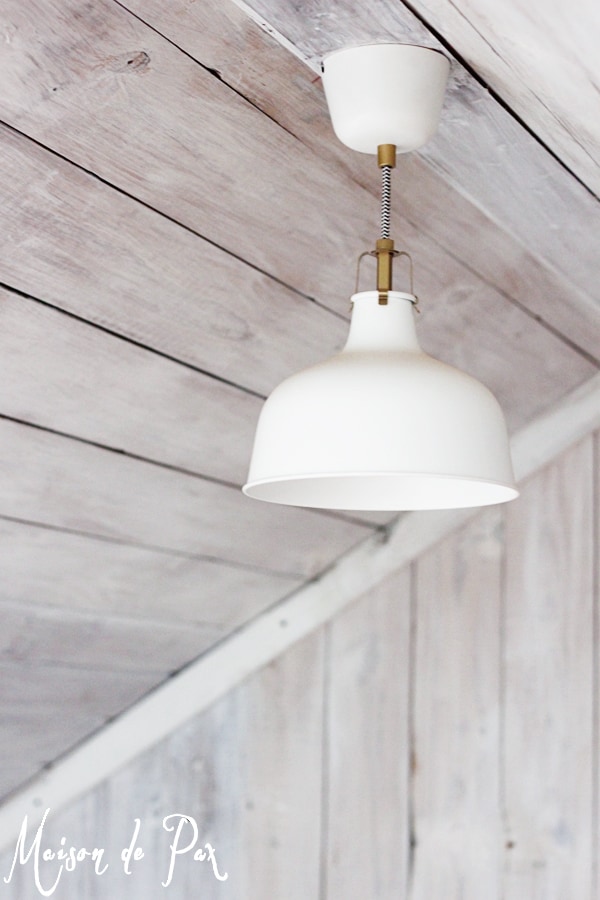
I love this space and this tutorial! Amazing job and the lights are killer!
Oh thank you, Summer! I’m so glad you like it. 🙂
The images of the boards are great! People are always asking us about whitewashing reclaimed wood….
Thank you so much! It was a bit of an experiment, but I’m so pleased with how it turned out. 🙂
Can I do this on an all ready painted surface?
I haven’t done that, but it’s certainly worth a try, Cathy! The painted surface won’t suck up the paint like raw wood, though, so you’ll probably need to wait a bit longer after brushing on the whitewash before you wipe it off. Your wiping technique (and the texture that it leaves) will be more important, too, since you won’t have the woodgrain showing through for variation. I would suggest trying it on some scrap wood first and seeing what you can accomplish. You also might try dry brushing some watered-down white, as that can have a similar look to whitewashing and might give you better faux texture. Hope this helps!!
that looks amazing, i love the look! Pinning! Saw this at the 36th avenue;)
Thank you so much for visiting, Kristen! I’m so glad you found me and that you like it!! 🙂
It looks beautiful!! Amazing space, I love the white washed look!
Thank you, Mindi! I’m so glad you like it; we’ve so enjoyed it! 🙂
This turned out gorgeous! I just wanted to let you know that I am linking to this post on 4/8 at Simply Creative Living if you don’t mind.
Thank you so much, Alyssa, I’m honored! So glad you like it. 🙂
I loved how you white washed the wood wall.
I would love to do this in my basement. How would I do this with wood paneling.
I’m so glad you like it, Audrey! Without seeing the paneling myself, it’s hard to say… but the biggest thing to keep in mind is that wood paneling often isn’t real wood and therefore won’t have natural grain for the paint to fill in. You may have to give it a more faux finish to achieve a similar effect. I would probably start by just trying it: paint on a little whitewash, wipe it off, and see what happens. If that doesn’t work, try dry brushing: go ahead and water down your paint and then get only a tiny bit on a very dry brush. Use the brush to create the texture you’re looking for and don’t wipe it off. It’s all trial and error until you find what you love. Good luck!
Love this! We currently have a cedar home and i’ve been really wanting to try this for sometime now! Did you stain the old wood or just the newer wood before whitewashing? Thinking of doing this for the bedroom but leaving the ceiling natural for contrast? How long did this process take?
I’m so glad you like it, Summer! We only stained the new wood, but you could certainly stain it all if you wanted a darker base color. We worked on it in pieces (because I wasn’t really supposed to be breathing too many paint fumes while pregnant!), so it’s hard to say exactly how long it took. Maybe 10-12 hours total?? It helped that we waited to install the flooring until after we finished so we didn’t have to worry about drips. A natural ceiling in contrast to white walls would be stunning! I hope you have fun making over your space!!
Hi! I would like to know what kind of brush did you use? Thanks 🙂
It was a cheap 4″ synthetic brush. Hope this helps! 🙂
The ceiling looks terrific. I lofted my attic and am not happy with the dry walled ceiling. Whitewash planking is my choice as well, I am just searching for thing wood to use as veneer planks to save space and weight. Now I just need to decide if I will run my planks horizontally or vertically.
I am so glad to see yours looking so beautiful; it reassures me that my plan is going to yield the pleasing result I imagined.
I am curious about how you handled the skylight. I have a number of them, and I don’t know how to finish them with the planking. Did you run the planks to the edge of the well, but leave the wells dry walled? Or, did you add planking inside the well? How did you finish the edges and the transition from ceiling to well?
Is there any chance you could post some photos of the skylight areas? Thank you for inviting us in to glimpse your home.
Hi Ellen,
Thank you so much! I’m so glad you like it!! We did not have any drywall on the ceiling at all, so everything has been planked (including the well for the skylight). We just butted the vertical boards right up against the horizontal ones… and given the rustic look of the planking, I think it looks fine. That is a great question, though, and I will do my best to get a photo of it soon (I was hoping I already had one, but I don’t seem to!). Hope this helps in some way!
Yes, this does help, thank you. I’ve been pondering how I will handle it, and have really just not seen it anywhere, so I’m quite excited to see yours.
I wish I had thought about planking when I lofted, but at the time I wanted something sky-like and sparkly. Metallic paints were hot at the time and I went with that, but it never felt right and didn’t sparkle. It matches the sky, so is great when the sun is out, but when cloudy it is like a steel canopy and quite heavy. There is some outstanding wallpaper, but the cost is prohibitive.
I know that the whitewashed planks will be so much more appropriate and pleasing.
Looking forward to your photos. Sorry for making you do more work, though.
I change my mind about design choices all the time! You’re not alone. 🙂 And please don’t feel bad… It’s about time to share some more details of the attic; I’ll try to have them up soon. Take care!
I think it looks beautiful! I also love the whitewash look. I have already done my brick mantel and our stairs and am a big fan of how it immediately lightens up a room. Your space is lovely and you did an amazing job. Thanks for the tips! Oh, and that gorgeous door – what a lucky find!
Thank you so much, Suzanne! I can’t tell you how much I appreciate that. Whitewashing is addicting, isn’t it?! Have a great week!
I love the look of your white wash. We have the knotty pine paneling that is real wood but has a varnished finish on it. It is very old and I want to know if I can just white wash over it without any other pre step preparation?
Thank you so much, Barbara Ann! Our wood was raw, so it soaked up the paint… It would not necessarily work the same way with a varnished wood. I did, however, paint knotty pine paneled walls in my old house. We were trying to simply paint them white, but they ended up looking a little whitewashed because we didn’t prime beforehand; the knots all showed through. I would suggest experimenting. Water down a little flat white latex paint and be ready with a wet rag to wipe it off if you don’t like it. You can also rough up the walls slightly with some fine grit sandpaper beforehand to allow the paint to grip a little better. I know it’s hard to “experiment” on your walls, but if you can find a semi-hidden area to do so, that’s going to be your best bet. Every type of wood and varnish will take the paint a little differently. I hope this helps in some way!
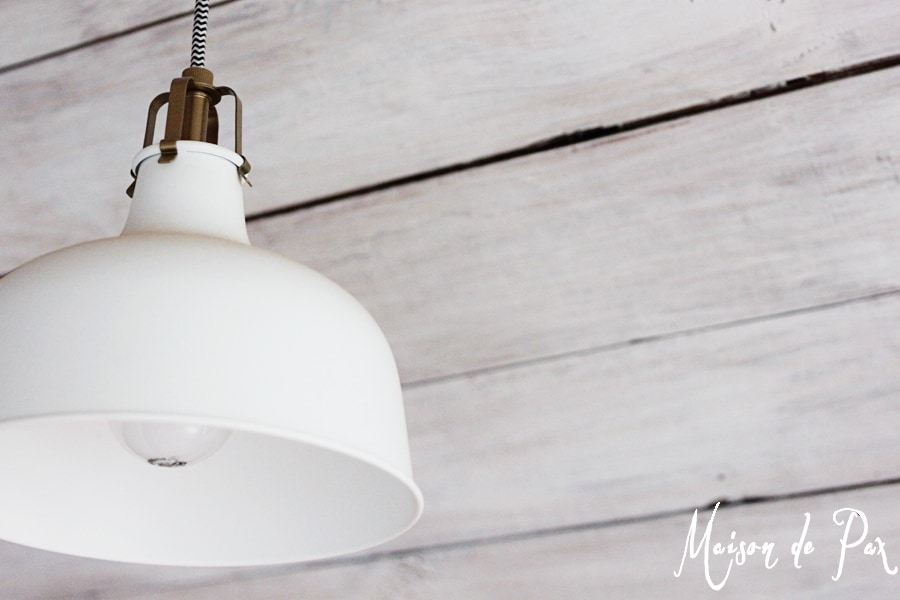
Can I ask where you purchased the ceiling light fixtures? Beautiful room!
Of course, Nicole! We got the lights at Ikea. You can find them here. Hope this helps and thank you!
I love your style! Can you please tell me where you found the white ceiling lamps that you used in your white-washed attic? They are adorable! Thanks!
Thank you so much, Carrie! So glad you like it. 🙂 You can find the lights at Ikea here. Hope this helps!
I love this attic. I have a half wall of old paneling in my living room. I finally found something that I like so that I can fix this ugly paneling. I have put oil on it a lot in the past, it has a little bit of a laminate or glaze over the wood. Do I need to sand it before I start this process? Or deglaze? If this works I am going to do my kitchen cabinets too. But they have that same old glaze on them. What do you suggest I do? Should I clean them with the vinegar and water that I have read about? Or just take off painting?
Thank you , great job! beautiful
Thank you so much, Angela! Our wood was raw, so obviously ours was little different. I bet that with a rag and some finesse you could get a similar look over the wood, but I’m afraid it would chip or rub off later. You could try an inconspicuous corner, give it a week, then try scratching it off. If it comes right off under your finger nail, I would try deglazing it somehow. Vinegar and water is a start, but it won’t remove varnish if that’s what’s there. I wish I had a better answer for you, it’s sometimes just a game of trial and error. Good luck!
Hi Rachel! What type of wood do you find works best to whitewash? I’m going to try to start with a simple bookcase project for this tecnhnique. Thank yhou!
Hi Kaitlin, I’ve really enjoyed working with cedar. It offers texture and variations without having too much grain. But I’ve whitewashed cheap pine and painted hardwoods, too, and had great success with all those. Good luck! xx
Hi Rachel! We have an old cedar closet we are trying to turn into a laundry room and I like the whitewashed look better than painted shiplap, plus the cedar is such a pretty wood to lose to paint. One thing is a lot of people I have talked to have a lot of concerns about painting / working with cedar because of the oils and how much it absorbs. Some people have said it ends up with a pink look. How is the whitewash holding up over time, and how is whitewashing / painting cedar different from using other woods? I don’t think our cedar wood is stained at all, it’s probably 30-60 years old so it’s definitely aged. Thanks!!
Hi Elizabeth! Unfortunately, we moved out of that home a little over three years ago, so I can’t tell you what it’s done over time. You’re right, that the colors of wood can sometimes seep into paint over time (pine tends to yellow, for example)… but in the year plus that we lived there after we did the project, we didn’t have any trouble. The other thing to remember, though, (especially if your paneling really is raw) is that if you change your mind later, you can always prime and paint over it. Sorry I don’t have more info for you!
My husband and I went out last weekend and looking for our forever home. We ran across a lot of new homes that had this link of flooring, or walls. I truly dig the idea of doing it ourselves. I so don’t want a brand new house, I want something I cam make my own. I agree when you said “You have to keep going until you love it…” I am a painter too and that statement is SO TRUE. Have a great day and thank you for the inspiration.
Oh thank you, Deedra! I so appreciate your comment, and I’m so glad you like the space!! Hope you have a wonderful day, too. 🙂
I have an old cape house in Maine and I’ve recently had new pine tongue and groove installed on my attic bedroom ceilings. I want to create the white wash look on it that you did. I was thinking of first doing a grey stain on the wood followed by the white wash technique. When you used stain, did it have any poly in it or was it just stain? Also, should the white paint be flat latex or should it have a sheen like semi-gloss?
It sounds like it will be beautiful! My stain was just stain – no poly, and I used a flat white latex. I hope this helps!
Hi! Just bought a new house and have paneling everywhere! I really want to whitewash my master bedroom because I LOVE the wood grain, but your tutorial didn’t say anything about having to sand the wood first. Did you not have to sand it? My paneling has a glaze or some sealant that has kept it in great shape since being built in the early 70’s, so I’m afraid about white washing because I was under the impression that you HAD TO sand, but if you painted you can just use Kilz and not need sanding.
Hi Laura,
Here’s the problem: ours was totally raw wood; there was no pre-existing finish, so no sanding was needed. Unfortunately, you’re right, the varnish or poly that is probably on your walls will definitely affect how paint sticks. If I were you, though, I might try using primer AS my whitewash… Definitely try it on a place were you can cover it up if it doesn’t work!! But who knows, it should adhere well enough and it might just save you the trouble of stripping off the finish. The other thing you could consider (though I have never used it myself, I’ve heard wonderful things about it from people refinishing furniture) is liquid sandpaper; it’s essentially a stripper of some sort. I hope these ideas help get you started! 🙂
So we just bought a house back in June and a majority of our walls and ceiling are carsiding and wood planks. When we first looked at the house we loved it then went to look at it again with a realtor and the home owners painted the downstairs carsiding walls all white! I was so upset that they ruined perfectly natural wood but it wasn’t enough to prevent us from buying the house. So now we I’m really wanting to do something about the solid white look. Any suggestions or ideas on how to get the white washed look that’s already painted?
Hi Laura! I can’t think of another way other than sanding it back down to the wood, followed by whitewashing.
Thanks for the inspiration! I’m planning to whitewash some rough cedar in our basement as an alternative to drywalling the space. Maybe you already answered this in the comments (haven’t read all of them) but how many coats did you do? Were you able to achieve the results above with one pass?
You are so welcome! I’m so glad you like it. 🙂 Yes, I was able to do it all in one pass, but I did only 2-3 boards at a time. With each section, it took some whitewashing, stepping back to examine, and then returning until I found the balance I wanted. There were even a few spots that I returned to a little later (remember the note about wetting your rag to remove some if needed) if I wasn’t happy with how they blended into the rest of the room. I did not, however, have to do a second full coat. When I finished those last 2-3 boards, I was done. I hope this helps!
Rachel,
I bought a 1989 fixer upper and just took the upstairs carpet out… It is your post that inspired me to DIY plank the entire upstairs and complete your technique to them. I am thrilled and cannot wait to finish, you are truly an inspiration 🏡❤️!
Many thanks,
Kimberly
Chesterfield, Va.
Oh Kimberly, I cannot tell you how that warms my heart!!! So so glad to hear it. I hope you love your home for many many years. 🙂
I have a pine ceiling that has been stained and varnished. Is there anything I need to do prior to white washing the wood? I am planning on white washing and adding light gray accents by dry brushing.
Thanks
It’s tough to say… Each finish is different, but you probably will need something more than just latex. Like furniture makeovers, latex paint requires you to sand the piece so that it will adhere. Chalk paint, though, is a great option for furniture makeovers because it will adhere to anything. The only problem is that chalk paint needs a top coat. So you have a few options: you could try a deglosser (I’ve never used one, but I hear they’re a great option for prepping finished surfaces for paint) and then your whitewash. Or you could try the whitewash with a chalk paint. It can be watered down and since it’s a ceiling, it may not even need a top coat. Experiment on a small surface and see what works. I hope this helps!
Hi! This looks great. I want to do this at my cottage. It is entirely old pine walls and ceilings with a clear coat. I asked a painter to quote on the job and he said you can’t whitewash over a clear coat / stain. That you had to sand it down and remove it first. It sounds like you did the opposite and just painted over the stain. Am I right ?
If you don’t mind letting me know i would be very grateful. Would love to go nuts on the place !!!!! I think it would look so much fresher !
Best regards Amanda
Thank you so much, Amanda! There is one important distinction: our ceiling had no sealers or clear coats, just some stain that soaked into the wood. I was simply using color to try to match the existing color of the aged wood (since we had some old and some new planks). So your painter was probably right; most sealed things need to be sanded before they can be whitewashed. You could always consider a deglosser or trying chalk paint, though, rather than a full sanding. I don’t have experience there, but it might be worth a try on an inconspicuous area to see if you can save yourself a full sanding. Sorry I don’t have an easier answer for you! Good luck!!
Thanks Rachel! This makes sense. The stain versus clearcoat is an important distinction. I may try a deglosser or chalk paint – great idea!!! amanda
You are so welcome. Good luck!!
Did you have to sand the walls before you began to paint?
I did not, but our planks were raw. If you have a preexisting finish on your walls, then you will definitely need to strip, sand, or degloss them before starting. Hope this helps!
Is it possible to whitewash a wood back porch like this? I want to put my house up for sale but need to do something exciting with my back wood porch that looks like it has no protection anymore on it. Thanks
That sounds like a beautiful idea, but it will take some experimentation. If the wood really has no protection at all, then it should suck up the paint and work quite well. If there is any sealant remaining, though, the paint may not adhere. You also will need to consider how you will finish it after you whitewash it; wood outdoor needs to be protected from the elements. You could also look into gray or white wood stains; I think some of the outdoor deck stain lines have some lighter options. I hope this helps!
lovely room
Have you had any stains seeping through from the cedar?
I want to paint new cedar ship lap and I am being told that I have to first prime with an oil base(?) then paint with acrylic or the stains (tannins) from the cedar will seep through.
I would rather do the project your way if the stains have not appeared.
Thank-you.
Thank you so much! Unfortunately, I don’t actually live there any more (we moved out about a year after we did the renovation). In that time, though, I did not see problems with tannins seeping through. I’m sorry I don’t have better info for you, but I hope this helps a little!
Hi Rachel! My husband and I just built a three season room that has knotty pine. I’ve done two coats of white wash. I did not stain it to begin with (he didn’t like that look so I compromised). Did you put anything over the whitewash coats? A clearcoat? A protective coat? Or did you just whitewash and leave it?
Thanks!
Hi Colleen, your new room sounds lovely! I did not use a protective coat, but ours was mostly ceiling, so it really didn’t receive much wear. The paint absorbed into the wood pretty well and it was such varied wood that nicks and scratches probably wouldn’t have shown anyway. But it’s a judgment call on whether you want a protective coat on yours. I would probably do a scratch test and maybe even give it some time. If it begins to make you nervous, a protective coat probably wouldn’t hurt. I hope this helps!
Wow! This is exactly what I was looking for. I do have a question, though. I’m moving into a home with existing knotty pine paneling that I’d love to whitewash. It’s stained currently. Do I need to do any sanding to get the glossy layer off? Do I just go right over the top? I’m unsure how I should be prepping the wood, if at all. I also read in some other article that you can shellac over the knots before white washing, and I’m not sure the purpose of that. Any insight?? Thank you, beautiful work and very helpful article.
Great question, Laura. The answer is yes. Without knowing what kind of sealant you have on your wood, I’m not sure exactly how to direct you, but for the whitewashed look, you want the watered down paint to soak into the wood, which can’t happen if it’s sealed. Also, your paint very well may flake off later if the paneling is not prepped properly. You could consider chalk paint or primer (which might adhere pretty well even with a sealed layer underneath), but then you have to finesse the finish a bit more to get the whitewash look since the paint won’t be soaking into the woodgrain. I’m sorry I don’t have more specific instructions, but I hope this helps in some way! For what it’s worth, I painted knotty pine paneling in my first home using plain old semigloss paint with primer. It was definitely more opaque than this whitewashed look, but the knots still showed through. If you can’t achieve the lighter look, you might consider trying that. Good luck!
Great info! Thanks for the reply! My backup plan if the white washing doesn’t go well is just to paint it white 🙂
I don’t think you can go wrong! 🙂
Love this! Quick question–did you simply nail up 1×4 pieces of wood or were these tongue and groove? We are getting ready too start a similar project in our attic (soon-to-be bonus room), and there are already some pine boards up there that are not tongue and groove. We want to match them, but it seems most people plank ceilings with tongue and groove, so I was curious what you guys did here. Thanks!
Ours were tongue and groove. Hope this helps!
Hi, question. Why the stain versus just washing down with 1/2 bleach/water and/or TSP? thanks so much and it looks GREAT!
Thank you so much, Kristi! Two reasons: first, I was trying to match the aged wood we had in places, so I needed to darken the new ones… Second, I found that the whitewash had more variation (which is what I was hoping for!) with the stained (or naturally aged) wood underneath. Without it, you couldn’t see as much wood grain through. Hope this helps!
Hi Rachel! I just came across your blog and this was the first thing I went to and read. Your ceiling turned out beautiful! I am assuming because this is latex paint you did not apply a topcoat or sealer of some sort…on either the ceiling or door. Is that correct?
Thank you so much, Helen! And no, we did not apply a top coat. Hope this helps!
Hi there! Sorry I am late to this party but I googled white washing planks and you came up 🙂 I want to do a tray ceiling and wanted to ask what kind of “new” wood to buy and where. Tight budget here, so I am thinking something thin and cheap from Lowes or HD. Any input is welcome.
We used tongue and groove cedar planks. I love the grain of cedar and its natural rot resistant properties… But it’s not necessarily super cheap. You could certainly try some grooved planks at Lowes or HD (in fact, I think they sell packages of pretty thin wood for planking walls), but be aware that the white wood (often poplar, but not always) that they use for most products like that has much less grain to it than cedar does. You may want to see if you can create a look you like with a small wood sample before you buy and open big packages of planks. I hope this helps!
Rachel,
First of all thanks so much for your wonderful blog. Things like this our so helpful for all of us first time DIYers. I have untreated wood shiplap that I’m wanting to whitewash. My question is, do I need to stain it first? I read in the comments something about the whitewash might possibly soak in. I would like to cut down as many steps as possible without compromising the look that I’m going for. Thanks in advance for your reply!
Great question, Tiffany! If it is completely untreated, then the world is at your fingertips. 😉 The problem is that types of wood vary in their grain, so you’ll want to test a few spots to see if there is enough natural grain in the wood to show if you simply use watered down paint. Watered down paint will give you the whitewash look, but it might come out very vanilla/bland if the woodgrain isn’t strong enough. And I’m assuming it’s new wood? Aged wood also has more pronounced grain and colors than new wood, which is actually why I stained mine first. I was mixed aged wood and new wood, and I needed the new wood to have a similar color/depth to the aged wood before I whitewashed it all… If you are happy with the look of just the paint, then skip the stain! But be sure to test some first because adding the stain will give more depth and variations to the grain. I hope this helps!
This is so pretty! Going to try it in my wood paneled laundry room. 🙂 Can I ask where you got those cool white pendant lights pictured?
So glad you like it! The pendants are from IKEA. 🙂
I am looking to white wash coffee and end tables that are wood but have varathane on them, want them to have more of a washed out wood look. could you help or give some ideas, thanks so much
Unfortunately, you may need to strip the varathane off if you really want to achieve a whitewashed look. You could also try a light sanding and then a wash with a chalk paint. It won’t penetrate the wood unless you remove the previous finish, but you can sometimes achieve a similar look with a wash or dry brushing over an existing finish. Just remember that if you create a faux whitewash with chalk paint, you will still need to seal the piece with wax or poly over the chalk paint. I hope this helps!
Did you have any issues with the latex bonding to the stain. I’ve always been told latex paint doesn’t adhere to oil based paint
Great question! Latex paint generally will not bond with oil based paint, but I didn’t have any trouble with this because I used a penetrating stain, not a paint. The latex also managed to soak into the boards even after the stain because I did not seal the boards at all. By all means, though, if you are concerned about the stain you want to use, test a small portion! Always better to be safe. 🙂
What if you were to whitewash before putting it on the wall….how would you cover up the nails? Love this look!!
Hi! You could try saving a bit of the whitewash paint in a small cup and then touch up the nails. Primer will help it adhere better- but it is a rustic look so it would probably be fine.
Hi,
Our paneling has a stain and looks like a seal to it. should I sand it first? this would be in our basement.
hi again, I read through some of the previous comments and found the answer thanks!
Thanks for being so proactive!! Good luck!! xo
Would love to know if there is a sealant of some sort that has to be over the white wash boards if I do this on my bathroom ceiling?
That’s a great question, but it doesn’t have an easy answer, unfortunately. It all depends on the amount of moisture that actually accumulates in your bathroom, which is dependent on the airflow in the room, the ceiling height, whether or not you have a fan, etc. I usually paint regular sheetrock ceilings in smaller bathrooms in satin paint, for example, to make them a little more water resistant, but it’s not always necessary. Cedar is actually very rot resistant (which is why they use it for fences, etc.), so if it’s real cedar, then you probably don’t need to seal the whitewash, but I’m afraid I can’t answer for sure.
I love this! Do you know if this will work on faux wood paneling?
Thank you! Unfortunately, the short answer is no. This particular technique will not likely work on faux wood paneling… but the long answer is that you can still definitely achieve a whitewashed look; it will just likely take a different process. This technique relies upon the stain and paint seeping into the raw wood. For faux wood paneling, you would likely be more successful with a kind of dry brush technique since the paint won’t absorb into it. And as with all paint jobs, you’ll need to make sure that you have good adhesion to the wall (maybe try a chalk paint or some kind of primer??) as well as a good seal on top so that oils from hands touching the wall won’t discolor the paint. I hope this helps!
Absolutely love this and so pleased to have found your article! We’ve just purchased 1600 sq ft of rough sawn fir planking to do our entire basement ceiling (previously 1980 ceiling tiles) and we want to whitewash the whole lot but was a bit uncertain how to tackle it. Most other articles we found were for very a smooth shiplap finish but ours is definitely a bit more rustic, very much like yours. Your tips will definitely help! Thank You!
I’m so glad you found it helpful! Good luck with your project! 🙂
Just found this article. I have a 108 yr old home with all shiplap! We have just had the dark exposed wood for many years. I was wanting to whitewash, but was thinking about using different color variations. An suggestions?
If the house is that old, just beware that the wood make take the paint a bit differently in some places. Anywhere that there has been grease or oil that may have gotten onto the wood may have trouble taking water based paint. But if variation doesn’t bother you, then go for it! I think different colors could be so fun!
We have a job to whitewash 2 cottages full of rough sawn cedar walls & cedar plank ceilings with wood beams. We have been told you need an oil primer put on before whitewashing. Is this true or can we use waterbase? Will we get the same effect whitewasing over the oil primer as you got..you didn’t mention priming… I dont think?
Unfortunately, it all depends on whether the boards have already been treated with anything. Ours were totally raw wood, so water-based paint wasn’t a problem. If they have previously been treated with a sealer or oil, though, that might be why you’ve been told you need an oil primer.
Thk u for your response. We were told that cedar wood bleeds through the whitewashing and leaves a brownish or pinkish film unless you use an oil primer. Your saying you did not have that experience…from what you’ve said you didn’t use primer and yours looks perfect…doesn’t look like its bleeding.
You’re welcome! It’s true that wasn’t our experience. In the years we lived there (we have since moved), we didn’t see any bleeding through… but our was also mostly new wood. If your wood is already very aged and has a lot of color to it, I guess it could potentially be a problem. I wish I could tell you for sure!
Rachel, this is so beautiful! Thanks for the helpful tutorial! We are finishing my daughter’s playroom in our bonus space. Knee walls with sloped ceiling. We installed pine planks for the sloped ceiling. Going for a modern dollhouse theme. I really want to white wash the planks to give it a more modern look, but I hate how the oil-based white stains yellowed on my test planks. Two questions 1) any thoughts on latex’s ability to stay true white? 2) how did applying the white wash on the ceiling go? Should we plan to be showered in paint? Floor is unfinished so no stress there, ha!
Thanks!!
I’m so glad you like it, Brittany! Pine can be tough, as it often leans yellow. I think you’ll be fine using latex (that’s what I used), but it still may take some experimentation before you land on something that won’t look yellow; that’s just the nature of pine. You could try applying a pre-conditioner to the wood (like you would use before staining) or you could try a water based gray stain and let it fully dry before you whitewash. Either (or possibly both) of those things might help tone down the yellow that wants to come through when you begin painting. And since the whitewash is applied in a pretty controlled manner (ie with a brush and rag rather than a roller), the mess wasn’t too bad… but like you, our floor was still unfinished, which is definitely easier than worrying about drips on a finished floor! I hope this helps!
Rachel,
Thought I would let you know that we followed your advice with a watered down grey based latex (sherwin williams eider white) and could not be happier with the results! It totally toned down the yellow and only took one coat! It even has a chalky grey look to it, which was perfect for us. We finished in late September and it hasn’t yellowed any since then. Thanks so much!
That’s wonderful news, Brittany!! Thank you so much for the update. 🙂
This is a whitewashed effect, not whitewash, because whitewash is a mineral based solution of slaked lime, chalk, and water and not diluted acrylic paint.
True! Thanks for clarifying!
You have given very good information about whitewash wood in this blog. I was looking for such a blog because I am also working as a Wood Interior in my house. I received accurate and helpful information from your blog. Thanks a lot for this beauty Enjoying article with me. I appreciate it very much!
Glad it was helpful!
Later this year I’ll be moving into the house my grandparents’ built in 1960. The kitchen and dining room are original paneling that my father had a friend freshen up by reapplying polyurethane to them 12 years ago. I hate the shiny look. Originally I was thinking of painting but now I’m thinking whitewashing them. My question for whitewashing them, do I need to sand the wood first?
Any time you paint, it’s always best to sand to give the paint something to grip. The shiny surface from the poly is hard and meant to resist stains, so I would recommend sanding them! You can also use a chemical deglosser as well.
Sorry for the double response, but I wanted to add one more thing: a true whitewashed look requires the paint seeping into the wood grain, and the polyerethane is designed to keep it from doing that. To achieve a real whitewashed look, you’d need to remove the poly entirely. However, you might be able to get a very similar look with some dry brushing and rubbing… but you will still need to sand or degloss the poly to make sure the paint will adhere and not peel off. It might be a bit of a trial and error process, but thankfully you can always paint over it in the end if it doesn’t cooperate. 🙂 I hope this helps!
Looks amazing Rachel! I have been wanting to do this in my basement and have a room I am turning into a fitness room to start with. A room that is not important to learn on. My basement has a tremendous amount of old barn wood on the walls all natural oak with a very dark natural patina and I have 5 gallons of retail store contractor grade paint I purchased for this. My question is mostly because I am a male and impatient do you feel a person could make it look decent by rolling a board and brushing down with a wider brush such as a drywall brush or wall paper brush and then use a paper towel or rag for the final wipe? The thought of doing just this room, not even thinking about the rest with a brush is agonizing! Just curious if you have even tried the lazier/quicker technique? Sorry as I may have posted this more than once…
Thank you, Fred! And I completely understand wanting to try to do this with a roller. By all means, you’re free to give it a try! The problem I found was that the watered down paint made a huge mess, but at least with a smaller brush I was able to control it somewhat. Now comes the joke about me as a female needing control. 😉 But really, I encourage you to play with the technique – if your planks have a slightly different texture or absorbency than mine did, then you might have success with a roller or a larger brush! Just make sure you don’t let it dry too much before you wipe it down. I hope this helps!
This is so beautiful and airy. Makes me feel like I want to start my project immediately. I have a low-ceiling, unfinished, very much raw and exposed basement (that I now slowly put more and more fitness equipment in) and I want a quick and easy solution. So, I am debating spray painting (white) versus white-washing (definitely without staining – it is a crazy mess with ducts and cables everywhere). I do like the white-washed look so much but it will be way more challenging and time-consuming – not even sure if I could reach all of the corners easily. And then, I will still have to paint the ducts white with hopefully the same paint. My basement is somewhere between 800-1000 sqft and I am the only person to work on this. Would you have any suggestions? Maybe, because the wood joist are nothing special, I could spray water-paint mix on the wood to save time but with some wood color shown under, and spray normal paint on the duct and wall areas? I’ll have to make time to read more posts from you. Thanks for being so responsive to everyone who commented.
I think the idea of having whitewashed joists would be beautiful, but it would be difficult to achieve with HVAC lines and plumbing. Spraying the underside white is a great option! I think you will love the clean, fresh look.
the whole project off in about 30 minutes if you don’t have interruptions. I was doing mine with a house full of kids (including a crazy 2 year old on the loose) so I did it in stages. It’s really not a hard project at all. 🙂
I love this, it is so beautiful and cozy! A whitewashed ceiling that really brightens a room We recently whitewashed our cabin pine ceiling with a similar technique: https://thevanderveenhouse.com/whitewash-pine-ceiling/
Beautiful, Jessica!
Hello Rachel,
I wonder if you can help on this one. I have new pine paneling. I am using Milkpaint. I wanted to whitewash the pine. I have never painted pine before… and I put shellac over the knots.
Well…. the white wash does not adhere to the shellac, even though I sanded before applying the whitewash. AND the areas that were shellac-ed show through pinkish… which I do not like at all.
I have thickened up the whitewash… but the only thing that sticks is full strength paint. And then the grain of the wood does not show up.
Any suggestions would be welcome.
Otherwise, I think I am going to paint with whitewash that is almost as thick as paint and just have a finish that is much more opaque with very little of the character of the wood showing through.
Thanks Valerie
Hi Valerie, I’m sorry you’re having trouble! Milk paint is an interesting product. When it doesn’t want to adhere (which it sounds like is the problem with the shellac), then a bonding agent is required… but then it’s not possible to get the whitewashed look. Have you tried using latex? I can’t guarantee it will work (since the shellac may keep the paint from absorbing which is what gives the whitewashed look), but I think you may have better luck. I wish you the best with the project and I’m sorry it has been hard!
Thank you Rachel. Yes, you are right that the paint had not adhered. I ended up sanding off the shellac with 100 grit and a palm sander, and now the milk paint is adhering.
Your blog is awesome and thank you for answering me. It is only after I found your webpage that I knew the look I wanted. Now I am making progress and that feels better!
I am so glad, Valerie!
I want to white wash the ceilings and walls in our camp which are covered in aged, rough cut pine planks. On the walls we have the rough cut pine planks running vertical to a chair rail and then horizontal smooth narrow pine boards to ceiling and then rough cut planks on ceiling. I was thinking about trying to white wash the rough cut and paint the horizontal boards white as those are finish with a varnish. Really looking for advice on how to brighten the space. Can you white wash rough cut wood? And what are your thoughts on the horizontal finished boards?
I have not tried whitewashing rough cut pine before, but I think it could be done. You might purchase some rough cut pine planks to experiment on first, as the best technique might differ a bit as you accommodate the rough surface. As for the finished boards, you might want to see this tutorial for painting paneling and planks. I hope this helps!
I have orange knotty pine paneling that has small divers and lines in between each panel. (the panels aren’t flat completely along the edges in between each plank. I tried on a few places in my closet and it just never looked right. I tired sanding lightly and then more aggressively I tried different dilutions and timing and either the orange showed through splotchy and I could see the grain, or no orange showed through but neither did the beautiful wood grain….It doest seem to have very many cracks and if really smooth and dense wood. Any thoughts or advice? I used light flat/matte eggshell and satin, no semigloss.
Have you tried a better primer? I like BIN for this application to block the orange tannins, but shouldn’t cover the grain.