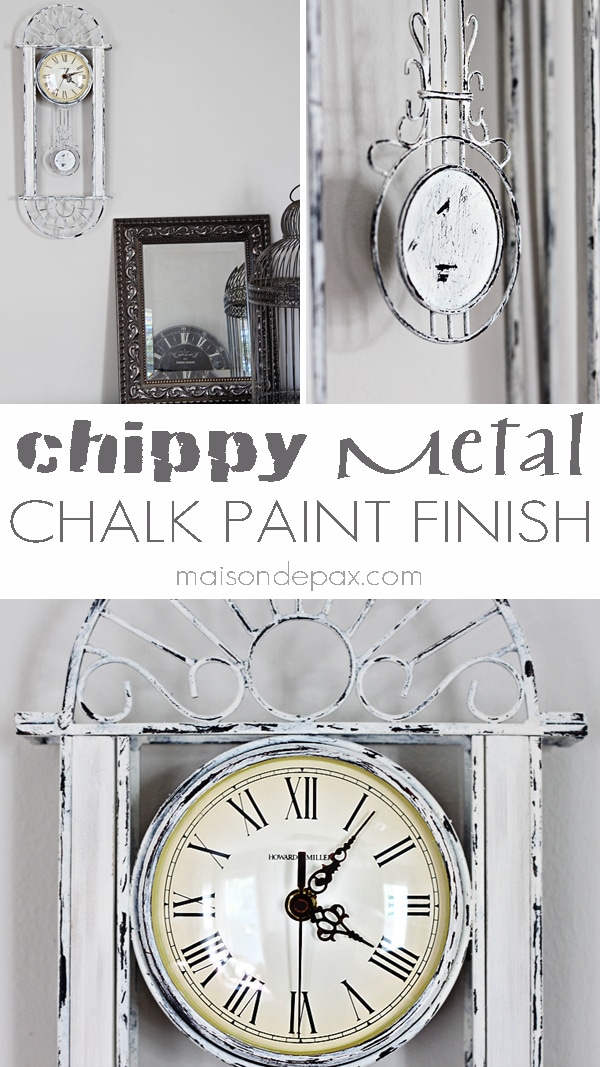
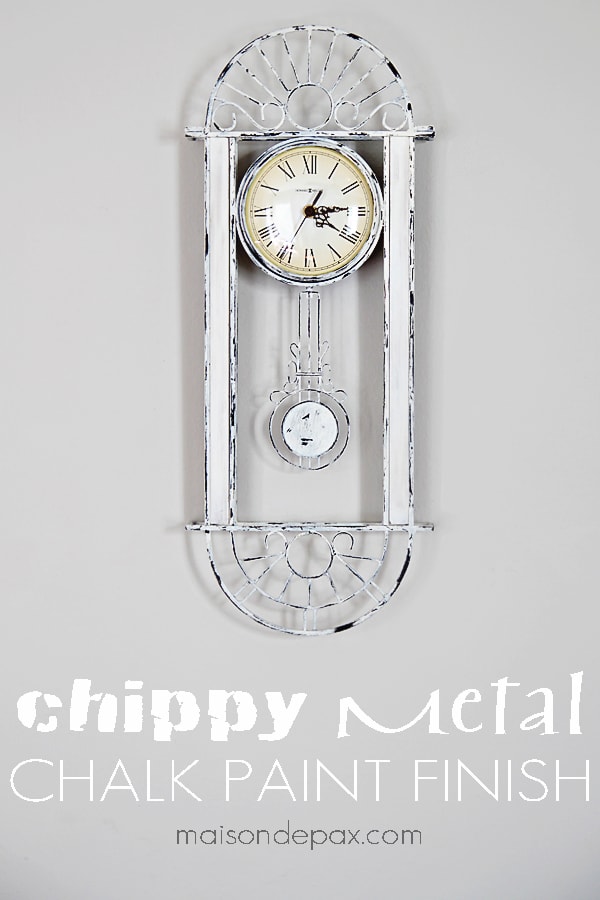
Chippy Metal Finish Tutorial
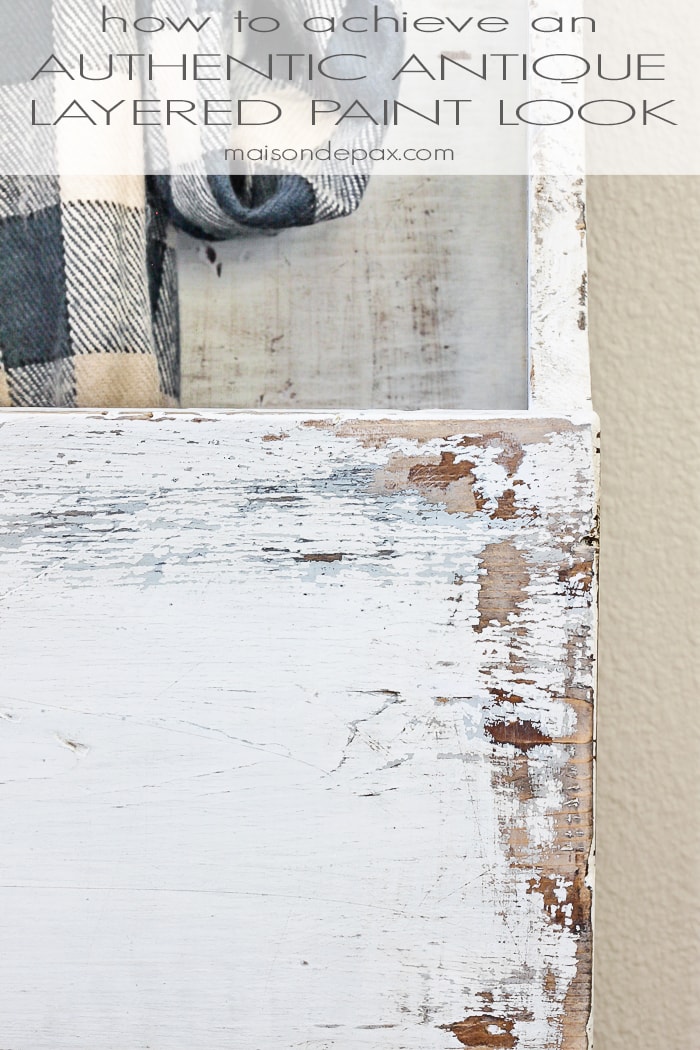
I love texture. And depth. And age. And history… even if they’re not “authentic.” 😉 These elements just add so much beauty to a piece – be it a frame, a piece of furniture, or (in this case) a clock. It was time to add some dimension to an old clock I had, and I am excited to share with you the tutorial for creating this beautifully “aged” metal finish.
I used five ingredients for this concoction:
- chalk paint (mine was Country Chic Paint in Vanilla Frosting, but any chalk-based paint – boutique or homemade – should do the trick)
- a big, natural-bristle brush
- 60 grit sandpaper (and my fingernails)
- antique wax (used only on the wood portion)
- clear wax (again, I used Country Chic, but any furniture wax or paste wax would work)
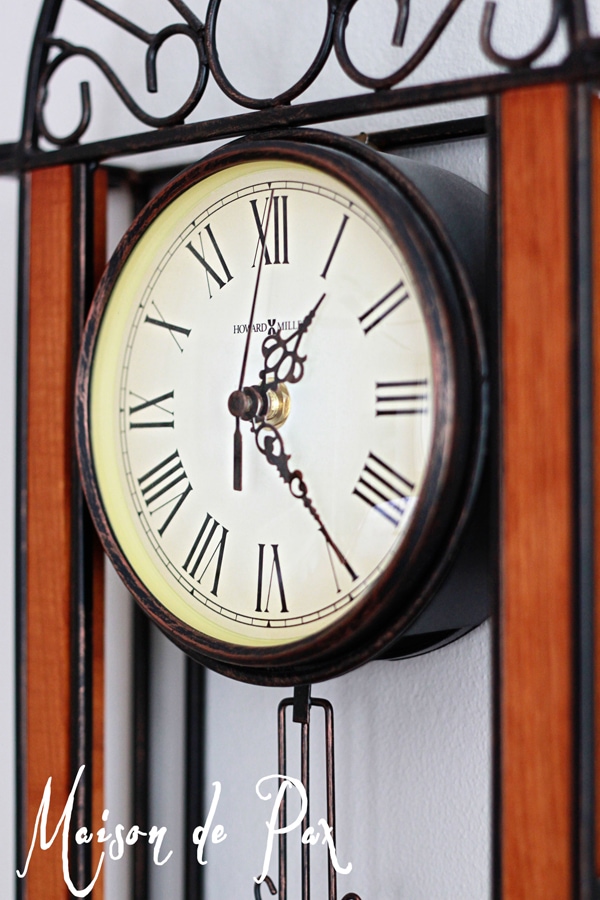
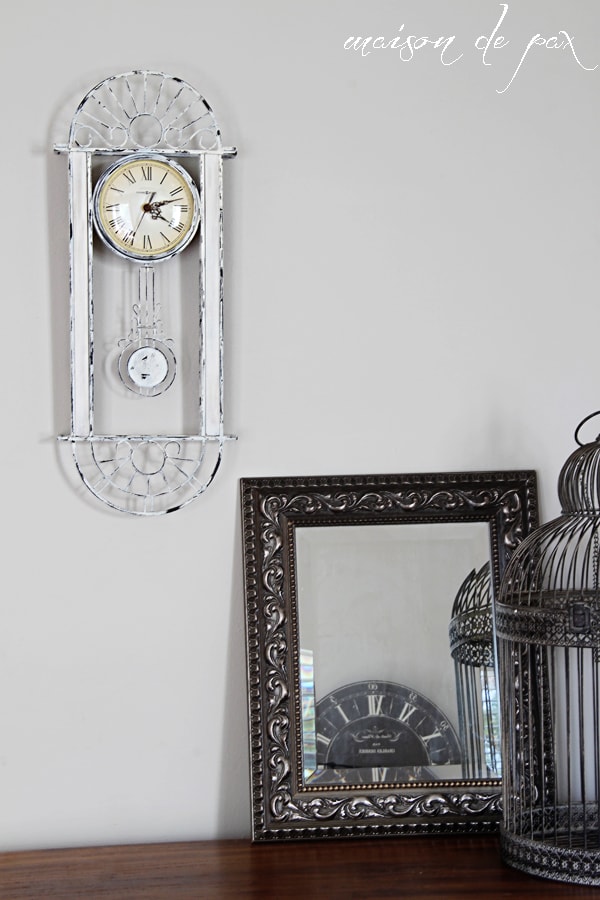
My clock began like this. It was really a handsome clock, the reddish wood and black metal just weren’t calling to me anymore.
The transformation process was easy… But there are a few specific tricks, so follow closely!
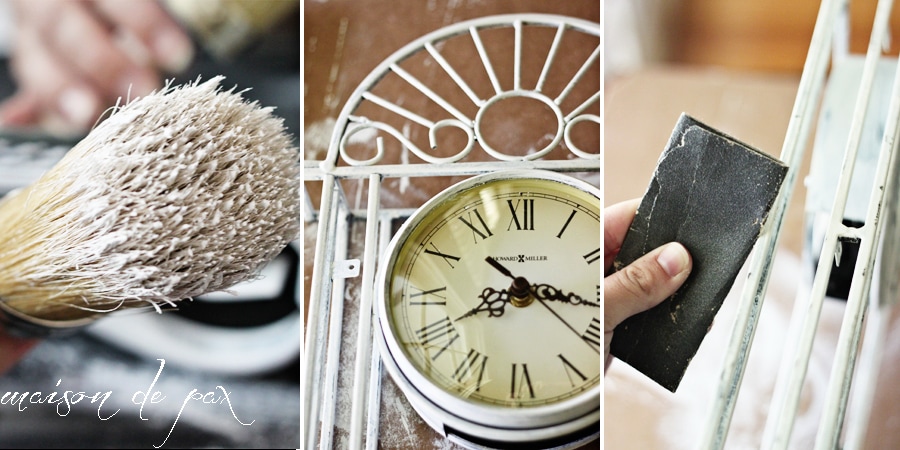
- *I removed the wooden pieces and painted them separately… so the following only applies to the metal portions.*
- Do NOT sand the metal.
- Using a natural bristle brush and VERY little paint (see image below – I never dipped the brush in at all; I only lightly touched the tips of the bristles with paint), paint the metail haphazardly – vary your texture, your touch, your direction, etc. In the second image below, you can see how imperfect the paint job was.
- Allow the paint to dry to the touch (1-2 hours) but do NOT let it cure (really harden).
- Use your sandpaper to distress the metal, but again, do it haphazardly. I found that folding the sandpaper and using the edges gave me a more “chipped” effect than sanded. The goal is to make it look like the paint has chipped off over the years… I even used my finger nail in places to get a bigger chipped section.
- Use antique wax if you have any wooden portions (like I did).
- Give the entire clock a coat of clear wax.
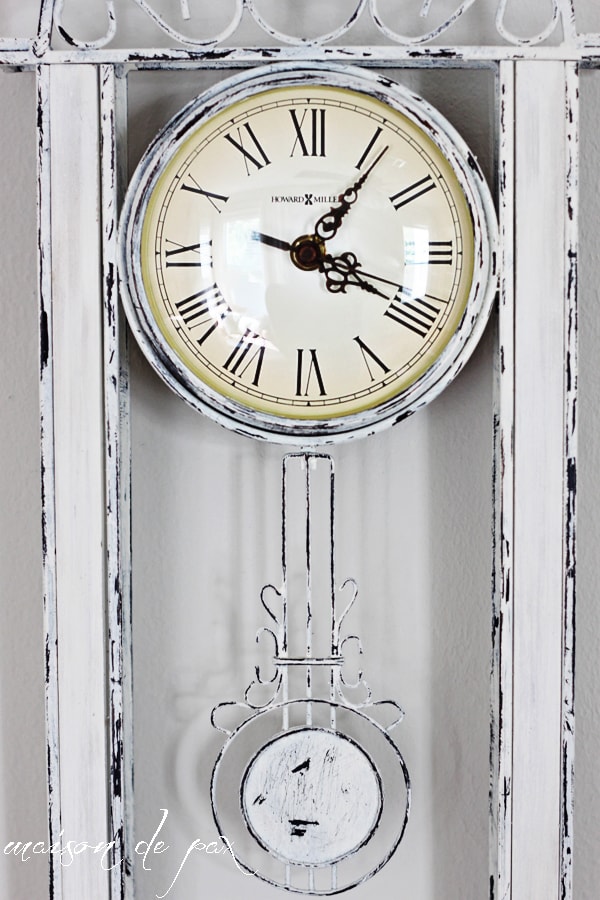
That was it. I did the whole thing while watching a move with Mr. Pax. The major tricks are the natural bristle brush (with random, imperfect coverage), distressing before the paint has fully cured, using chalk paint so that once it cures it will actually adhere to the metal, and sealing with wax to protect your art. You could certainly add an even more aged look by using antiquing wax on the whole thing, but I didn’t want any more brown on this piece.
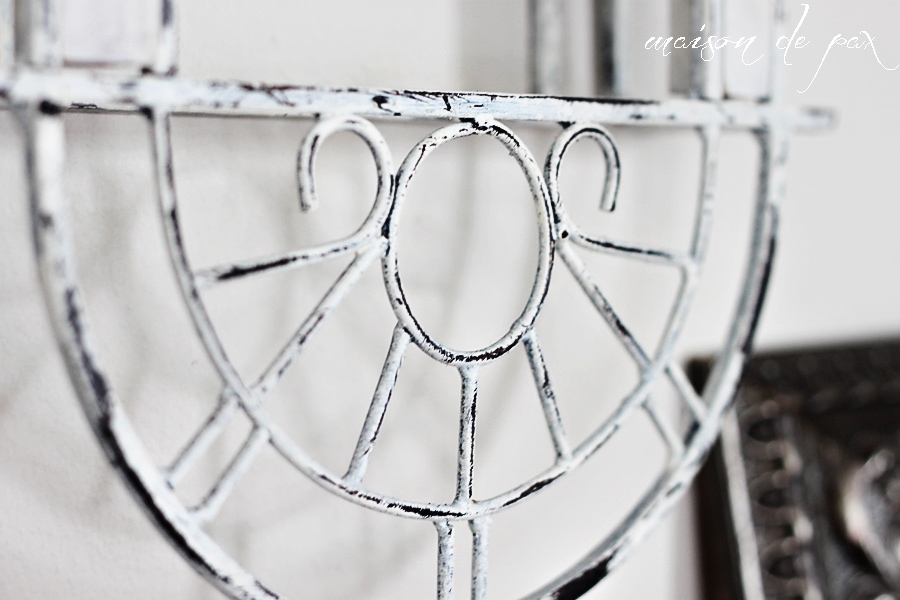
You can see that some places got a little of the scratchy look from the sandpaper.
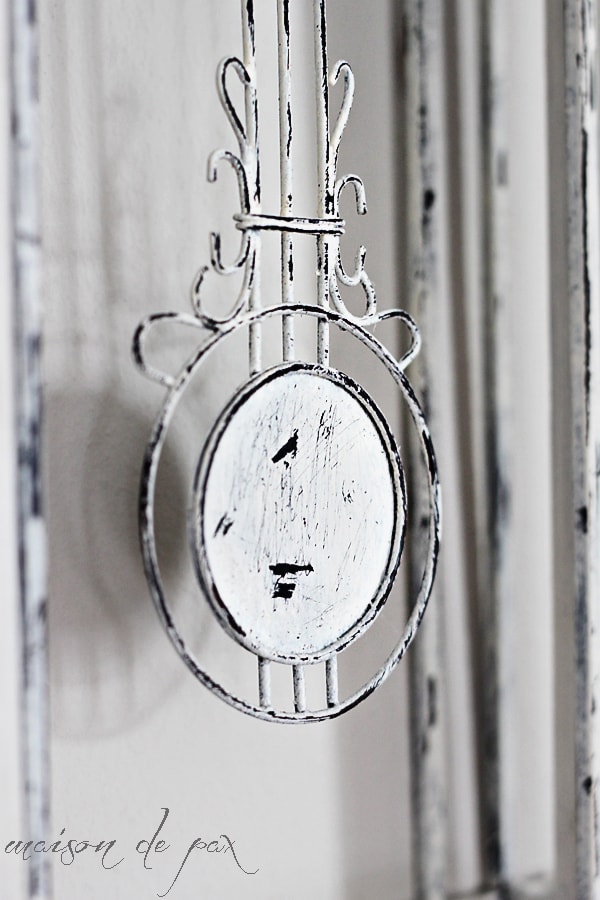
But most truly look more chipped than scratched.
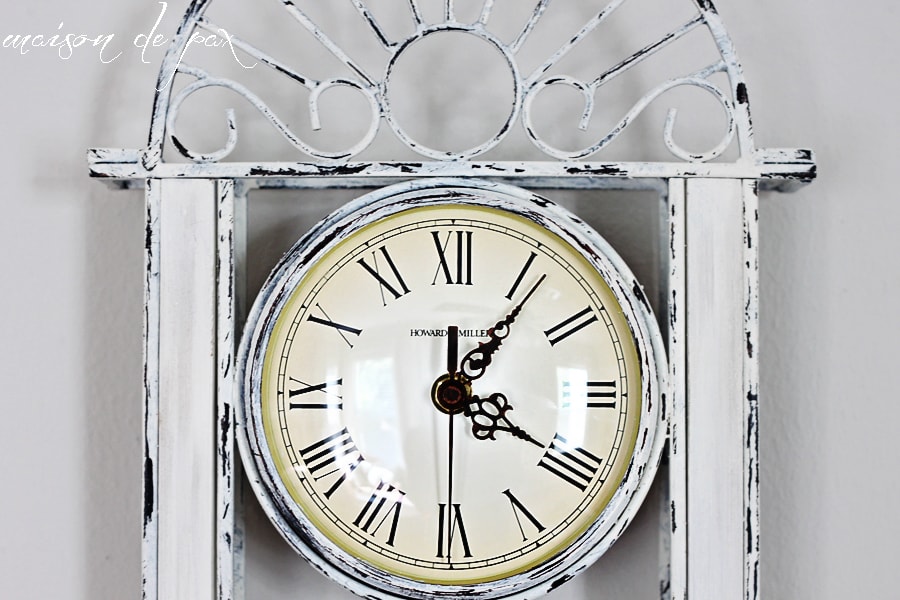
And I’m pleased to say that I think the clock is much more suitable with my (current!) style…
Perfect until the next time I decide it needs a makeover. 😉
Disclaimer: As a part of the Country Chic Paint blogger squad, I do receive compensation in the form of goods and products from Country Chic Paint, but, as always, all opinions are 100% my own!

This clock is such an amazing transformation Rachel- and thanks for the tutorial. Pinned!
What a lovely patina you achieved on the transformation. Fingernails always work as a last resort – look at mine :>)
Ha! I love it, Donna. Fancy fingernails are overrated, aren’t they? 😉
Terrific makeover. Such a great result. Thanks for the tutorial.
Thank you, Ann! So glad you like it. 🙂
Hi Rachel. I see a lot of makeovers and once in awhile I stop and say ” Wait! What?”. Yeah that before and after metal clock is fantastic! Great job!
Awww… thanks, Michelle! I’m so glad you like it!!
Oh I LOVE this look Rachel! It’s much more my style too! I’ve pinned and plan to use your technique on a few mixed metal/wood items around my own home! Thanks for the tutorial!!
You are so kind, Cindy! I’m so glad you like it, and I hope you find it helpful in transforming your pieces!! Good luck. 🙂
Love it <3
I love your clock! We just bought one but the metal is painted. We do not want the color it is to be the color that shows through after we distress it. What do you recommend we do or use to cover the paint that is already on it?
Thank you so much, Susan! There are a couple of options. I would start by painting it the color you do want to show through (perhaps black or dark brown??) with either a chalk paint or a metal primer – something that will stick to the current color. Now comes the tricky part: before you paint the next color, you’ll want to put a “resist” in between the paint, so that when you go to distress the top color, it leaves the bottom color untouched. You can use several things – vaseline, wax, oil – anything to keep the top coat from sticking too well to the bottom coat. Then you just chip it off where you put the resist. Does that make sense? I did similar things with some furniture: here and here. I hope this helps!
Have you used the vaseline method to get the chippy look on metal?
I haven’t done that on metal, but I have used it on wood many times. I’m sure it would have a similar effect!
Thank you so much!
Of course!