6 Lightroom Mobile Editing Tips for Gorgeous Photos
Want beautiful mobile phone photos? Don’t miss these 6 easy Lightroom Mobile editing tips plus free lightroom mobile presets!
It’s been a while since I’ve shared any photography tips… But I recently was chatting with some friends who begged me to show them how to edit pictures on a phone, and I realized that these Lightroom Mobile editing tips would be helpful not just for bloggers and decorators, but for just about anyone!
I am a professional photographer of interiors, but I am also an avid photographer of my children, the local wildlife, and anything else that helps me to capture and remember the beautiful things in my life. And 9 times out of 10, those in-the-moment opportunities don’t allow me to get out my fancy camera. Instead, I yank my iPhone out of my pocket and hope that my kids haven’t moved yet. 😉
Unfortunately, the lighting and circumstances are rarely ideal. For professional photoshoots, we manipulate lighting, use top-of-the-line equipment, and can take multiple options and angles to capture the best one. But for mobile photography, you usually have just one chance.
Fortunately, there’s a free Lightroom Mobile app for your mobile device. It is by far my favorite editing app, and I use it to turn those quick iPhone snaps into gorgeous, memorable photos.
Before I do, let me answer a few Lightroom Mobile FAQs:
Lightroom Mobile App
Is Lightroom Mobile free?
The Adobe Lightroom Mobile App is free to download and use, but there are some capabilities that are only unlocked with a paid Adobe Creative Cloud subscription. Curious about Adobe CC? Read more about why I recommend it on my photography resources page. If you have no interest in desktop photo editing, though, you will probably want to simply maintain the free version of the Lightroom Mobile camera app.
Is Lightroom Mobile available on both Apple and Android?
Yes! There are some subtle differences, but for the most part the Adroid version functions like the Apple version (though this tutorial was made with the Apple version, for the record).
Is Lightroom Mobile the same as Lightroom desktop version?
While I love Adobe’s suite of photo editing software, I do find the names a little confusing. There are several versions of programs called Lightroom, all of which have different specific capabilities.
Suffice it to say that Lightroom Mobile uses a similar process to the desktop version, with categories of editing adjustments and sliders to make those adjustments. But the desktop version of Lightroom is much more robust. If you have an Adobe Creative Cloud subscription, there are ways to organize and access your photos both on mobile and on desktop, but it is not necessary to have the desktop version in order to use the mobile app.
The Best Editing Tricks for Lightroom Mobile
Here’s a quick video showing you the 6 Lightroom Mobile editing tips I use to edit just about all my iPhone pictures. Three of them are the most powerful (and available with the free version). Steps 3-5 are a bonus that is only available with an Adobe CC subscription, but they can raise your images to the next level.
Now to break it down for you…
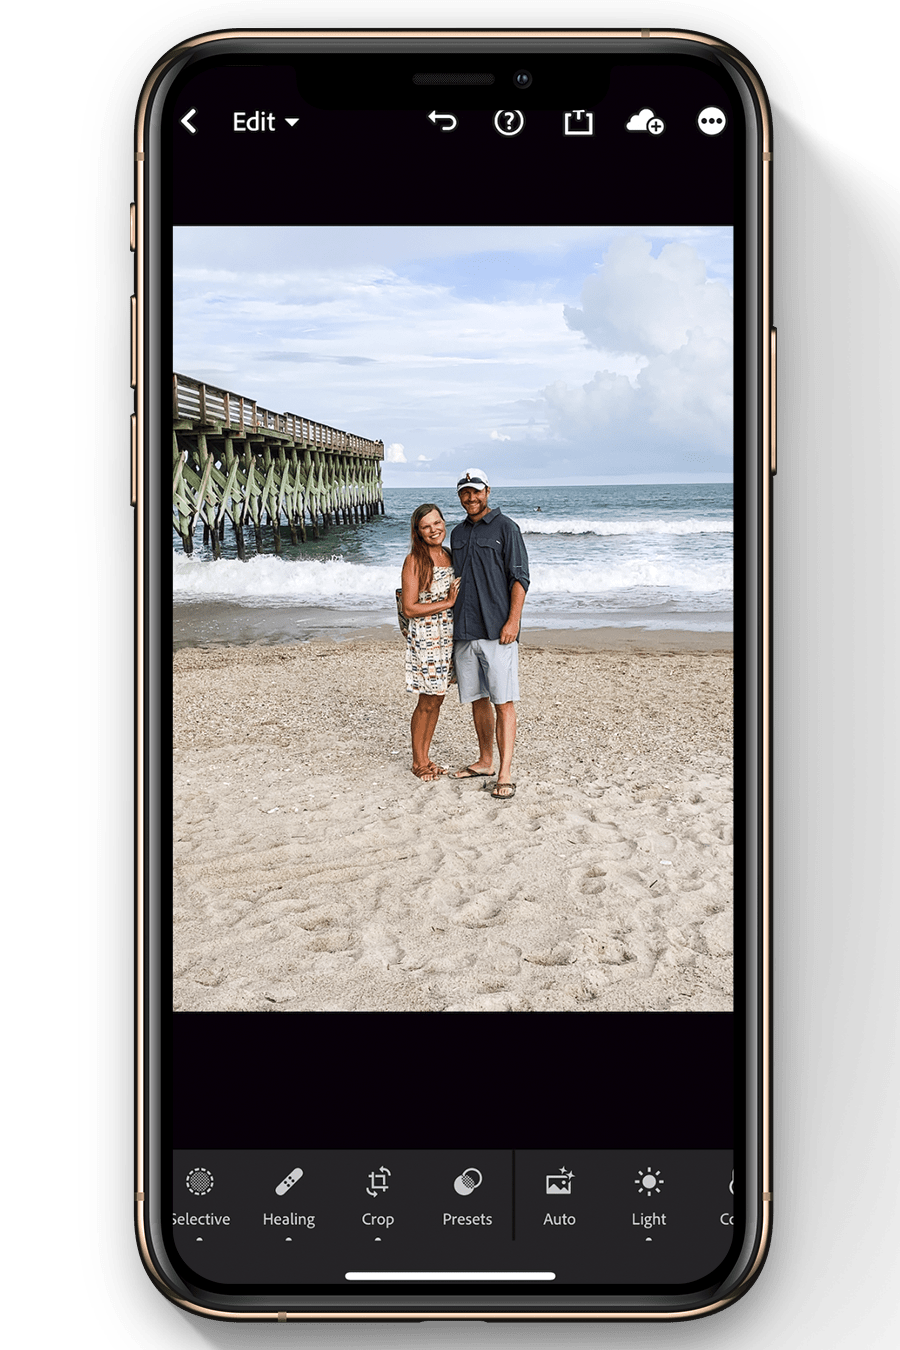
Once you install Lightroom on your mobile device and import a photo, you are ready to begin editing.
Step 1: Start with a good preset
Presets in Lightroom are easy, powerful quick edits. They are dng files (that you usually access from zip files) and install into your Lightroom Mobile App. Once you do that, it takes a single touch of a button to apply a beautiful overall edit to any given image.
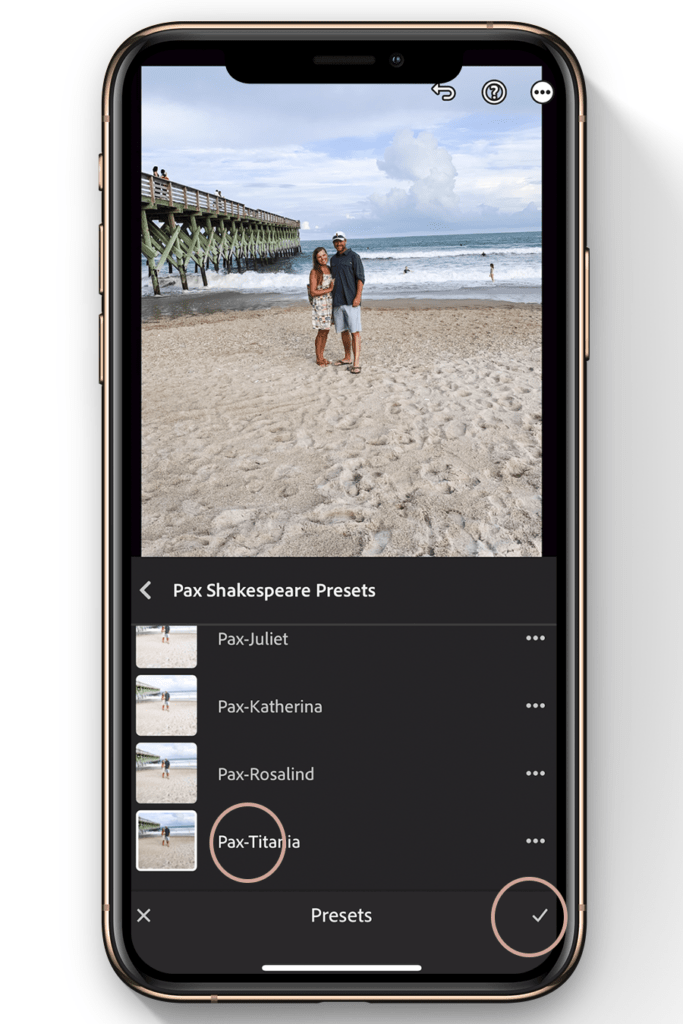
I offer these free Lightroom Presets, so if you are just beginning with the mobile editing process, I suggest you try those first. If you love them, you might consider my Shakespeare preset bundle with even more variety of editing power.
Tip: Learn how to install presets here.
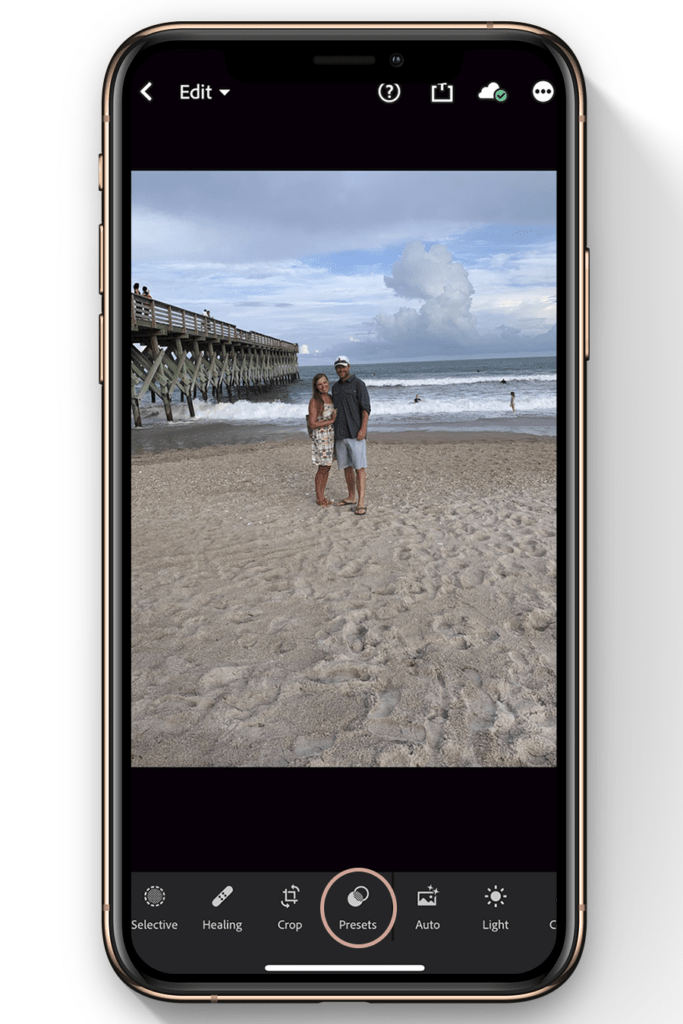
To apply a preset, tap PRESETS, navigate to your chosen one, then click the check mark.
Just look at the one-click difference a preset can make!
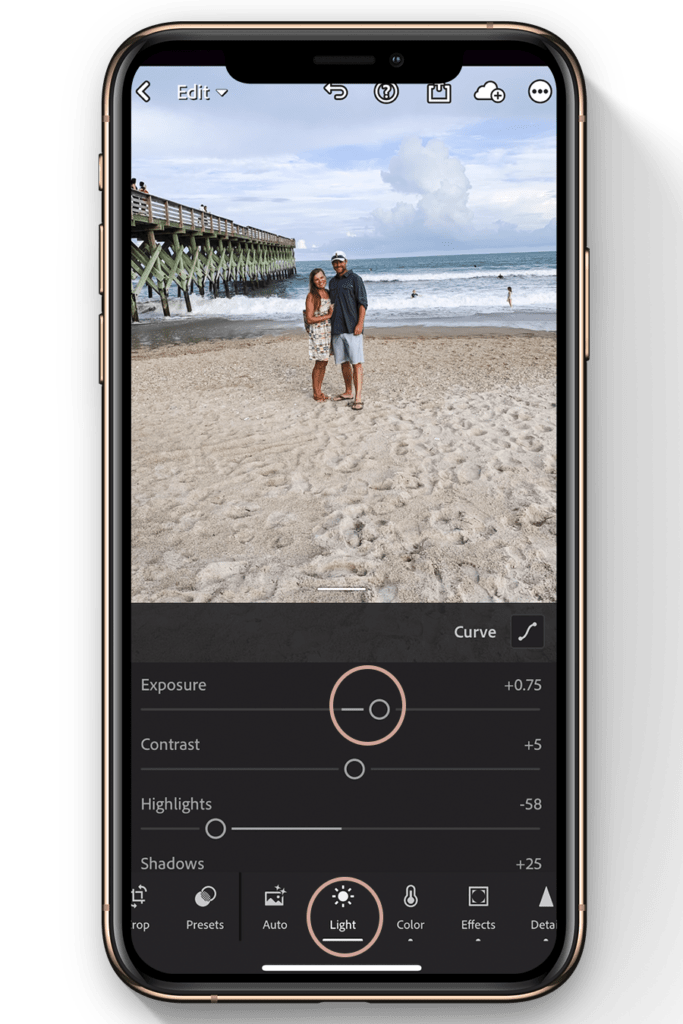
Step 2: Adjust light and color
Even when you use a perfect preset for a given image, there are often light or color tweaks that can be made. For example, a picture taken outside in my backyard starts much brighter than one taken in my kids’ room. And an image taken by lamp light is going to be much warmer than one taken in evening shade.
Fortunately, you can make quick changes to light and color to adjust for these exposure and white balance differences.
To adjust brightness, tap LIGHT, then raise or lower EXPOSURE.
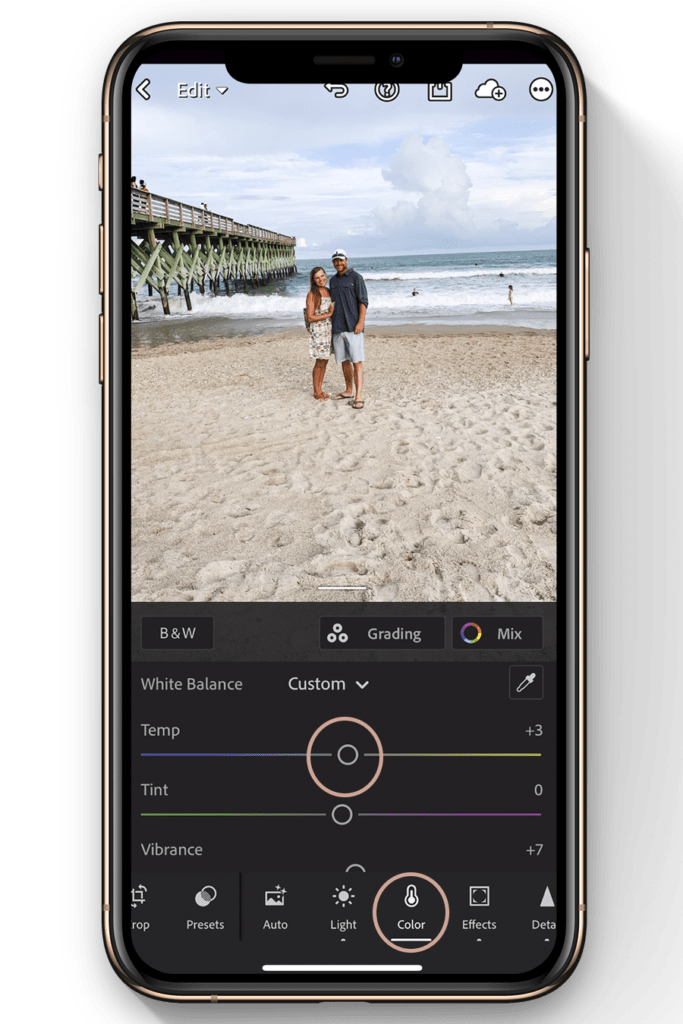
To tweak color, tap COLOR, then adjust the TEMP and TINT sliders.
And that does it for 75% of the images I take on my phone. It brings them from just ok to really bright, crisp, and beautiful! If you do not have an Adobe CC subscription, then the only thing left to do is crop the image (jump to step 6!). If you do have an Adobe subscription, read on for some higher-level editing tips.
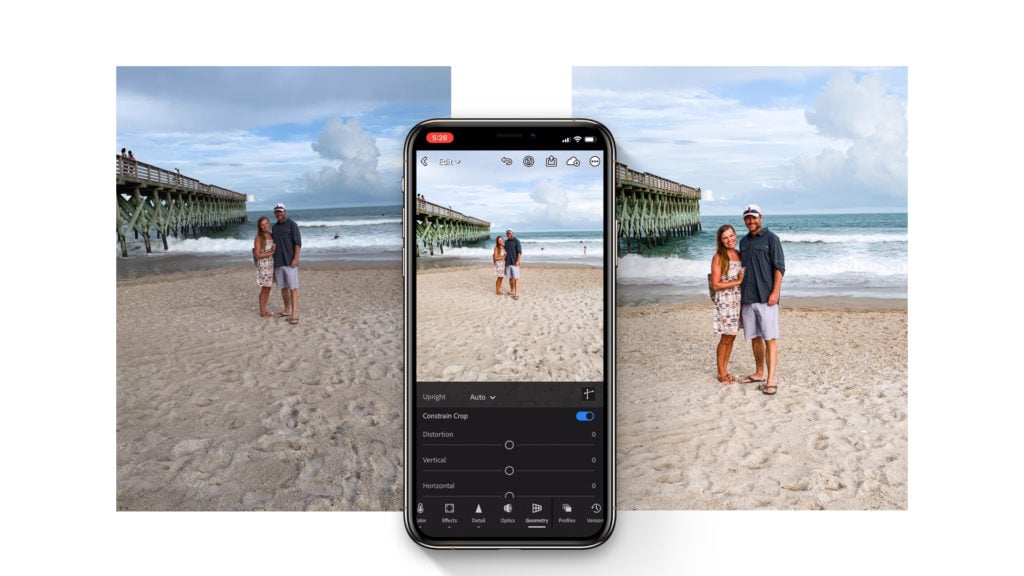
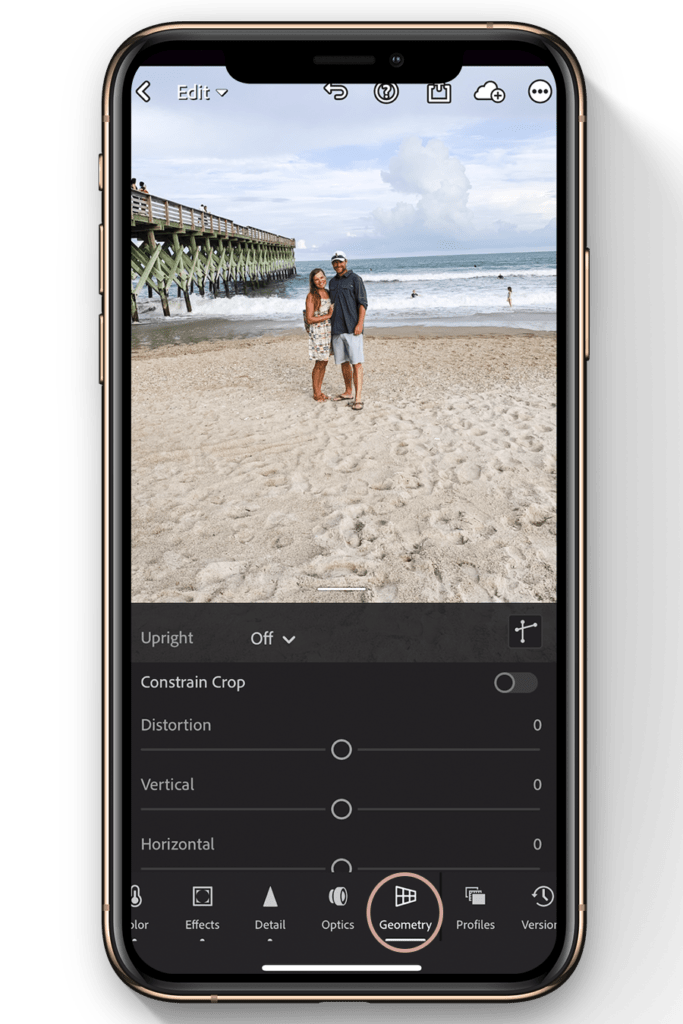
Step 3: Tweak the geometry
Note: the following three edits are only available with an Adobe CC subscription. If you do not have an Adobe CC subscription, move on to step 6!
Since I often photograph interiors, the geometry of an image is near and dear to my heart. Use this powerful tool to straighten your images instantly.
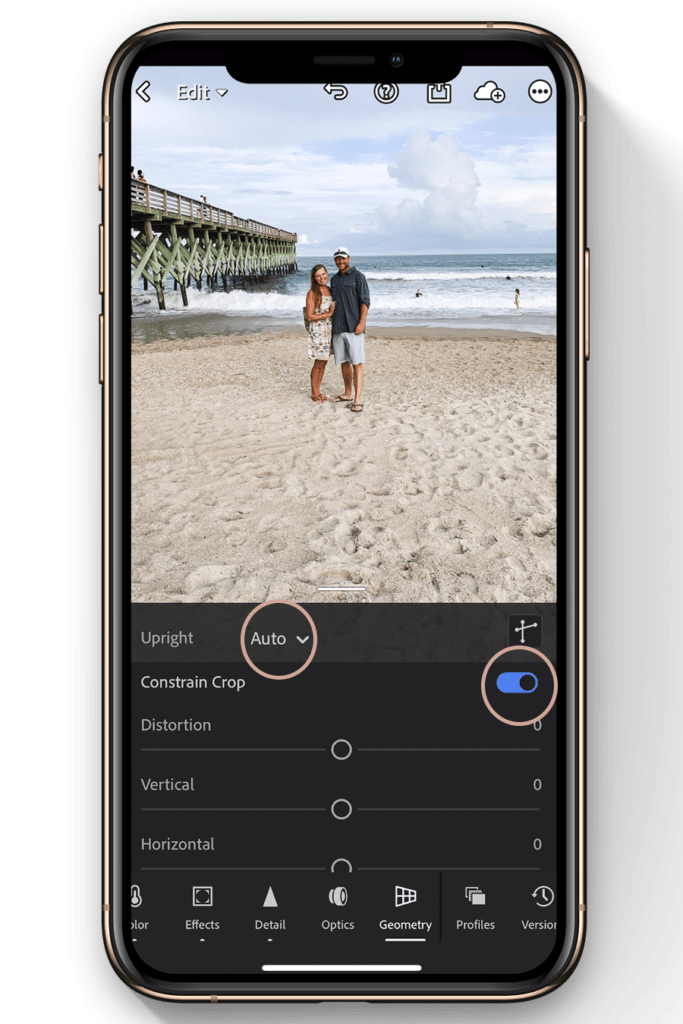
To straighten, tap GEOMETRY, toggle on CONSTRAIN CROP, then choose the Upright dropdown menu and change from Off to AUTO.
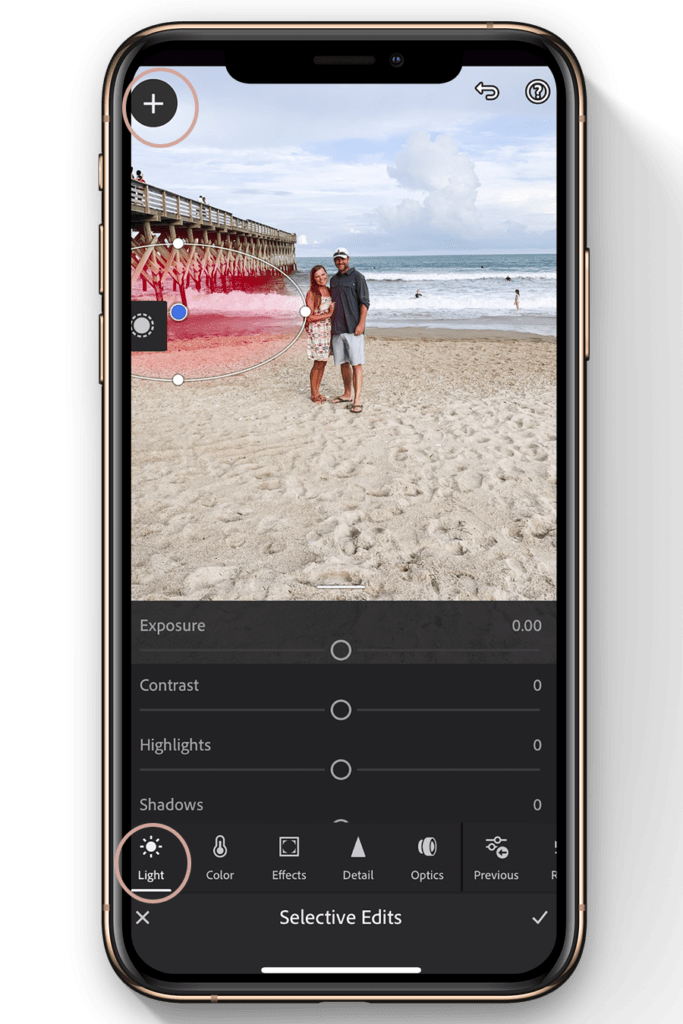
Step 4: Make selective edits
This tool is so helpful when an image is too dark in one portion, or when a light is casting an oddly warm glow over just part of the image, or when someone’s face is in a shadow… Whatever the cause, a selective edit allows you to adjust just a portion of the picture.
To apply a selective edit, tap SELECTIVE, tap + sign, choose the paintbrush or (my favorite) the circle, draw on your image where you need the adjustment.
Next, choose the area of adjustment from the bottom menu and move the sliders to make the change.

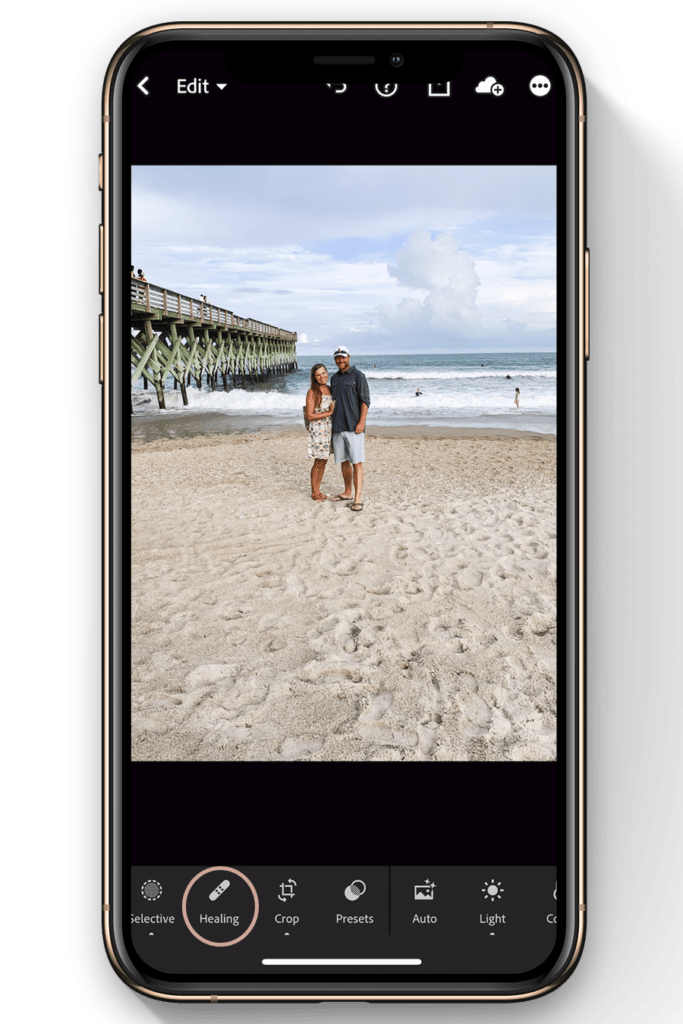
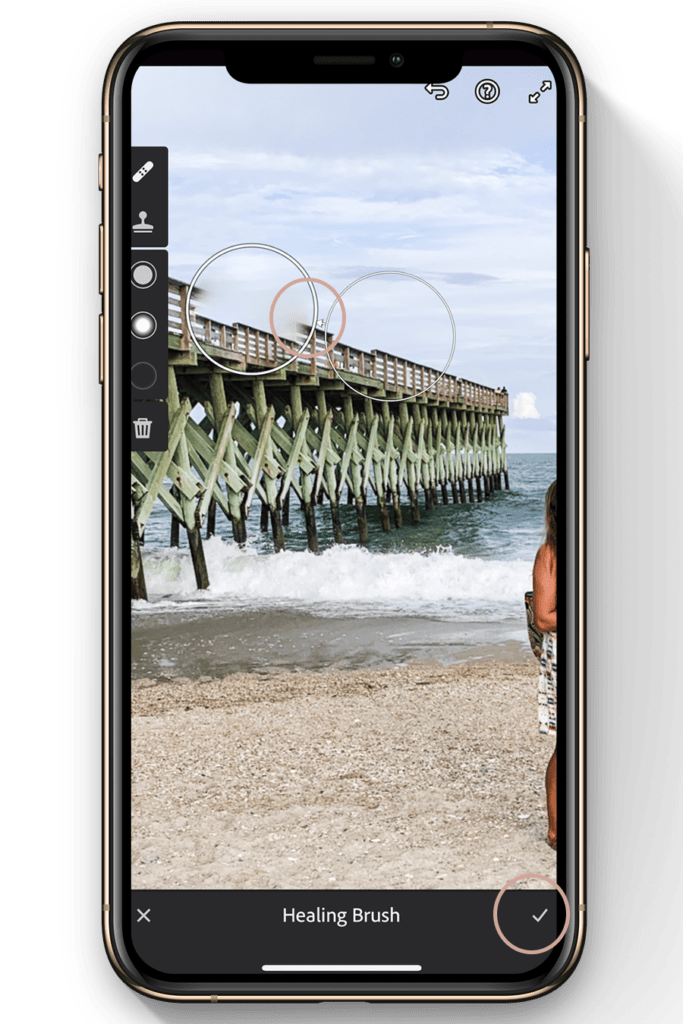
Step 5: Heal distractions
This is basically a smart correction. If you had a distracting imperfection (think dirt on the ground, an extra person in the background, a leaf hanging over someone’s face), you may be able to remove it with the healing tool.
To remove minor distractions, tap HEALING, then tap the spot you want to remove, then adjust the circles until the correction is pleasing.
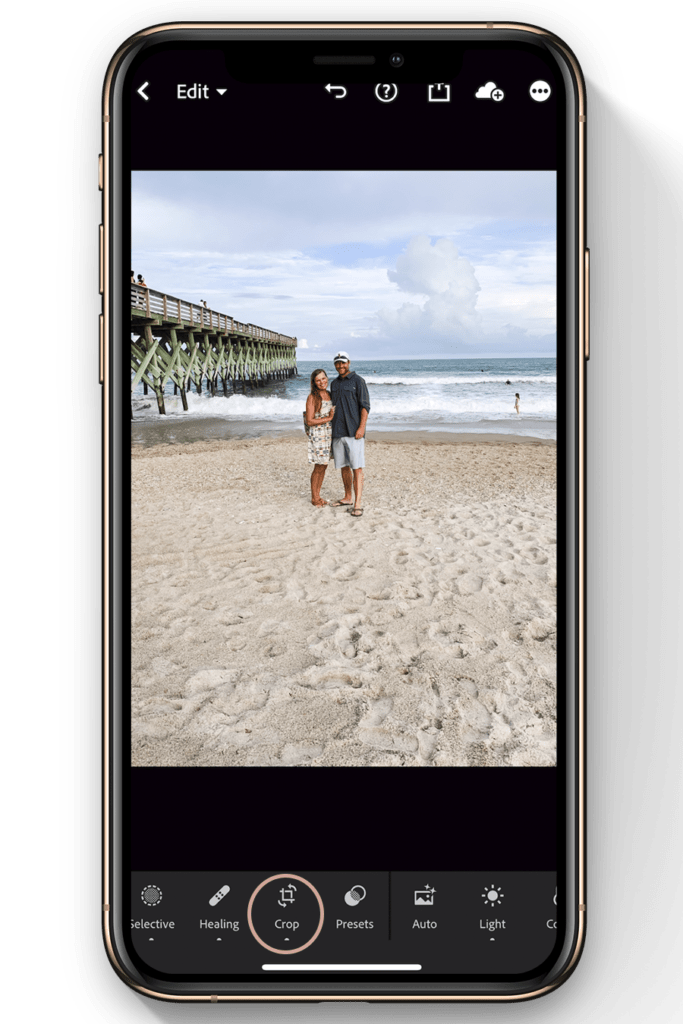
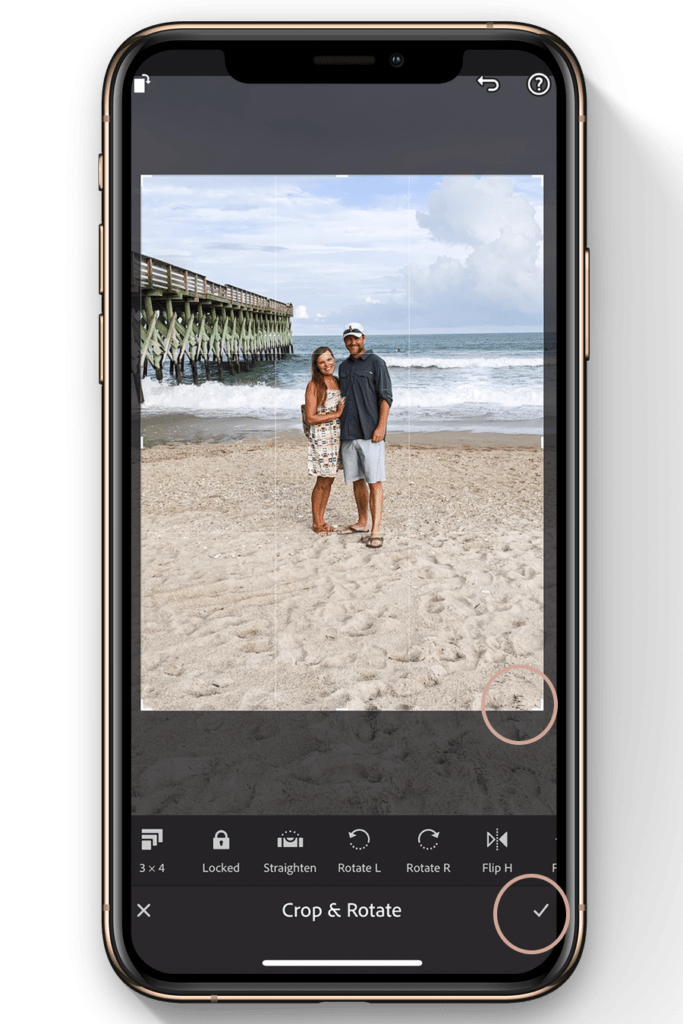
Step 6: Crop
As you may expect, cropping is pretty self explanatory. Make the overall composition of your image perfect with a simple crop edit.
To resize your image, tap CROP, then drag the corners of the rectangle to adjust. Tap the _ x _ icon to change the proportions of your crop.
And that’s it! I use these same Lightroom Mobile editing tips whether I’m editing pictures of my kids’ latest fashion choices or creating DIY tutorials in my shop.
I hope you found this helpful! Don’t forget to get your free Lightroom and Lightroom Mobile presets here.


Great tips! I love your Shakespeare presets…I just used Desdemona! I’m looking forward to your Haven photography workshop in a couple of weeks.
Thank you, Jennifer! I can’t wait for Haven as well!
awesome blog about mobile editing tips. thanks for posting 🙂
Glad you found it helpful!