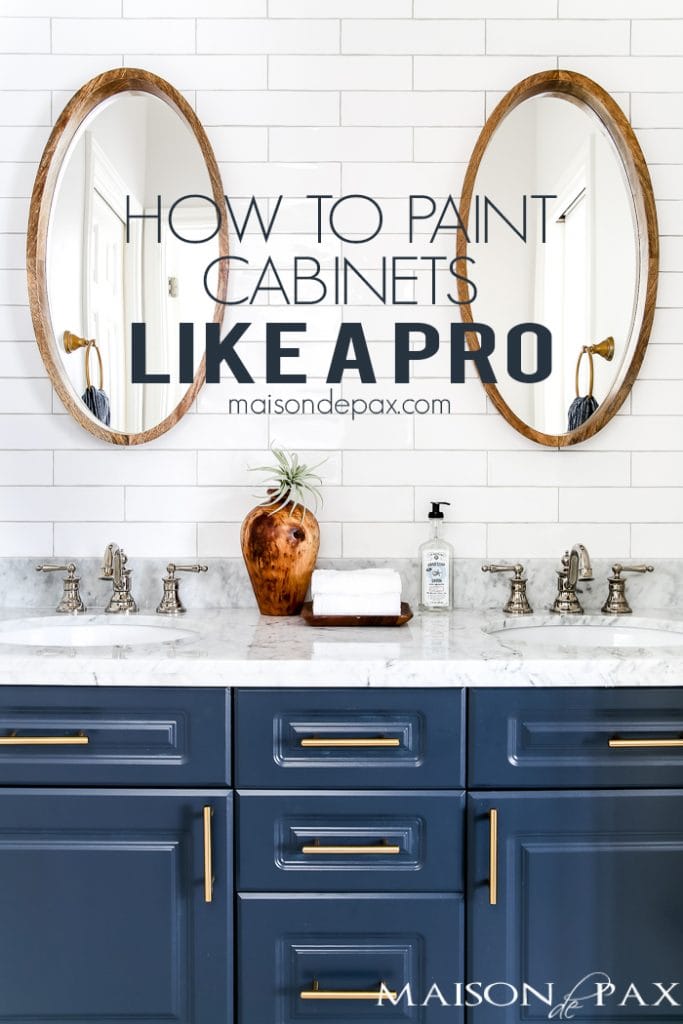
How to Paint Cabinets to Last: Painting a Bathroom Vanity
Whether you want to know how to paint kitchen cabinets, how to paint laminate cabinets, or how to paint wood cabinets, these basic steps will help you to achieve a quality paint finish that will last. Read this step-by-step tutorial to learn how to paint cabinets like a pro.
I’ve painted many a cabinet in my day (my DIY-loving dad kept building more and more in our home while I was growing up, and guess who his paint crew was? 😉 ). I’ve tried oil based paint, chalk paint, acrylic paint, and more…
But in my recent bathroom makeover renovation, I painted my bathroom vanity cabinet and took care to systematize the process that I think produces the absolute best results so that I could share them with you. No matter where your cabinets are in your home, these steps will help you achieve a smooth, lasting interior paint job.
Here’s a video that sums it all up. There is a supply list and written steps below, as well!
Supplies needed to paint cabinets:
This post contains affiliate links. Click here to read my full disclosure.
- paintable and sandable wood filler
- palm sander with medium grit sandpaper (I like 150-220-grit sandpaper)
- lint-free rags
- simple green cleaner
- deglosser
- painter’s tape
- drop cloths or plastic
- trim foam roller and tray
- interior primer (like Zinsser 1-2-3)
- high quality paint (like Benjamin Moore Advanced) in satin, semi-gloss, or high gloss* (I used Polo Blue in Satin for this cabinet)
*I am often asked what kind of paint to use on kitchen cabinets (or bathroom cabinets, for that matter), and while I certainly haven’t tried every paint on the market, I love Benjamin Moore Advanced and Sherwin Williams Emerald Urethane for high-traffic cabinetry.
Save money by painting your cabinets yourself, but splurge a little on quality paint, whatever brand you choose. I am also asked how to seal painted cabinets, but the beauty of a high quality paint like this (in satin, semi-gloss, or high gloss) is that they do not need to be sealed.
How to prep and paint cabinets like a pro:
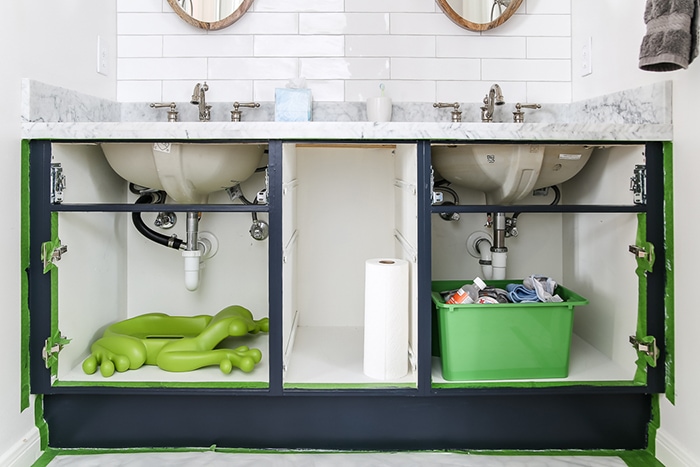
- Remove all cabinet doors, drawers, and hardware (not pictured)
- Protect walls, floors, and hinges with drop cloth, plastic, and painter’s tape

- If planning to change hardware, fill holes with putty
- Lightly sand all doors and the cabinet face frame with medium grit sandpaper (repeat putty and sanding over filled holes if necessary)
- Clean all doors and cabinet face frame with a strong cleaner like Simple Green to remove all dust, dirt, grease, and oils
- Using a lint-free rag, wipe on a deglosser to all doors and frame according to product instructions

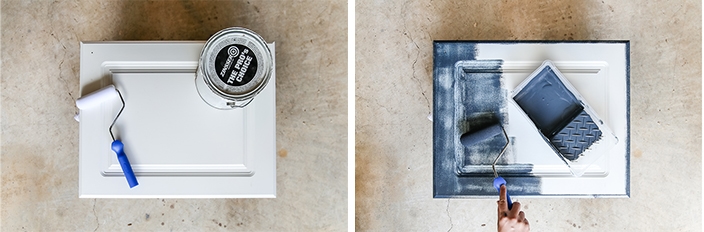
- Using a trim roller, apply a thin coat of all-purpose primer to all surfaces; use a brush to catch drips, if needed
- After you prime and coat of primer is dried according to package instructions, apply 2-3 very thin coats of a high-quality satin, semigloss or high gloss paint; be sure to allow to dry according to package instructions between coats

- Once dry completely, reattach doors and drawers and drill for new hardware if desired

Cabinet Painting FAQs
What is the best paint for cabinets?
As I mentioned above, a high quality water-based paint (like Benjamin Moore Advanced or Sherwin Williams Emerald Urethane) will give you a durable finish. For cabinets, you generally want satin or semi-gloss. You can also use an oil based paint, but
Do I have to remove all the pulls and knobs?
Yes, I recommend removing them rather than painting around them.
Do I have to use a foam roller or can I use a brush?
The foam paint roller will likely give you a smoother finish than a brush. Even with self-leveling paint, a brush can leave texture and brush strokes. I recommend brushed paint only in crevices or other places that the foam roller can’t reach.
Can I start the second coat of paint as soon as the first coat is finished?
Probably not. Be sure to follow the label directions regarding drying time between coats.
Have you painted bathroom cabinets? I’d love to know!
Did you find that helpful? Pin it for later! And check out many more diy projects here.

![The [Master Closet’s] Messy Truth](https://www.maisondepax.com/wp-content/uploads/2013/04/closet-sweaters-mess.jpg)
Beautiful! This is on my list of upcoming projects…this post makes me want to push it closer to the top!
Thanks April! It makes a big difference in my space.
Great job Rachel the color is wonderful.
Thank you so much, Diana! xo
Hi, love your painted cabinets. My kitchen cabinets were painted when I moved in (I have no idea how many coats have been applied over the years) and you can see the brush strokes, which I don’t like. Will applying more paint using the foam roller hide this?
Do you use a brush when there is trim moulding on top of the flat service?
Also, since these are old cabinets, is there a limit to how many coats you can apply?
Hope you can answer some of these questions. Thank you.
I’m so glad you like it! Unfortunately, the only way to completely get rid of brush strokes is to sand them away. However, if you don’t want to do that, your light sanding before you prime will help some… and a really high quality paint (like BM Advanced) will self-level some to soften the brush strokes. You can use a brush or the end of the foam roller (which is what I did) when it’s a section with molding. And regarding how many coats of paint, the answer is kind of. Technically, if each coat is applied properly, you should be able to apply almost as many as you want. However, each time something is repainted there is a chance it wasn’t done well, which makes the cabinets susceptible to chipping. Also, if chipping does occur (which, of course, is more likely with each layer of paint), the gouge it leaves will be deeper than if it were only one coat chipping off. I hope this helps!
Beautiful! I am planning to paint our powder room cabinets and am sooooo scared to do it! I love the color you used. I’m sure you posted it somewhere but could you let me know? It’s exactly what I’ve been looking for. Also did you use satin or semi gloss?
Thanks for your response. I love reading your posts! KK
Thank you! This is BM Polo Blue in satin. 🙂
Did you use BM advance satin? Have any problems with the paint not matching the actual color? Taking mine back today…it’s very grey and so does not match the dark swatch 🙁
I think that Benjamin Moore Advanced is a great paint and I have friends who have used it with success! It’s possible they need to remix a batch for you- I wouldn’t hesitate to ask!
I painted a dresser to use for storage in the kitchen. I used wood putty in the old knob holes and still can’t believe how they disappeared. Also used Advance paint, took THIRTY days to really dry, for nothing to stick to it. Ben Moore paint guy warned me but I didn’t believe it. It’s held up extremely well but dang that’s a long cure time.
I kept it in the garage with a heater set for 70 degrees and the humidity of about 50%. I know that’s technical but I was trying to get it done.
Advance is a good paint, but it does have a longer open time. I think if you have the time then it’s worth it for the hard finish.
Did you sand or use steel wool between the light coats of paint. Your cabinets look wonderful and I love the color you chose. Thanks!
You can very lightly sand in between coats, wiping down afterwards to clean up the dust. Glad you enjoyed the post!
i painted my bath vanity a very similar color from Behr with primer in the paint. it would go on perfect then start looking like reptile scales as it was drying . each time I sand off and re-prepped the surface. nothing changed. then I used steele wool and thinned the paint just a little and it came out beautiful. yay. good thing I wasn’t on a deadline . project took far longer that I intended. but it came out just like I wanted.
Oh no! I haven’t had that problem, but I am so glad you found a solution.
Thank you for your painting tips Rachel. They are VERY helpful! I have been too afraid to try painting mine but your detailed steps may give me the confidents to do it. Your blue cabinets are beautiful! Do you have a hard time committing to the blue (or any color), worrying you’ll get tired of it? Or do you just plan to repaint when you’re tired of it? I tend to keep mine neutral because I love to decorate for all of the different seasons and holidays. Just curious how you handle the bold colors. Thank you again for the detailed painting steps!
I think blue is a great neutral and is usually classic and in style. But, yes, I can always repaint. You should go for it!
I love seeing how you accomplish all of your beautiful projects….I so love the color…thanks for sharing your wonderful tutorials…Stay safe and dry!!!
Thanks, I am so glad it was helpful!
I have wondered what foam rollers were best used for. Do you recommend that over paint brushes?
Yes- they create a smooth surface and reduce brush marks. I do use a brush for nooks and crannies in the cabinets though.
Just beautiful!
Thank you!
Thank you so much for this helpful info! When painting cabinets white, what do you like to use to prevent yellowing down the road?
I’m so glad you found it helpful! While I can’t speak for certain, in my experience a good high-quality paint is your best bet. If the cabinets are properly prepped and primed, you shouldn’t have any bleed through from the wood, and a high-quality paint like the BM advanced I used on these shouldn’t yellow down the road. I have a friend who followed these same steps and painted her kitchen cabinets white three years ago, and they still look perfect. I hope this helps!
Thank you very much, Rachel! I really appreciate it.
You are so welcome!
Lovely 💛 So glad I happened across your blog; so much to explore and I look forward to future posts.
What a sweet thing to say, Amy Beth! So happy to have you here. 🙂
thanks for putting the steps in writing. i’m presently using a very similar color on my vanity but i chose a Behr paint the has primer in it. Its called Marquee semi gloss enamel. I spent so much care on the prep to guarantee my paint stays put. But i have one question, should i paint the inside of the cabinet doors too? some say yay, others nay. Thank you and your home is beautifu.l
I think you should- it presents a finished look! If you do, its a good idea to start with the inside, finishing painting those, and then flip over, so if any minor imperfections happen in the switch to the other sides, they are on the inside. Marquee is a great paint too!
We used Advanced on our kitchen cabinets, too! I read so many bloggers’ posts about painting cabinets, and that paint just kept coming up again and again. We painted them about a year and half ago, and I have been SO pleased with the results. We have a few chips here and there, but considering we are in our kitchen ALL the time and they can easily be re-touched, we are still so pleased with that paint! It’s amazing how much you can change the look of a room just by painting the cabinets! – Mauri @www.theamericanpatriette.com
BM Advanced is fabulous! It really does hold well in a hard-working room like the kitchen. 🙂
I think my bathroom cabinets are laminate. Will this work technique for those?
You can absolutely paint laminate! Be sure to scuff it up a bit with a sand block or sanding paper, followed by priming really, really well. Choose a primer not just a paint with primer. Prep is key!
Where did you purchase & name of the gold hardware? I absolutely love it and looking for a similar in chrome.
Hi Katie! You can find all the sources here: https://www.maisondepax.com/navy-white-bathroom-remodel-source-list/ but specifically, the gold hardware can be found here (affiliate link): http://rstyle.me/n/b5dkbsb5bux
I have done a lot of furniture chalk painting and have been happy with the results. I want to paint 2 cheap Home Depot bathroom vanities. They are espresso “wood” cabinets but already show areas where the finish has worn away. Not sure if it is a laminate, dark glaze/paint or veneer over thin wood panels but need to know what kind of paint will provide the best adhesion and where on that surface. Thank you! Love the one you did.
Nancy
Hi Nancy! I think they sound like the right candidate for this painting project. The key is to scruff them up with sanding and use a high quality primer (BIN by Zinsser is a good one) before you begin the painting project.