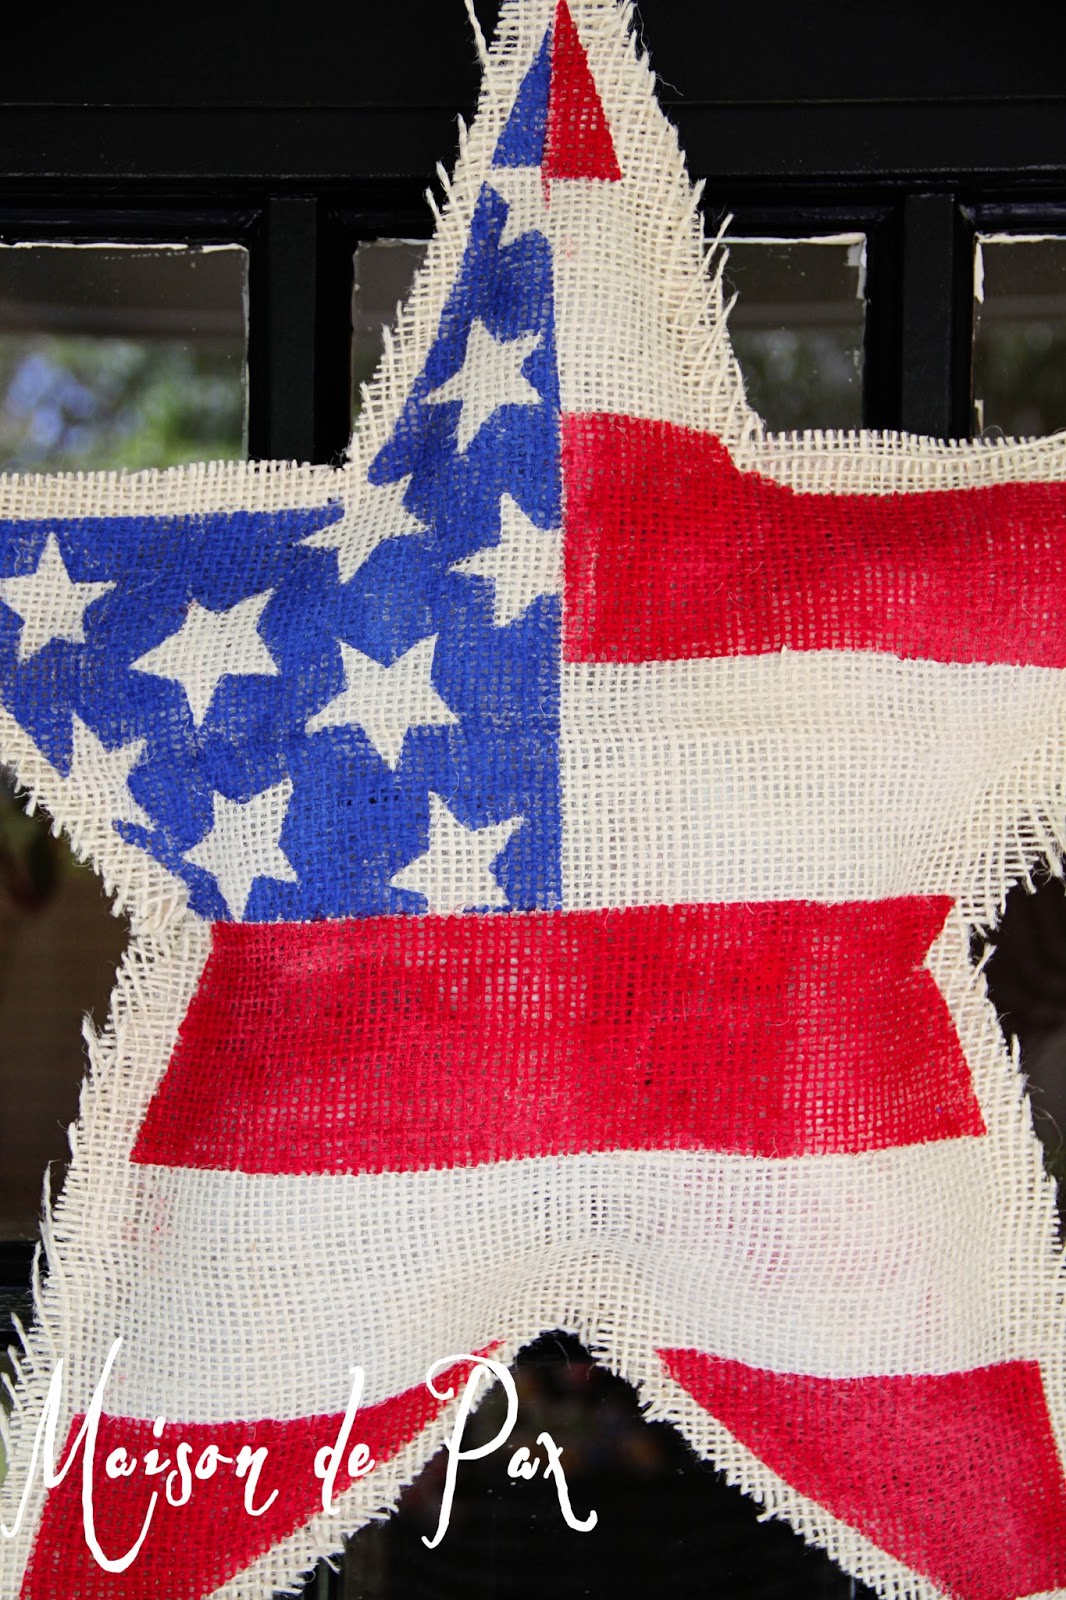
Painted Burlap Star
Happy almost 4th of July!

I know I’m cutting it close for Independence Day crafts, but I thought it was better late than never. 😉
Materials:
-burlap
-acrylic craft paints (red and blue)
-painter’s tape
-scissors
-hot glue gun
-plastic grocery sacks
-floral wire or other hook for hanging
Ok, ready for the tutorial? Sorry for so many pictures; this is one where it’s easier to show than explain…
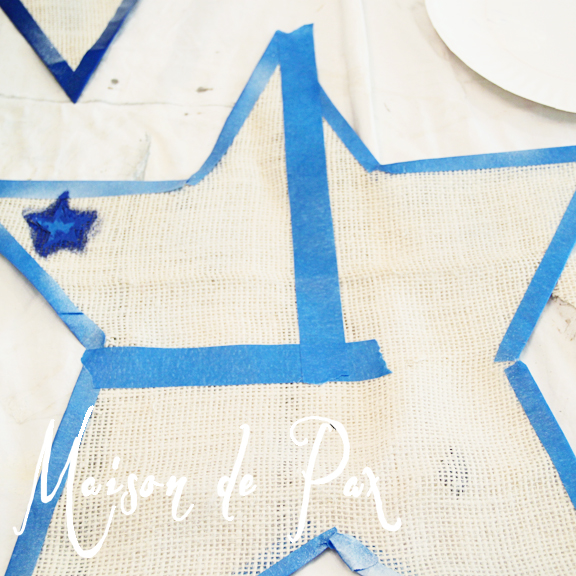
1. Cut two burlap stars (fold your fabric and cut two at once so you ensure they match), and set one aside (it will be the back, so it is not needed until the end).
2. Use painter’s tape to mark off an edge on your front star.

3. Tape off an area to be your “stars.”
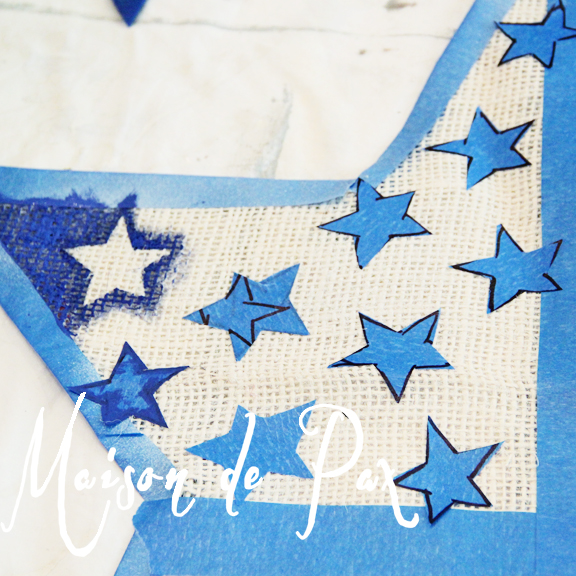
4. Draw multiple stars (I just free-handed because I wanted an imperfect look, but if you have a stencil, go for it!) on painters tape.

5. Check one star to make sure it works and then place your stars as you like.

6. Paint your “stars” section blue and carefully remove your stars while the paint is still wet. Tip: Always try to remove painters tape while the paint is wet; it should give you a cleaner line.
7. Tape off your “stripes.” Tip: Use painter’s tape (pressed down gently) as a space holder to even space your stripes. Peel it off before you paint, of course!
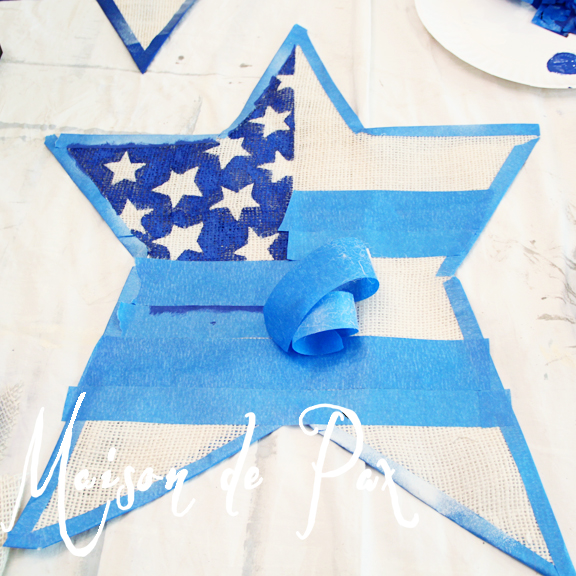
8. Paint your stripes red.
9. Remove all tape and let dry.
10. Place painted star face up on top of unpainted star (the one you set aside earlier) and run a bead of hot glue between the stars along all but one of the edges. Leave an opening!! Tip: Use a plastic knife or popsicle stick to press the two pieces of burlap together while gluing; burlap is a very loose weave, and that hot glue will burn you when it seeps through!
11. Roll/stuff plastic grocery sacks between the two pieces of burlap to attain your desired fluffiness. I wanted mine to be fairly flat, so I used just 5 or 6. If you are making this for indoor use, then batting of some sort would certainly work, but since I wanted mine to hang outside, I chose plastic bags for durability (and price!).
12. Glue the final edges shut. (Sorry I don’t have pictures of the last steps; I was busy trying not to burn myself with the hot glue!)
14. (Optional) Spray with a protective sealant. If you live in the tropics, like me, then it seems like a good idea… I used a spray clear acrylic.
13. Hang it with pride. 🙂
Feel free to play with your design, too. My precious friend Shara (who is my craft buddy… That sounds really dorky, doesn’t it? I don’t care… I love her and appreciate her!) turned hers, and I love the result:
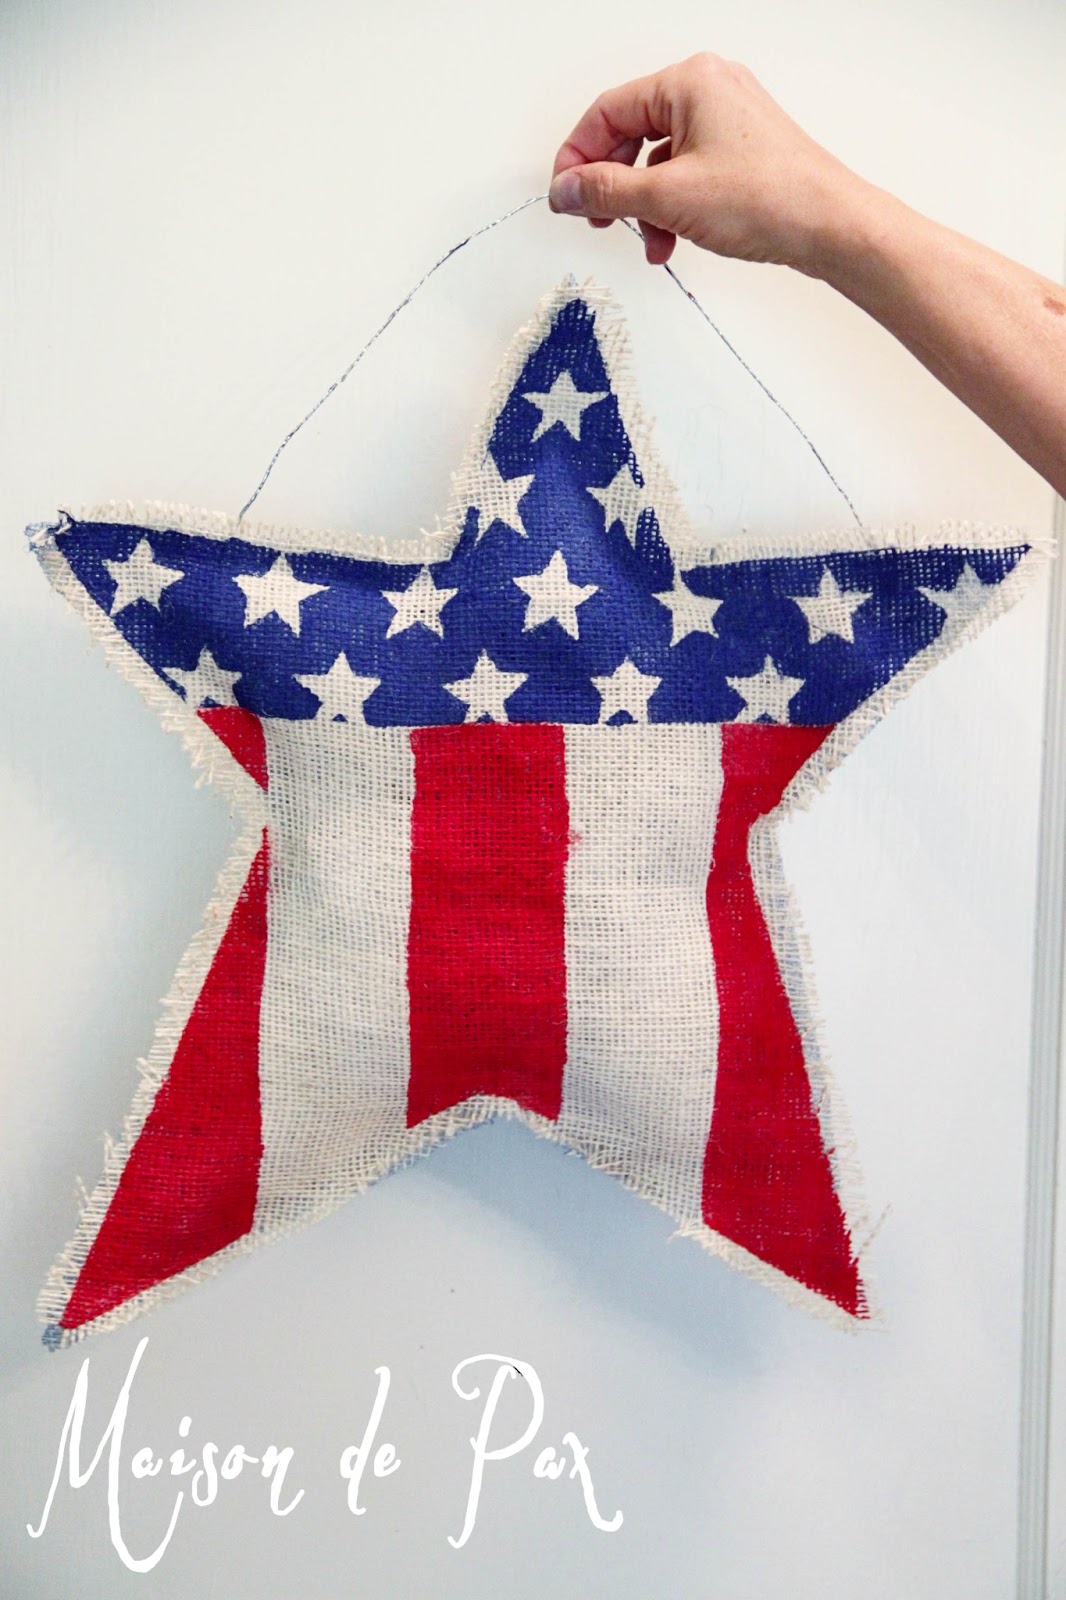
For hanging, you can use wire like she did (hooking it through the burlap behind and adding a dot of hot glue to secure) or you can use a hook. I grabbed a 3M one and just stuck it to our back door and hung the hook through the fabric.

What do you think?
I opted to display it on the back door since we have a double front door that’s mostly glass… Too hard to figure out where and how to hang things there! I rather like it against our simple back door, though. I think the texture of the burlap is a nice balance to the crisp lines of the black door and planked ceiling.
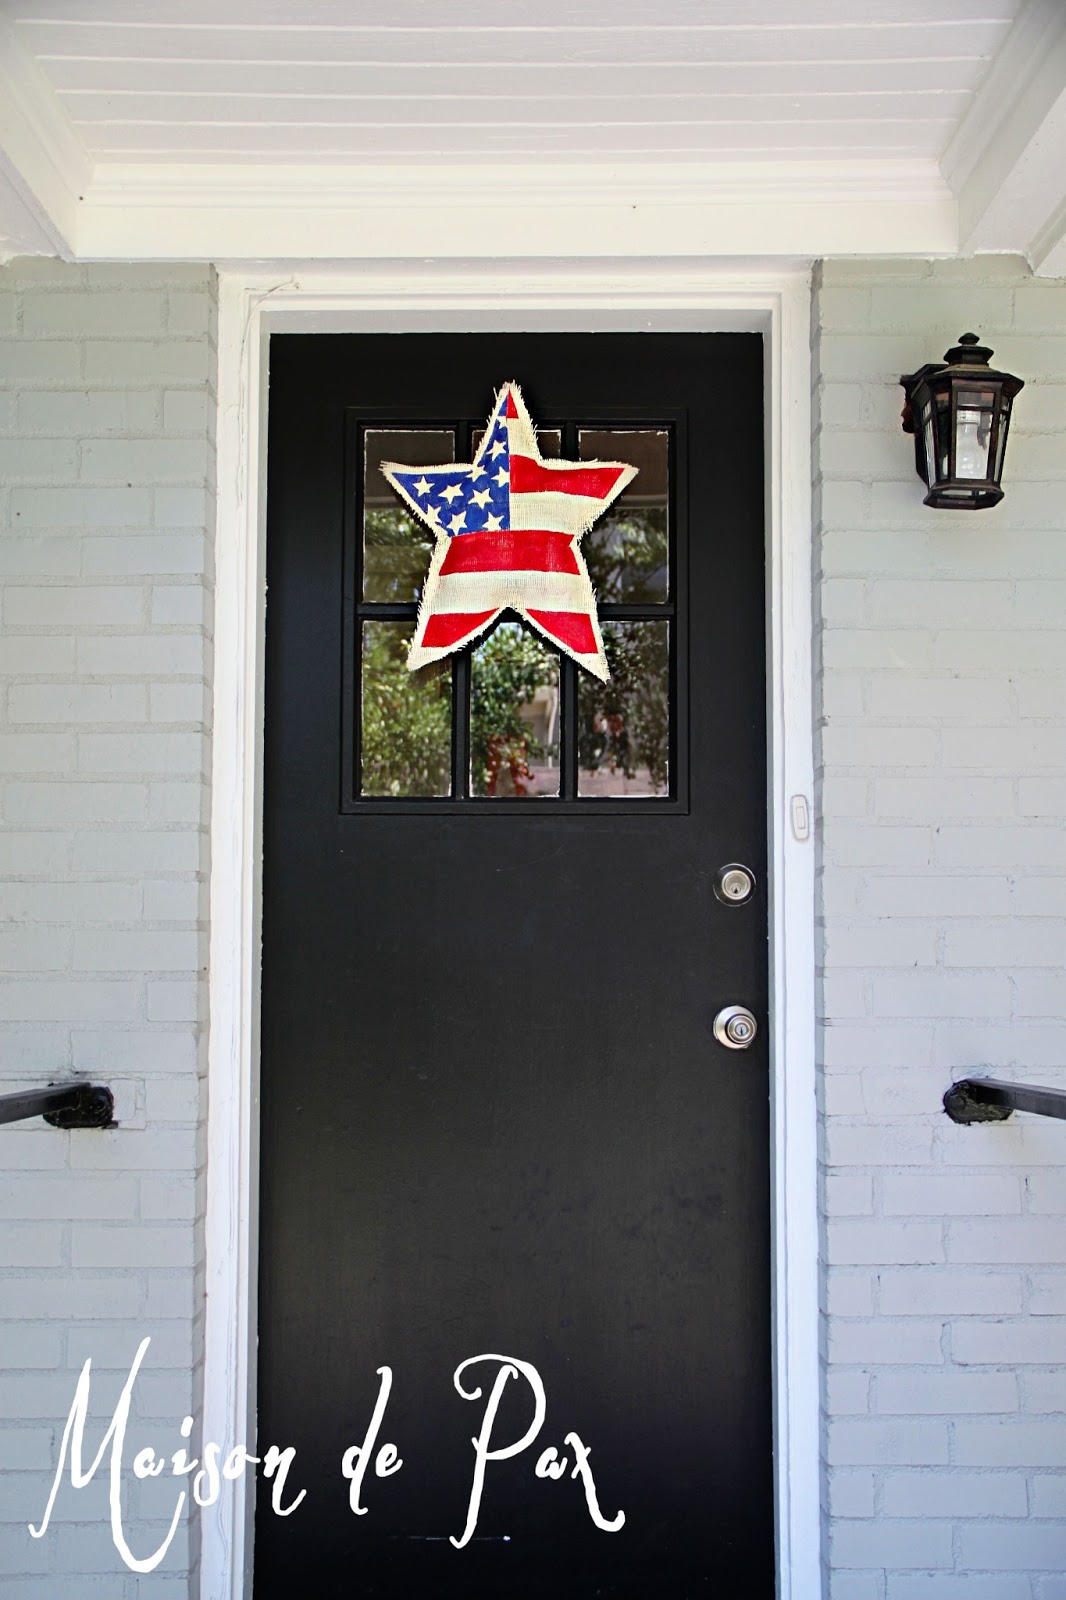
We probably won’t have actual celebrations here on the 4th (since my parents live in town, we do most of our holidays at their home), but I’m sure going to enjoy it, especially since we usually enter the house through this door. And I love that it’s an easy thing to store for next year. Fast, fun, free!… fabulous. 😉

Very interesting and well explained! I will be trying them.
Thanks
Susie
Thanks, Susie! I am glad they inspired you!