DIY Decorative Molding
This is one of those projects that made me say, “Why on earth did we wait so long to do that?!?!”
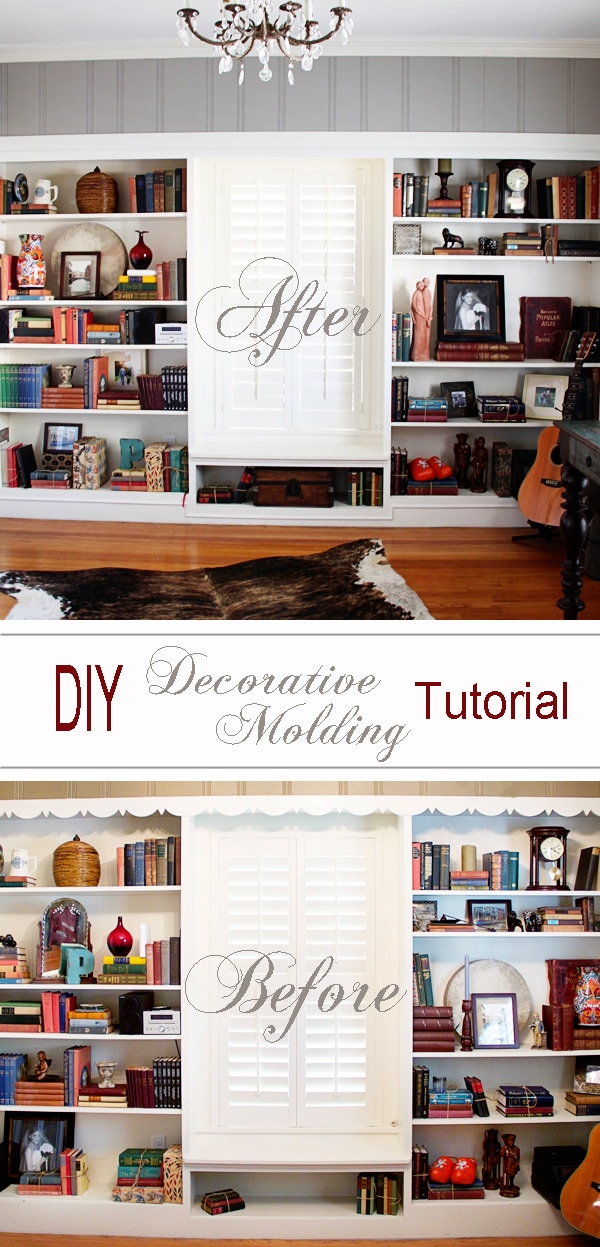
We used to refer to our library (aka my office) as our “Swiss Chalet” because of these bookcases. They were topped with a dollhouse-style molding that did not fit at all with the classic lines and look of the rest of the home. And contrasting the decorative molding at the top was a very boring flat lumber at the bottom. Something needed to be done.

For just a few hours and a few bucks (not to mention finally choosing the right color for the office), Mr. Pax and I managed to transform the entire look of the space… don’t you think?

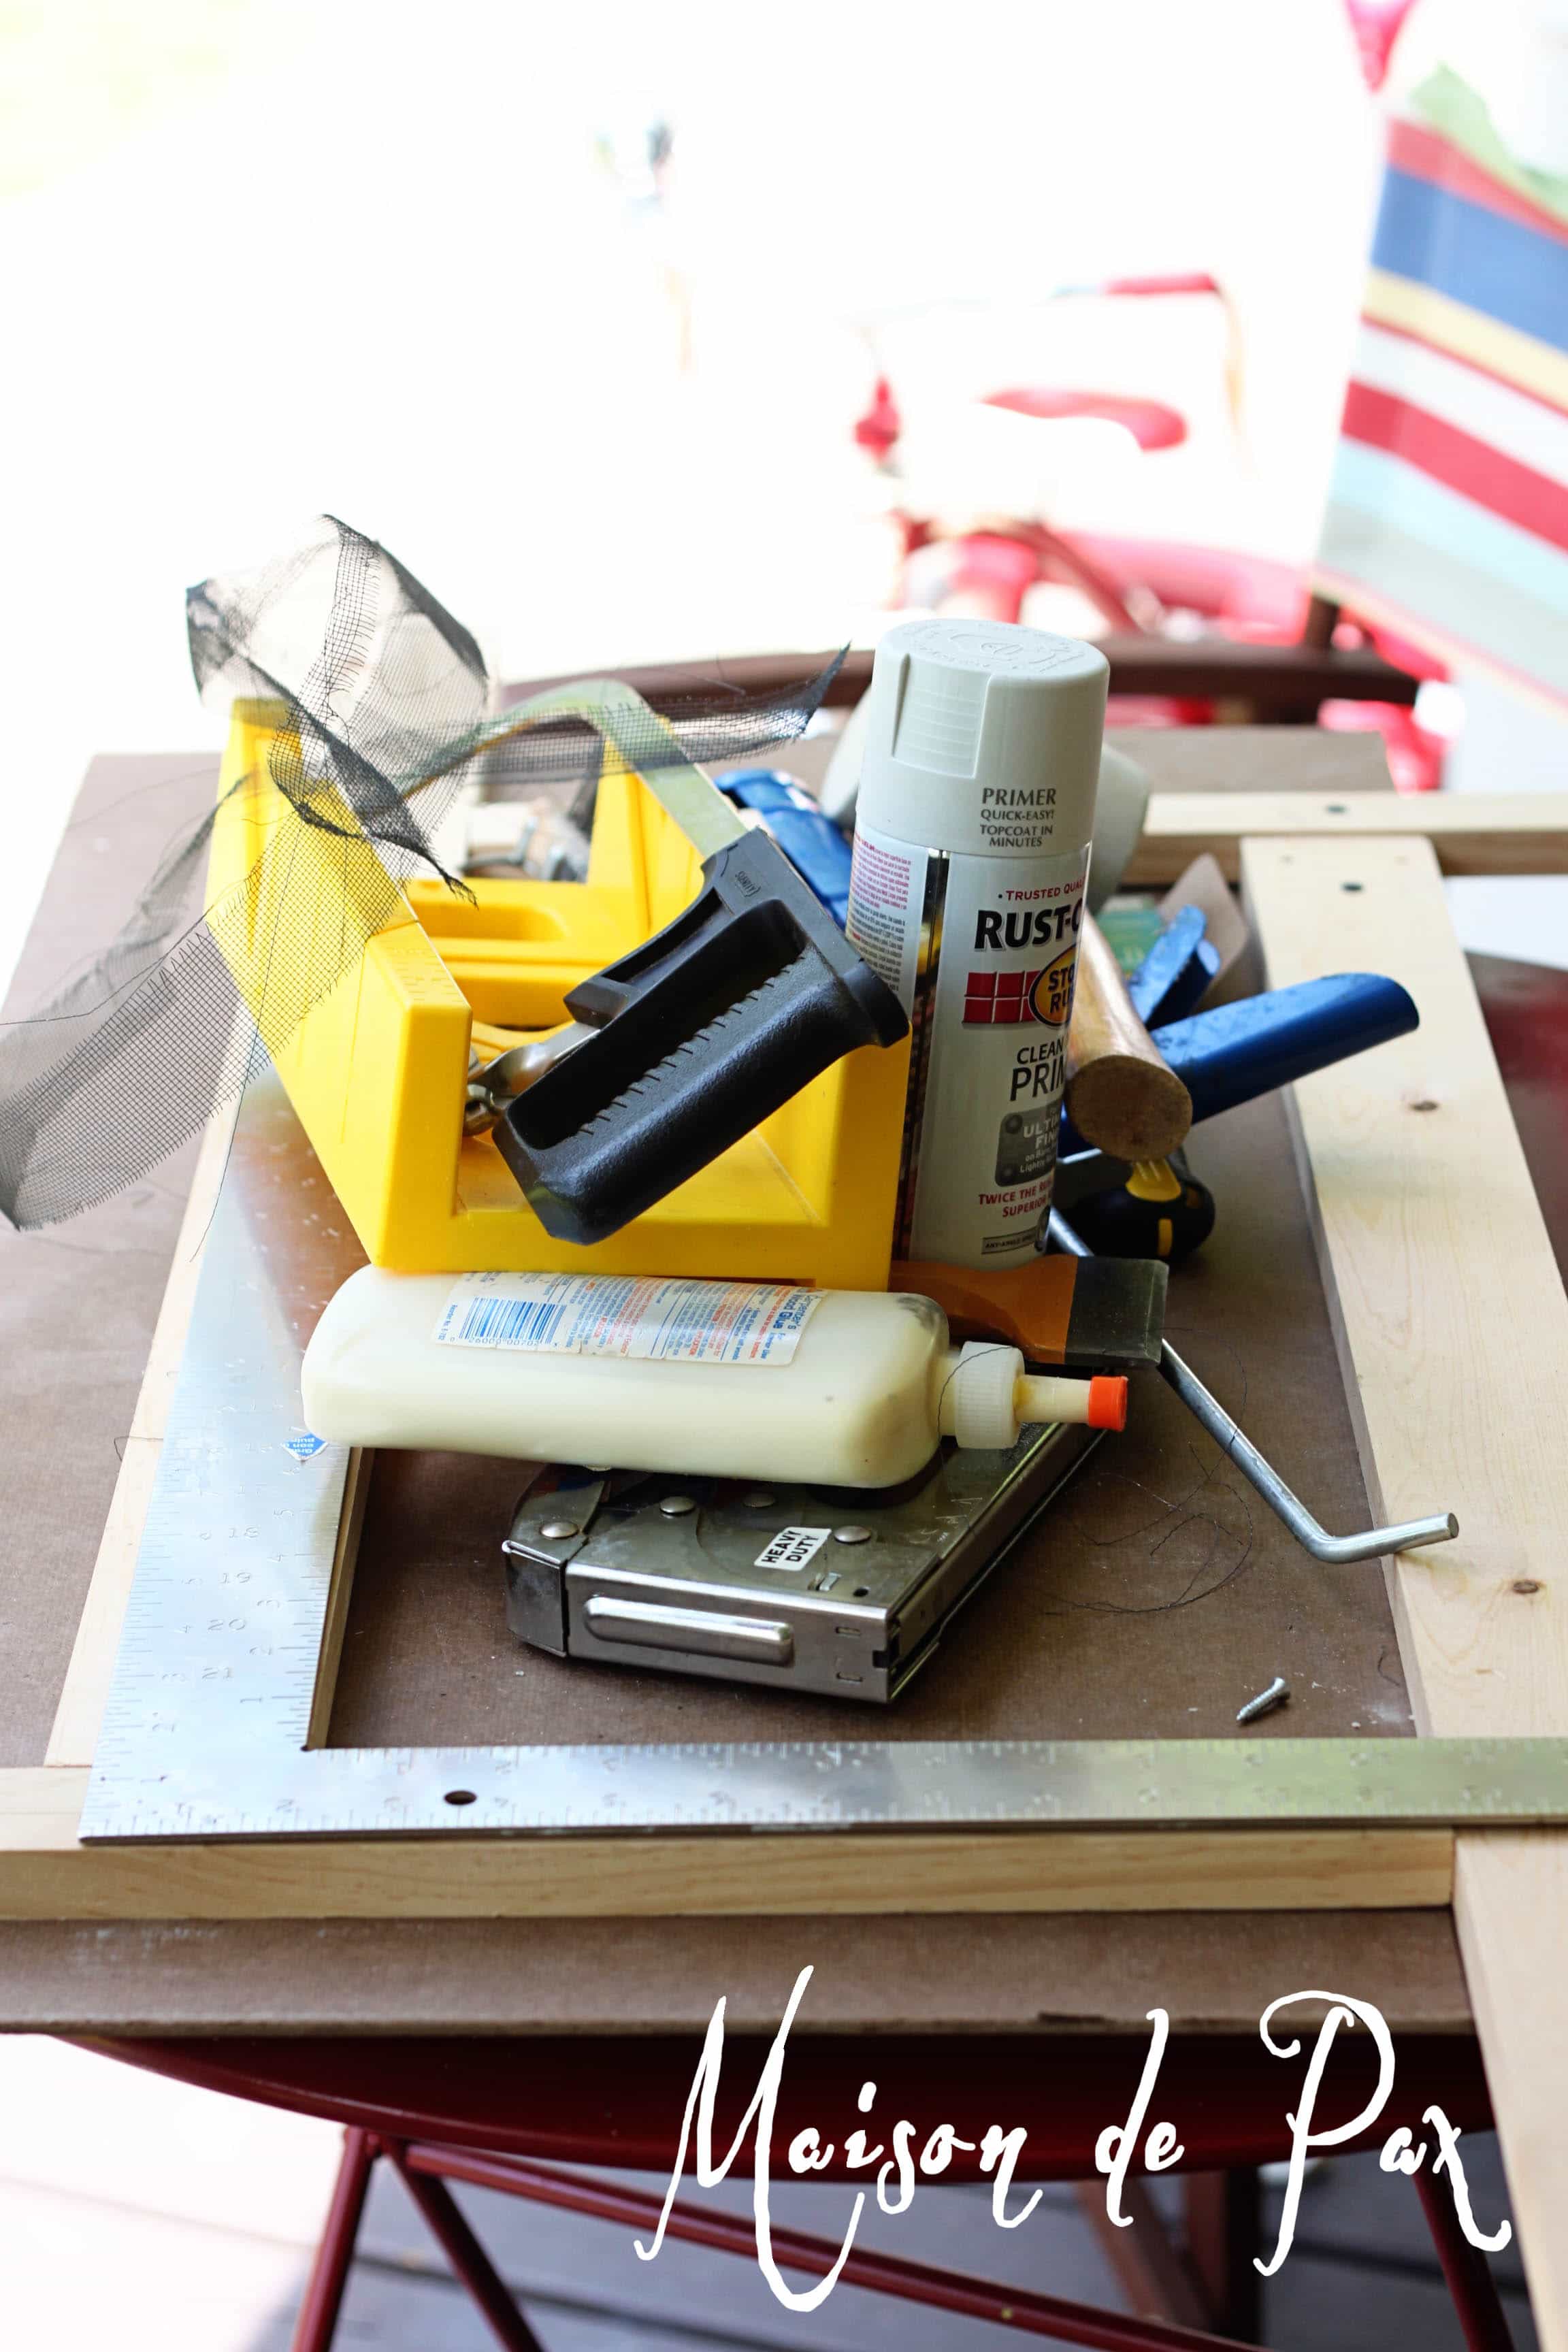
Here is what we did. I will include the specific measurements and pieces that we used, but remember, the same concept and steps could be applied to any space in need of some updating. We used power tools (a small saw and nail gun), but all of the following could be done with hand tools, as well. I’m telling you… It’s easy!
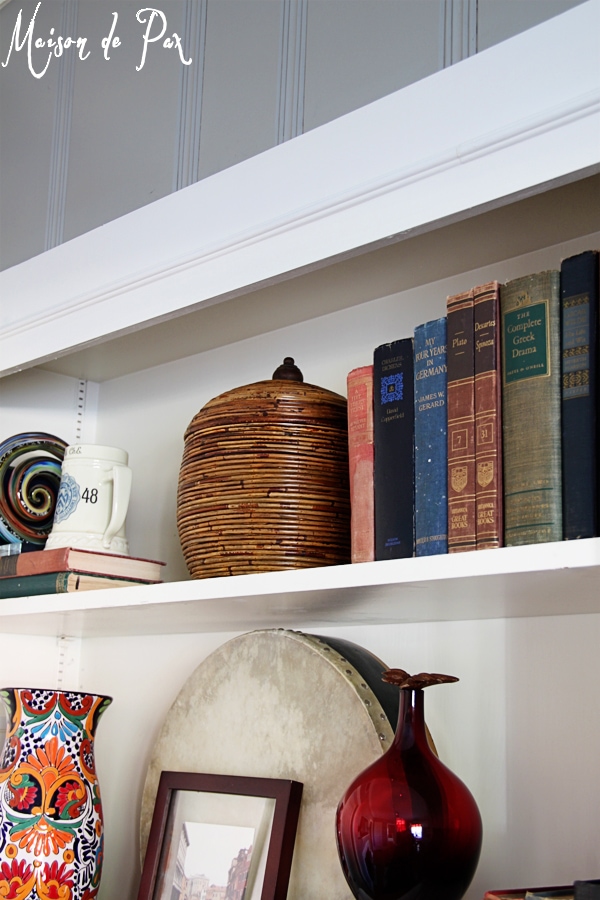
- Choose your new molding. We went to Lowe’s and just played until we found something we liked. We wanted something straighter and cleaner than the Swiss look, and we needed it to be 12′ long. We didn’t find anything perfect in the decorative molding section (plus, those can be so expensive!) so we opted for a basic 1×6 with a small decorative strip.
 This saved us money and gave us the simple, clean look we were going for. Plus, it allowed us to match the look on the bottom of the bookcases.
 - Remove old molding (carefully! so you don’t damage the walls).
- Trim vertical molding to fit the new molding. The Swiss molding was only ~4″ tall, but we wanted something a little more substantial, so we chose a 1×6 for our new base piece. Therefore, we trimmed the vertical pieces (just the decorative ones on the face of the bookcase, not the structural ones) to fit a 6″ top piece.
- Dry fit your molding. This serves two purposes: 1) it assures that the piece will actually fit (in older homes, the walls are SO not straight, so sometimes a little tweaking is needed!) and 2) it allows you to choose the placement of your decorative strip.
- Build your molding. If, like us, you create your own decorative molding, you will find it’s easier to attach them before they are on the wall. To attach the decorative strip to the main piece, simply use a thin line of wood glue and a few finishing nails.
- Prime and paint your molding. SO much easier to do before it’s installed! One coat of paint should be enough because you’ll need to do another coat after you caulk.
- Install your molding. Again, fit it in place. This time, secure with finishing nails.
- Caulk all seams. Where the decorative strip meets the 1×6, where the 1×6 meets the wall and vertical facing of the bookcase… anywhere that’s not smooth and gorgeous.
- Finish with another coat of trim paint.
 This saved us money and gave us the simple, clean look we were going for. Plus, it allowed us to match the look on the bottom of the bookcases.
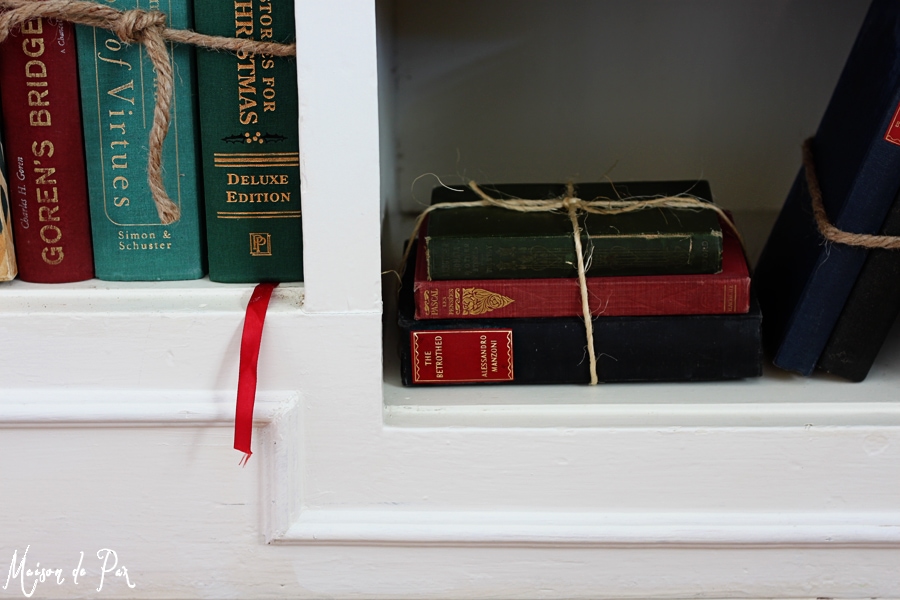
The same concept applies to the bottom of the bookcase, but we only did steps 4 and 6-9, as we were not removing anything, simply adding the decorative strip. We simply added it proportionally to offset the top molding, creating 45 degree cuts for the corners to follow the dip at the window seat.
I couldn’t be more pleased, truly. I feel like my office is finally becoming the space I want it to be. It’s amazing what a big difference a little molding can make! What was the last “small” touch you made with BIG impact?

Looks amazing Rachel -what a big difference such a little thing can make. I love your styling after and the books wrapped in twine.
Thank you so much, Krista! I have to protect my books from my toddler – ha!
Love this room and the bookcases are fabulous. I adore that cowhide rug. Hugs, marty
Thank you so much, Marty! So glad you like it. 🙂
Rachel, it looks amazing! I’m in love with your rug!! Thank you for sharing at Make it Pretty Monday! Hope to see your prettiness again next Monday! Toodles, Kathryn @TheDedicatedHouse
Thank you, Kathryn! Mr. Pax hit a Christmas-present homerun with that rug, didn’t he? 😉
Rachel, Love your bookcases and the new streamlined trim really updates the look. I have plantation shutters in my office too and have wanted to build bookcases on each side for a while. Your post may have pushed me a little further in doing just that.
I’m so glad you like them, Marsha! And though we didn’t build these bookcases ourselves, I have loved having the storage and the window seat. We did build our own in my husband’s office, though, and we love it. Good luck with yours!!
Fabulous job on these shelves. I’m including it in my collection as I try to decide what to do with our 3 bedrooms built in that are in dire need of updating!
Thank you so much, Linda. I’m so glad you like them! 🙂