Sheet Music Christmas Trees
I refuse to skip Thanksgiving, but planning for Christmas is so much fun! I was singing Christmas songs with my three-year-old the other day while we made these, and it warms my heart. Don’t worry, though, we’re still doing our daily thankful leaves, and Christmas hasn’t taken over the house yet. 😉

In fact, the pile of Christmas decorations, like my blue glitter pine cones and these sheet music trees, is growing to inordinate amounts in my laundry room as we speak. Oh. well. We are actually hosting 40 people for a Thanksgiving meal (don’t worry, it’s mostly pot luck; I’m just responsible for the turkey and ham… and my kids… and hosting… piece of cake ;)) this Thursday…. so the Christmas decor has to stay hidden at least that long. But I wanted to go ahead and share the tutorial on this one so you can make some for yourself!

Materials needed:
- styrofoam cone forms (I found mine at Hobby Lobby for 40% off)
- sheet music (even better if it’s Christmas music!)
- glue gun
- modge podge and glitter (for the tops)
- spray acrylic sealer (optional)
To make your own Sheet Music Christmas Trees:
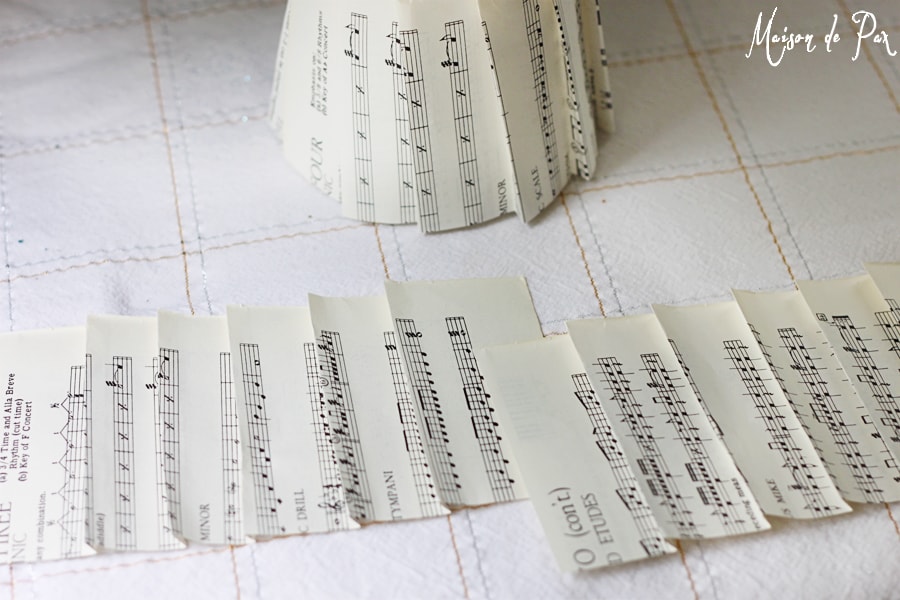
- Decide the height of each layer and cut your sheet music accordingly. I cut my pages in half.
- Fold your sheet music as desired. See below for further instruction.
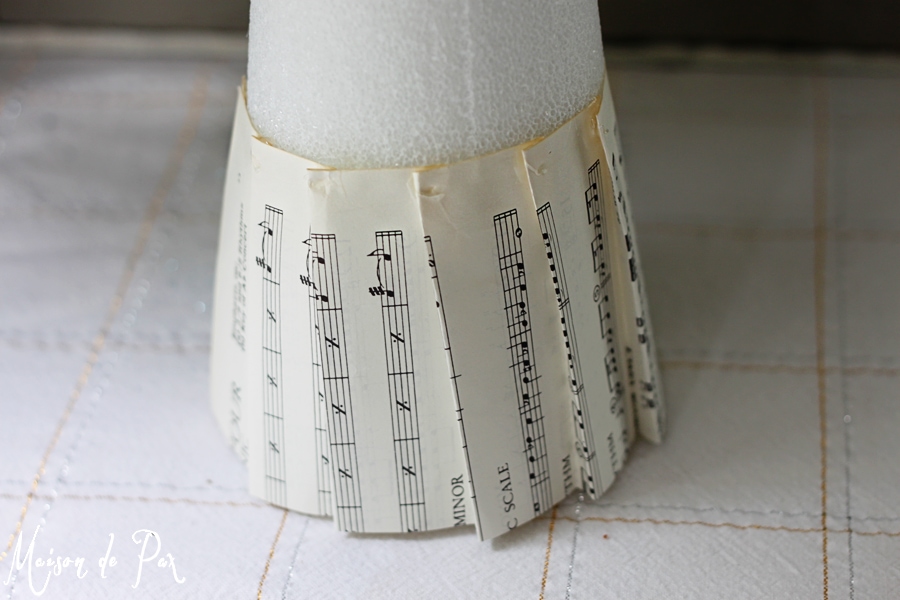
- Glue your folds in place and glue the top edge only of the sheet music to the styrofoam form. See below for further instruction. It may take more than one piece to go around the tree. Just make sure you line up your folds accordingly.
- Glue the next row of music so that it covers the glued portion of the first row. And continue until you reach the top!
- Dip the tip of your tree in modge podge and then glitter. This is not necessary, but I found it a nice way to cover the top edge where the paper meets the styrofoam form.
- Spray the entire tree with acrylic sealer. Optional, but this will preserve your tree better.
You could probably figure out how to copy these just by looking at the picture… but I do have a few specific tips (so you can learn from my slow discovery process!).

First, fold your paper as seen below (all folds go the same direction, and there is approx 1″ between each fold):
Then glue the folds down from the backside of the music. Next, apply one long bead of hot glue along the top edge of the music and affix it to the styrofoam form. Finally, go back and glue down top tip of the folds from the outside. You can see where my glue went here (note that there is no glue below that top edge):
It’s very simple, but I love the visual interest provided by the music notes while the trees themselves remain neutral. They look lovely on a mantel, shelf, or as a table centerpiece. I can’t wait until after Thanksgiving to be able to actually start decorating with them!

What do you think? What other projects have you done with sheet music?


Very pretty! I love the tops dusted with glitter. Pinned and I’ll share on FB, too.
Thank you so much, Sharon! I’m so glad you like them. 🙂
I love how these turned out! I shared this on my blog today in my Christmas decor Pinspirations, here is the link: http://onemilehomestyle.blogspot.com/2013/11/monday-pinspirations_25.html
Steph
Thank you so much for sharing and letting me know! I hope you have a wonderful Christmas. 🙂