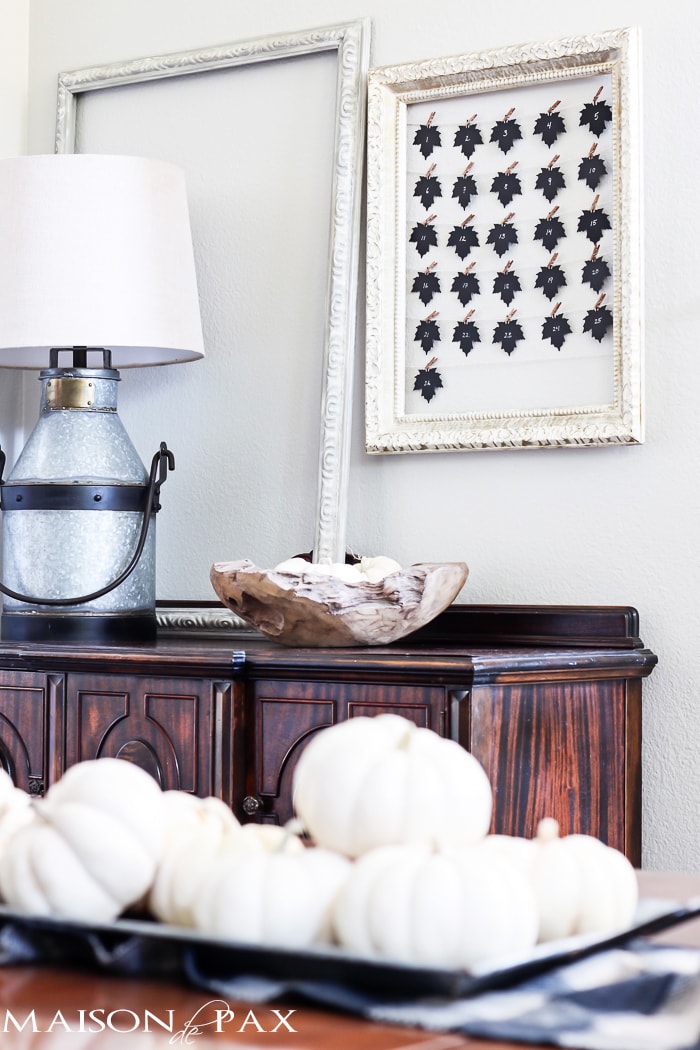
Thanksgiving Advent Calendar Frame
Thank you to Birch Lane for sponsoring this post. As always, all opinions and text are entirely my own. Be sure to scroll down for links to other beautiful Thanksgiving projects!
As I was putting this together in late October to photograph for you, my five year old walked into the room and said,
Oooooo… Thankful leaves! Mom, can we do those now?!?!
Oh my heart.
The reason he knew what I was doing is that I shared a similar project two years ago: chalkboard thankful leaves. Those leaves have been so special to my family as we count our blessings each November. This year, though, I decided to create a more prominent display.
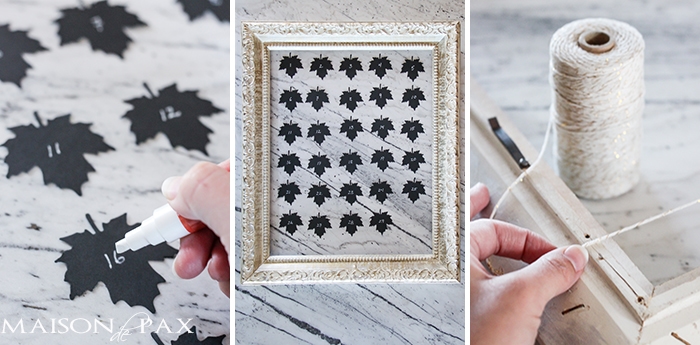
I also opted to simply cut the leaves from black card stock rather than using our actual chalkboard ones (for re-usable ones, see this tutorial) because I cannot figure out where I put them when we moved. Oops! Truth be told, though, the black card stock ones were a snap, and while we will have to throw them away at the end of this year, they only took about 5 minutes to cut out, so we can always cut new ones next year. 🙂
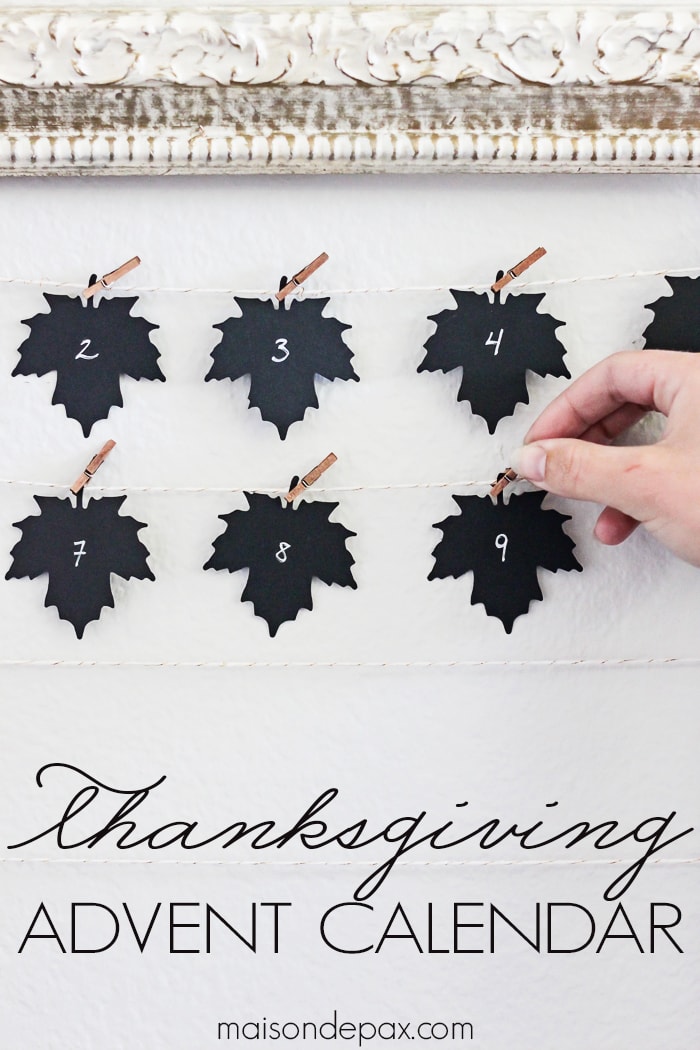
I know it’s already November 2, but you still have plenty of time to create and enjoy this before Thanksgiving (or you can always pin it for next year). I’m telling you, it has been one of my little family’s most cherished traditions. For the last two weeks since I set this up, my sons have been asking to start them! I told them they had to wait until November 1, so last night was sweet when we took down #1 and wrote what we are thankful for on the back.
To make your own, you’ll need the following:
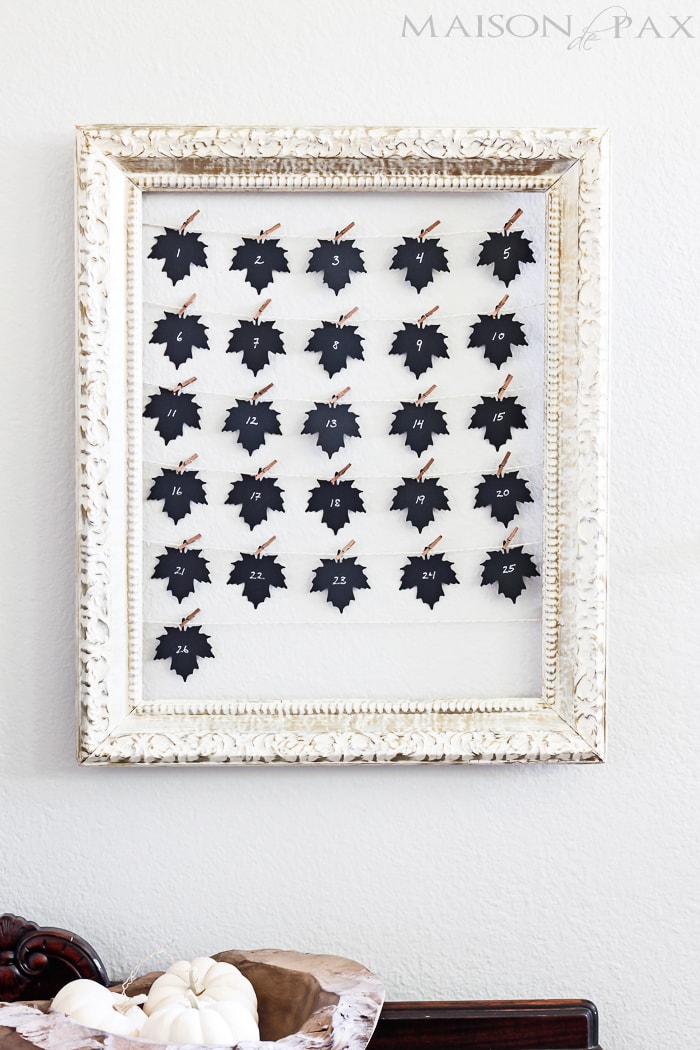
- black card stock (I managed to fit them all on just 2 pages, but 3-4 would be safer)
- this leaf punch
 (or cut your own leaves by hand)
 - a chalk marker
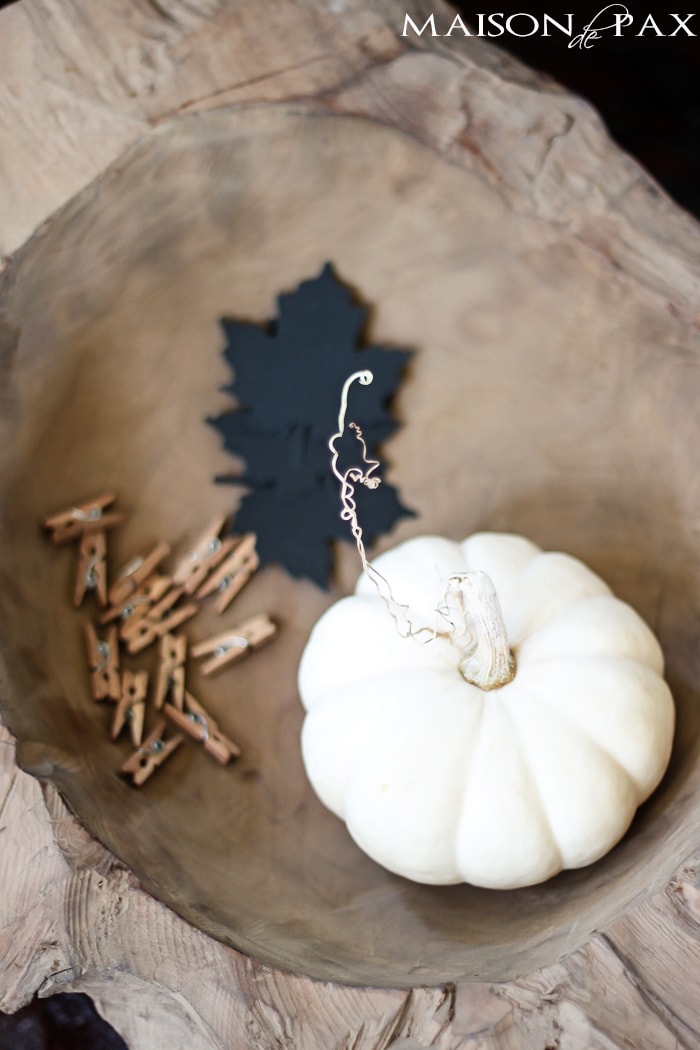
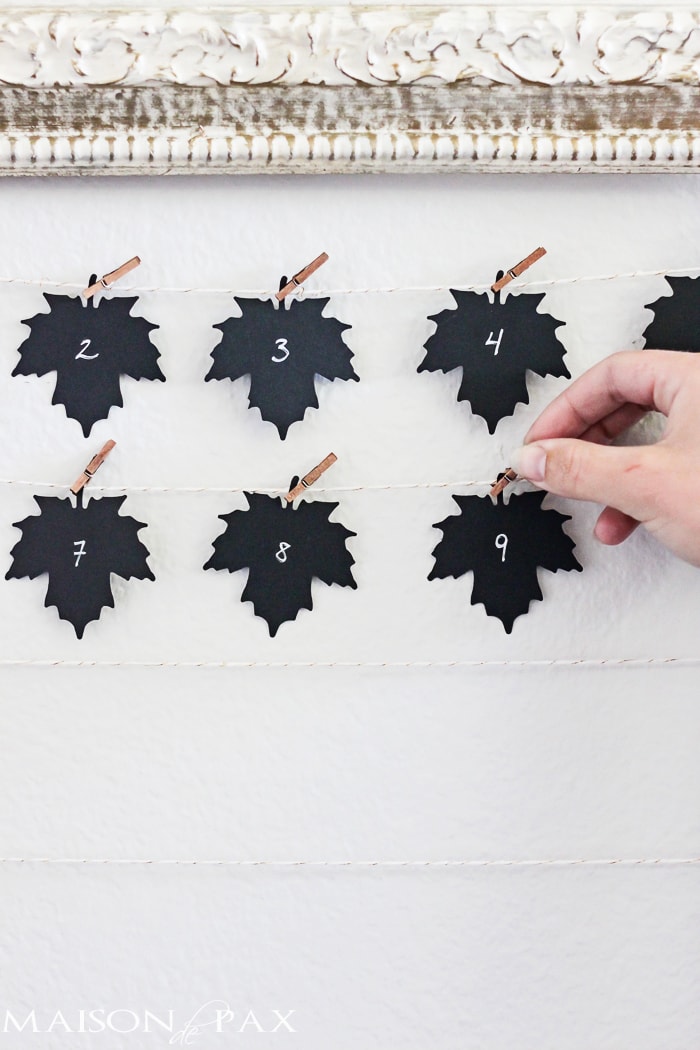
- mini clothespins
- an open frame
- string
- tape
After punching out your leaves, number them 1 to ___ (whatever date Thanksgiving falls that year). Then decide your arrangement in your open frame. Stretch string across the back of the frame (I used baker’s twine like this![]() ) and secured it with strips of washi tape I had on hand.
) and secured it with strips of washi tape I had on hand.
You can then choose to hang them all at once in the frame and take them down to write throughout the month or hang them as you go, adding one each day.
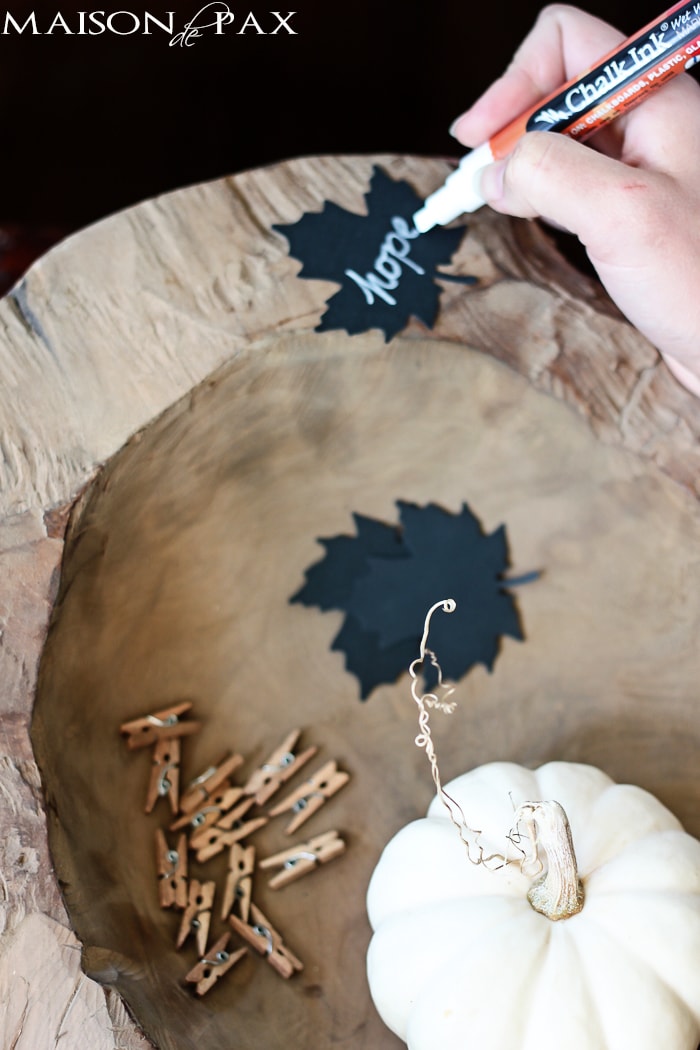
Either way, keep a container nearby with a few extras (you never know when one will get torn or lost… it’s amazing what my kids can manage to destroy!) and a chalk marker so you’re ready to write your blessings. I couldn’t resist using this beautiful teak bowl from Birch Lane for ours.
And on Thanksgiving Day, as we come together for our big Thanksgiving dinner, we can take these down, pass them around, and take turns reading all of these thankful leaves and recounting all the things we are so very thankful for.
And that, my friends, will be a very sweet day indeed.
For more ideas and inspiration for creating a beautiful Thanksgiving, be sure to visit my friends’ who will be posting throughout the week.

Monday

Everyday Enchanting | Maison de Pax | The Wood Grain Cottage
Tuesday

Rain on a Tin Roof | Making Home Base | Life on Virginia Street | Migonis Home
Wednesday

The Blissful Bee | House by Hoff | The Happy Housie | Just a Girl and her Blog
MORE DIY DECOR FOR FALL:


This is such a great and beautiful idea!….Thanks for the inspiration Rachel!!!
I looooove this idea, Rachel! And I live that your five year old is ready to count his blessings! How sweet! The teak bowl is divine!
So beautiful!
I absolutely love this sweet, beautiful idea Rachel!!
I LOVE this idea! and instead of throwing the leaves away, you could always toss them in a photo album or keepsake box to remember all the things you were thankful for in 2015. Especially if there are some funny ones along the way! 🙂
Beautiful, Rachel! I CAN’T BELIEVE I GET TO SEE YOU IN A COUPLE OF DAYS!!!!
This is such a beautiful idea, Rachel! It so perfectly illustrations the spirit of the season. Thank you so much for being a part of this tour! xx