Low Cost Furniture Makeovers for Your Home
I have been so blessed by the number of sweet (and amazingly talented!) ladies who have been willing to share their work while I’m adjusting to life with three little ones… Today, I’m thrilled to introduce Allison from The Golden Sycamore. This girl has talent, y’all. She has an eye for a bargain and a flare to make it beautiful. Read on for tips on how you can score some amazing furniture and make it your own!
_______________________________________________________________________
Hi guys! I’m so excited to be here today! First of all, I wanted to say thank you to Rachel for having me over to her blog today! I found Rachel’s blog a few months ago and was so impressed by her amazing talent right from the beginning, so it’s such an honor to be here!
* * *
My blog, The Golden Sycamore, is where I share my DIY projects, home improvement updates, and furniture makeovers. I have been blogging for about two years now and I love it! It’s such a great creative outlet for me!
One of my favorite things to do is paint furniture. Another one of my favorite things to do is save money. And putting those two things together? Well, that’s a win, win! I love the fact that with a little paint and creativity, a piece of furniture can be totally transformed into a gorgeous, custom piece for your home!
Here are some of my favorite transformations I’ve done …
Painted Furniture Makeovers
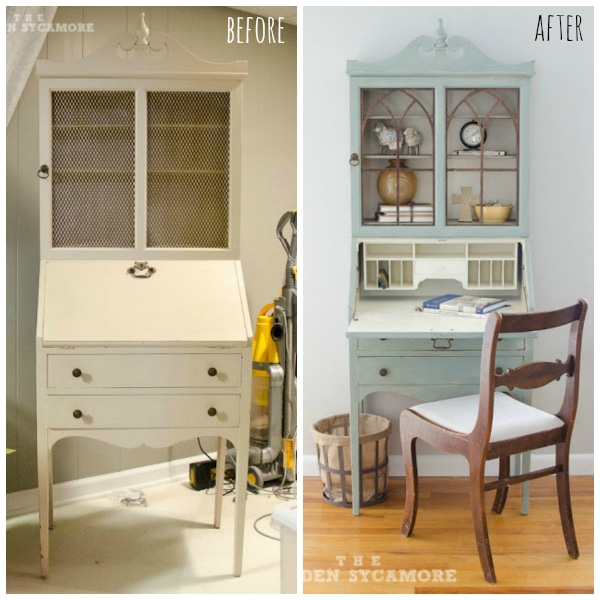
This vintage secretary was only $40 at an estate sale. It had these metal grates on the windows which I couldn’t stand. I almost passed it up until I opened the desk and saw that it came with the original wood inserts. Once I saw them, I knew I had to take this piece home with me. A little paint and adding the original inserts gave this secretary a custom look. This piece still sits in our living room where I get to enjoy it every day!
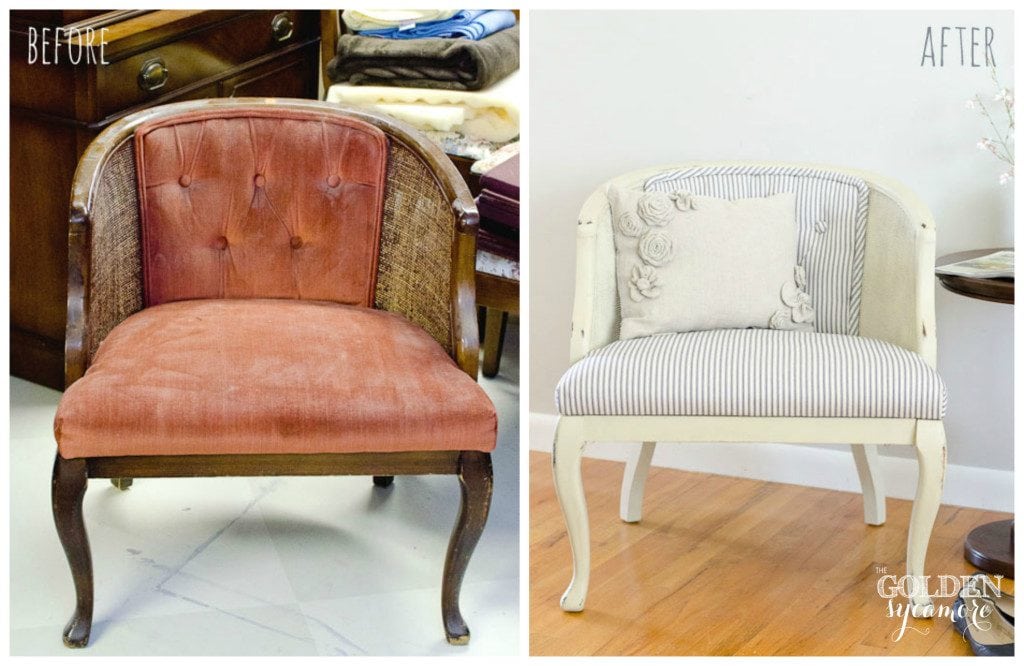
This gem of a chair was found at a garage sale near my house for a whooping $2.00! I couldn’t believe the price when I saw it. It definitely needed some work, but for $2, I could totally ruin it and I wouldn’t have lost much, right?! I gave the chair a bit of a cottage/beachy makeover with blue ticking stripe fabric and light beige paint. Once I had finished it, I had a really hard time giving it up because I loved it so much. But I sold the chair to my mom, so I still get to visit it now and then!
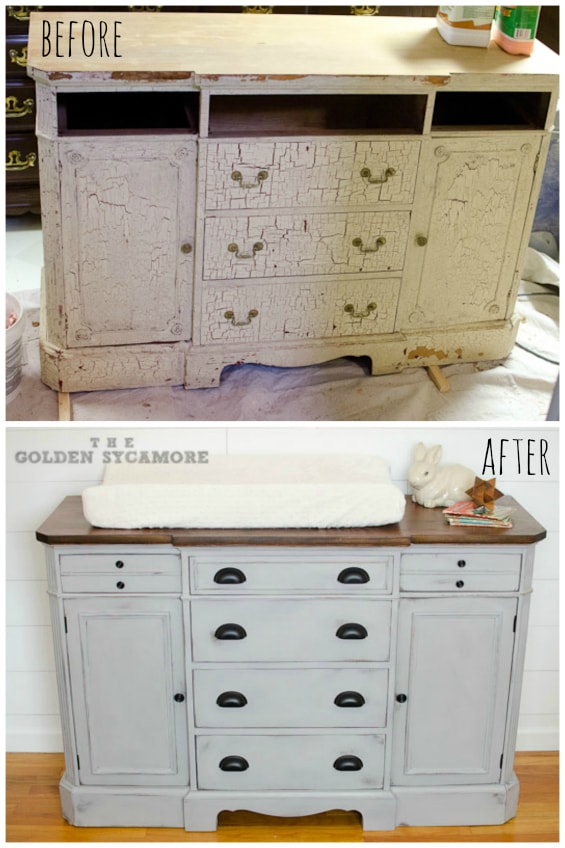
This dresser/changing table is another one of my favorite, inexpensive transformations. The dresser was given to me by a friend that no longer wanted it. She had painted it years before and it no longer fit with her decor, but she didn’t feel like redoing it again, so she gave it to me! Umm, yes please! I LOVE free furniture! 🙂 My husband did all of the stripping and sanding work on this piece since I was quite pregnant with our second daughter at the time. It took a lot of work to get it all cleaned up, but it was totally worth it. After staining and sealing the top and painting the body, it has been transformed into the perfect changing table for baby #2!
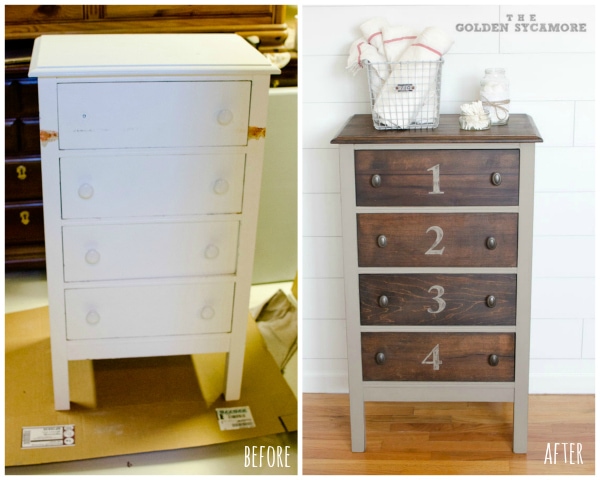
This small dresser was a custom piece I did for a friend. She wanted a pretty specific sized piece for her bathroom makeover and I just happened to find something on Craigslist that fit her desired dimensions. This piece was $40. It was a little pricey for such a small, plain piece, but it had great potential. This one also took lots of stripping and sanding since it had 4 or 5 layers of paint on the whole thing. I stripped the top and drawers down to bare wood and stained them with dark walnut stain. Then I painted the body and then added numbers in the same paint color to the drawers. I was a little sad to let this one go, too! Thankfully for my friend, I had no good place in my house to put this, so she got to keep it! 😉
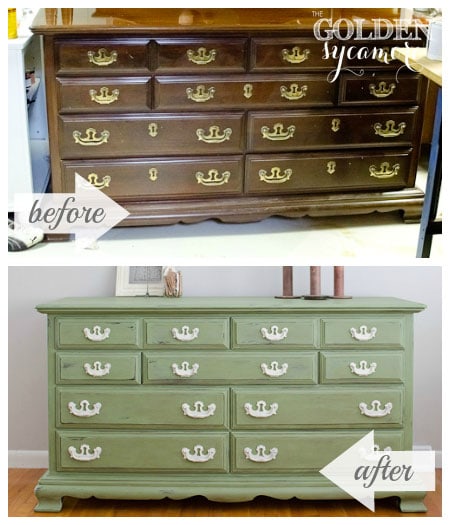
This dresser was also given to me. It wasn’t that old of a piece, maybe 80s or 90s, but man, was it heavy! It was so heavy, in fact, that it had casters tucked under the feet, so you could roll it instead of having to pick it up to move it around your home. I gave this one a bright and cheery makeover with a custom mix of Chalk Paint® colors. I wasn’t a huge fan of the drawer pulls, but they had to stay since they were an odd size and I couldn’t find anything to replace them with. So, to give them a little update, I painted them white. Even though they’re a little old fashioned, the white paint helps liven them up a bit.
Thanks for taking this little trip down furniture makeover memory lane with me! As you can tell, I really love painting furniture! I have lots more furniture makeovers (and DIY projects, home improvements, etc) in my project gallery if you’re itching to see more!
Be sure to follow me on Instagram, Facebook, or Twitter for all the latest updates!
MORE LOW-COST FURNITURE MAKEOVERS:
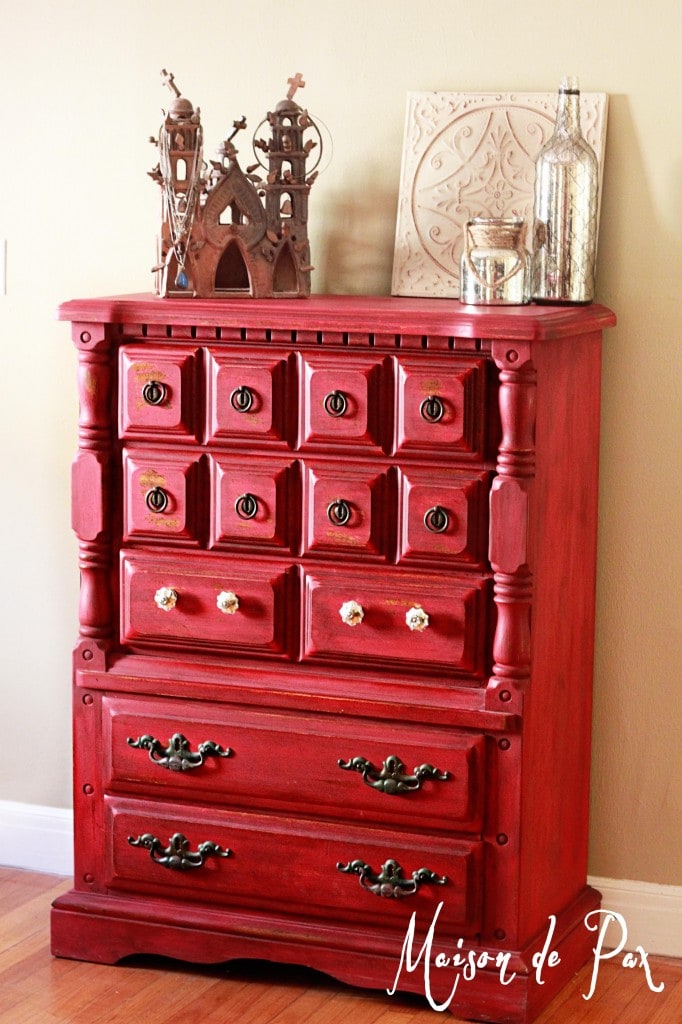
Red Dresser Milk Paint Makeover

Oh my…. furniture beauty here!!!! LOVE every one!
Allison has a real talent, doesn’t she, Yvonne? Thank you so much for your sweet comment!