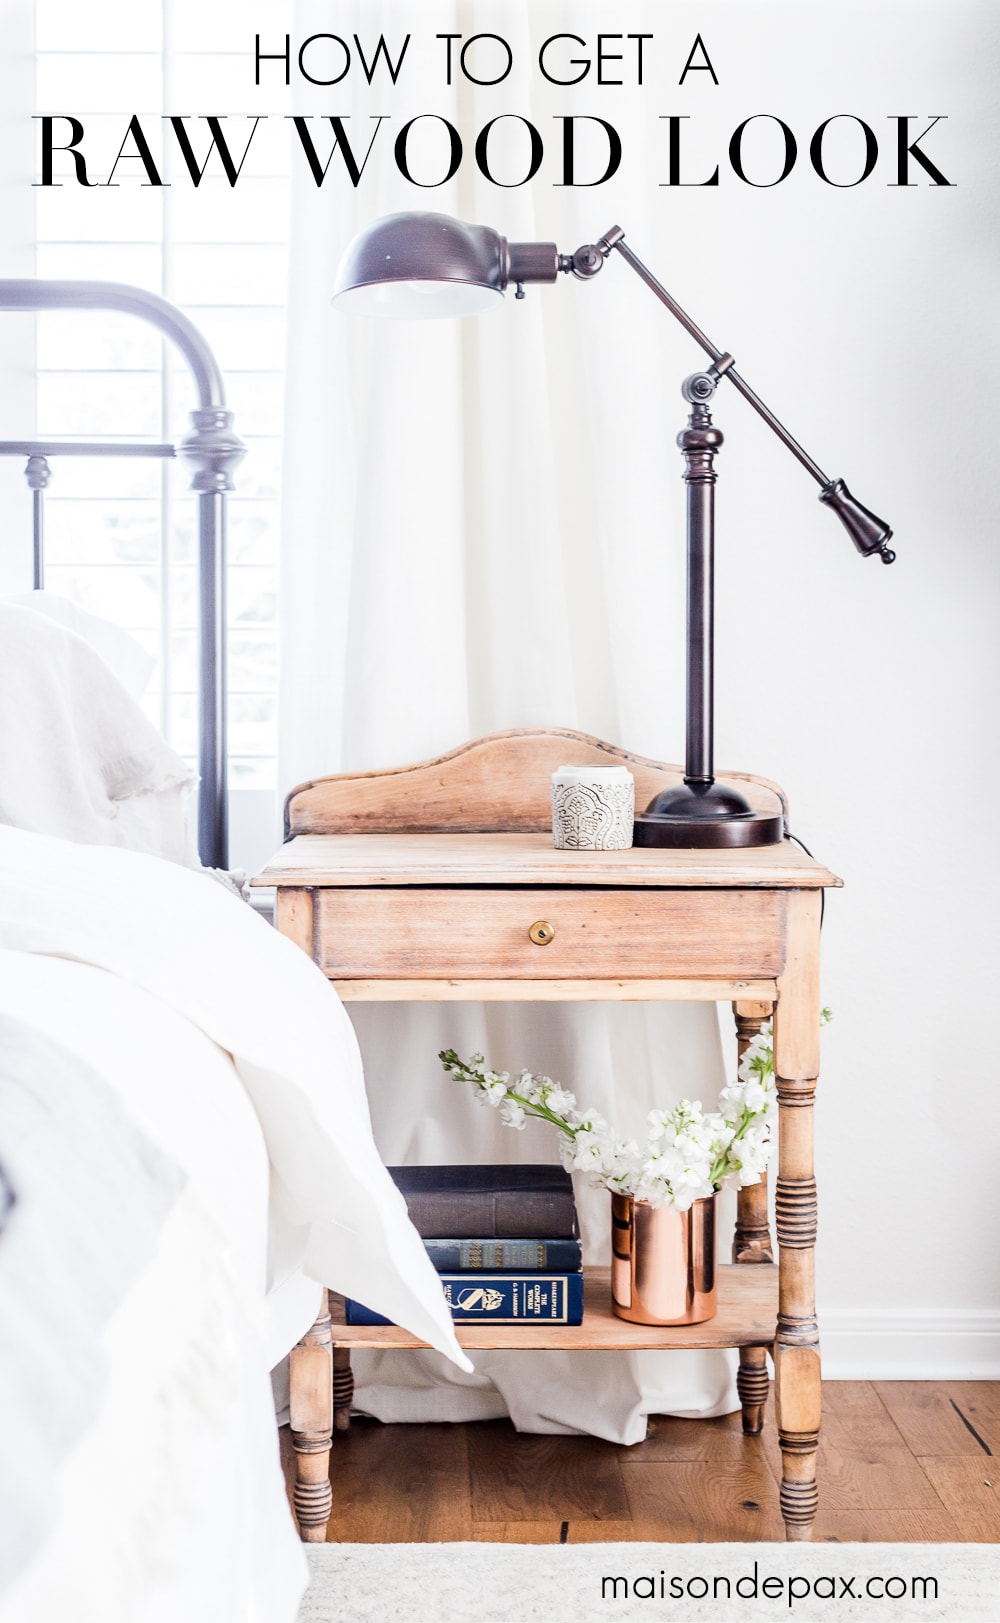
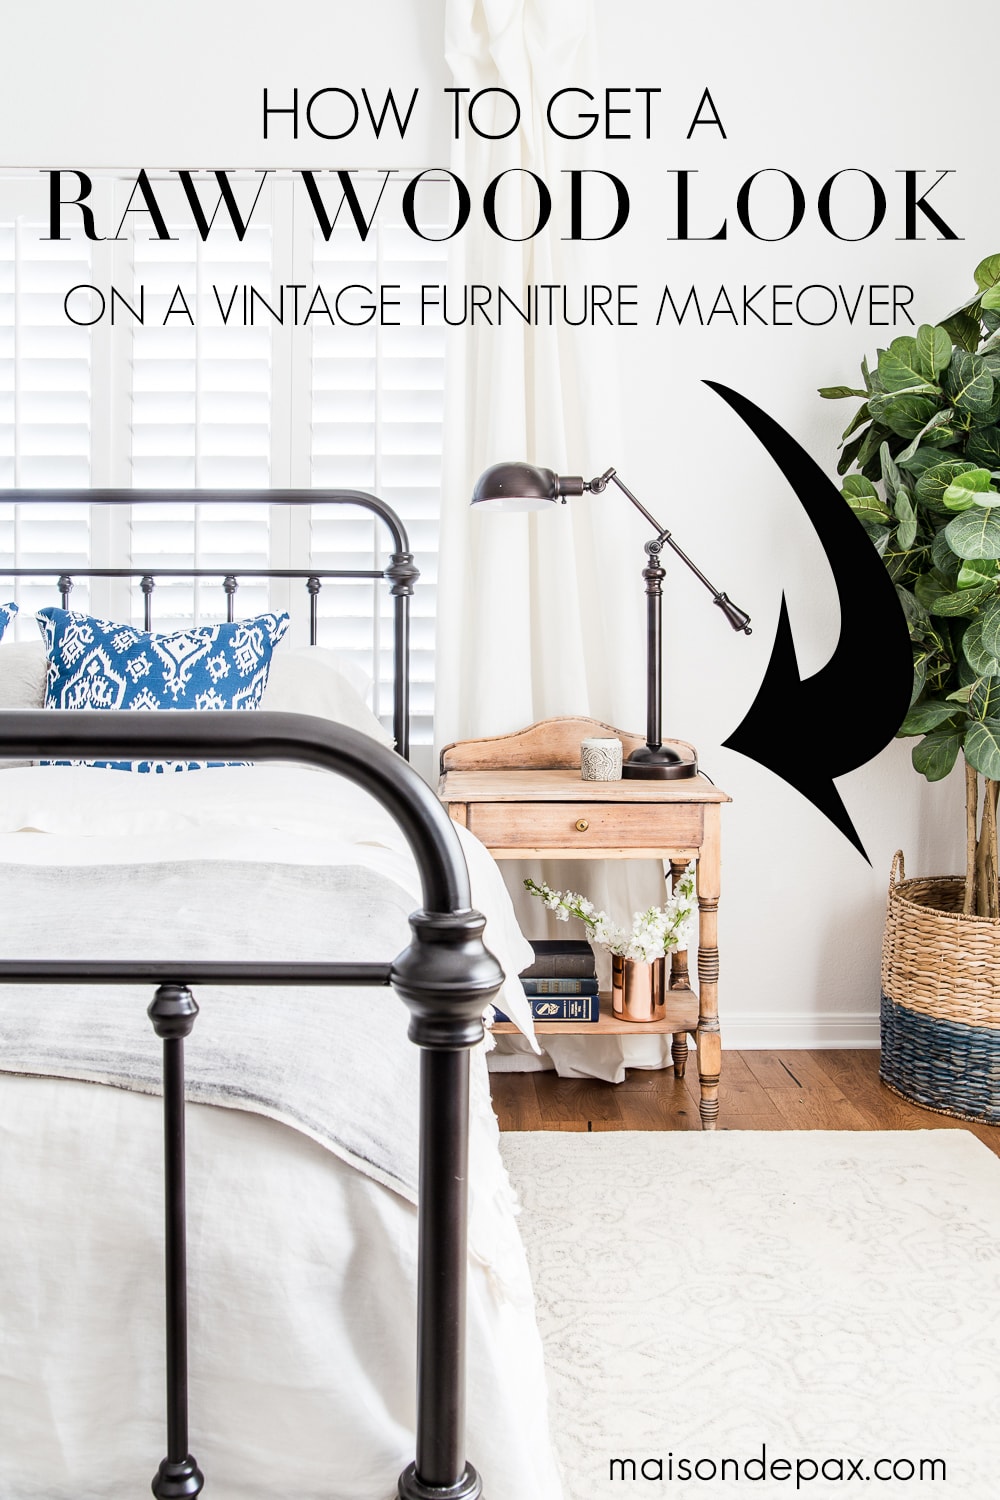
How to get a Raw Wood Look
Trying to update your vintage, antique, or dated furniture? Find out how to get a raw wood look for a fresh, modern vibe. Learn how to do this rustic modern furniture makeover in just three easy steps!
Well, friends, this is one of those total blogger fail moments. I not only didn’t stage, light, and video my tutorial… I didn’t even take many pictures! Or maybe I did (I have a vague memory of doing so…), but I can’t seem to find them on my camera. Oops. But – wouldn’t you know it – the one thing I didn’t document is the one thing I’m getting lots of questions about. So we’re going to make up this tutorial after the fact (and with a couple of sloppy iPhone pics to the rescue!) as best as we can… and share how to get raw wood look on old furniture. The best part is that it’s so easy that the fancy tutorial pictures aren’t even necessary. 😉
Trying to create a natural wood finish:
How to lighten up an old finish:
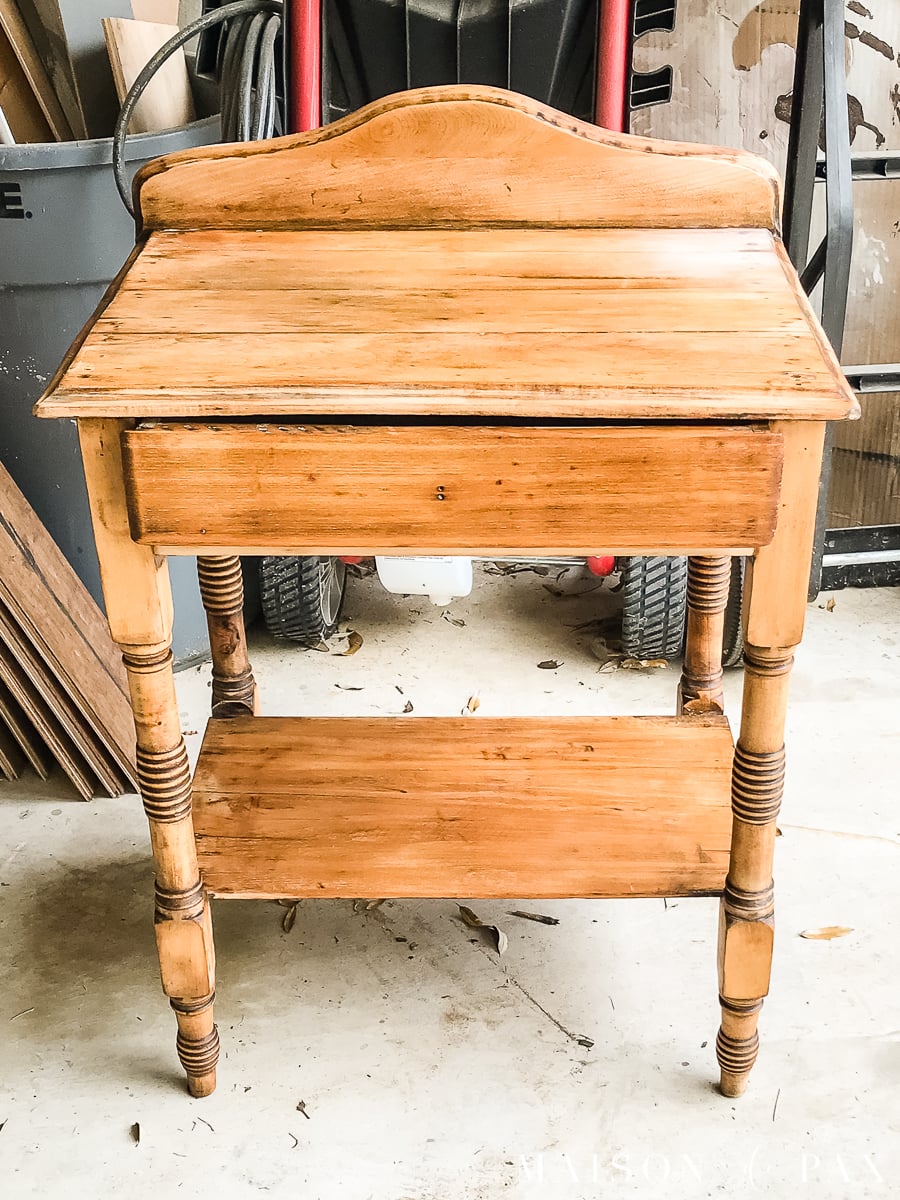
This sweet little nightstand happens to be one of the first piece of furniture my in-laws ever bought as a newly married couple. That alone is reason to cherish it, right? But I also liked the simplicity of it, and the little drawer and shelf are super practical. It seemed to have been finished with a walnut colored stain (though the wood is clearly pine or some other wood with very little grain), and the finish had definitely seen better days.
This post contains affiliate links. Click here to see my full disclosure.
I’ve recently been super inspired by my favorite bowl and its companion vase, both of which are a raw teak (seriously, I want to put them in every room and every vignette every time I decorate!). The raw, organic look feels very modern and is such a beautiful complement to white.
Update: that bowl and vase are no longer available, but I’ve gathered some similar ones for you below.

With that inspiration, I knew I wanted a wood finish rather than a painted one, so the first step was to remove the nightstand’s old finish.
There are two main options when stripping furniture: sanding the finish right off or using some kind of chemical stripper. I have used some of the more environmentally friendly strippers in the past, but since I’m not pregnant right now and I had plenty of ventilation, I decided to just go for it and try this chemical stripper.
To be honest, half way through I just quit using it and sanded instead. The clear coat finish was not very thick, so 60-grit sandpaper took it off without too much elbow grease. Plus, since the wood was kind of soft, the sanding actually took off the stain color pretty quickly (the stripper was taking off the clear, protective coat, but not removing the stain).
In the end, an hour or two of sanding (with an orbital sander on the big portions, a palm sander in the corners, and by hand on any non-flat surfaces), the piece was stripped almost totally bare. I didn’t bother to try to remove the stain from some of the nicks and grooves because I like how it aged the piece.
In fact, when I finished sanding off all the finish and wiped off the dust, I thought THIS! This is what I want the piece to look like!!
(insert face palm because this is the step that I cannot find pictures of…)
But how to protect the raw wood finish???
How to seal wood without changing the color:
Unfortunately, raw wood is totally unpractical in this instance… And the short answer is there is no perfect way to seal wood (especially the aged wood of antique furniture) without changing the color at least some. I could have put a clear satin or matte water-based poly on it at that point and quite possibly have preserved the look for the most part, but sealing wood with almost any clear coat makes the wood a bit darker and richer when it goes on.
I also knew that polyurethane would be much harder to alter if I didn’t like the final look (since it really is meant to be the very top coat). So I used some beeswax finish from Fusion Mineral Paint that I had leftover from another project since I love the matte finish of wax and knew it could be adjusted afterwards if need be. As I expected/feared, it wonderfully hydrated and sealed the nightstand, simultaneously bringing out the oranginess of the wood.
This picture doesn’t do it justice. It was orange. I told my husband it looked like “horseshoes nailed to the wall” rustic. That’s not necessarily a bad thing (I am a born and bred Texan, after all!), but it was not at all the look I was going for with this piece. So I began brainstorming how to bring back that natural, raw wood look.
How to get raw wood look on furniture:
- Remove the old finish (leaving some darker color in nicks and grooves is fine)
- Apply 1-2 coats of a hydrating wax finish (like Fusion Mineral Paint’s beeswax)
- Apply 1 coat of Amy Howard’s cerusing wax
To apply the cerusing wax (there is a great little video on the Amy Howard site here, but I didn’t watch that before, so I made up my own way 😉 plus, it’s really for application over a painted finish ), I simply squeezed a quarter size amount or so onto a lint free rag and rubbed it into the wood in a circular motion. Be sure to wipe off any excess.
(See how the right side is much less orange than the left?!?!)
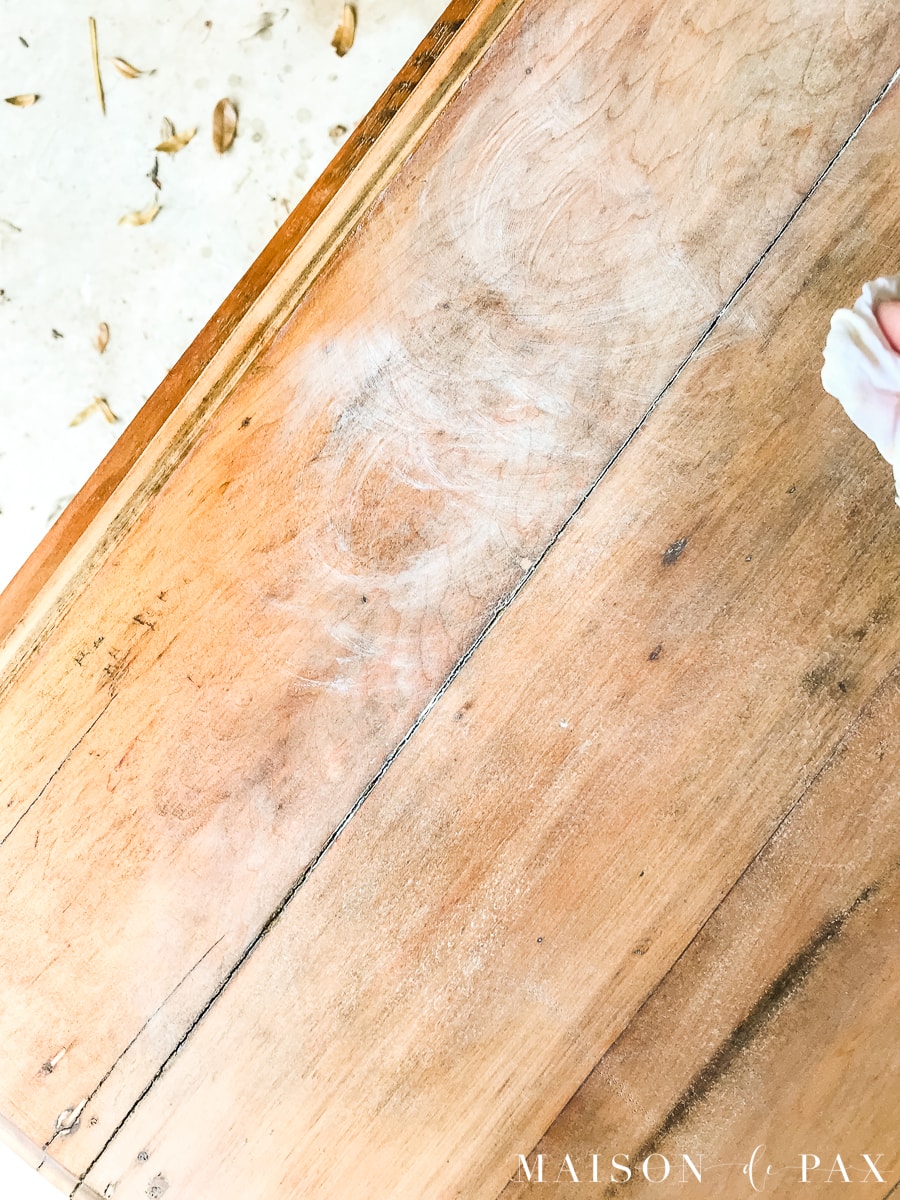
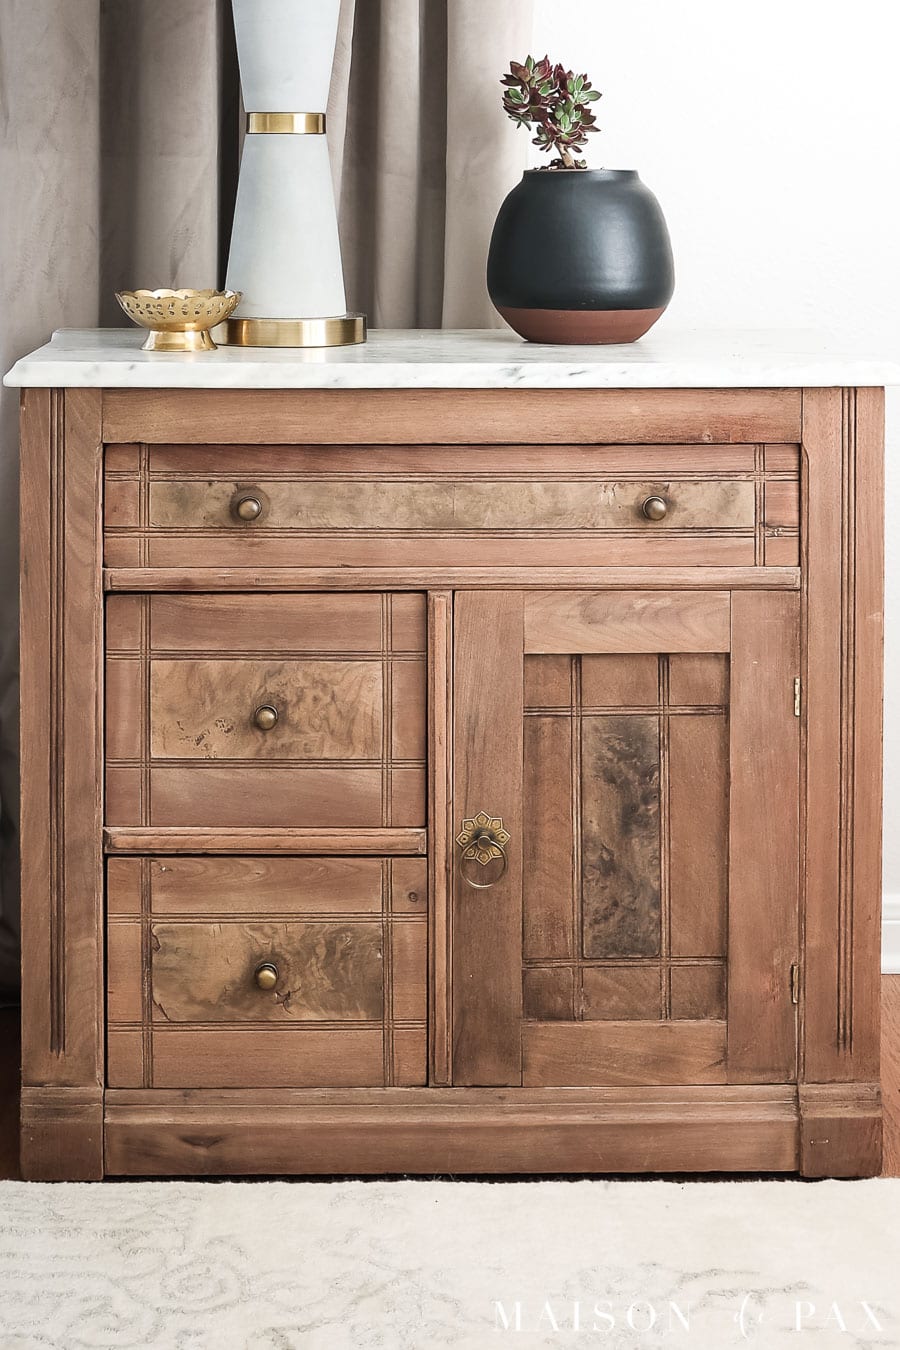
The cerusing wax is what did the trick: it took the piece from the warm orange back to a nice, more natural look.
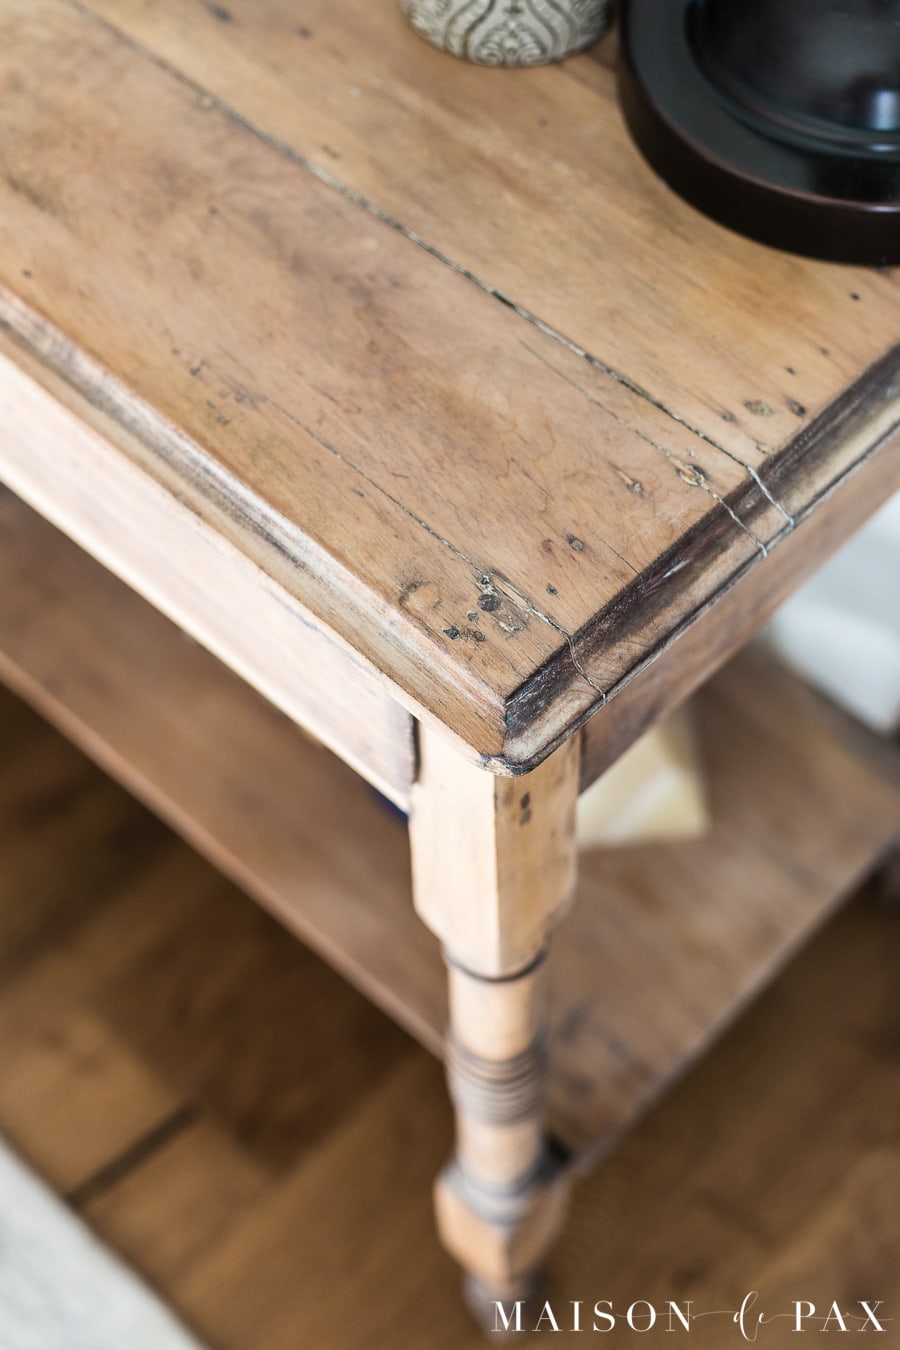
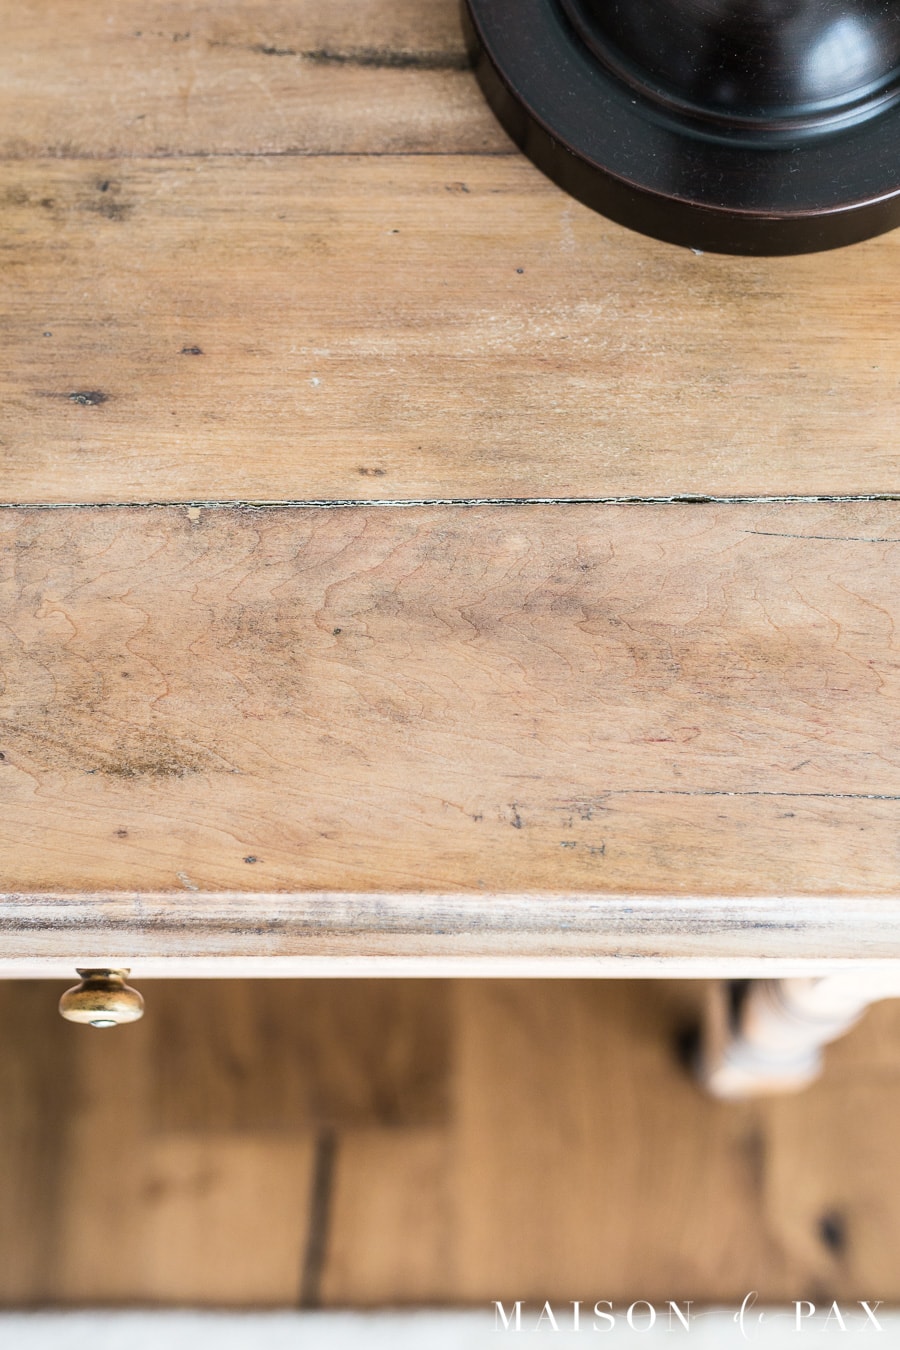
If you look closely, you can see some of the white wax in the cracks and crevices and grain of the wood, but the overall look is not necessarily whitewashed, simply natural.
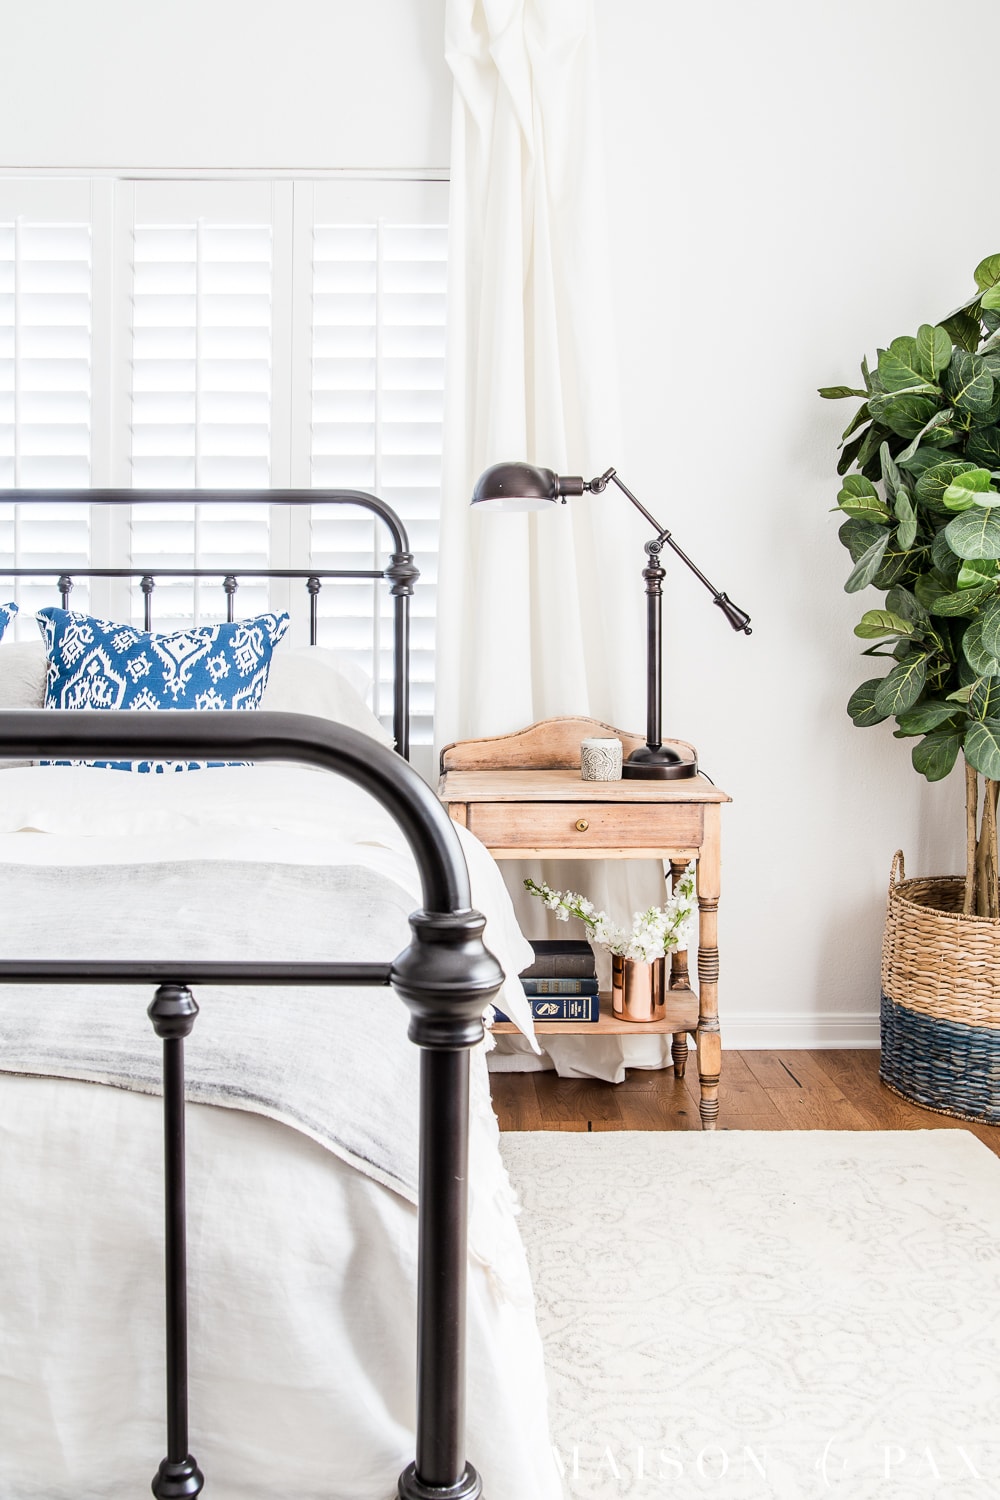
It’s just the rustic modern look I love that I have with those two favorite accents I mentioned.
And I love how it looks with our new bed in our recent master bedroom makeover.

GET THE LOOK:
Now I have to figure out what else I can strip. 😉
Update: if you need your piece to have a more durable finish (like a kitchen table, for example), try this method instead.
Be sure to pin it for later and let me know if you try the diy process and how it turns out on your piece!


If you were to do over again would you even use the hydrating wax or go straight to the Amy Howard wax?
Great question! As a rule of thumb, I always use clear wax before any colored wax (especially dark), so that I can better control the amount of color. I obviously haven’t tried it, so I can’t be sure, but often colored wax will stain paint or wood when applied before clear wax, and I wonder if it would have been a much more whitewashed look had I done that? That’s one tough thing about making over vintage pieces; there’s no scrap wood on hand to test!
Do you worry about deciding to use a different kind of finish and not being able to remove the wax? I feel like everyone who uses or recommends waxing wood should warn people that it’s nearly impossible to remove. You’ll never be able to refinish it with anything else
In this case, I didn’t worry for a small piece. I think the natural look is a timeless style so I don’t have to worry about stripping for different trends.
Mineral spirits removes wax very well. I’ve never had a issue removing wax and redoing a piece . Also, chalk paint seems to stick well to waxed pieces … in my experience anyway.
Thanks, i do like the look and now the learning experience.
Thanks, Marlene!
Rachel, I’ve refinished furniture before and I always completed with stain and poly, but I have to say this piece looks really nice with the “raw wood”. It was interesting the way you had to experiment to get the look and still protect the wood. Really cute little table too!
Thank you so much, MaryJean! Growing up, I always did stain and poly for makeovers, too. Waxes are not quite as durable, but they variety of options they provide are so much fun!! 🙂
I’m seeking to do this this on a drop leaf dining Table That I picked up out of a neighbors trash! Is the wax impractical and I should use the poly fit the hard coat or do you think I could get away with using the wax? …I also have two toddlers and am constantly wiping food off…everything 😅
For a food safe surface, I think I would recommend a poly coat! The wax will likely get worn down by wiping the table with cleaning solvents. Kids are tough on tables. 😉
Hi! So I found a dining table from the neighbors trash as well and sanded down to the bare wood. It’s beautiful! I want to keep the natural look – I’m terrified to put the wrong thing on it to seal it – it took me days to get to the final product and the last thing I want is that orangy look. I was wondering if I apply the beeswax and cerusing wax (I love the look), would you recommend a matte poly on top? I don’t know a thing about poly or wax or sealing….this was my first diy project 🙂
But I want to get my beautiful table protected ASAP!
Sounds like a great find, Liz! Unfortunately, you cannot mix wax and poly. 🙁 You have a couple of options: you can just use a wax finish (but it will require some pretty major upkeep if this is your regular dining table) or you can use a different product to provide a touch of white (i.e. paint or stain) that will work with poly for the protectant. You can see what I did with my old dining table to achieve that look here. It’s not quite as raw looking as this little side table, but I’ve been very happy with it for a super durable dining table with a similar look!
I absolutely love it!! I have just the piece for this and I’ve been looking for something beaides paint. I should have known you would have just the thing. Thanks! I’ll send you my finished pic
So glad it was helpful, Emily!
l love the look of the little table. Thanks for the info.
Thank you Margaret!
Thanks for posting this. I have a similar table and I’m going to give it a try. Nice departure from paint.
I’m so glad you like it, Nancy! I hope you enjoy the makeover. 🙂
Rachel, I love what the cerusing wax did to the finish. The table is beautiful! Did you know about the new company that Amy Howard is launching, called A Makers’ Studio? Lots of new paints, waxes and finishes as well as beautiful stencils and stamps. So many possibilities for those of us who love to restore. Thanks so much for sharing your sweet table!
I hadn’t heard about that yet, Diana. Thanks so much for your sweet comment and for sharing!
Love the look of this! I’m thinking about doing it to our kitchen table. How would you clean it? With just a wet wash cloth? Would coasters be needed so the wood doesn’t get moisture rings? Thanks for your help 😊
I’m so glad you like it! I want to caution you about a kitchen table, though, as wax is not a particularly durable finish; it’s great for side tables or nightstands or bookcases, but kitchen tables get so much use. I actually have a wax finish on my kitchen table right now, but I have to reapply it every six months or so… it’s not totally ideal. If you want to try it, though, I would definitely recommend coasters as the wax repels water much less than a poly or other hard coat would. I hope this helps!
Reilee & Rachel ♡
I realize this is LATE, but wanted to share about waxing kitchen tables. There’s a product (that I have yet to buy or try) created specifically for tabletops! Its called Lustersheen Tabletop Wax. It’s on their site, Lustersheen.com and I’ve seen it on ebay, but not sure if that’s a vendor or the company.
The selling point for me was that the wax *will not* let water rings form. Don’t know if you need to re-apply every so often, but probably would make it better.
To get water rings out of waxed wood furniture, search Pinterest for the method using a dry iron and tons of paper towels. (Full disclosure, havent tried that one either! 😆) Then do the waterproof tabletop wax. And post your results!
Thanks for the product tip, Chuey!
Hi Rachel,
I also love the raw wood look. In fact, I want to purchase a Restoration Hardware dining table that is made from salvaged raw wood and that doesn’t have any kind of finish on it. I’m not sure what to do because the raw wood is what makes the table special, but if I buy it then I’m going to have to figure out a way to protect it. Can you suggest anything? I, too, fear that orange look, and I definitely don’t want a glossy look. I like a matte, raw wood look. I would appreciate your help! Thank you Rachel!
I understand your concern! Are you sure it has no finish at all? Unfortunately, finishes are kind of a trial and error thing depending your wood… maybe you can practice on the under side of the table? There are also some matte poly finishes that might work, like Fusion Mineral’s wipe on tough coat. I haven’t used it myself, but I’ve heard great things about it. I hope this helps!
I like butcher block conditioner. It’s a mix of bees and vegetables waxes that needs reapplication once every couple months. I personally like to keep it close to hand reapply as often as is convenient. Best of luck.
We use a glass table topper with our table from Restoration Hardware and it protects the raw wood table from stains. Plus, you can see the table perfectly💗
Great idea, Renee! Thanks for sharing!
I have an old pine piece that I sanded the top of and want to seal in some way. I tried applying a coat of Butcher’s Wax but it soaked it right up! I want the top to have a matte finish with a very low shine. What would you recommend? A different wax? Or that Fusion Minerals Wipe On Tough Coat you just mentioned? Any advice is appreciated!
I have a coffee table that I just refinished with danish oil and it came out too yellow as well. Knowing this table is going to get a lot of use, what do you suggest I do? I can’t sand it anymore as the finishing nails have surfaced. Thank you!
You can use a gel stain, which is really more like a paint that sits on top of the wood to change the tone of the wood.
Thank you, Rachel. What colour of gel stain should I use? I found a white one that I can dilute called Unicorn SPiT…
My favorite brand is General finishes. I wonder if white stain will tone down the orange.
I had a custom stove hood made and wanted it to have a raw wood look. I’m wonder how the wax would hold up on a stove hood? The heat and steam component makes me nervous but I know it would be beautiful.
Hmm! Great question! I’d also wonder too about oil and cooking stains.
Hi Rachel, was browsing Pinterest and saw this post and thought I’d leave a comment about Formbys. I use it all the time on old pieces to restore or revive them. But it is not a stripper per se. It only removed top coats; varnish, lacquer, etc. It doesn’t remove stain which is what ya want when you’re just trying to clean up an old piece and remove years of wax and varnish. But you learned that with this piece. I love raw wood as well and there is a Watco product called Flat Out Flat which gives a nice protective finish with no shine. Wonder if it would work on the stove vent? It didn’t darken the oak too much on the piece I used, you might want to give it a try on something. I loved the end result on your little stand and using the cerusing wax on old pine was genius! If you ever want to remove old varnish tho, Formbys is your man! Thanks for this post!
Crystal, ooh, that is such a helpful tip! I’ll have to consider that.
Hi Crystal!
Which Formby’s product did you use please?I would like to remove the old varnish….just the top coat and then use a lime wax or cerusing wax for a softer worn in look. Thank you!
Hi Jessica, I think she’s referring to the Formby’s Furniture Refinisher which I linked above (but she can weigh in if I’m incorrect!). 🙂 Also, you might check out this post for more stripping tips. I hope this helps!
After sanding how do I clean the piece before sealing it. Soap and water??
Actually, you’ll want to avoid water as it will likely raise the grain of the wood that you just sanded. A good, hard brushing and then a wipe down with a dry cloth is better. A tack cloth (a sticky cloth that you can buy from any paint store or hardware store) is a great option, as well. Sometimes, if there is still just a little dust on it that doesn’t seem to want to come off, I might get a cloth just barely damp to catch the last of it, but too much water will undo your sanding job. I hope this helps! 🙂
I have oak, 6 panel doors with Ipswich pine stain on them and I want them to look like natural wood. Would you use the same technique on doors that you used on your table?
Apologies for the slow reply! I would image that oak doors with pine stain are pretty orangey yellow in color, so trying a white wax or lime wash might help create a more raw look. The thing to watch out for, though, is how they are currently sealed. Do you know if they already have poly or varnish of some kind on them? If so, the wax may not penetrate. Either way, test a small, inconspicuous spot… Always worth a try! 🙂
Thanks for this! I love how it turned out and am following your same process for a trunk I refinished. I have a question about how long you waited between the wax coat(s) and the cerusing wax? It says that wax topcoat has a curing time of 30 days but I was hoping not to have to wait that long before adding the cerusing wax. Thanks again for the tutorial!
Hi Kim, great question! I usually follow the instructions for wait time on buffing, rather than curing, before putting another coat. So if the clear wax says 30 min before buffing, then I feel comfortable layering cerusing wax on at that point. Does that make sense? Hope this helps!
Thank you so much for the reply. I finished off with the cerusing wax and am so happy with how my project turned out! Thanks again!
Perfect, Kim! I hope you love your new look!
Did you use 60 grit sandpaper on the orbital sander and the palm sander, too?
I’m afraid I don’t remember, Tina. I’m sorry! Usually when I sand I start with 60 and then move down to 120 or 150 and eventually 240 for finishing.
Hi! If using this technique with the wax, is it possible to apply some type of poly to hard seal it (as you were talking to another person about a dining room table). I am guessing the chemicals repel each other, but I just wasn’t sure if there was a solution? Thanks!
Melissa, you can use a poly OR a wax. Poly’s can sometimes yellow your finish, so be sure to use acrylic.
I’m guessing I couldn’t guess this look just by doing plain pine wood this way? 🤷🏼♀️
Good question. The cerusing wax will still cool down the yellowish tones of plain pine, but it would lack the darker tones of age that the side table has. You can see how I treated some new pine with stain and then cerusing wax in this post to get an idea of how it might turn out. I hope this helps!
Love the look of this finish, really has an “old” raw wood appearance that I would like to try after seeing your results on the little night table. I have two pine pieces in my bedroom – a 2 door cabinet with a 2 drawer base about 60″ tall and a matching chest of drawers about 48″ tall. They are a typical orange/pine color with very little grain pattern and some knots. They are not antiques but nice heavy pieces with bun feet that are about 30 years old. I have always loved the “pickled pine” look and wonder if this technique would work for that. Would you recommend stripping or sanding? Thanks for sharing this technique.
Hi Jill, you’re right! The cerusing wax does give a bit of the pickled pine look. It’s hard to say without examining the current finish in person, but if you’re planning to refinish them in some way no matter what, here’s what I would probably do: I might lightly sand an inconspicuous spot (maybe the side that doesn’t face the room) and then try layering a bit of the cerusing wax right on top of the current finish. Who knows… it might save you the big job of stripping the entire pieces! If you like the look, I would definitely give it time to make sure the wax will actually hold to the existing finish. If not, then the next step would be to strip the pieces entirely. I hope this helps!
I will be using howards restor on my maple stock kitchen cabinets. They are showing wear ( 15 years old)and the budget is not to replace them for for about 5 more years. The malple tone is not quite my favorite, do you think after the howards wax i could use a coat of the cerusing wax to slightly tone the cabinets?( perfect world I paint them a lovely sea glass – almost turquoise but my husband would have a heart attack).
Lol. My husband wouldn’t go for turquoise cabinets either. 😉 But I would imagine that layering cerusing wax on top of another oil or wax finish should work… just to be safe, I would recommend contacting Amy Howards customer support or their chat feature on their website and asking if the cerusing wax finish would be compatible with the Howard’s restor. I would hate to steer you wrong. Hope this helps!
so happy to have found your post! i have a piece that has been sanded down to the raw wood and i adore the color as it is, a peachy tan. i even toyed with the idea of painting it that same color – but it has some gorgeous grain that i don’t want to hide. i’ve been doing some testing on the bottom of the cutting board, using the amy howard ‘mind your own beeswax’ along with the cerusing wax. using the beeswax turned the whole thing more of a brown than i cared for, and even with the white wax on top it lost that peachy tone that i love.
i did try (and am now in love with!) the cerusing wax alone, and the cerusing wax followed with the beeswax. using the white first seems to protect that peachy pink color from the beeswax. soooo – my longwinded question for you is, do you see any issues with using just the cerusing wax alone on raw wood? is that enough protection? or would using the cerusing wax first and then the beeswax be better? it will be in the kitchen but not a high traffic piece, more for canning and storage. i will paint or line inside the drawers and cupboards. any advice appreciated – again thx for this post!
I’m so glad you found something that worked for your piece! It’s always a bit of a trial and error process, isn’t it? Truth be told, the reason I usually start with clear wax first is that the colored waxes can stain the wood, but if there is clear wax underneath, you can always remove some of the colored wax if needed. BUT, if you get the look you want with the cerusing wax on the bottom, go for it! There’s no harm done there. Now as to the protection factor, I’m really not sure. It will depend on your use. If you really like it just as well with the clear wax over the cerusing wax, then I would probably add a very thin layer on top, just to be sure. The truth is, though, that wax is wax, and one complete layer of cerusing wax probably isn’t really any less protective than a layer of plain beeswax. I hope this helps!!
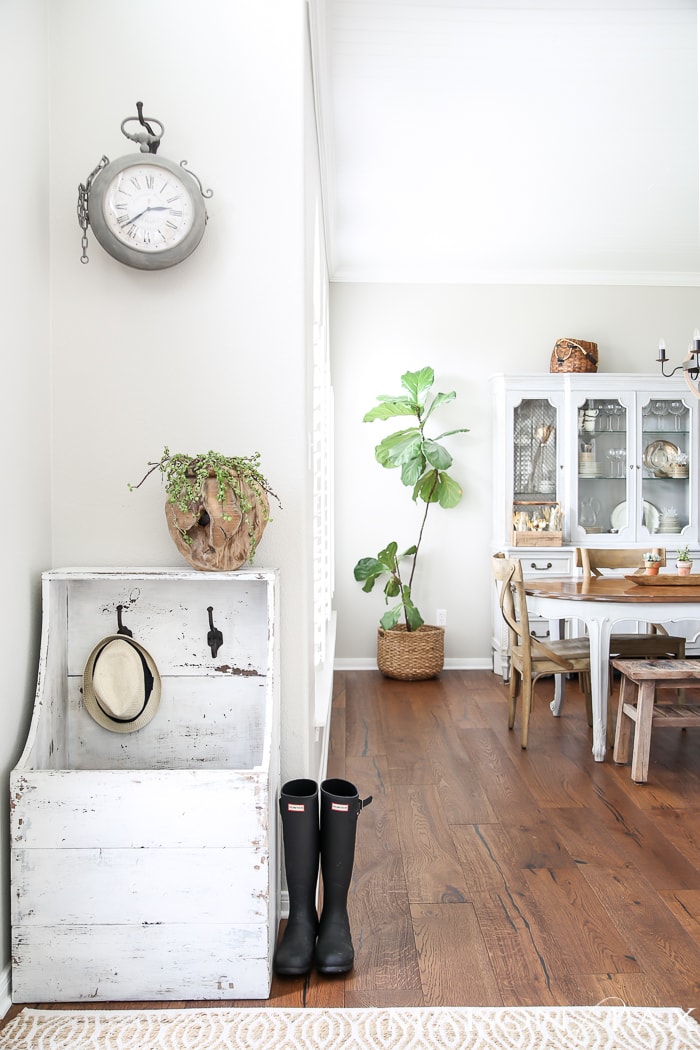
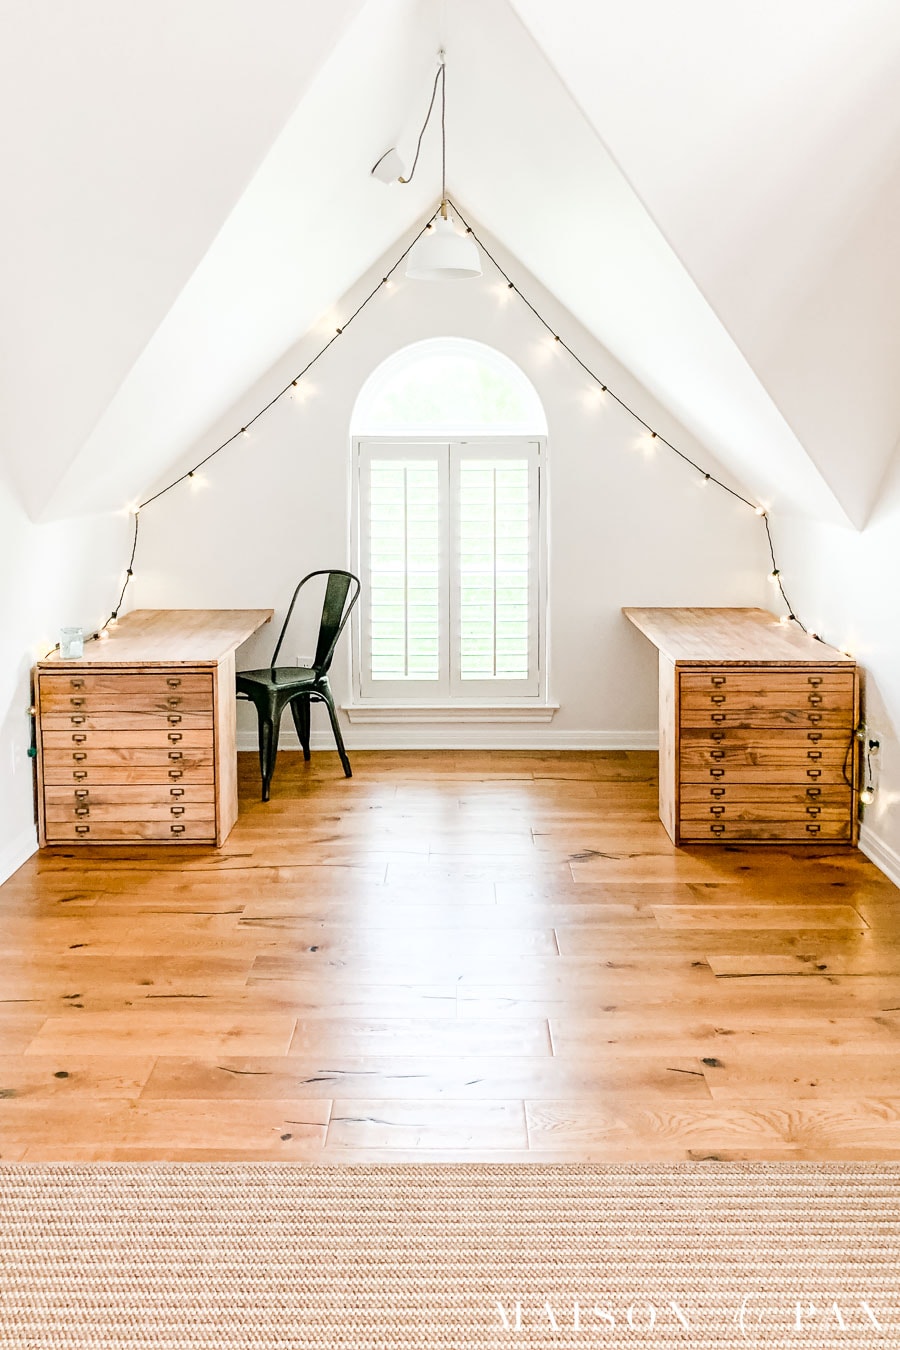
I love the look! I like your flooring- what type is it, if you don’t mind my asking?
I have a whole post dedicated to our floors: https://www.maisondepax.com/wide-plank-oak-floors/ They are made by Green World Industries with a wide oak plank. Hope this helps!
I have something for you, and it’s so obvious you’ll face palm.
Paint BASE. The stuff before they put pigment in it. I get BM’s darkest paint base, the one for navy blacks. I use latex, exterior, FLAT dark paint base.
It goes on horrifyingly white, but dries so invisible that it looks like the wood in fact is, actually raw.
Exterior paint has the UV and water repellant components in it.
I’m experimenting with oil based paint base at the moment. I want something even more durable in my kitchen. I’ve built my cabinets out of white oak and am in love with the creamy and tan grain. Polys yellow and as you mentioned, change the tone of the wood. My experimental drawer front, with 2 coats of paint base, is so far, wipeable, I can use Windex on it,. A fellow woodworker was over and asked me how I was going to seal my raw (looking) wood cabinets. SCORE!
So there’s really no need to go through all those steps unless you really l like the effect. The darkest paint BASE will seal the wood without changing the raw color.
Hope this is a new tool for your tool box!
What a fascinating idea, Christine!!! I’m definitely going to have to give that a try. Thanks so much for the info!
I thought I’d give you an update.
I wanted a really durable finish in the kitchen, while maintaining this raw look.
I mentioned I was going to give oil based paint base a try, and I have.
(Gong Show WONK) Nope. The oil based base dries white. I’m sticking with several coats of the latex paint base. I also find BM dries more clearly and invisibly, whereas SW look raw still, but it mutes the grain a tiny bit.
So. BM, DARK, flat, exterior paint base is the easy trick. No extra steps, no priming, just base.
Just info. 😉
Thank you so much for updating me, Christine! I’m glad you’ve got a method that works.
Which BM exterior Latex flat dark? Aura?
Thanks!
Hi Rachel! Thanks for this great post — your table turned out beautifully! I am definitely considering the cerusing wax to achieve a similar look with my kitchen table, but I don’t know if I can handle waxing it all the time. So to that end…
Christine — I am sanding an old dining table down and am hoping I will like the natural wood beneath. Are you suggesting that once I’ve sanded it down and assuming I like the color, I can just seal it with paint base and put it back in my kitchen? It’s not a fancy table, so I am hoping I won’t have to do too much to achieve the look I am going for.
Thanks!
Cindy, I actually just ask for paint base. The can is green and says, “Moorlife” exterior, latex, flat, base 4 (or 5).
I think it’s a lot less expensive than Aura or Cashmere types like that.
Sara, I don’t want to hijack Rachel’s Blog here so I’ll make it brief.
(If you have already waxed something, don’t forget to get it off your piece with mineral spirits. I actually find the ammonia in Windex works just as well, BTW. Which is why wax can suck in a kitchen.)
So Yes, that is exactly what I do. I’ve recently stripped (Citristrip!) the finish off a lovely, serpentine high-ish boy, and come to a velvety smooth, rich cherry. The grain is so beautiful. I used the paint base directly on the raw wood and it looks like I never put anything on it. Now, if I were doing a kitchen table, I would do 3-4 coats. The 1st will just soak in. The 2nd will start to make a finish, and 3rd will guarantee someone doesn’t accidentally cut through it with something. I might consider a 4th if I had kids. I did this on a butcher block counter top I made. I don’t use knives on it, but being a counter top I thought it was smart. Let it cure between coats. I can usually do a day, because I have no one around to touch it or fuss.
I’m starting to build drawer fronts and doors for some cabinetry I built and/or refinished. Collected some from reuse centers. I’m using wine crates. To keep the gorgeous, light color of the raw pine, I plan this. I would hate the dark yellow polys would create.
Rachel, thanks for letting me answer.
Hi Christine, thank you so much for this tip. I recently stripped a cherry wood table and love the raw wood, but it’s the table we eat in everyday (with 6 kids) so knew I need to protect it somehow.
I put one coat of the exterior dark (4) base Latex flat. It’s looking a little bit like it’s white washing the wood.
Did you have this experience at all?? I’m thinking it might be ok. But feel like if I did more than one coat it’d really look white.
Odd. Did you use BM? I know Sherwood Williams is a little cloudier.
Another product I use, which water proofs the wood, too is a wood hardener.
Anyway, I would lightly sand your cherry piece, just to give it some tooth, and do a 2nd coat. Perhaps get a 5?
Hi! Thanks for the reply. I got BM but realized it wasn’t the exact line you mentioned. It is exterior latex and the darkest base (which is a 4 for this one).
Maybe because the cherry is a darker wood the whiteness shows up a bit more than on the white oak you were using it on.
Do you think it’s worth trying the exact Benjamin Moore you used. The one I used in the “ben” paint. From your other post it looks like you have the Royal line “moorlife” one. Does that one have a 5 for their darkest base?
Where I’ve done it, It’s noticeably whiter, I’ve done several coats and even thinned it with water a little bit. It’s not white like opaque, it just looks like whitewashed wood a bit.
Hi Christine – Do you have any photos of something you used this paint base one? If so, I’d love to see them! And did you use the interior or exterior paint base on your cabinets?
Sorry. I just saw your question. After all, just a visitor here, ‘ya know?
It doesn’t matter, as long as it’s latex, exterior, DARK (4 or 5) paint base.
Someone asked me for pictures, but there’s nothing to see. As I mentioned, it’s so invisible you cannot see where you left off. It doesn’t even change the texture. And, as I mentioned, exterior.
I’m currently working on cabinet doors with wine crate faces, and am using this method to seal them in their natural, light state again. Love this trick!
Hi,just wanted to fill you in ,I’ve been refinishing wood cabinets for years as a hobby, I’ve used a lot of floor sealers,polys and reciently used tongue oil on dressers , I always leave on for 24 hours to dry. Then I go back and steel wool with 000 steel wool,,wipe off real good with dry towel.. I usually go back and put 3 coats on steel wool real good then 000 steel wool again , The last coat just steel wool.The outcome is real nice,,hard finish but after you steel wool the last time brings back the raw wood look, never tried to put a sealer on but use cabinet every day ,Mary add another coat 4 or 5 years down the road ,you wouldn’t be sorry,try it on a little piece,,you won’t b sorry if you love the real wood look
Thanks for all the great tips, Julie!
Do you think a hydrating oil would achieve the same effect as the hydrating wax? I have Boos Block mystery oil on hand and wonder if it would do the trick.
Good question! My guess is that it probably would be fine, but the only concern I have is that the oil and wax wouldn’t mix properly and might leave your wax from sinking into the wood as you would want. I would recommend trying a small piece of scrap wood with both materials and see how they interact before you use them on your piece. Hope this helps!
Hello Rachel. As I was searching for a method to finish two end tables I came across your post. I have two 40 year old black cherry end tables with solid brass bail pulls. One has a single drawer drawer the other a double. They are currently in my living room and have wanted to update them for years now. I have previously finished an oak table and chair set doing the chalk paint on the table base and 6 spindle chairs with a wax finish. We sanded down the top and put an espresso stain on it. It looks great. When I saw the look of this cute little table you did, I fell in love with it. Do you think black cherry, if sanded down or stripped, would be a good look with the finish of liming or a natural wax? Would you put a stain on it first?? My taste is rustic modern.
That’s a great question, Darlene. Unfortunately, I don’t think I’ve ever stripped anything made from black cherry! I wouldn’t want to steer you wrong… Maybe do some more research on the undertones of that kind of wood? Good luck!
I really hope Rachel won’t mind me chiming in, but I hope you don’t mind, but I have stripped black cherry. I took it to raw wood, though, and the dark tones didn’t need any other stain afterwords. I couldn’t believe how beautiful it is.
I’d STRONGLY recommend not sanding down these probably beautiful tables. Citristrip can take the finish off something without chemicals. A 2nd coat will suck the stain right out of the wood, so there might not even be a need to restain it to something else.
Put some plastic bags or wrap over the wet stripper to hold it against the wood or it can’t work and will blotch. Leave it for about an hour and peel it off. With the grain, use a plastic scraper to squeegee the goo off your piece. Avoid metal, because you don’t want to gouge the softened wood. Neutralize with water. Mineral spirits will re-liquefy the old stain right back into the wood. I sadly did that and it turned he residual stain magenta and put it right back into the wood. I had to do it again. When it is dry, smooth the wood’s grain with a 220. Don’t go digging around with sand paper.
They sound absolutely beautiful.
Hi Rachel!
First off, thank you for your awesome post. I’ve been searching for a doable way to attain this “raw wood” look for both a renovated china cabinet we use as an entertainment center & a coffee table in our livingroom. These pieces are definitely “orange” on their own so I’m very excited to give them a natural makeover. However, both of these pieces get an equal amount of traffic in our home so my fear would be—using the beeswax & cerusing wax but not having enough overall protection. My question for you is- what do you think makes the most sense in our situation? Would it be feasible to use beeswax & the cerusing wax as well as a clear poly on top to seal it all in? Or would that poly possibly alter the natural color achieved by the cerusing wax? I read in another comment you responded to that it’s either wax OR poly.. I guess I’m just trying to figure out what could possibly seal this beautiful color in without it being ruined by everyday touching or use.
So glad you like the post, Lindsay! And great question… A tough one to answer, but I’ll do my best. 😉 Unfortunately, it’s true. Wax and poly don’t mix well. Wax is a form of protection all its own, but it is rather delicate for such high-traffic pieces. The advantage to wax-finished pieces is that you can simply add more wax at any point, without having to strip and refinish. But if you would rather not have to continue maintenance in that way, then you’ll want a stronger sealer. Ultimately, cerusing wax is basically a white wax (it’s probably much more than that, but the effect it gives on the furniture is a blue/white counterbalance to the orange). So… if the wood is too orange but you need a stronger finish than wax, you might try experimenting with extremely watered down paint or even a white stain. The other option is to try bleaching the wood. I haven’t written any posts on it, but I did it years ago with my dad, and it’s is effective (though very time consuming). It may be a bit of trial-and-error… but I wish you the best of luck!!
Thank you again, Rachel! We’ll be testing out bleaching and if that doesn’t do it, we’ll probably end up going for the wax process since we really really want that natural wood feel. I’ve sanded down my pieces, do you recommend both the beeswax & the cerusing wax? Our pieces are very orange/yellow just like yours was in this post, so we’re definitely sold on the cerusing wax! What do you think?
The advantage to starting with the clear wax is three-fold: 1) an overall coat of wax protects your piece. 2) The clear tends to go farther than the cerusing wax (since it’s a little thinner). 3) By putting a base coat of clear wax to start, you have more freedom with adding/removing the cerusing wax. Cerusing wax straight onto the wood will be hard to spread to the effect you want. I hope this helps!!
hi all! this just popped up in my email and i thought i’d add my experience using both! i’d tested using beeswax on the bottom with cerusing on top, & cerusing on the bottom with beeswax on top. Rachel’s absolutely right – it’s easier to apply the beeswax first. However – there was a significant difference in color between the 2 depending on which wax went on first. If you have wood with a lot of yellow in it, it may be worthwhile to test on an underside if possible to see which you prefer? I ended up going with white first then beeswax on top because it ended up being more peachy toned than brown – but I imagine each piece would vary. I wish I could upload a photo – it was interesting to see the difference!
I love this, Nat! I almost said something about it all being an experiment, but my response was getting long. Lol. There are so many potential variations to the process (type of wood, previous finish, how you stripped it, etc.), so it’s always a little bit of trial-and-error. I’m so glad you found something that you like, and I definitely agree with you about testing it on an inconspicuous spot if you can!
You’ve both helped so much! Thank you for your responses & info. I’m still debating what to do and what order to do it in (wish there was a manual for this LOL). My pieces have orange undertones even at their raw base. I love Rachel’s result taking a piece with orange undertones and neutralizing that by using the cerusing wax last.
Here’s another question for you both-
Is beeswax the only hydrating-wax option to use as a “primer” for my renovation? Are there any others that might offer more bang for my buck? I’m working with a rather large coffee table & a china-cabinet that’s also on the bigger side. I’m scared I might need to buy 2 or 3 beeswax’s.
Great question, Lindsay! Beeswax is definitely not your only option. I find it to be one of the most hydrating (since it’s pretty thin it seems to seep into the wood more than some of the others), but your main goal is really to protect the piece, not necessarily hydrate it. I actually have refinished quite a few pieces with plain old paste wax (which is less expensive), but I’ve never tried it in combination with the cerusing wax. Might be worth a try, though, given the cost difference?
Thank you for all your helpful information! I went ahead and ordered the cerusing wax & paste wax. Can’t wait to see the finished products; thank you so much, Rachel!
You’re so welcome! Good luck!!
Thanks for sharing the pictures. I actually love how it looks.
Thanks, Landon!
Hi Rachel, I absolutely love how your piece turned out. So I decided to duplicate it, the problem is it’s a dining table, and I had to put a sealant on top. So I used Minwax water base polyacrylic protective finish in clear Matte. The problem is I haven’t even had it a week, and the poly is starting to peel off. Help. What do I do? Do I need to sand off everything or use some kind of a strip to get everything off, and then just put some type of sealant on top?
I really want to keep the look of the vintage aged wood, and your three-step process did the trick. I just don’t know what to put on top to seal it. I’m assuming me putting a poly on top of the wax is what’s causing it to strip?
Any advice would be appreciated. Thank you!
Hi Carrie, I’m so sorry you’re having trouble with your dining table! Yes, unfortunately you can’t put a poly sealer over wax. 🙁 I hate to say it, but you will likely need to strip the piece again. You might look at this post on stripping furniture and then this post on how I got a similar look on a dining table. Different process entirely (because, like you, I wanted something stronger than wax for a dining table finish), and not quite as “aged” in its look, but I’ve been really happy with it… I hope this helps!
Hey Rachel! I have a friend that had a dining room table built and the top is beautiful reclaimed wood that is 130 years old. She wants the raw look but the builder put a polyurethane on it that turned it very gold/yellow and she is not pleased with the color. DO you think the method you used on this end table would hold up on a dining room table?
Great question! I do not recommend wax on dining tables (unless you are a VERY careful person)… but I tried to achieve a similar look on an oak dining table for my family and was pretty pleased with it. It’s not quite as aged looking, but it does have a nice, natural color and a sturdy finish. You can see the full tutorial here. I hope this helps!
I found this post and the comments you answered so incredibly helpful!! Many thanks from a newbie furniture flipper.
Hi Danielle, so glad it was helpful!
I actually used Amy Howard paint on some old cabinets in a prior home. Bauhaus Buff I think. Then I used Amys finishing wax and reapplied about every 6 months. Turned out beautiful! I really love the Amy Howard products. I suppose you could put a matte poly, water based coat so as not to reaaply so often?
Yes, you could absolutely do a water-based poly instead of waxing! I’m so glad you love her products.
Just one note of warning: if you want to use matte poly, you can’t use the cerusing wax first. You’d have to use a watered down paint or some other option… Poly won’t adhere over wax. 🙂
If you can actually get any kind of top coat to stick to wax? Please let me know because wax does not provide a base for adherence. Unless of course it’s more wax.
You’re right, Christine. Unfortunately, wax is just about the only top coat that can go over wax.
If you apply the beeswax before Cerusing Wax but the beeswax rubs off then how does the Cerusing Wax stay?
I’m sorry, Kassidy, but I’m afraid I don’t understand the question (you might be responding to another comment, but all I can see is your question, so it’s out of context). Can you clarify? Happy to help if I can!
I went through all this with oak floors. All you really need is water based Varathane: https://www.homedepot.com/p/Varathane-1-Gal-Clear-Satin-Water-Based-Interior-Polyurethane-200231/100176203
Thanks for the tip, Stephen!
You could have just used Polycrylic if I want to keep a natural finish I use matte polycrylic. Unlike polyurethane it does not have a tint to darken the furniture I used it on my nightstands and nobody even knows it’s clear coated!
Great tip!
Hi, I love your blog and what you did with that table. I have this old marble top desk piece and would like to restore the wooden base to its natural look. I have no idea what kind of wood this is. Right now it’s shiny dark brown…yuck!:-) Can I just sand it down to its natural wood or would I need to first remove the sheen and stain by a stripper of some kind. Hope my pic helps. Thanks so much, Lydia /Users/lydiawaruszynski/Desktop/Screenshot 2023-02-08 at 6.52.56 AM.png
Hi Lydia, I find that you usually have to do a combination of both stripping and sanding to get all of the original finish off. I hope that helps!
Thanks so much and exactly what I thought, too! Happy weekend, Lydia