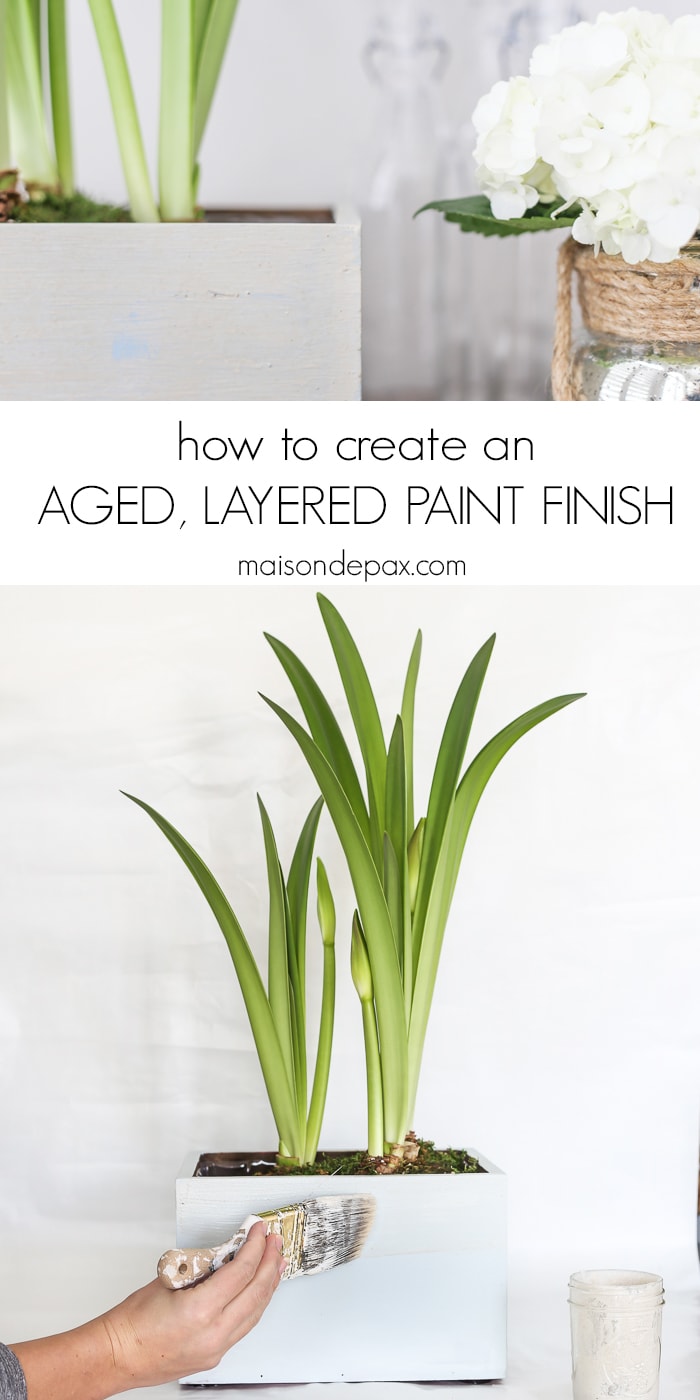
Layered Paint Finish for an Aged, Antique Look
Looking for diy painting techniques that will add interest to your home and give that authentic, antique look? Try this tutorial with a layered paint finish using chalk and milk paints for a textured, aged look.
__________
Thank you to Amy Howard Home for providing products for this project.
It’s no secret that I love a good antique finish.
Whether it’s in a bold red, pale neutrals, or my signature white, I can’t get enough of that aged, textured look. It adds loads of character, interest, and – in my humble opinion – beauty to a piece.
While I’ve played with layering chalk-based paint before as well as layering milk paint, I’ve never tried the two together, so this project was a new discovery for me. And I’d say it was worth the experimentation.
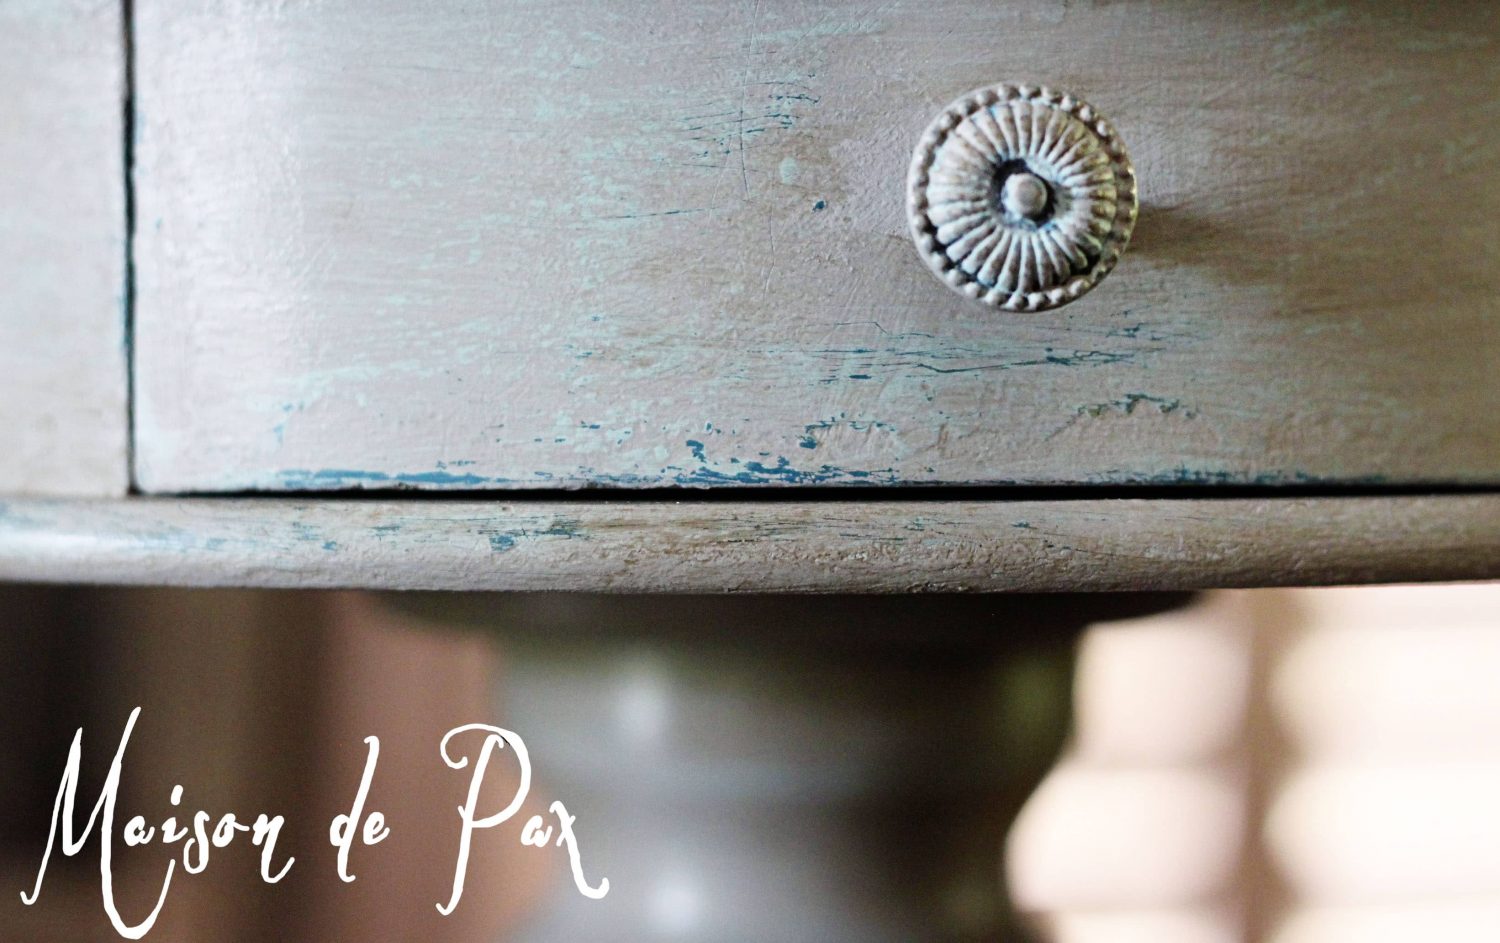
I’m afraid I really struggled to get the images to do the texture and colors justice on this. The layers are so subtle and the variations so intricate that I can only describe them as yummy.
Food… furniture… it’s all good. 😉
Here is what you will need to create a layered paint look:
This post contains affiliate links for your convenience. Click here to read my full disclosure policy.
- One Step Paint in French Blue
- Toscana Milk Paint in Pompeii Grey
- paintbrush
- Antiquing Glaze
- natural sea sponge
- clear furniture wax
- lint free cloth
How to create an aged, layered paint look:
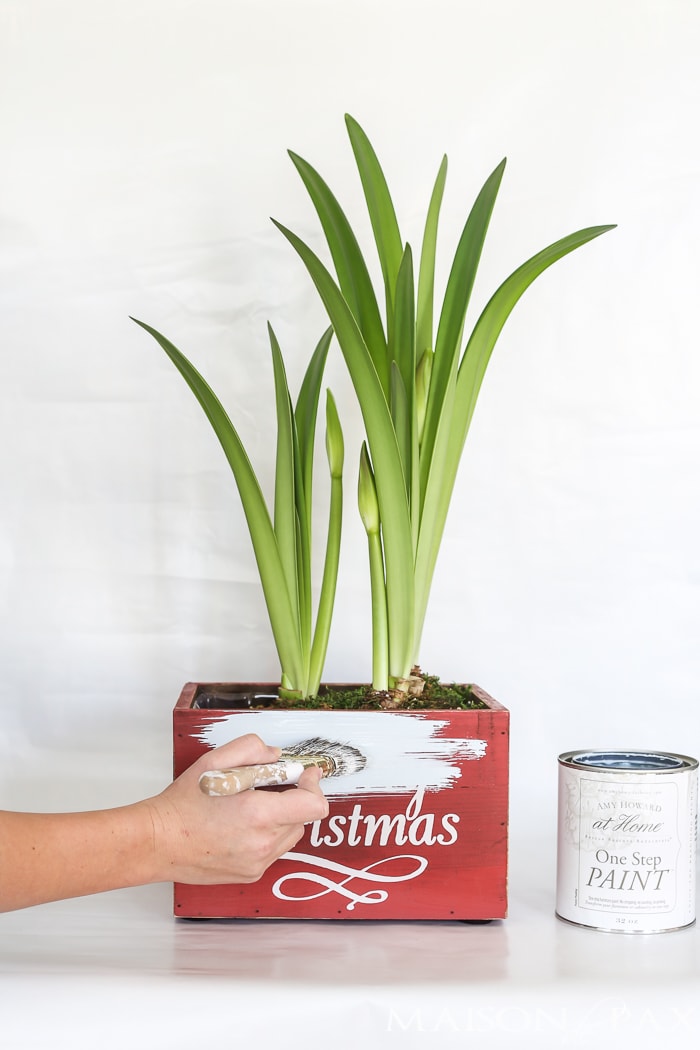
1. Paint the entire piece with One Step Paint.
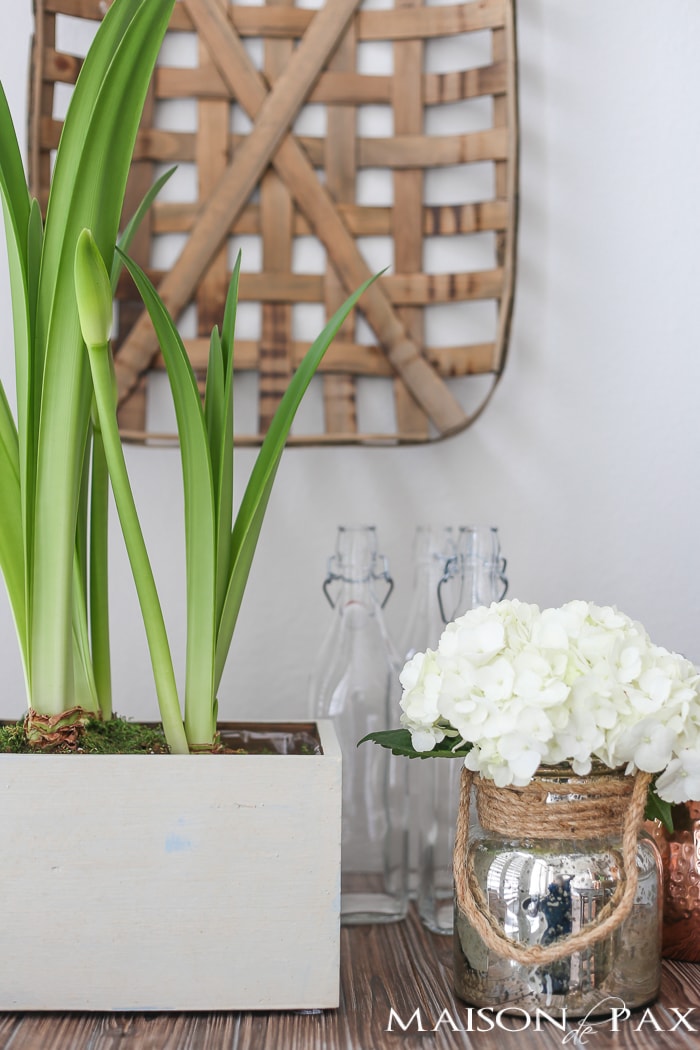
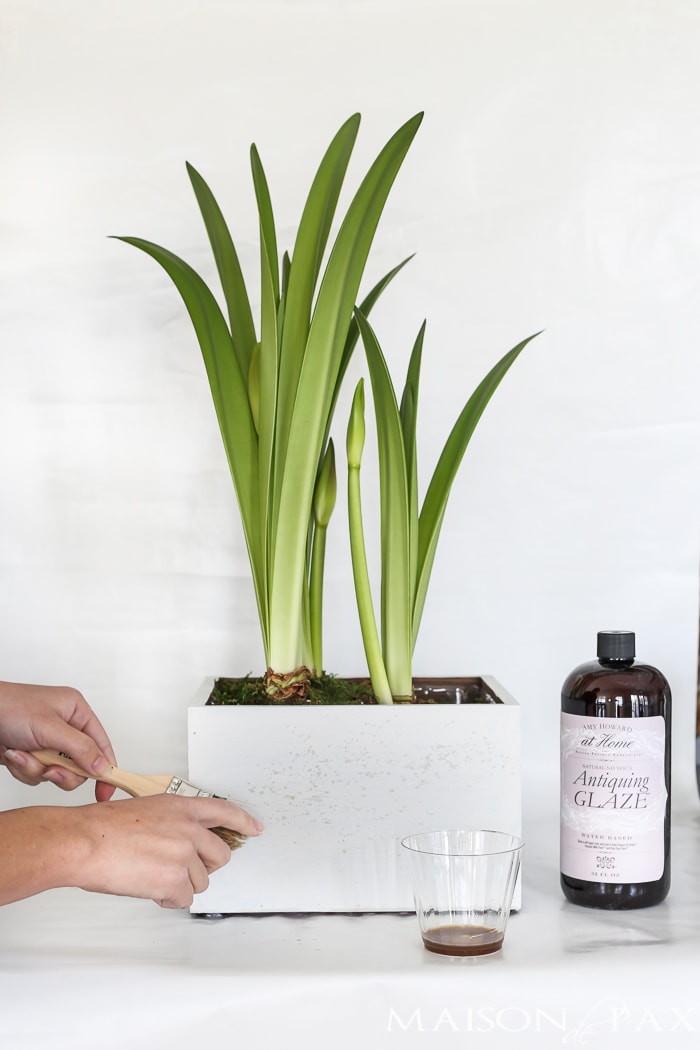
My sweet mother in law sent us this amaryllis for Christmas, and while it is growing beautifully, we are a bit past the sentiment at this date and the sweet flowers have yet to appear… So I decided this little planter could use a makeover. I actually did two coats because I was afraid the text would show through otherwise. I gave each coat approximately 30 minutes of drying time.
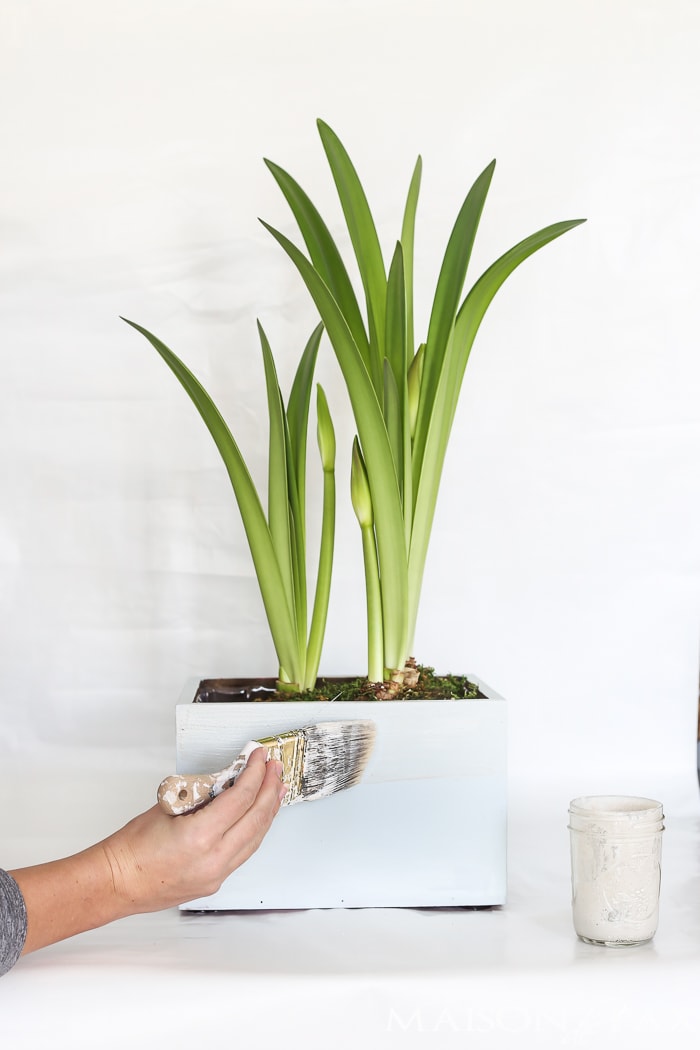
2. Paint the entire piece with Toscana Milk Paint.
Milk paint begins as a powder, so mix according to directions. I used a 1:1 paint to water ratio and shook it thoroughly in a small mason jar. I used the same synthetic brush (after a good wash, of course) that I had used for the One Step paint. I did one solid coat and allowed it approximately 30 minutes of drying time.
3. Splatter with Antiquing Glaze.
Using a cheap natural chip brush dipped lightly in the antiquing glaze, I followed Amy Howard’s suggestion of running my finger along the edge of the brush to spatter the glaze across the dry milk paint. I allowed this to dry for about 5 minutes.
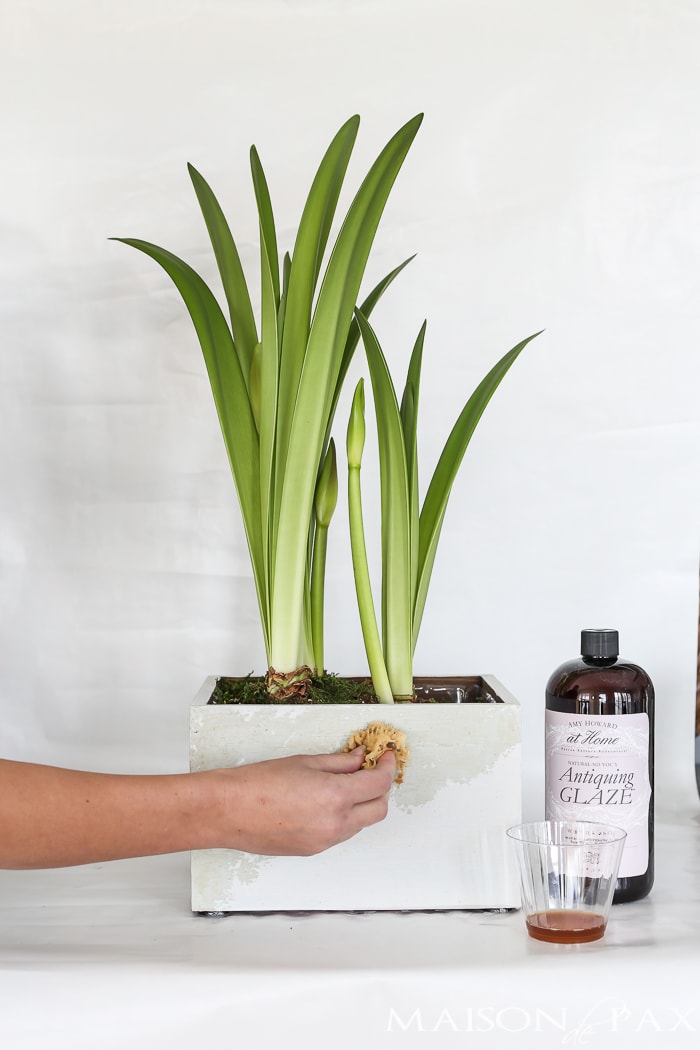
4. Apply Antiquing Glaze with a natural sea sponge.
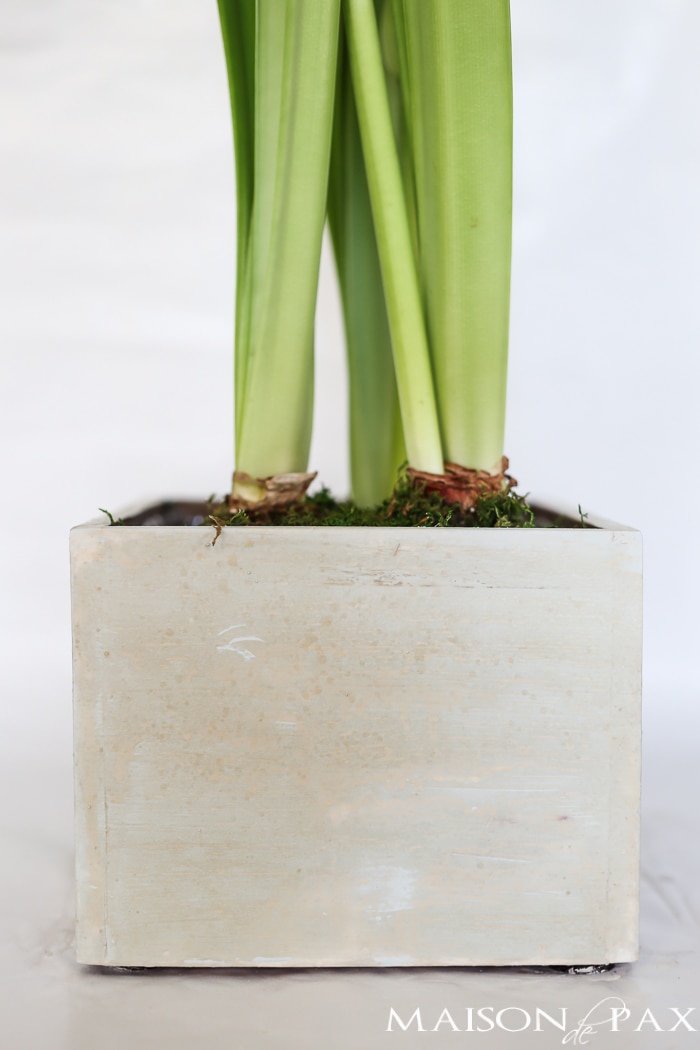
Following the directions on the antiquing glaze, I sponged glaze all over the milk paint, pressing down and lifting but not wiping. This allowed the milk paint to thin and even come off in some places, giving the authentic looking wear and age to the piece. I actually did several rounds of sponging, continuing to press down and lift until I saw the desired amount of milk paint removed. I then dabbed with a lint free cloth to remove any excess or drips and allowed it to dry visually (you can see it lighten as it dries).
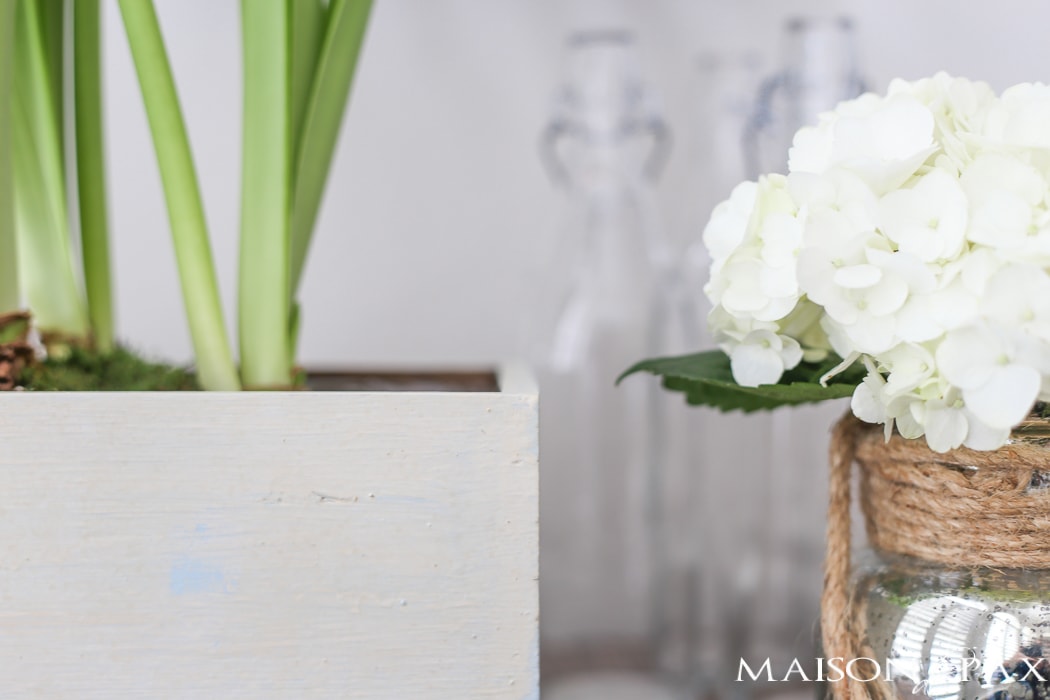
5. Wax and buff.
I covered the piece with a light coat of furniture wax and then buffed with a dry, lint-free rag.

A few thoughts on the process and potential variations:
First, I obviously chose two colors very similar in hue. For more dramatic layers, you could use one lighter color and one darker.
Second, I put on a fairly thick coat of the milk paint, and I think a thinner coat would have been more successful. It would have allowed the antiquing glaze to antique it more easily.
Third, I’m still getting the hang of the antiquing glaze. The “wear” that it provides on the milk paint really is unique and lovely, but I think the amount used and the pressure required to antique as desired is a bit of a trial and error process.
Most of all, this is an art rather than a science…
which, naturally, is why I love it.
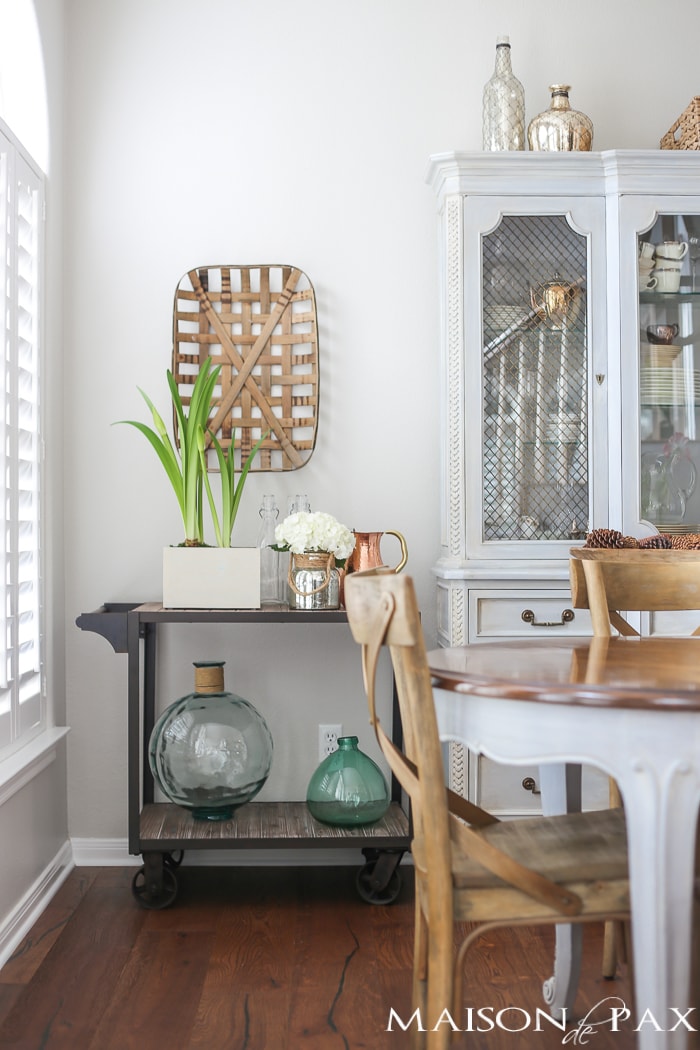
I think these same techniques would be especially beautiful on a piece with more elaborate designs: moldings or carvings could look amazing. In the meantime, it was (as usual) a fun paint therapy session for me. And as cute as the Merry Christmas box was, I’m thinking this more neutral version could stay here for a long time.
What should I paint next? 😉
I like this textured look. It made the planter perfect for your home. Thanks for the how-to!
Thank you so much, Randi! You are so sweet. xo
I also love this antiqued look! Thank you for sharing the pictures along with the steps. I am so visual, it really helps! Your planter box looks perfect!
I’m so glad you like it, Ashley! Thank you so much. 🙂
It turned out so great, Rachel! I love the technique!
Thank you so much, Natalie! xo
Love the look–now you can use it all year round. Thanks for sharing your how-to!
Thank you so much, Beth!