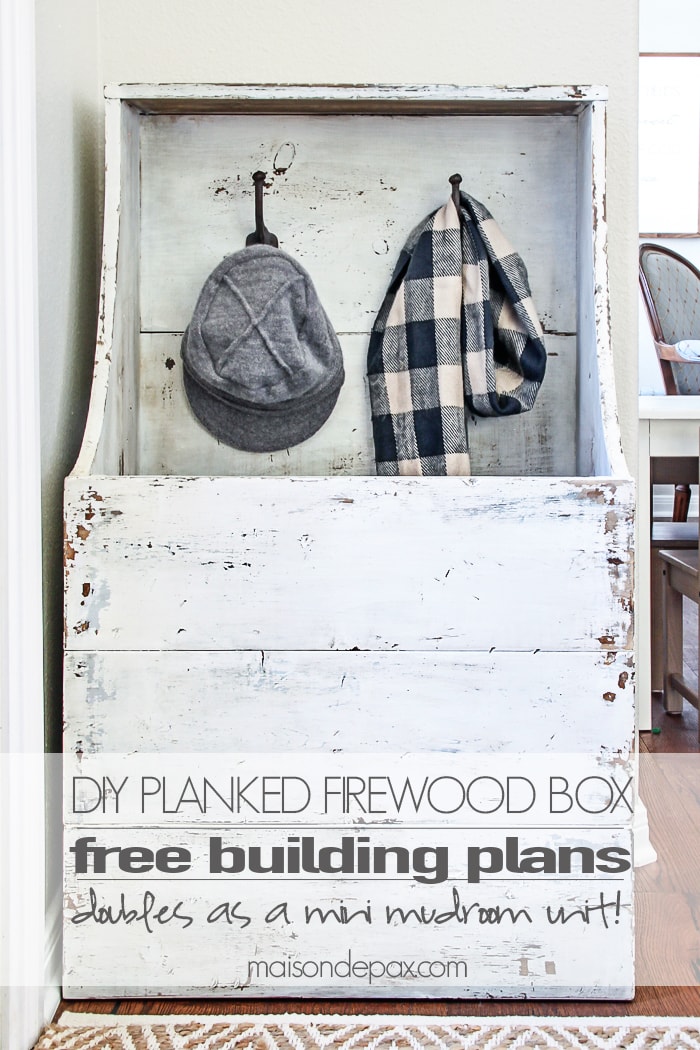
DIY Planked Firewood Box Building Plans
This post is sponsored by Elmer’s Glue. As always, text and opinions are my own.
I can’t even contain my excitement about this new piece… It not only looks amazing (in my humble opinion!), it fits our space perfectly, serves a truly useful purpose, AND…
I designed and built it myself.
The full plans and tutorial are at the end of the post!
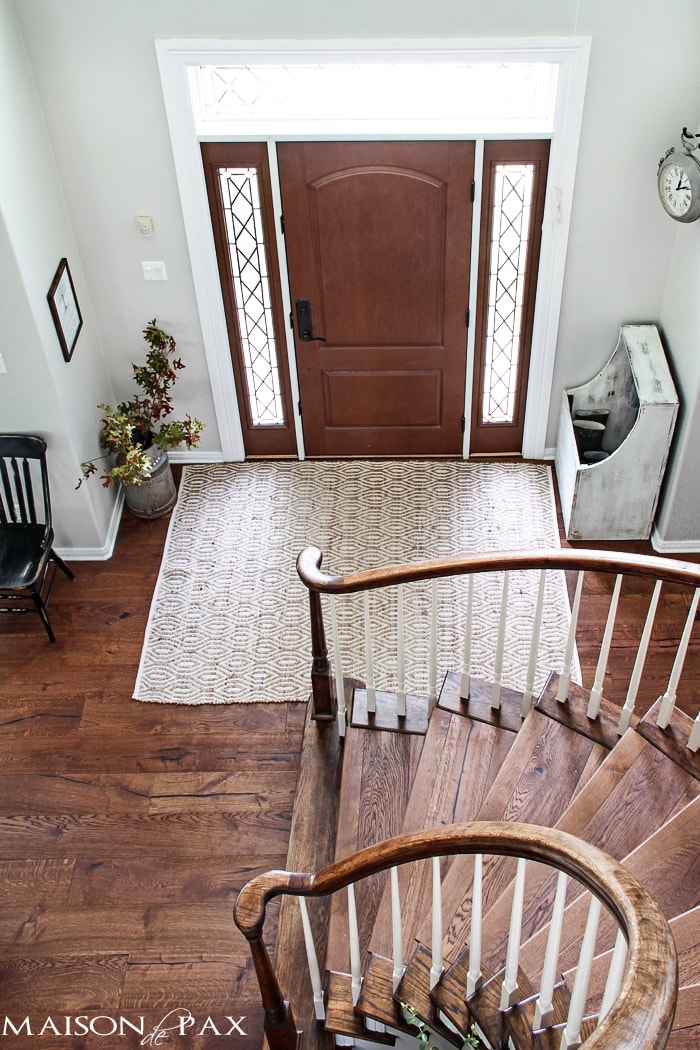
After the 15 millionth time I tripped over my kids (and my *cough* husband’s!) shoes, I knew we needed a better solution for our shoes in this new house. In the old house, we used a bench and trays, but there’s no good spot for that bench near either door, so we’ve been stuck lately. This is my new secret weapon.
I wanted to imitate those antique firewood boxes: primitive, rustic, utilitarian, and gorgeously used. My in-laws have one and it’s a beautiful piece in their home in Santa Fe. Our little fireplace (which we recently gave a makeover!) is actually gas burning, so we don’t need logs…
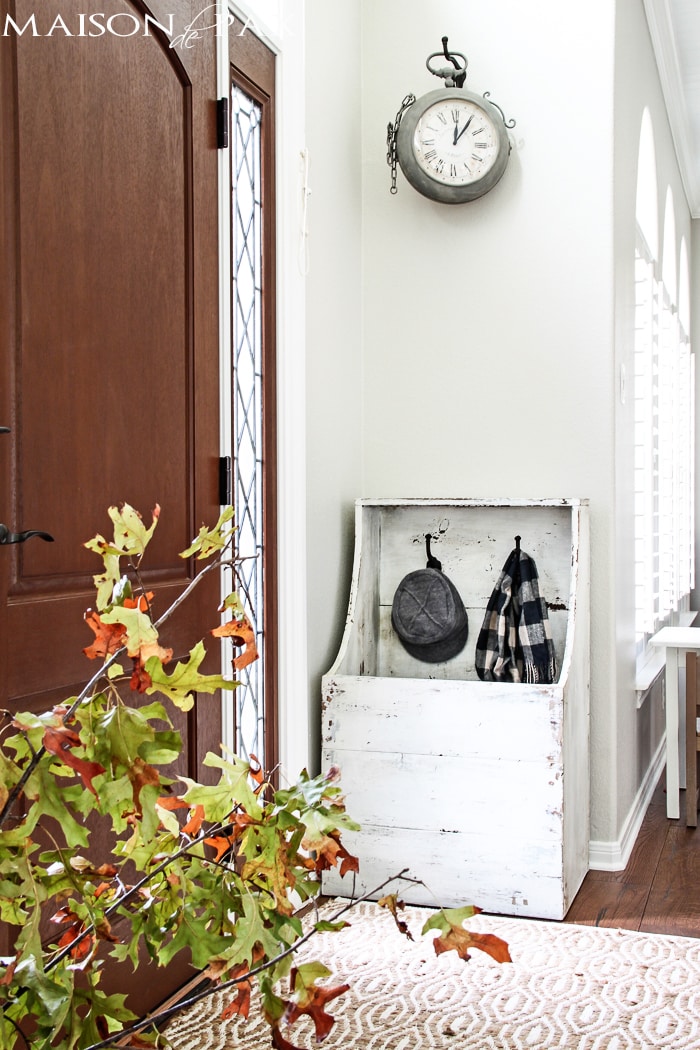
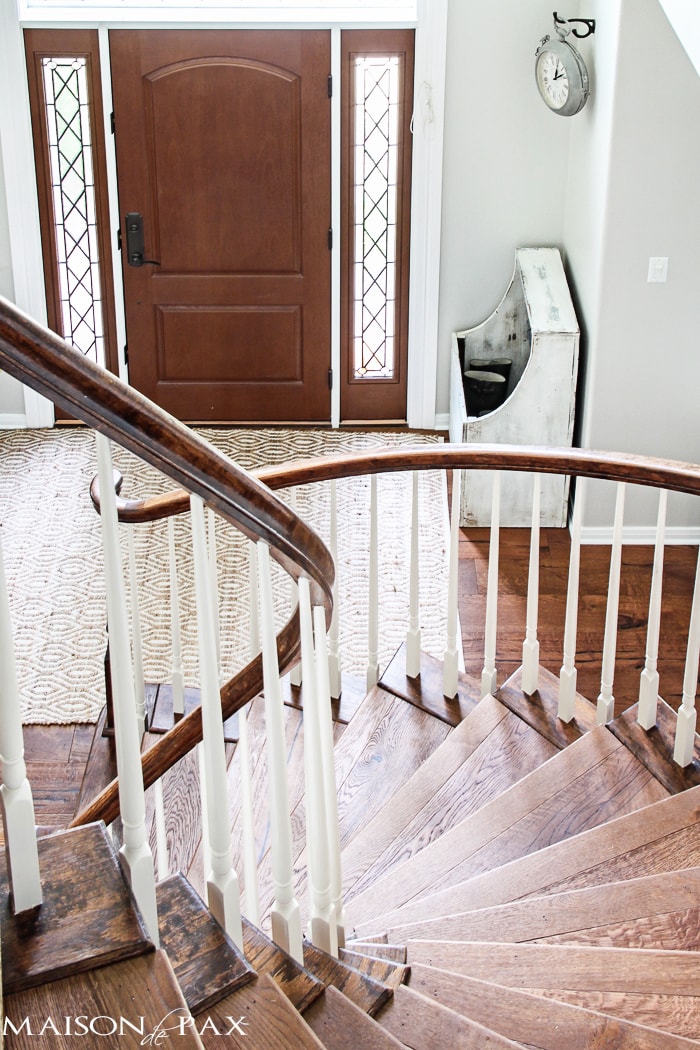
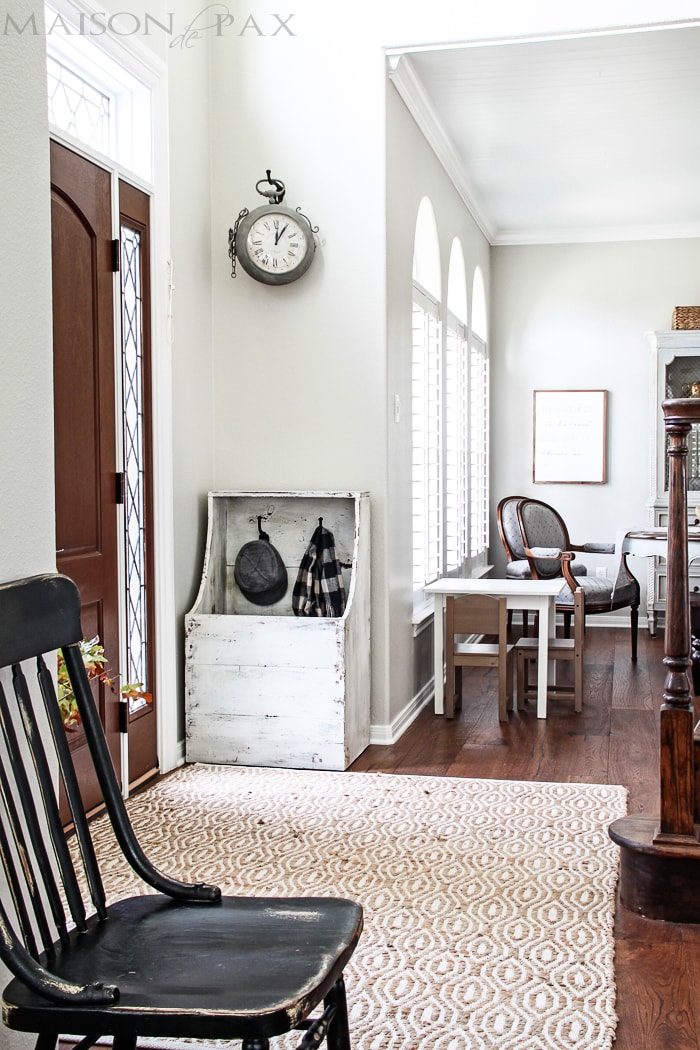
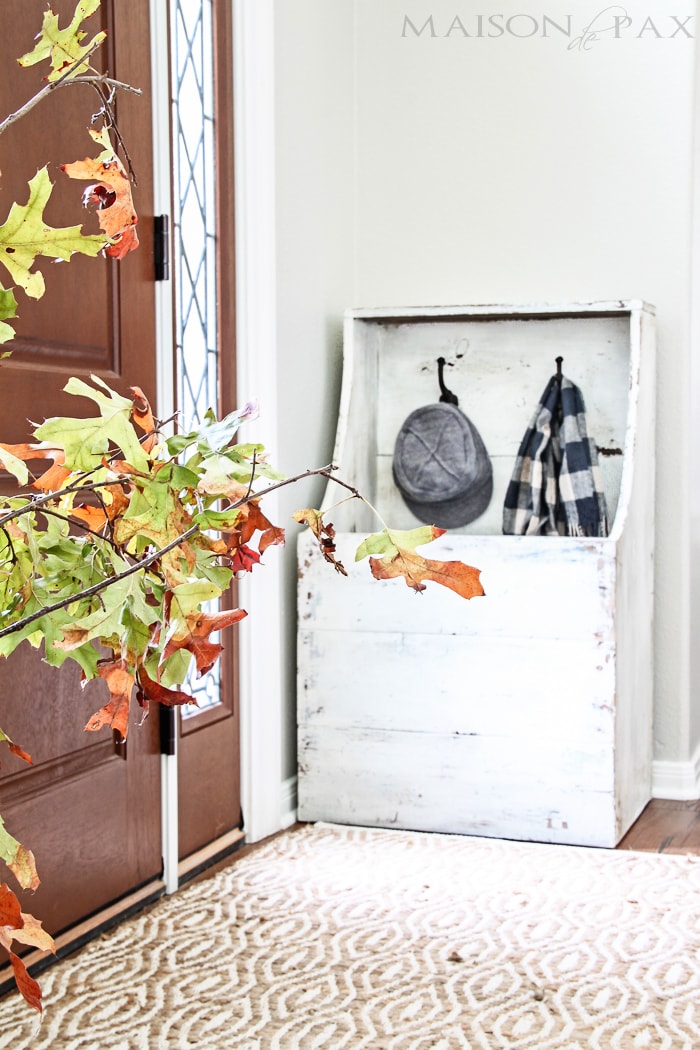
Leaving this little beauty to act as the perfect mini mudroom near the front door.
I planned it with three things in mind: looking like an authentic antique, fitting our space, and using lumber efficiently. I am SO pleased with the result.
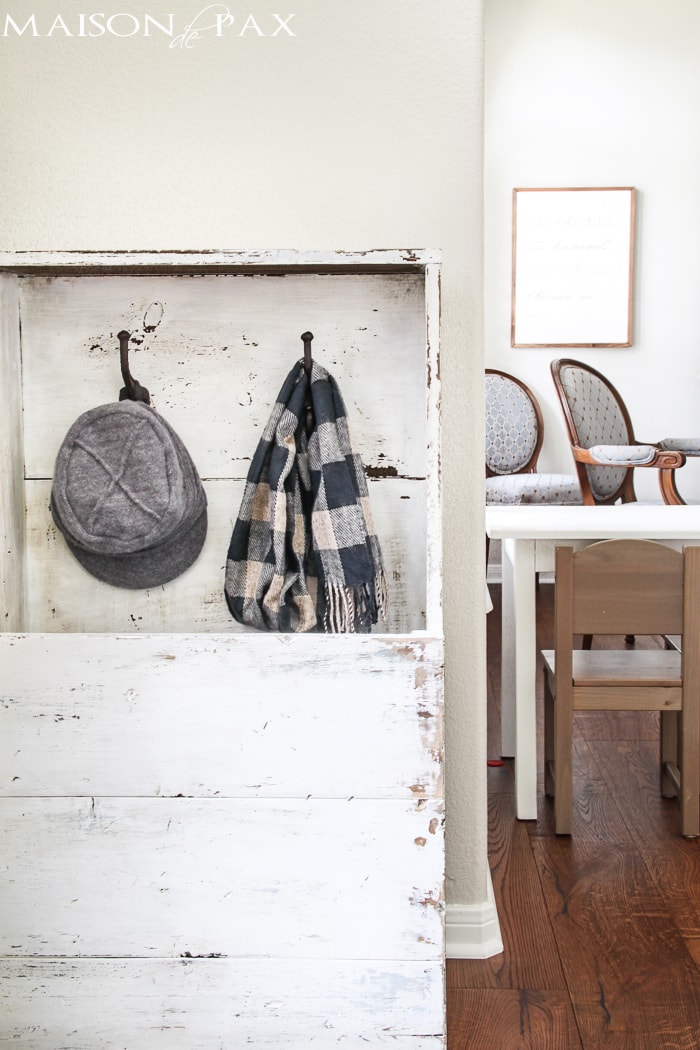
These little hooks left over from my diy rustic towel rack (tutorial coming soon!) are the perfect addition, making this piece functional for hats, scarves, and purses, as well as shoes.

And the best part? Even when your shoes inside look more like this (because, let’s get real, they are never perfectly lined up at our house!)…
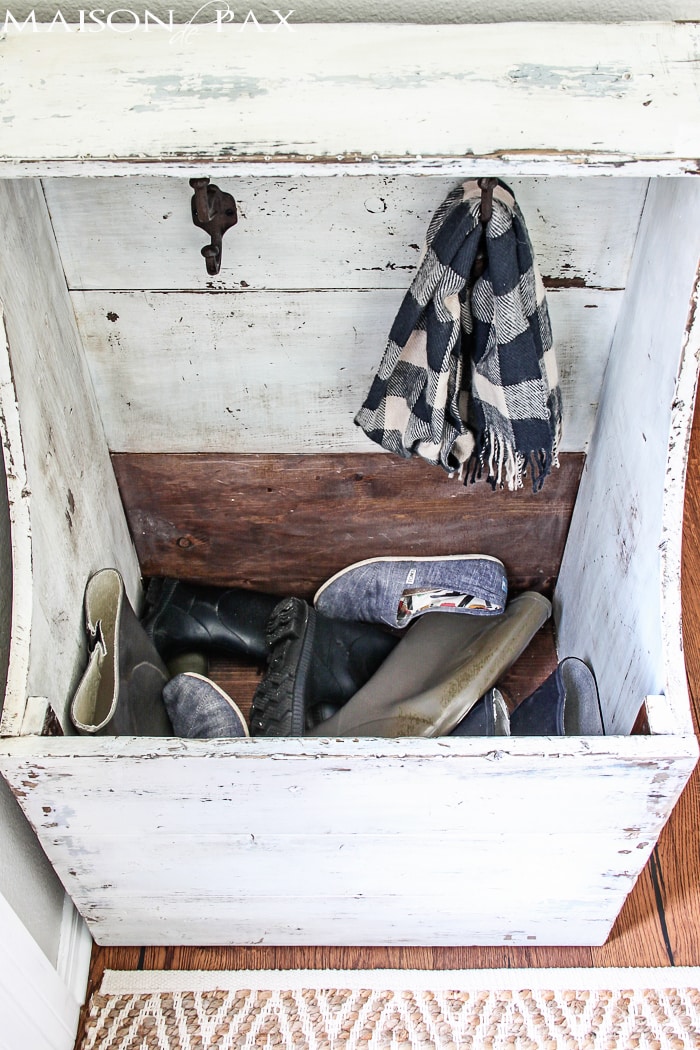
It still looks like this from the outside. Win for mom. 😉
I’ll be sharing a tutorial for the finish later (because this is already a ridiculously long post!), but here are your full building plans.
Shopping List:
1 – 3/4×16 edge glued pine panel @ 96 inches long
1 – 1×8 @ 8 feet long
1 – 1×12 @ 6 feet long
1 – 1×2 @ 8 feet long
1 – 1×6 @ 4 feet long (you only need 2 feet, though, so use a scrap if you have it!)
1 1/4 inch wood screws
1 1/4 inch finish nails
Elmer’s Wood Glue Max
150 grit sandpaper
Tools:
measuring tape
square
pencil
safety glasses
chop saw or circular saw (I have this one and love it)
jigsaw
sander
nail gun
General Instructions:
Please read the entire plan and comments before beginning this building project. You may need assistance (i.e. an extra set of hands) for some steps of this project. Be sure to take all necessary precautions. Always use straight boards, check for square after each step, and predrill holes before attaching with screws. Be safe and have fun!
Cut List:
4 – 1×8 @ 23.75 inches (front and top)
3 – 1×12 @ 23.75 inches (back)
1 – 1×6 @ 23.75 inches (back)
2 – 1×2 @ 16 inches (interior bottom braces)
2 – 1×2 @ 19 inches
1 – 3/4×16 @ 22.25 inches
**2 – 3/4×16 @ 39.25 on high end (you will need to fit these together as below; do NOT cut straight across your board with your circular saw)
Cutting Instructions:
** I realize that 23.75 inches may seem an odd width for your firewood box. This is to ensure that you can get 4 pieces out of your 8 foot board (compensating for the kerf – the width of your saw blade)
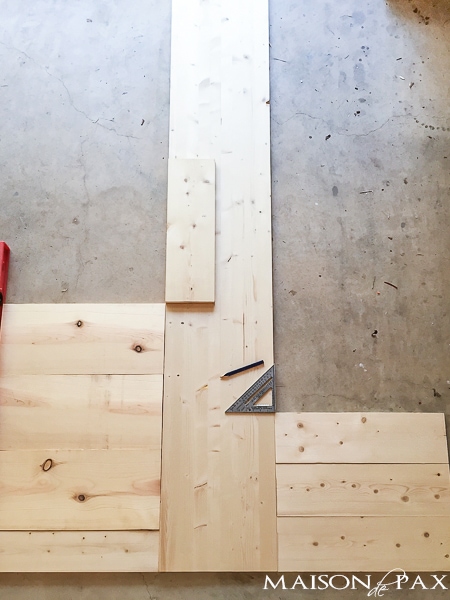
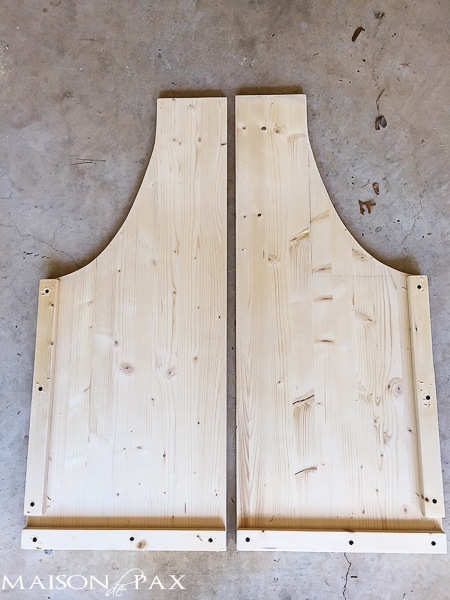
- Cut all your straight boards above, then line them up together as shown.
 Since not all boards (especially 1x12s which tend to have some bowing) are exact widths, you’ll want to use your actual boards to determine the proper height of your side panels: the 1×5 + three 1x12s make up your back (and the taller side of your side panels); three 1x8s make up your front (and the shorter side of your side panels).
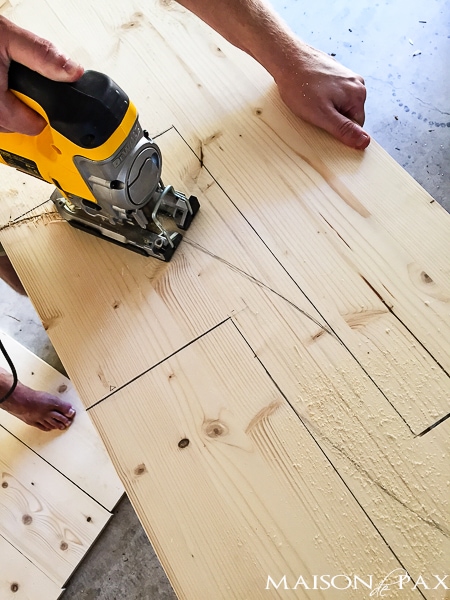
 - Mark your heights on your 3/4×16 panel and draw your pieces to fit together as shown. Sketch your curve as you like.
- Cut out one of the side panels using a jigsaw.
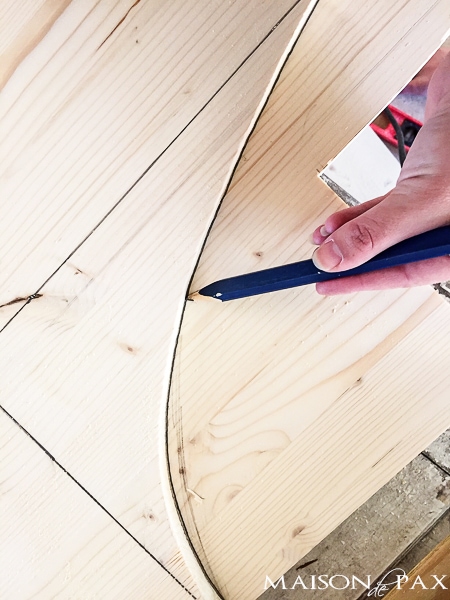
- Lay the first side on top of the second to trace an identical curve.
- Cut the second side panel using a jigsaw.
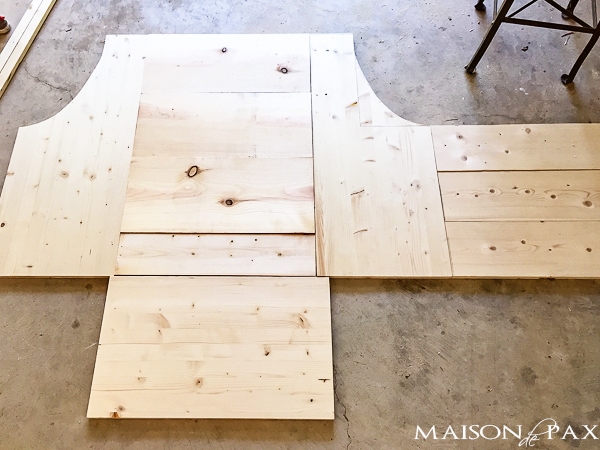
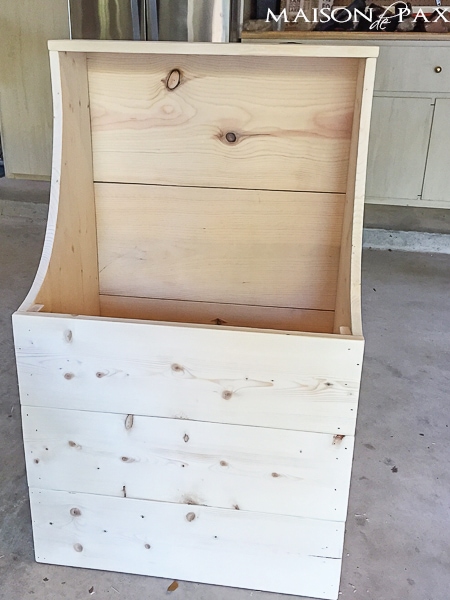
- When finished, all your pieces should look like this (except for the bottom… for some reason, I took this picture before I cut the bottom to fit, sorry! It should be narrower than the planks above it).

 Since not all boards (especially 1x12s which tend to have some bowing) are exact widths, you’ll want to use your actual boards to determine the proper height of your side panels: the 1×5 + three 1x12s make up your back (and the taller side of your side panels); three 1x8s make up your front (and the shorter side of your side panels).
Step 1:
Sand all rough edges before beginning assembly. Note: to achieve a more rustic look, sand the edges of each board until they are more rounded rather than sharp corners.
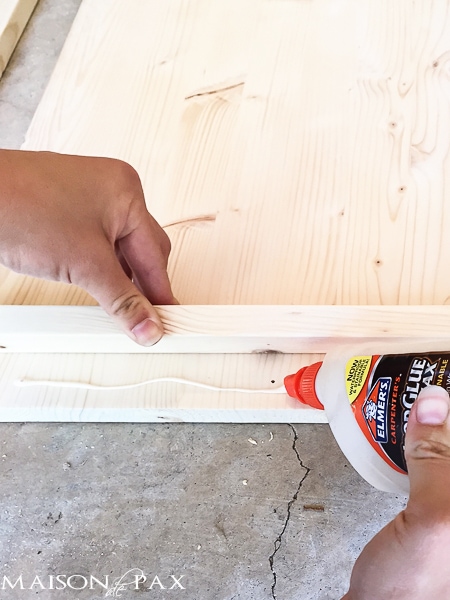
Step 2:
Secure your 16 inch 1x2s to the bottom of your side panels using Elmer’s wood glue Max and screws.
Step 3:
Secure your 19 inch 1x2s to the short sides of your side panels using wood glue and screws. Be sure to leave a 1 inch gap between the bottom and side 1x2s (as shown).
Step 4:
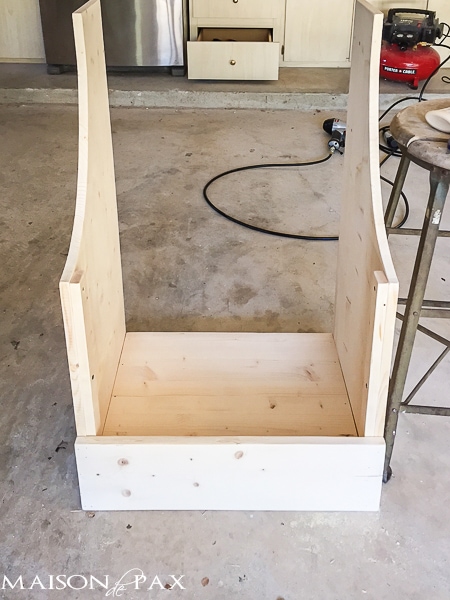
Stand up your side panel, and using a level to ensure your side panel is standing straight, attach your first 1×8 at a right angle to the short side of your panel using wood glue and finishing nails (see image below for clarity). Repeat for second side.
Step 5:
Once you have created your U shape (with the side panels and your first 1×8), slide your bottom piece in to rest on the horizontal 1x2s. It should fit below the vertical 1x2s. Secure with wood glue and finishing nails.
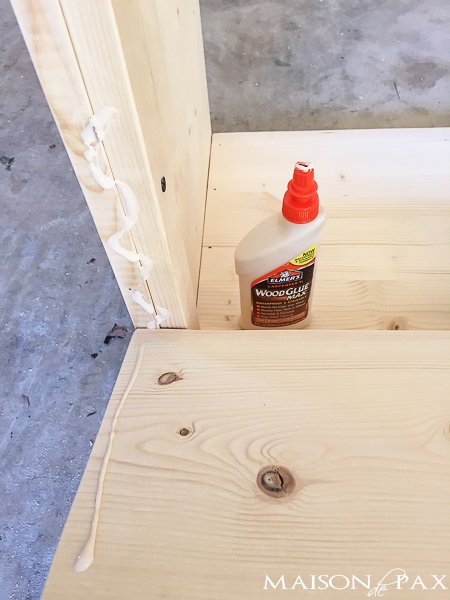
Step 6:
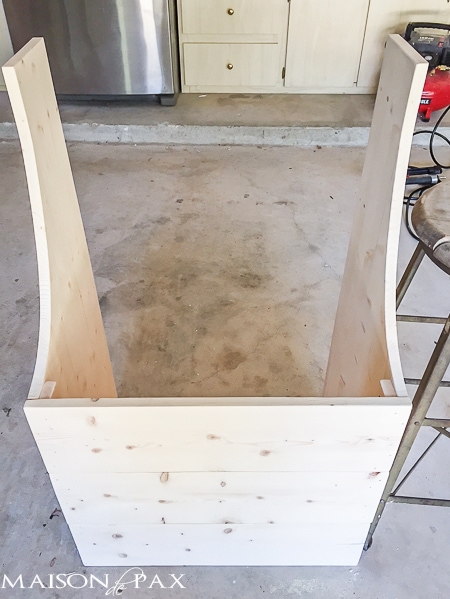
Above the first 1×8, attach two more 1x8s across the front (to the shorter sides of your side panels) using wood glue and finishing nails. As always, wipe of excess glue. One advantage to Elmer’s wood glue Max, though, is that it is stainable, so you won’t ruin your piece if you miss a tiny bit of glue.
 At this point, your box should look like this.
Step 7:
Attach the 1×6 across the bottom on the back of the box (the taller side of the side panels) using wood glue and finishing nails.
Step 8:
Stack a 1×12 above the 1×6 and securing using wood glue and finishing nails. Repeat for the remaining 1x12s. Your box should be complete except for the top.
Step 9:
Attach your final remaining 1×8 across the top and secure with wood glue and finishing nails.
Finishing:
I have a full tutorial to come separately on the very distressed finish I achieved which involved stain, layered milk paint, wax, and hemp oil. Once you fill your nail holes, though, you can paint or stain this piece to your liking. Finish it off with some antique looking hooks for greater function as a mini mudroom.
Though I wouldn’t call this a beginner build (probably more like intermediate), it’s really not hard. And the rustic nature of the box allows for some imperfections, too. 😉 Remember, power tools may be fun, but they require knowledge and safety precautions. Please make sure you are working safely! And if you build one, be sure to send me a picture.
Want more diy projects and inspiration? Sign up for Elmer’s DIY newsletter here!


MORE DIY PROJECTS:


I love everything about this wonderful project, especially the fact that the authentic design hides the useful purpose! Congratulations on a beautiful job!! I love using milk paint -your finish is fantastic!
I have been seeing this and wondering where you got it,just thought it was something from your parents. So glad you made it and now i can make it too, i hope! lol! Thanks Rachel i really like this, you have a great weekend.
Haha. Thanks, Marlene!
It looks great, Rachel! Love it! And it could also be used for so many other great things!
Not only is this practical, but it is SO pretty, too, Rachel!
Wow, Rachel! Such a beautiful piece of furniture – can’t believe it’s a DIY! Great job!
I am thinking of making one of these, but one change that I am thinking of is using a 1×4 on the bottom of the front and hinging it to open out. This way I can easily clean the bottom of the box. Firewood boxes can get pretty messy on the bottom after a winter of holding wood.
I love that idea! It would definitely be helpful if you intend to use it for firewood. Thanks!
I can’t believe this is new wood! Such a great box and thanks for the plans 😉
Hugs, Jamie
Thank you so much, Jamie!! xx
How do I print the plans
I am sorry that there is not a printable version, but you can certainly copy and paste the text if you want a hard copy.
Love this! Could you tell me what the depth and height of this actually turns out to be once completed? Thanks.
I’m so glad you like it! It’s 39.5″ high and 17.5″ deep. Hope this helps!
Width? Working with a tight space. Thanx!
The finished piece is approximately 24″ wide (or a bit shy). Hope this helps!
I’m just finding your blog, and I love it! I already have several projects added to my list now. Can you tell me if you posted about how to achieve this finish?
Thank you! You can see the finish tutorial here. Hope this helps!