Nothing Beats a Hug and a Kiss!
I know it’s very un-American of me, but I really loved the *bisous* practice when we lived in France…

A quick kiss on both cheeks quickly became much less awkward than the how-hard-should-you-grip-someone’s-hand handshake or the armpit side hug. It may invade personal space a bit, but who needs personal space anyway? Especially on Valentine’s Day…

In honor of that upcoming celebration of love (disclaimer: hugs and kisses are for ALL loved ones, whether it’s officially a significant other or just friends and family. We don’t discriminate here!), I couldn’t resist a simple knock off of Anthropologie’s whimsical pillows.
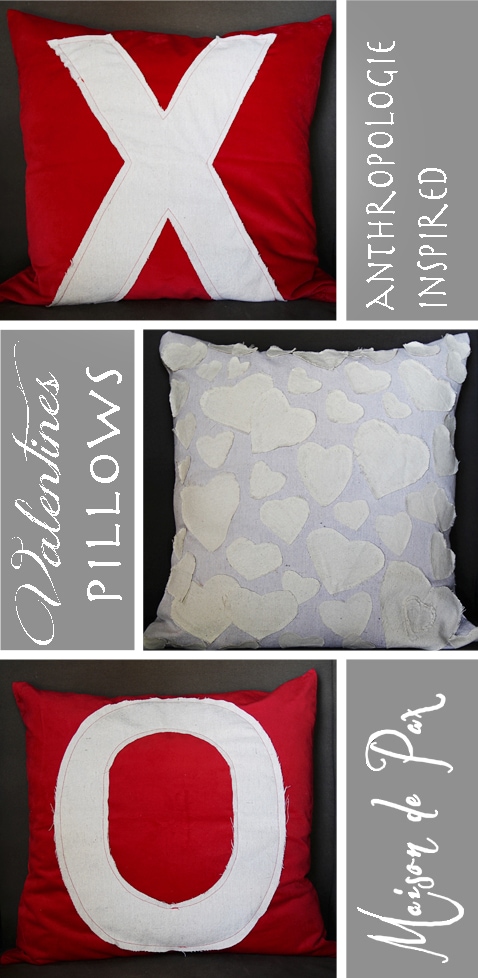
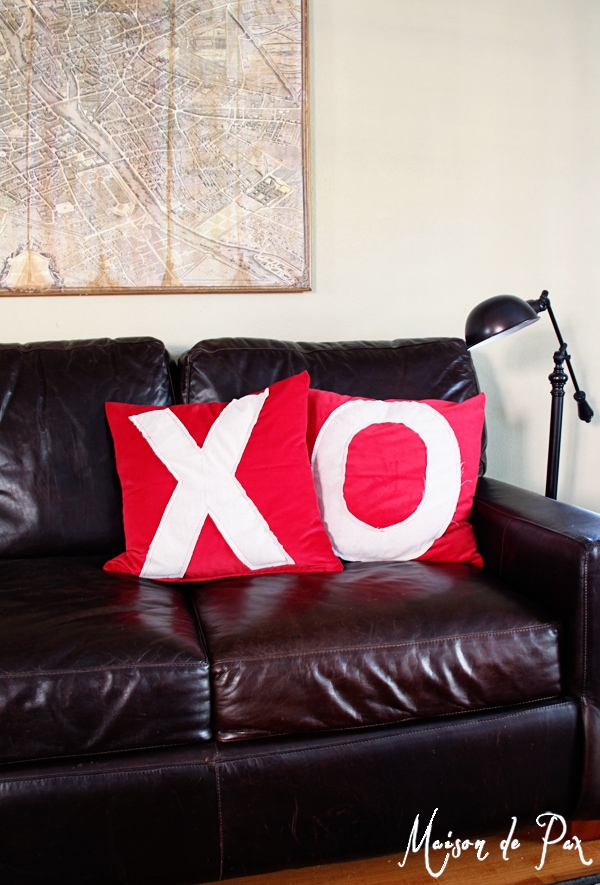
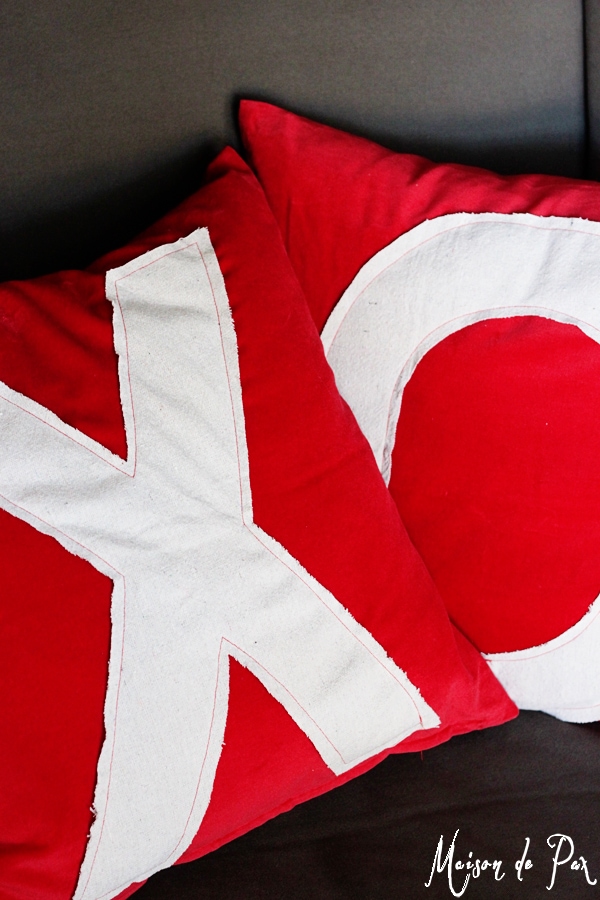
Be sure to come back next week for a tutorial for the heart pillow (update, you can see that tutorial here), but for today, I want to share how I made my own version of the Sentimentalist Pillows. And for further good news, rather than $148 each, these came in at a whopping $8 for both. I started with these pillow covers from Ikea. You could certainly make your own, but at $4 each, I decided to save myself the trouble. Plus, I really like the slightly vintage feel of the funky red velvet.
I then used leftover drop cloth from my smocked living room curtains (I’m telling you, this stuff has gotten some serious mileage: roman shades, TOMS, a crib skirt, pillows, and a tree skirt!) to cut out the letters. Deciding how to cut the letters to the ideal size was actually the hardest part of this. Unfortunately, I did it late at night (without my camera), so the iphone pictures are terrible, but once I figured out how to do it, it was quick, easy, and successful. So I want to save you the trouble of figuring it out!
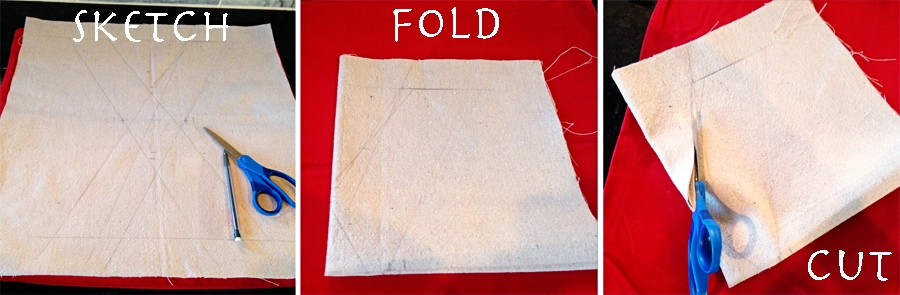
- Lay your drop cloth on your pillow cover to visual proportions.
- Sketch the approximate size you want using a pencil and ruler… but don’t stress about having everything perfect.
- Fold your drop cloth in half twice (once vertically and once horizontally) so that you only see one quarter of your letter.
- Carefully cut through all four layers according to the lines of the quarter showing.
This will give you a perfectly symmetrical letter. 🙂 I did the X first, then laid the X on my next piece of drop cloth and roughly sketched the O to be the same size… Then I followed my folding and cutting technique to make it symmetrical, as well.
To attach the letters, I just sewed a simple seam (using red thread) approximately 1/4″ inside the edge of the drop cloth. I am NOT an accomplished seamstress, and I don’t think I’m even very good at sewing a particularly straight seam, but if you’re worried about the contrasting thread being too crooked, feel free to use thread that blends into the drop cloth more. Personally, I like the imperfections.
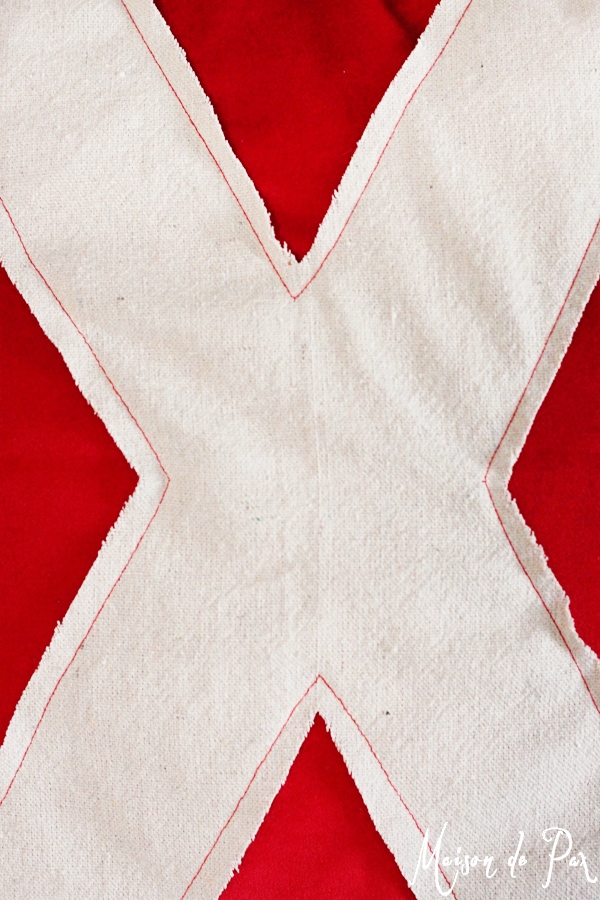
I also did not finish the edges of the drop cloth because I want it to fray. The seam will keep it from fraying too far, and I like the texture the frayed edges provide… I expect them to continue to fray more as we use them!

I love how they offer a nod to St. Valentine without being overly feminine (since I do still live in a house full of boys!); I love how easy they were, and I love how affordable! But even more, I love that they offer me an excuse to smother my boys with hugs and kisses while we snuggle on the couch…
Everybody needs a daily dose of x’s and o’s, don’t you think?!?

This makes me want to learn how to sew ASAP just so I can make them. I can’t even explain how much I love these!!!!
Ha! It’s not hard, but in the meantime, fabric glue is always a good option! You wouldn’t have the contrast effect, but you could put it 1/4″ in so the edges would fray. 🙂 I’m so glad you like them!!
Rach…I love them! Great job. I think you should make a set for your favorite Sunday School teachers 🙂 BTW, I officially subscribed. Thanks for making it easy. XO
You might just have to make some at our next craft day, Shara! Glad it was easy. 🙂
The pillows are all so cute. Love the heart one especially. Thanks tons for linking to Inspire Me. Hugs, Marty
Thank you so much, Marty. I’m so glad you like them! 🙂
Thank you so much for sharing at Redoux! Featuring later today at my party!
I do adore these x’s and o’s. Would love for you to share at Fridays Unfolded!
Alison
Nancherrow
Thank you so much! I’m so glad you like it. 🙂
Those are way too cute!! Love how easy they are AND the fraying edges of the letters. I need to make some. 🙂
Thank you so much, Cecilia! I hope you enjoy them as much as I have! 🙂
I love these pillows and i know just where I would use them. You have my mind twirling right now!
So glad to hear it, Debi! Have fun!!
I love this idea, and I’m definitely pinning it. I wanted to let you know that and also, you might be interested to know that I’m hosting a $65 Etsy shop fabric giveaway on my blog this week. You might want to check it out.
Thanks so much, Kim! Happy Valentines. 🙂
Love it!!! Thanks for sharing it!
Thanks so much, Lorraine! xo 😉