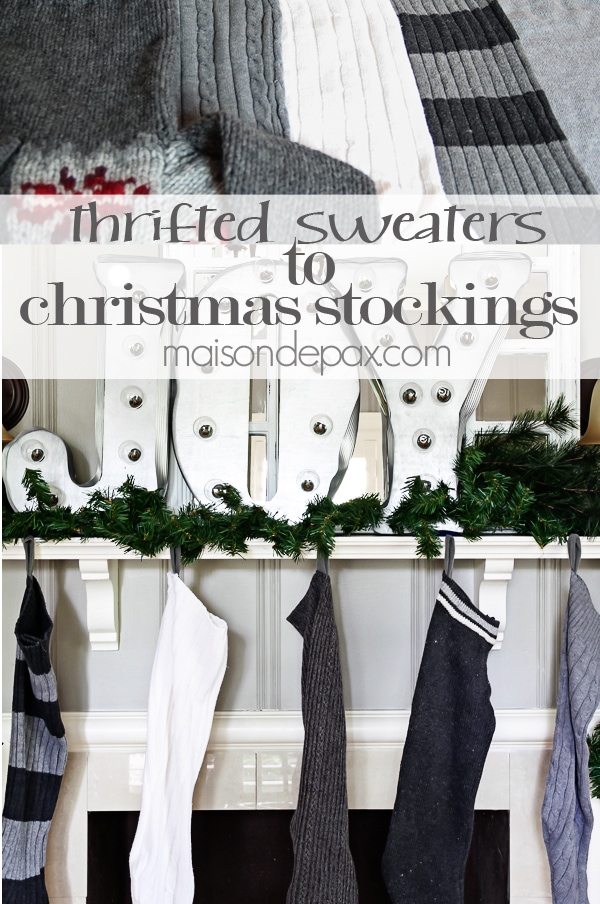
Ugly Ducklings
There are few things more exciting and satisfying than a story of redemption. Of being reclaimed into beauty.

You may laugh that I compare old sweaters from the thrift store to something so grand, but I think it an apt analogy given the goal of today’s post: to show you that decoration to celebrate Christmas doesn’t have to cost a fortune. And I’m so excited to team up with 30 other bloggers to demonstrate that today! Speaking of a cost-effective Christmas, be sure to enter my Favorite Things Giveaway going on now – over $500 in prizes!

Since we’ve added a family member since last Christmas, I knew a new stocking was in order. And I was dreaming of something a little old school.
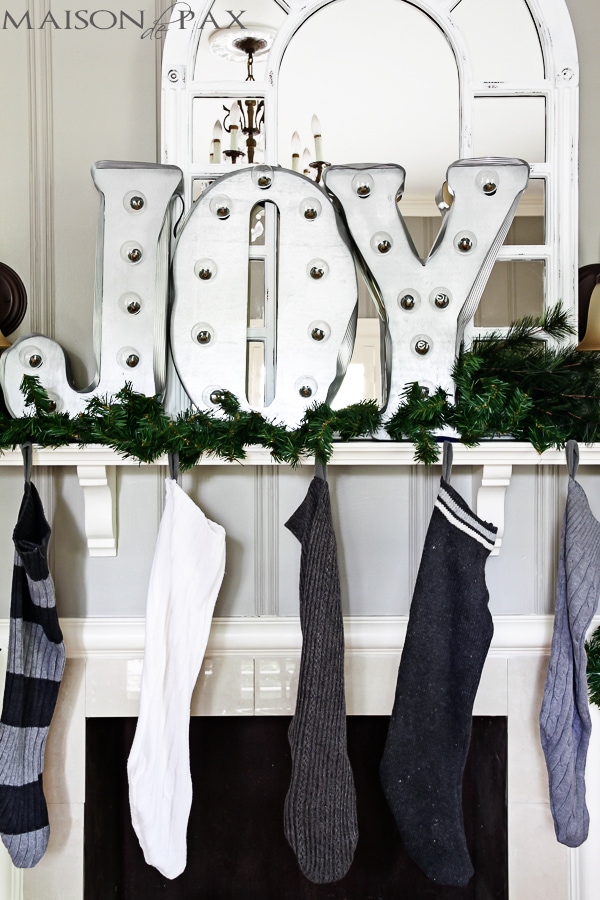
I wanted them to be reminiscent of the long knit stockings, rather than the more modern square shaped ones. And, naturally, I wanted gray.
And after a quick trip to the local thrift store and less than $20, I had the materials to make 5 new stockings. Here’s how I did it:
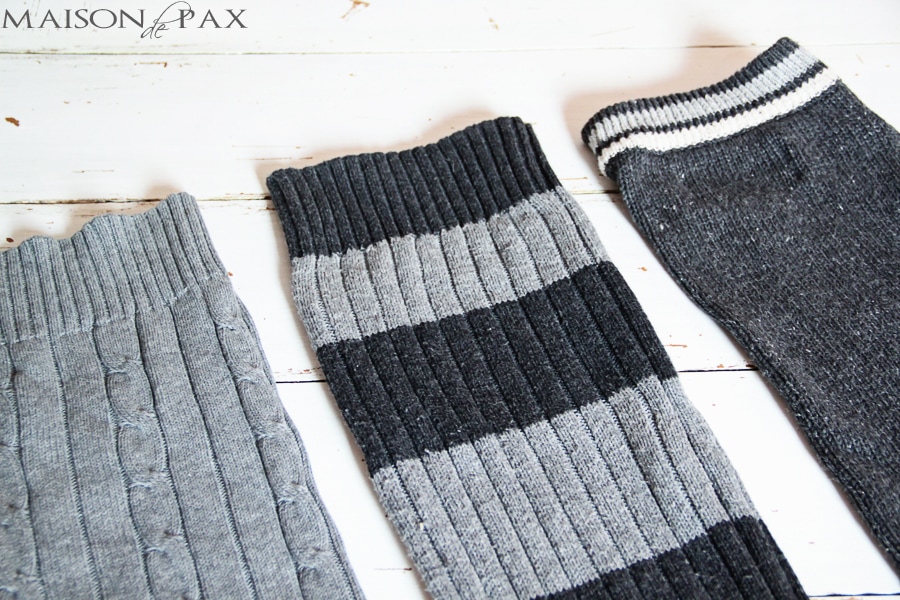
- I found 5 old sweaters from the thift store: I wanted variety that coordinated.
- I determined my shape (I copied an old knit stocking that had belonged to my husband as a child).
- With the sweater turned inside out, I pinned around my template.
- I cut out my stocking (front and back at the same time since the front and back of the sweater acted as layers).
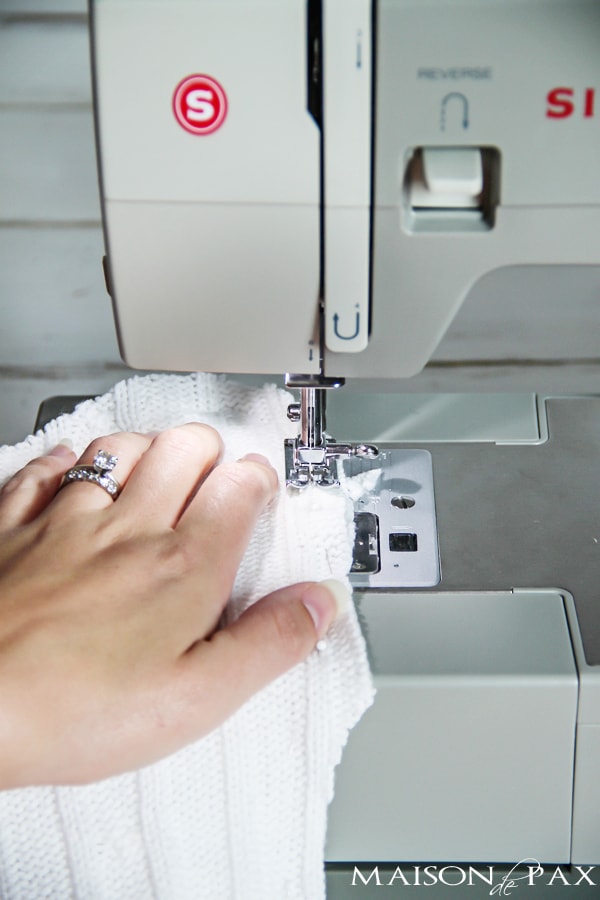
- I sewed a simple seam all the way around the stocking.
- I attached a loop from which to hang the stocking.
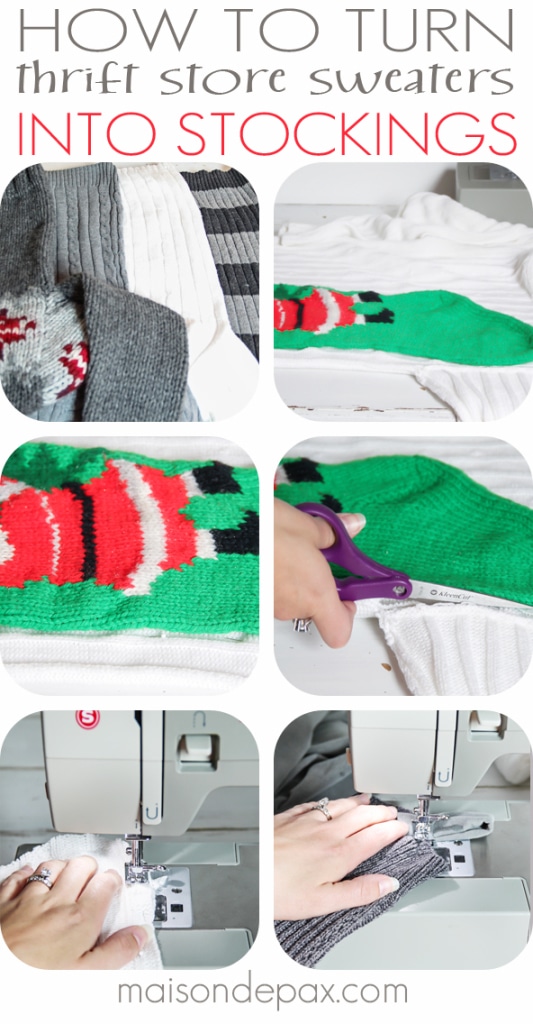
Two major things to keep in mind: first, be sure you line up your stocking so that the bottom hem of the sweater is the top of your stocking. Since you are working with knit, you want a nice, finished edge to act as the top of your stocking.
Second, thick materials like cable knit are often harder to navigate through your sewing machine, so when you need to change directions, be sure your needle is down through the material, lift your pressure foot, and turn the sweater. Then put your pressure foot down. This will keep you from veering out of place when you have to adjust the knit fabric.
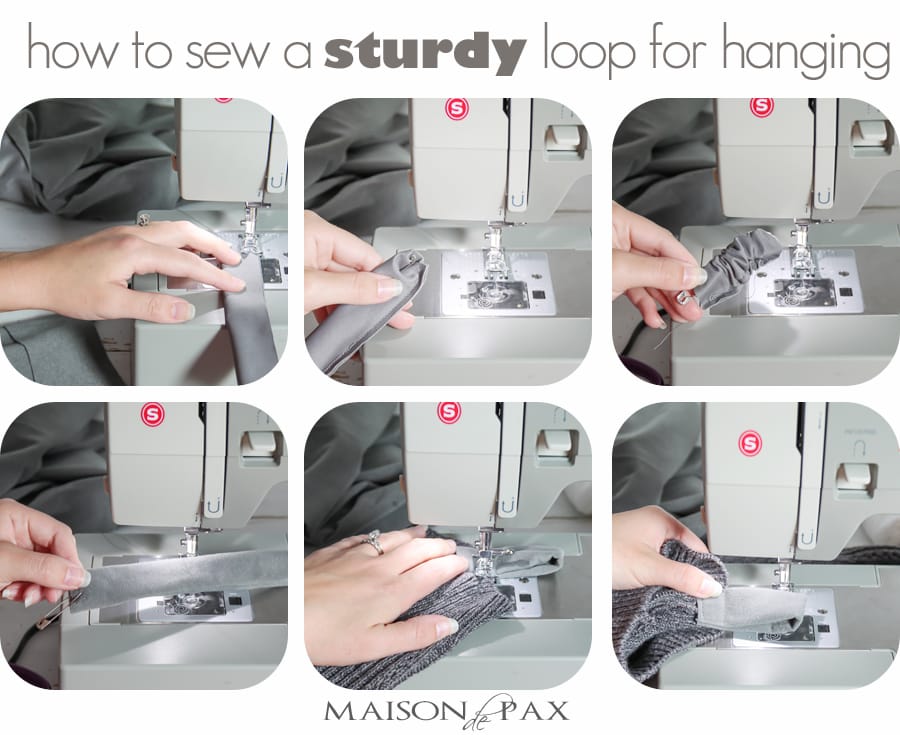
To create a loop from which to hang the stocking, I took some scraps left over from my velvet pumpkins. To make a nice, sturdy loop:
- Fold a rectangle of fabric onto itself and sew a straight seam down the open side.
- Attach a large safety pin to one end of the tube (the shape your fabric has now taken on).
- Push the safety pin through the tube until it comes out the other end.
- Pull on the safety pin to coerce your fabric right side out.
- Double over the fabric to create a loop and sew it onto the top of your stocking.
- For best results, sew a complete square to fully secure the loop.
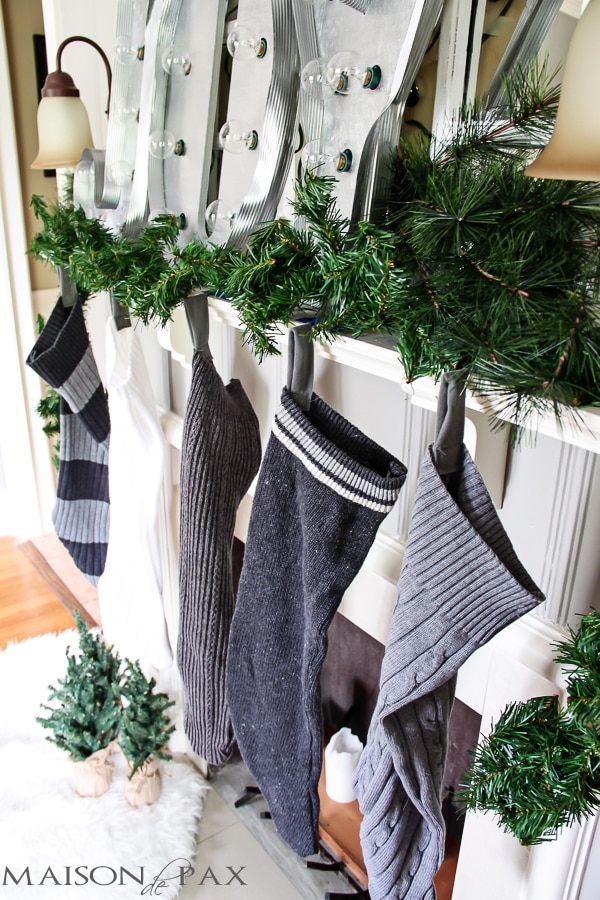
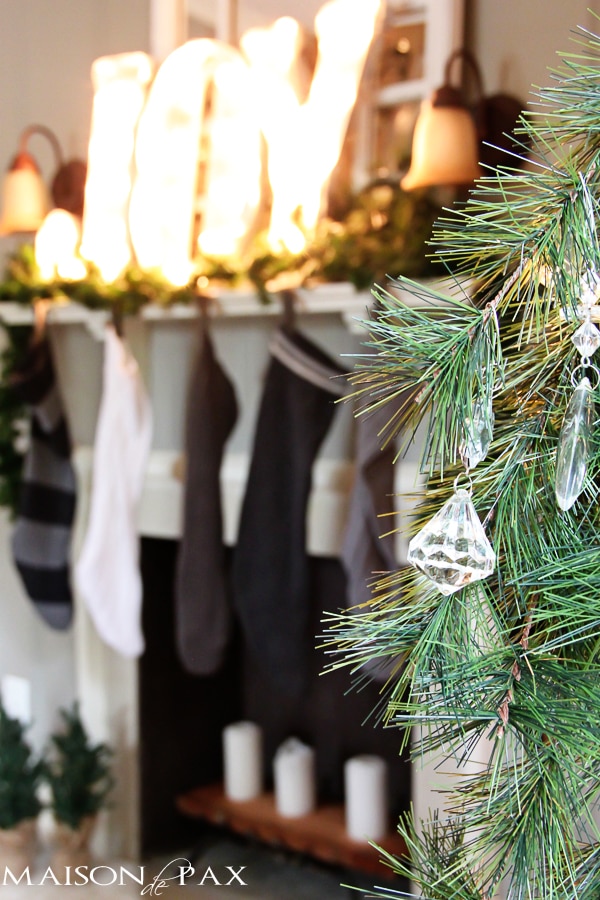
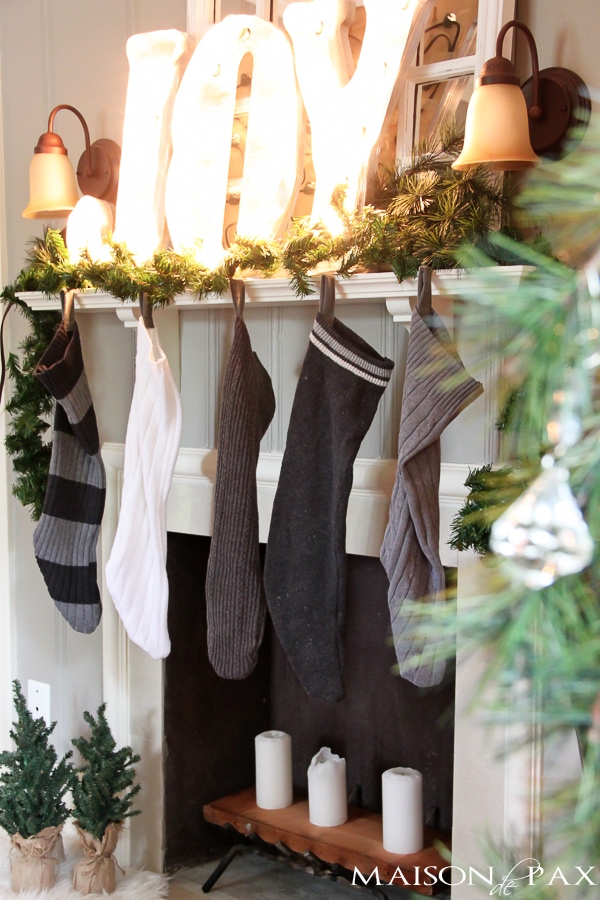
I just love how they turned out. The old fashioned look with my DIY vintage marquee sign (find out how to make your own here) simply charms me.
And the fact that I made all 5 for less than the cost of ONE knit stocking at most retailers…
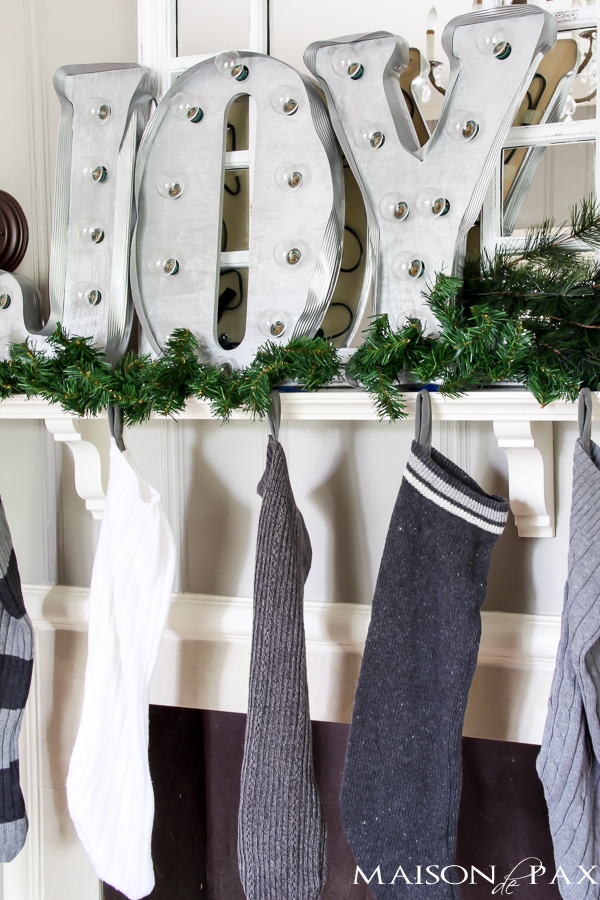
I love the variety of shades and textures…
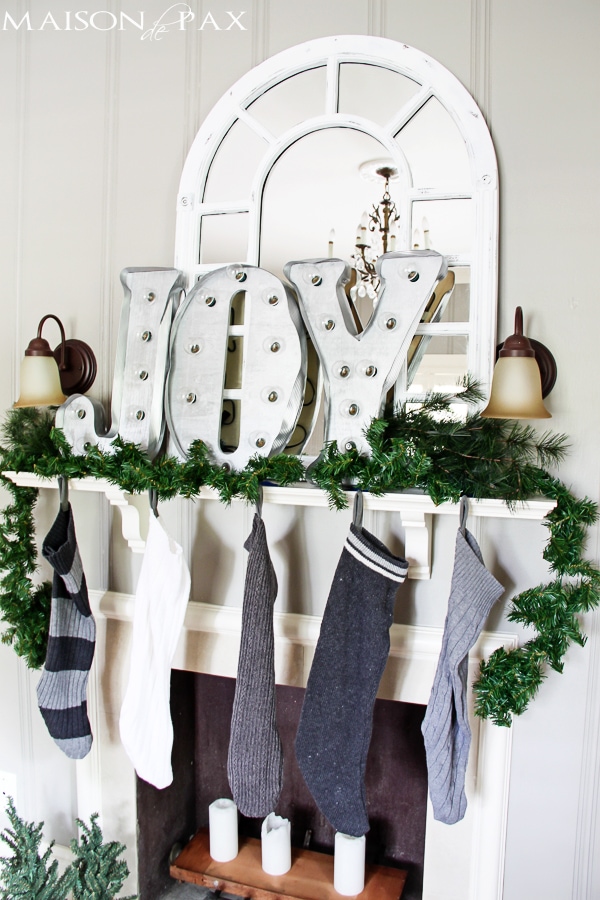
And the cozy warmth they provide to my holiday decor.
Now I’m just dying to find the time to make some pillows from the scraps! What would you make?
Don’t forget to visit all the other creative thrift store finds, and try it yourself: bring a little new life into an old item. After all, isn’t that what this season is all about?
HOLIDAY THRIFT STORE CHALLENGE:


These are so creative Rachel and too cute! Love them and you whole mantle! Perfect!
Oh thank you, Summer! xo
What a lovely idea, I really love your stockings!! Well done on your creative challenge!
Sonia
Thank you so much, Sonia! You’re so kind. 🙂
Love these Rachel and that you made them more in the old style, long knit ones! Fantastic job! Thanks for joining with me for the Holiday Thrift Store Challenge!
Thank you so much for organizing this, Alice! It was so fun to be a part!! xoxo
LOVE these so pretty!
Thank you so much!! xo
They are “old school” lovely! I would have been intimidated by the material you had to work with, fearing I would do something wrong when cutting. I applaud you! They are beautiful!
Brenda
These are so DARLING! Great job! Congratulations on the new family member too!! 🙂
Soooooo adorable! Love your whole mantel. x
Rachel, they are so ‘old school’. I love them! Really reminds you of something that your grandparents might have hung from the fireplace. They look just darling with your mantle décor! I am loving this fun challenge. Big shout out to Alice!
hugs,
Jann
Girl, these are awesome!! I love long stockings, they make my heart sing! I made mine as long as I could for my piano… one day I will have a fireplace! But I would have never guessed these were from old sweaters! Absolutely beautiful!
You are so creative! I absolutely live what you did with these sweaters! I lo e seeing how creatuve everyone has been with this challenge!
Great idea, Rachel! I want to make new stocking for my husband and I…may go sweater hunting around the house now 🙂
So very pretty, Rachel! I love the vintage look, and the colors you chose – perfection!
Rachel! These are soooo good! I love them! Pinning immediately!
these are awesome, rachel! i love that they are unique but coordinated!
These are absolutely charming! I love the different styles and textures and love that you used your husband’s old stocking as a template! It makes for a very cozy mantle.
Tammy
Wowza, what a great idea, girl! I’m definitely going to be sharing these on my FB page 😉
Hugs, Jamie
Santa is sure to leave lots of goodies in these stockings! Nice job!
I love these stockings!!!! The colors and texture are perfect!!!!!
Melissa @ Shabby Love
Love the stockings! How do you think up these cute ideas?
Cute idea.. I like the colours of sweaters you chose.
SWEET idea. The colors are great too.
Beautiful stockings Rachel..makes you never want to throw out your sweaters!!
SO fun! And they’ll be nice and stretchy to fit all of Santa’s treasures! 🙂
These are so sweet & clever, Rachel!!