Easy Textured Painted Metal Tutorial
Being 39 and a half weeks pregnant has me doing two things: finding projects that involve sitting, and frantically trying to get the baby’s room into a “finished” state (as if anything over here were every really finished…). That led to my chippy chalk painted clock last week and this textured metal mirror today.
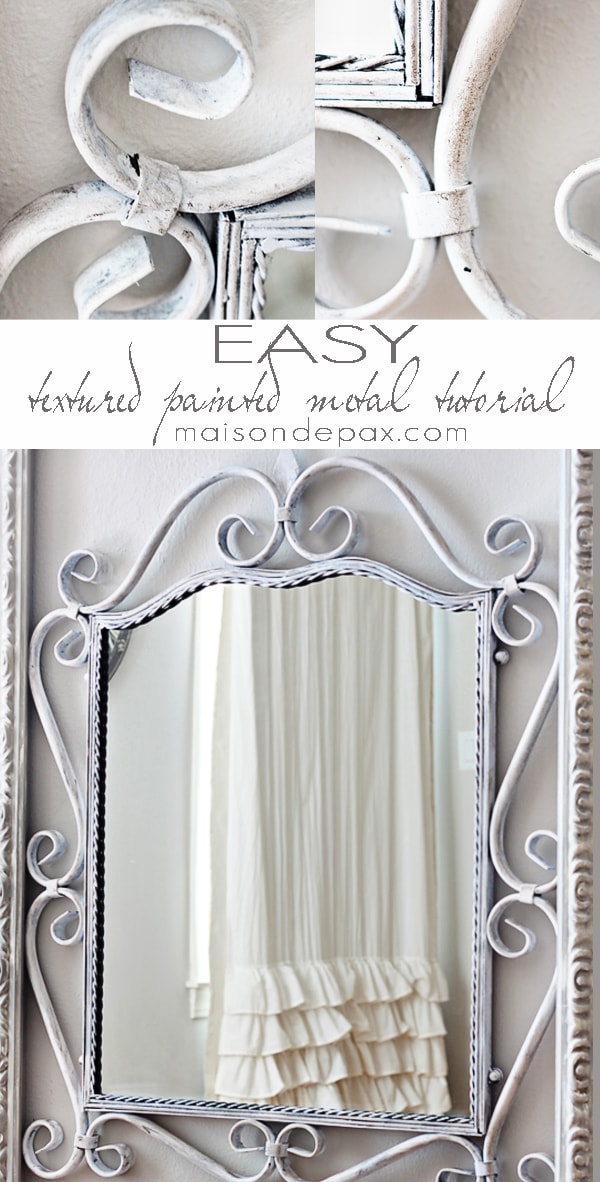
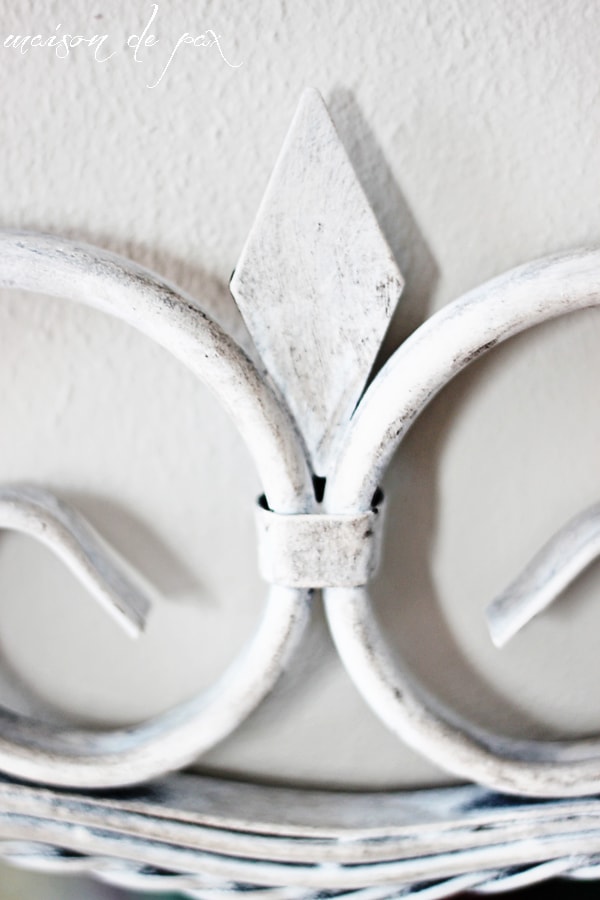
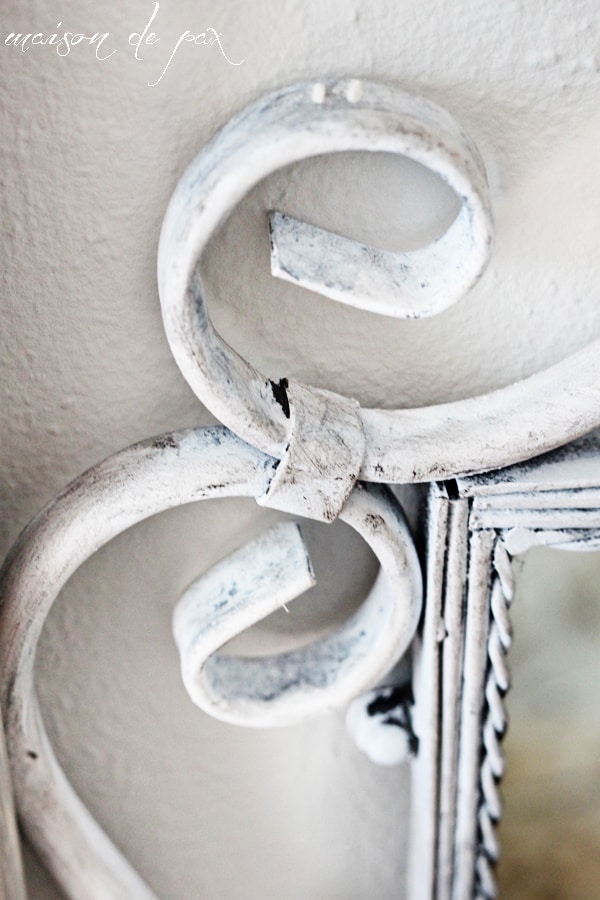
For the record, I love them both. What I love most, though, is the difference between them. Though both were basically black metal painted white, the texture and look – patina, if you will – is so different. Sadly, these pictures don’t really do it justice (I’m trying not to give away too much of the nursery before I get to reveal it fully to you!), but the finish has an aged look almost like gesso would create.
Another fabulous feature? It took only two steps. Boom. And that makes for one happy momma!
I started with an old mirror I had bought in college. The shape was fun, but the matte black metal finish was just not my style any more (sorry for the iphone photo, friends; we’ve been under a bit of a time crunch over here!).
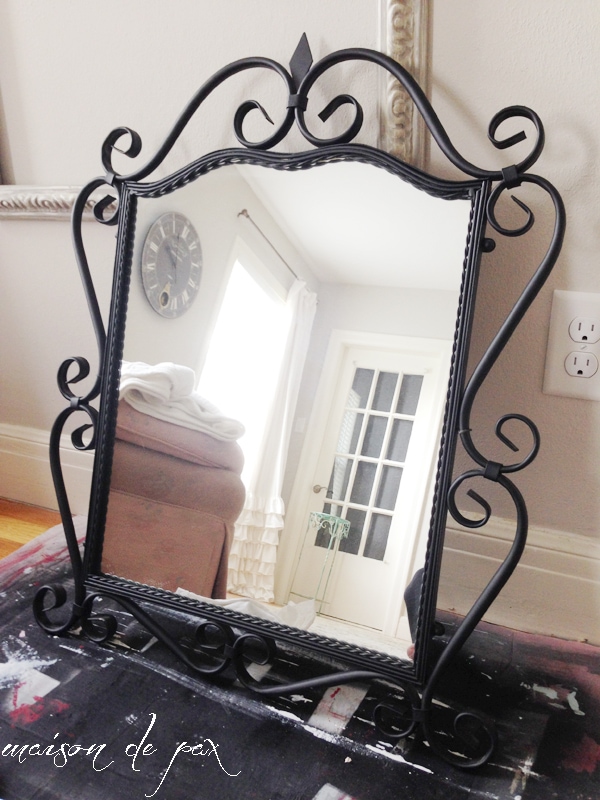
To give this mirror its gorgeous new skin, I used a big, natural bristle brush (this is important – it adds the texture you need) with very little paint on it. I never dipped the bristles all the way into the paint; I just dabbed the ends:
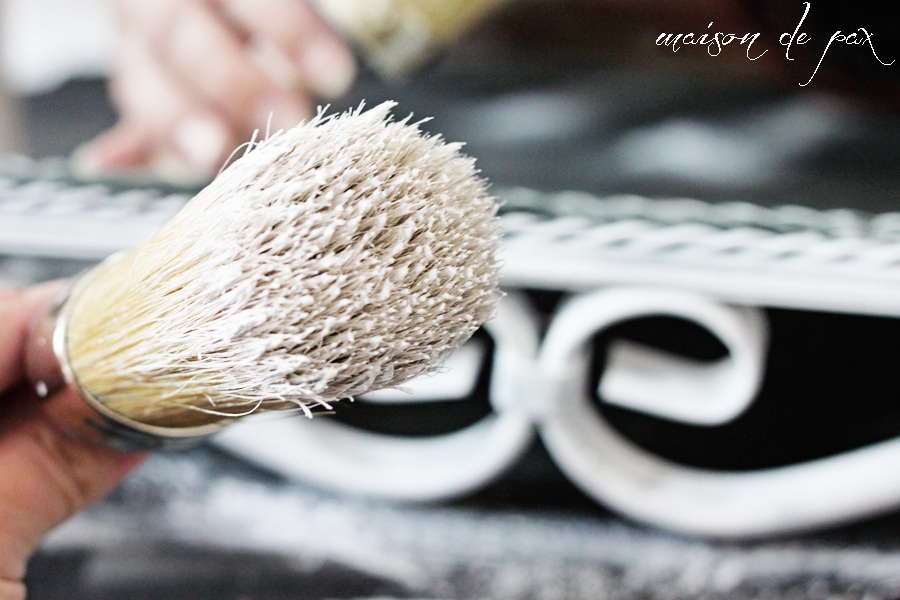
And painted imperfectly over the whole frame, using Simplicity by Country Chic Paint (the same color I used on my attic bedside table). Side note: I don’t tape off my mirrors when painting them usually; I just wait until the paint is dry to the touch (but not fully cured) and then use a paper towel with windex – it comes right off! Dab, brush, wedge, splot (yes, I just made up that word), whatever – you aren’t going for perfection or even full coverage.
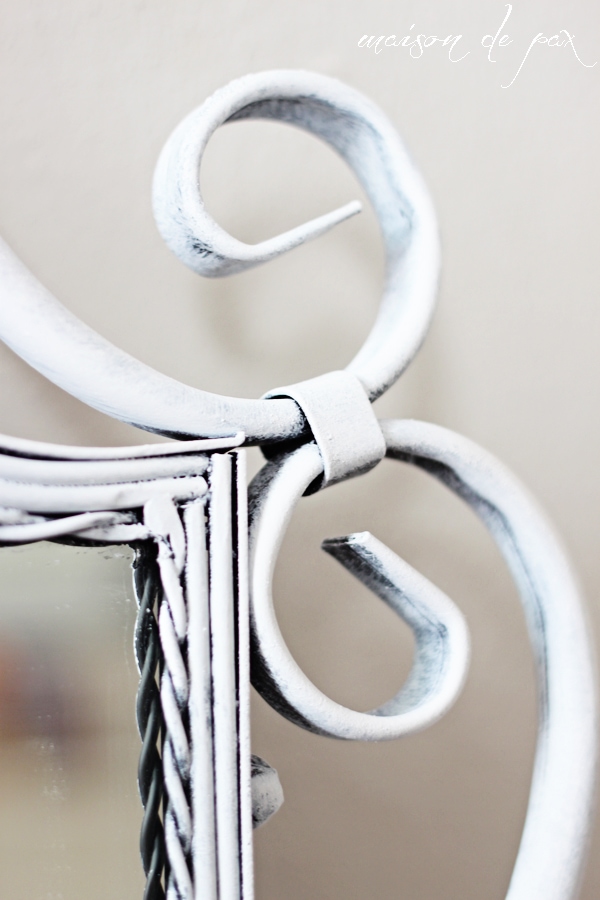
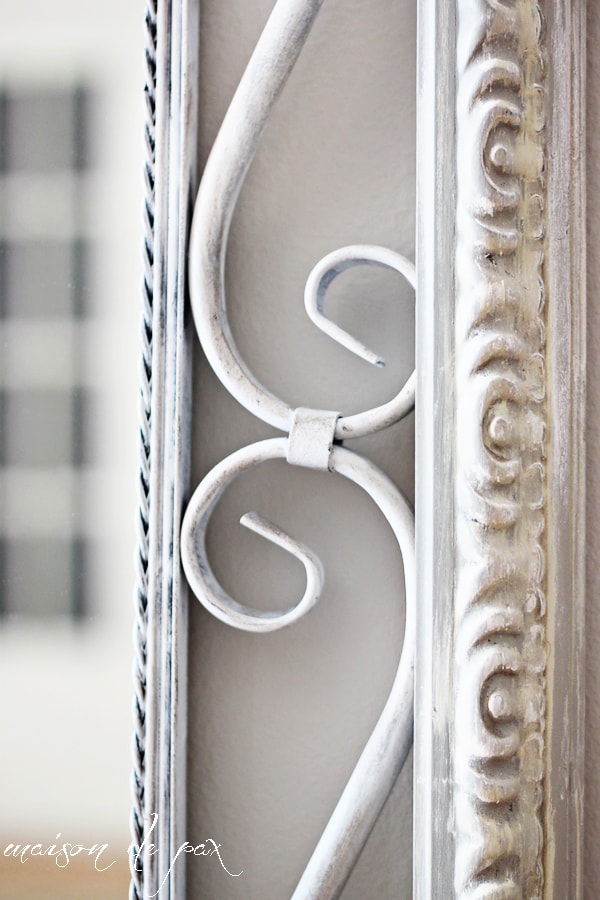
Once the paint was dried and ready for wax, I used antique wax (also by Country Chic) directly on the white paint. Normally, I would recommend using clear wax before antique because the antique wax will stain your paint color, but here I wanted the paint stained. I wanted it to look dirty, layered, even rusty in places.
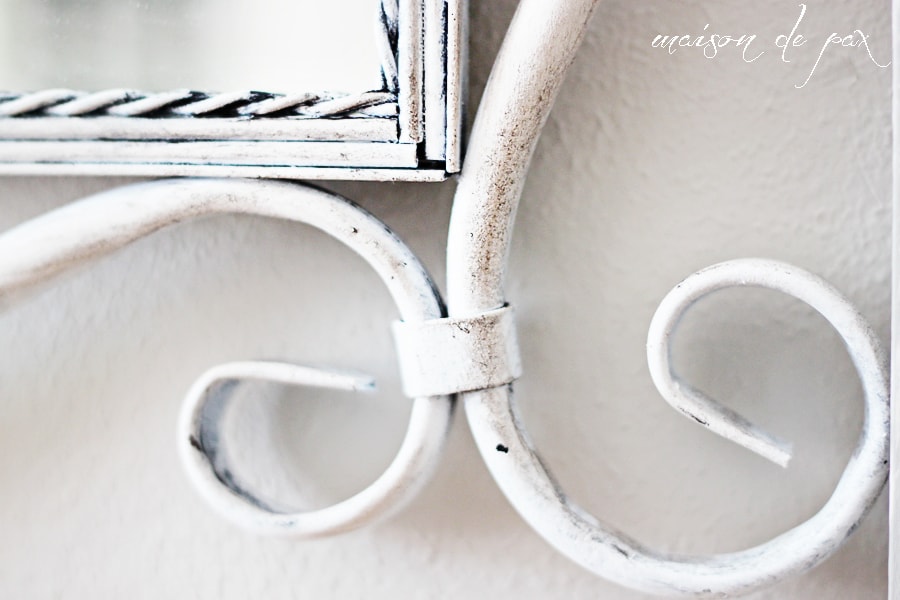
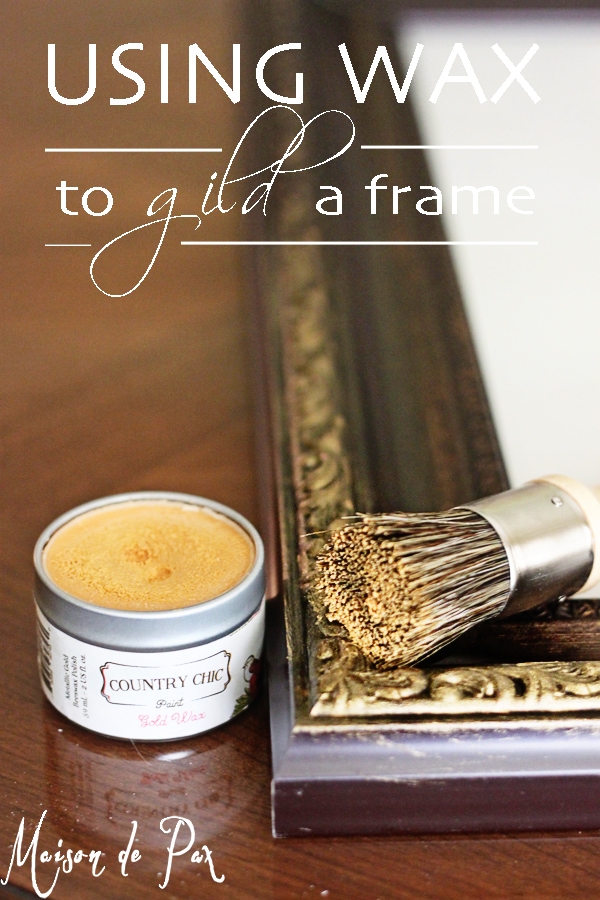
The antique wax directly on the pure white also warmed it up significantly, allowing it to complement the frame I put around it (you can find a tutorial for painting that frame here). Interestingly, there was no true white on the frame, rather I used gray and cream… But I think the two paint jobs complement one another nicely.
Now if any of you follow me on instagram, you saw my son’s shocking Mother’s Day card and may have noticed that he claims my favorite color is white. I didn’t believe him at first… but maybe I’m starting to. 😉
Disclaimer: As a part of the Country Chic Paint blogger squad, I do receive compensation in the form of goods and products from Country Chic Paint, but, as always, all opinions are 100% my own!
MORE PROJECT TUTORIALS:
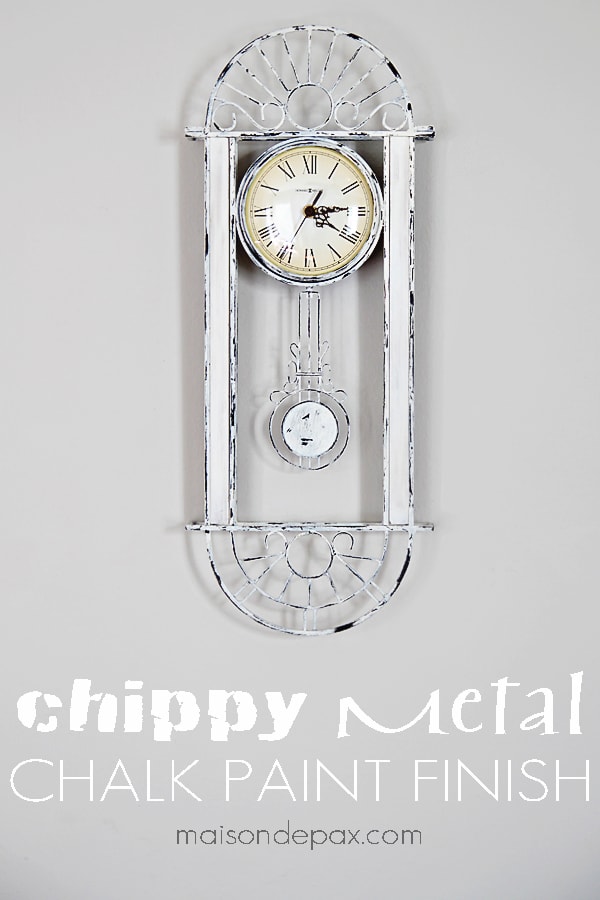 Chippy Metal Chalk Paint Finish
Great project- I had a mirror like that once but sold it in a garage sale. Darn:) Now I know how great it could have looked. Hope you are feeling well!!
Thanks, Krista! If only I could bring myself to have garage sales… then my closets wouldn’t be so ridiculously full of all the things I think I can improve upon whenever I find the time. Ha!
all the white looks so good. Everything seems to look better with white.
It does brighten things up, doesn’t it? Thanks!!
Very pretty! It looks easy enough to do. I messed up my first attempt at an ” upcycled” piece so I am a little hesitant. Thanks for the inspiration!
Thanks, AnnMarie! I hope you’re able to be brave and have fun with more upcycles in the future… I’ve had my share of failed ones, too, but the ones that work are so rewarding! 🙂